
| Page: |
| Home > Show Us Yours! > My mk2 metro, track and show weapon. PIC HEAVY! | |||||||
 6274 Posts Member #: 509 Post Whore Isle of Man |
29th Oct, 2008 at 11:18:13pm
ha, my mate was at uni down south, and was sick one night on the windscreen of a metro outside his local pub (i know i know)
"Turbo's make torque, and torque makes fun"
|
||||||
 673 Posts Member #: 1395 Post Whore chepstow |
29th Oct, 2008 at 11:38:09pm
ha ha nice.
Edited by mayoturbo on 29th Oct, 2008. |
||||||
 4641 Posts Member #: 20 My sister is so fit I won't show anyone her picture Lake District |
29th Oct, 2008 at 11:41:20pm
I love it ! My next project is going to be a Metro, if i can ever afford to do it. |
||||||
 233 Posts Member #: 863 Senior Member Lathom, lancs |
29th Oct, 2008 at 11:48:25pm
ye phil, there great. i cant see why they have such a bad reputation ok ok so they rust BUT minis are much worse i reckon.
|
||||||
 6729 Posts Member #: 618 Post Whore Glasgow |
30th Oct, 2008 at 11:08:56am
that is one straight looking car - best of luck and keep us up to spped on progress
|
||||||
 4360 Posts Member #: 1459 En-suite user Braintree, Essex |
30th Oct, 2008 at 06:30:51pm
Nice project. :) On 19th Jan, 2010 wil_h said:
I would start the furthest place from the finish. On 24th Mar, 2012 apbellamy said:
I feel all special knowing that I've given your mum my wood. Been neglecting Turbo'd 'A' series.............. |
||||||
|
233 Posts Member #: 863 Senior Member Lathom, lancs |
31st Oct, 2008 at 10:56:42pm
Thanks guys, oh milamber do you have a metro turbo? if so can you tell me what you did with the fuel sender to fit the return? if it was a conversion that is haha
|
||||||
|
4360 Posts Member #: 1459 En-suite user Braintree, Essex |
31st Oct, 2008 at 11:46:48pm
Yep, you can safely say I have a metro turbo.............in bits!
On 31st Oct, 2008 MINIMON said:
Thanks guys, oh milamber do you have a metro turbo? if so can you tell me what you did with the fuel sender to fit the return? if it was a conversion that is haha p.s. my coilies and conversion plates have arrived. along with some stub axles, will get them prepped ready for welding in tomorrow if they weathers abit walmer than it is now  On 19th Jan, 2010 wil_h said:
I would start the furthest place from the finish. On 24th Mar, 2012 apbellamy said:
I feel all special knowing that I've given your mum my wood. Been neglecting Turbo'd 'A' series.............. |
||||||
|
233 Posts Member #: 863 Senior Member Lathom, lancs |
31st Oct, 2008 at 11:53:41pm
Thanks, and if its in bits you may aswell clear some space and sell me the sender hahaha *runs and hides* |
||||||
|
4360 Posts Member #: 1459 En-suite user Braintree, Essex |
31st Oct, 2008 at 11:56:47pm
if it has a sender in it, you can have it. No use to me. On 19th Jan, 2010 wil_h said:
I would start the furthest place from the finish. On 24th Mar, 2012 apbellamy said:
I feel all special knowing that I've given your mum my wood. Been neglecting Turbo'd 'A' series.............. |
||||||
|
233 Posts Member #: 863 Senior Member Lathom, lancs |
1st Nov, 2008 at 12:00:35am
|
||||||
|
233 Posts Member #: 863 Senior Member Lathom, lancs |
5th Nov, 2008 at 05:25:10pm
Well I've managed to get another lead for the the camera (had to get a new one as the dog sabotaged (sp) the original one)
Edited by MINIMON on 5th Nov, 2008. |
||||||
|
233 Posts Member #: 863 Senior Member Lathom, lancs |
5th Nov, 2008 at 11:11:06pm
Edited by MINIMON on 5th Nov, 2008. |
||||||
|
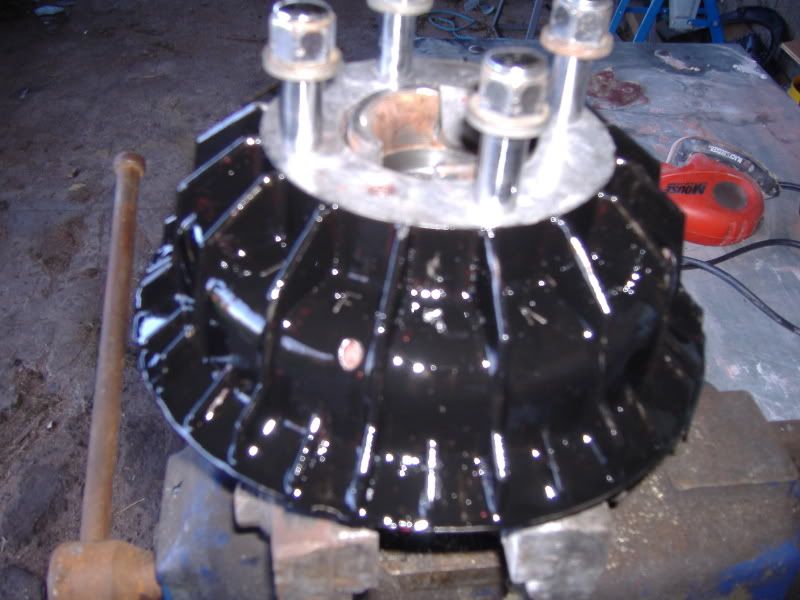
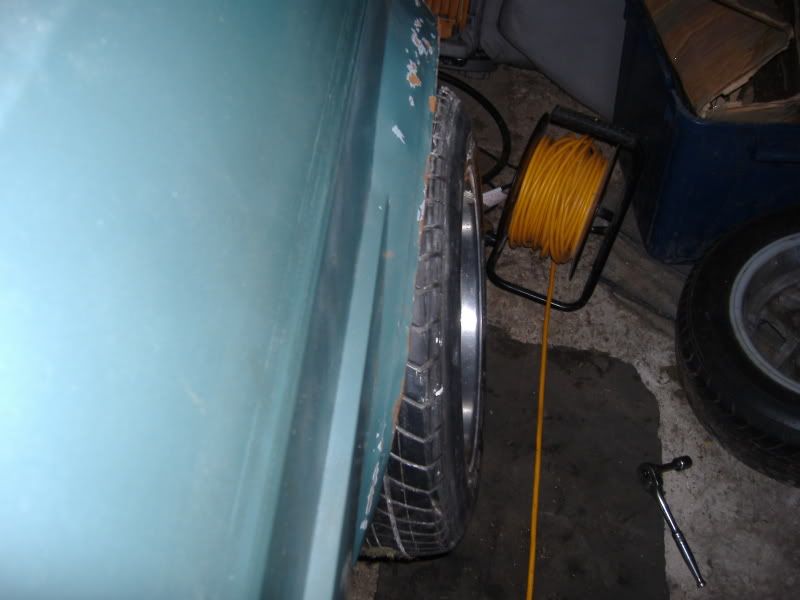
233 Posts Member #: 863 Senior Member Lathom, lancs |
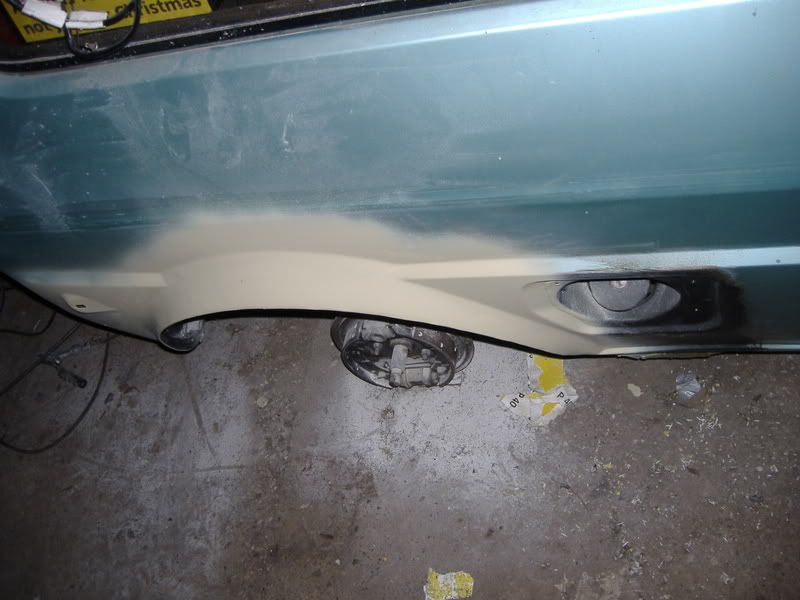
8th Nov, 2008 at 08:22:19pm
Fitting the above drums has widened the track about an inch as ive said, heres a pic to show just how much wider it is:
|
||||||
|
233 Posts Member #: 863 Senior Member Lathom, lancs |
5th Dec, 2008 at 07:47:42pm
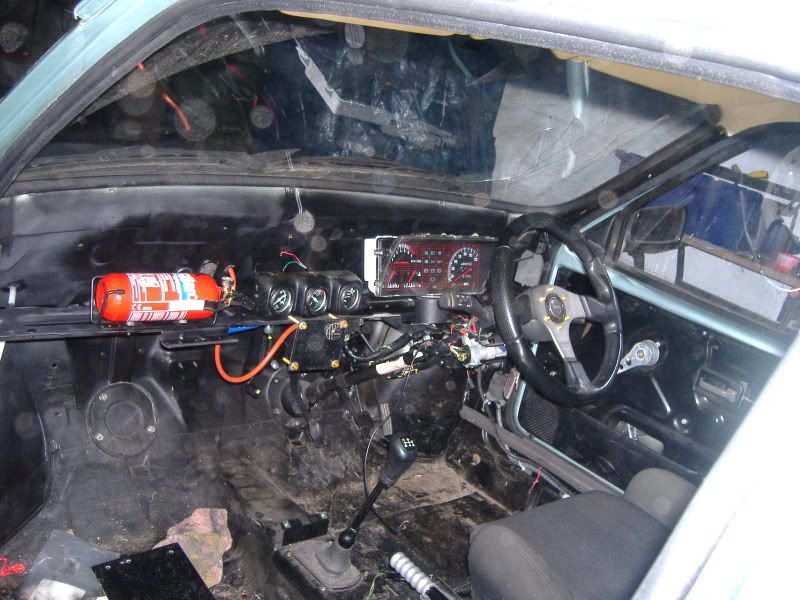
Well update time!
|
||||||
|
48 Posts Member #: 4179 Member Cumbria |
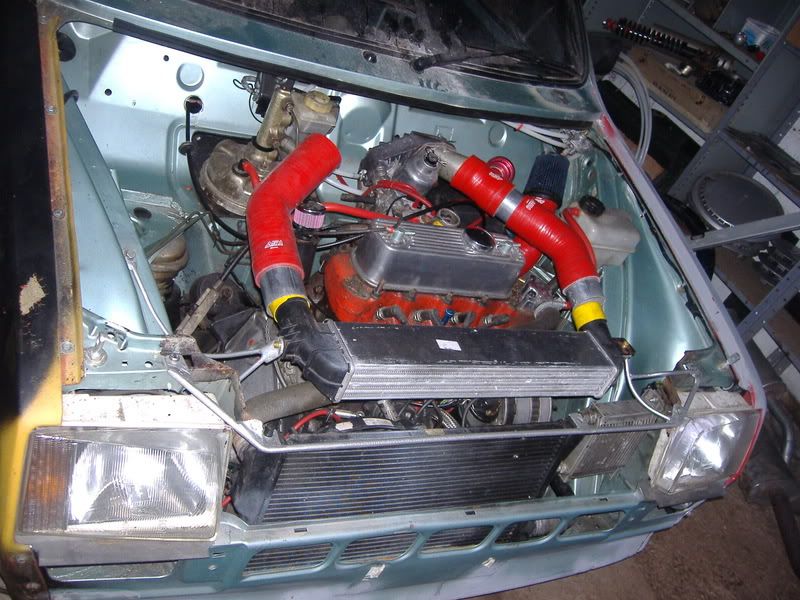
5th Dec, 2008 at 08:42:37pm
looks like is going to be abit tight getting everything in there mate. :) Do it right the first time and make it mint!!!!!! |
||||||
|
806 Posts Member #: 989 Post Whore North Yorkshire |
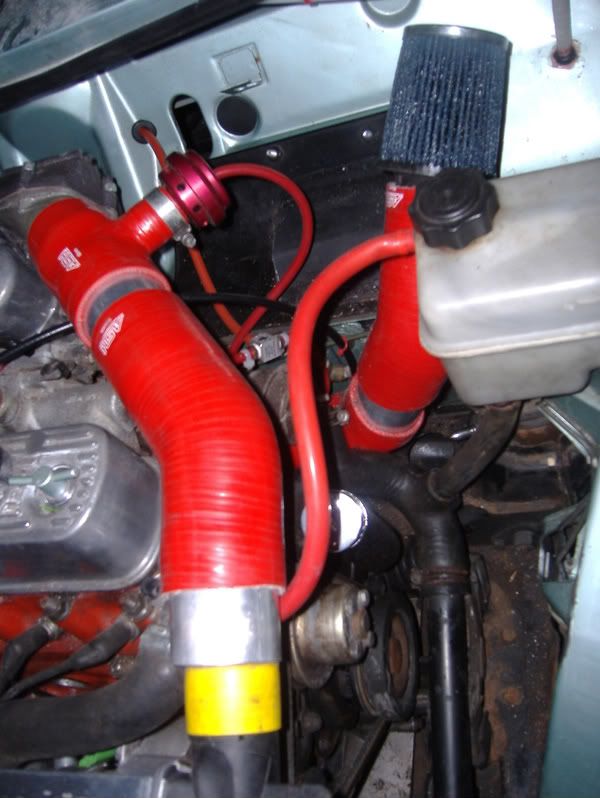
5th Dec, 2008 at 08:58:47pm
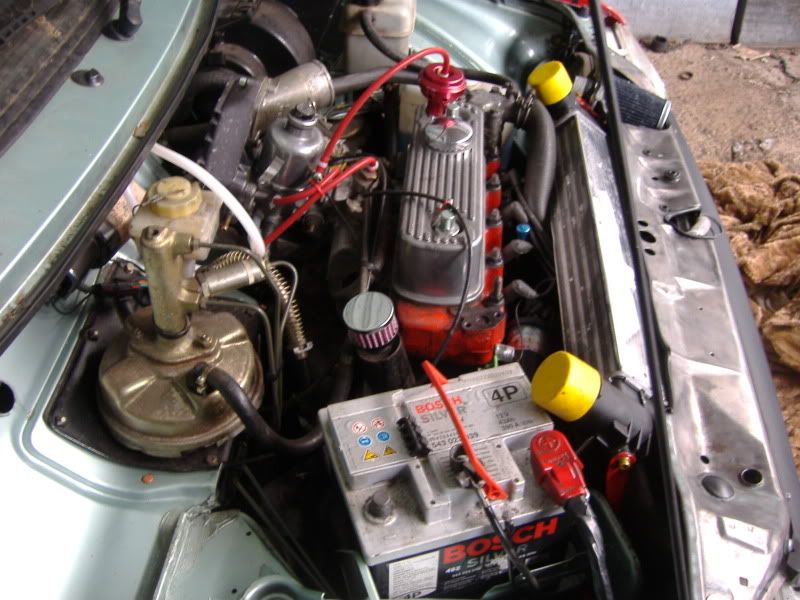
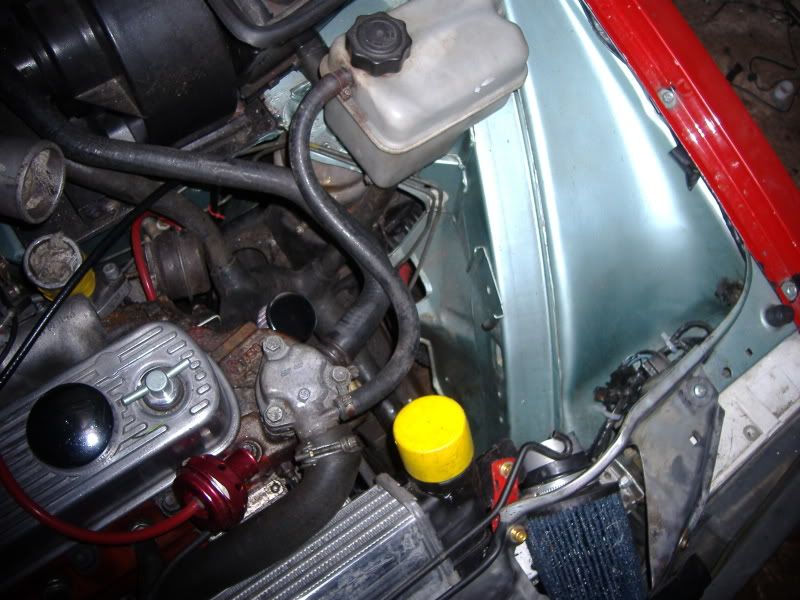
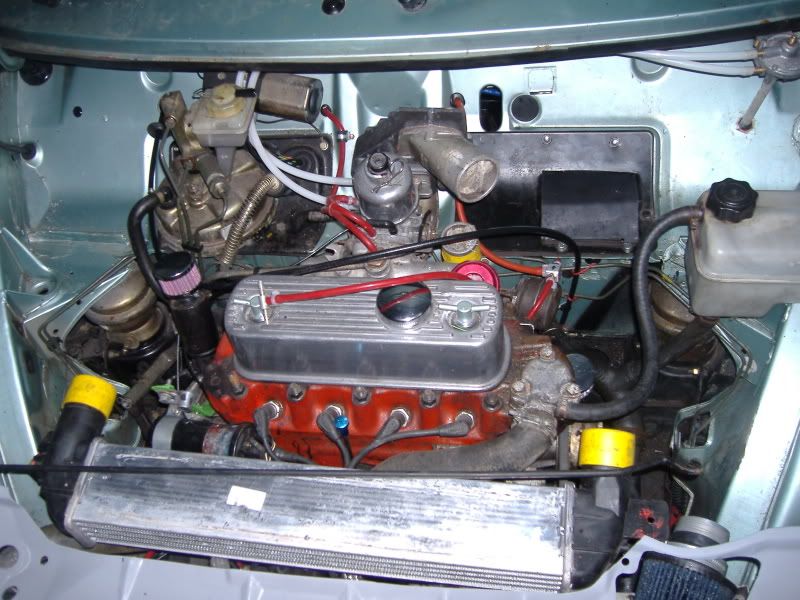
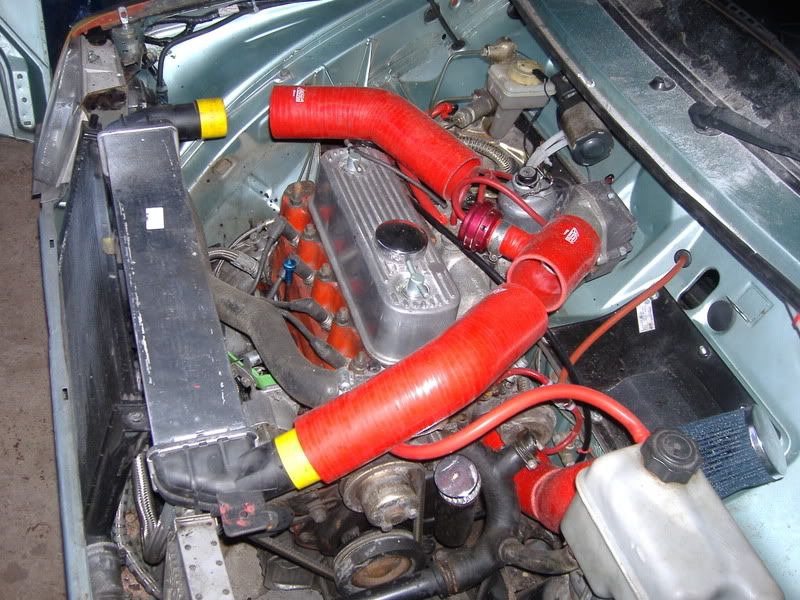
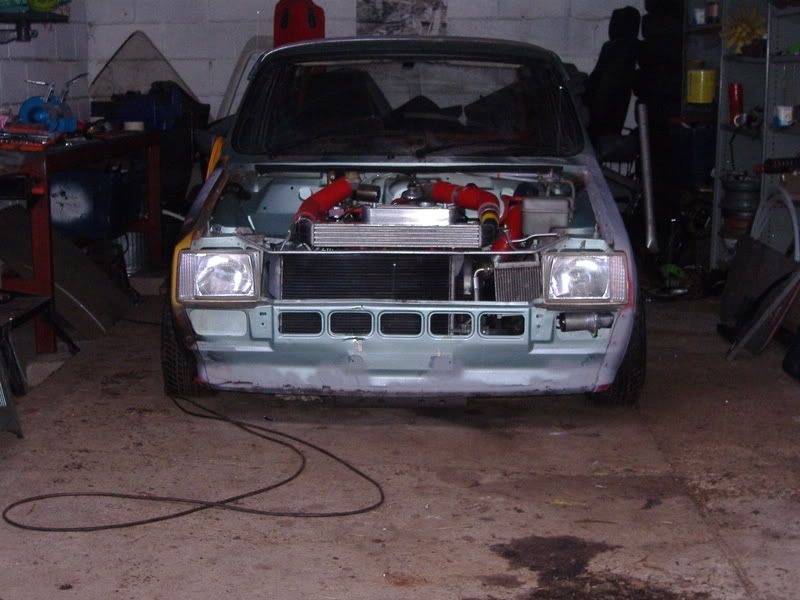
How are you getting cold air to the intercooler? It looks like it is just going to be fed with air straight from the radiator at the moment. |
||||||
 3184 Posts Member #: 628 Post Whore a LIL fishing village on the coast - Newcastle Upon Tyne |
6th Dec, 2008 at 09:48:25am
you may have problems with the cooler pipes where they meet at the turbo and plenum, or do you have an offset pipe for the turbo ?
On 17th Aug, 2009 Jay#2 said:
I doubt I'll be dipping into the 13's like you did though! |
||||||
|
233 Posts Member #: 863 Senior Member Lathom, lancs |
6th Dec, 2008 at 12:46:55pm
Offset pipe? ive got a reducer pipe of thats what you mean? everything fits pipe wise Edited by MINIMON on 6th Dec, 2008. |
||||||
|
233 Posts Member #: 863 Senior Member Lathom, lancs |
6th Dec, 2008 at 01:04:44pm
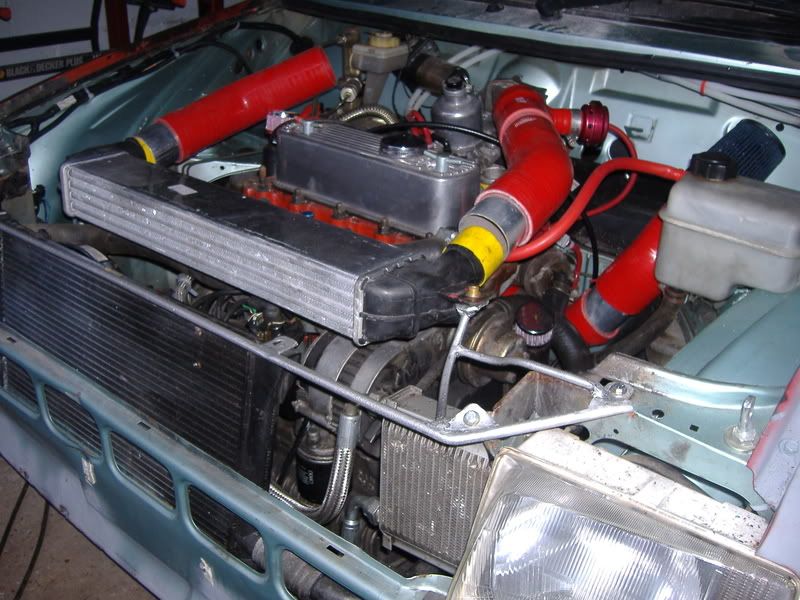
Just to add, can anoyone think of anywhere else the intercooler could go i wanted it as far forward and above the rad as i could and that is the best i can do without removing the slam panel.
|
||||||
|
233 Posts Member #: 863 Senior Member Lathom, lancs |
11th Dec, 2008 at 02:08:53am
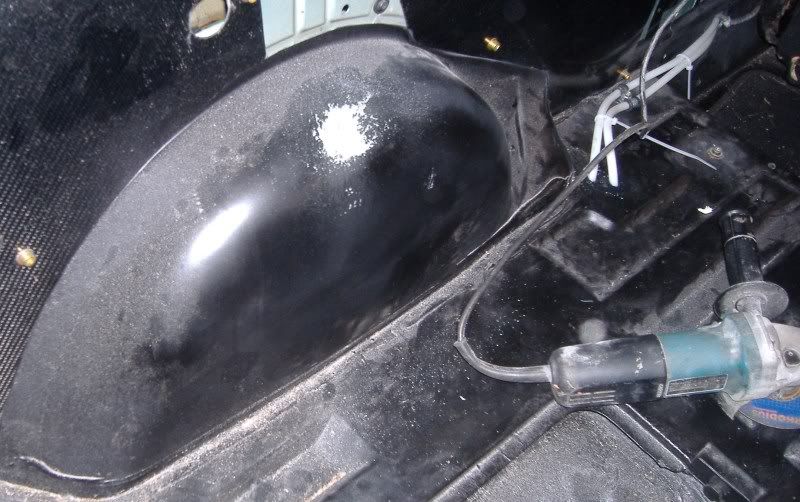
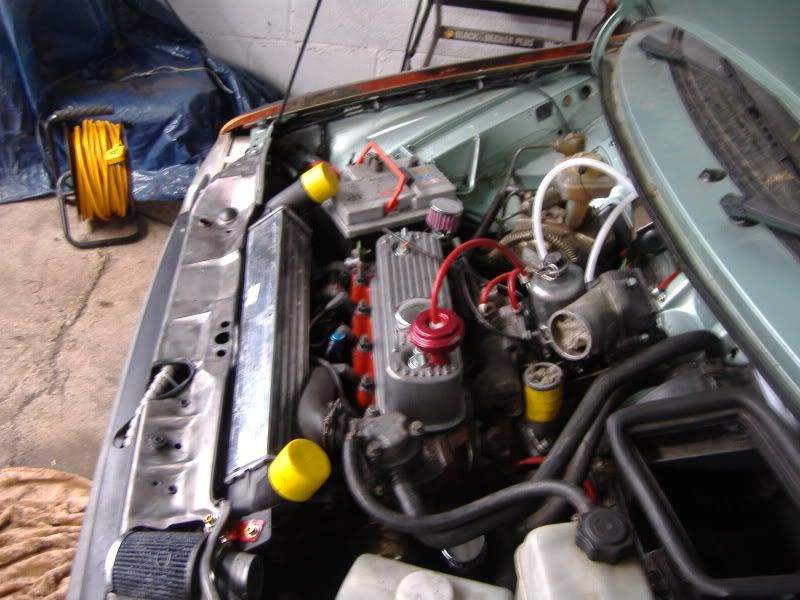
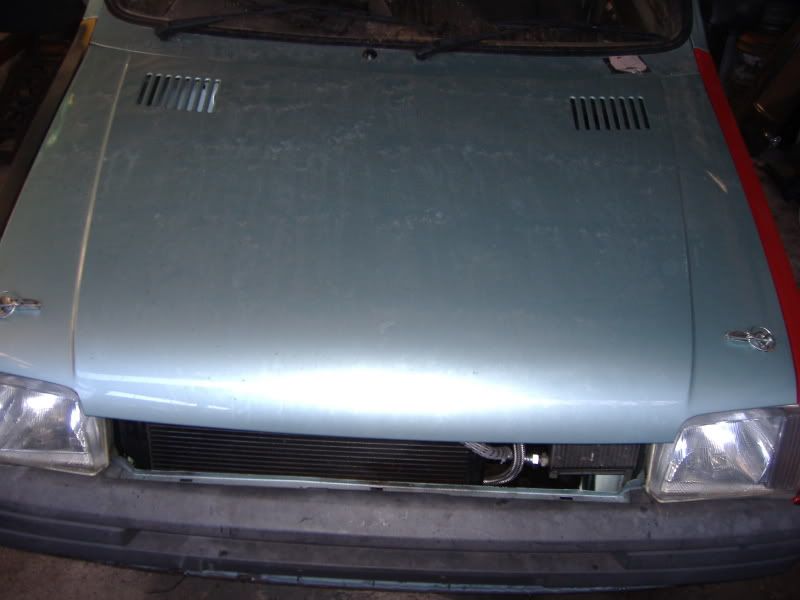
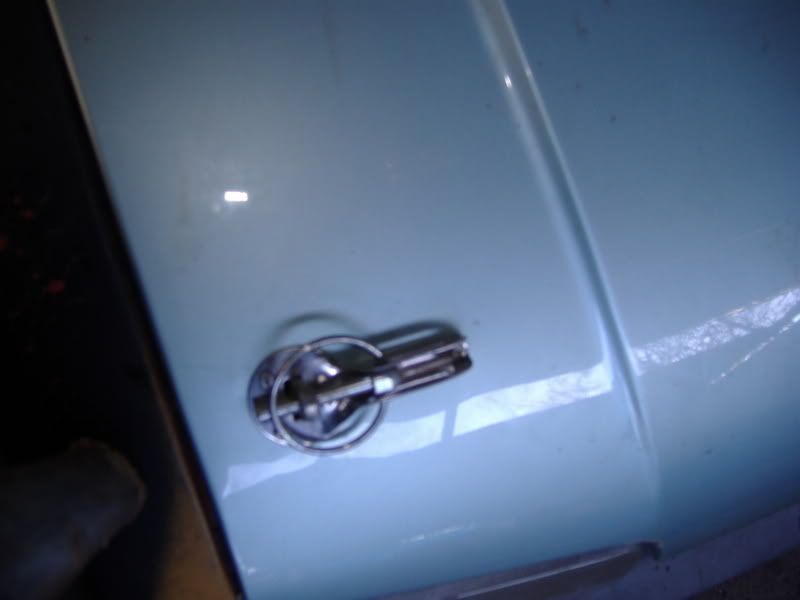
i refitted my intercooler after advise on here that is wasent getting enough direct cold air so after rethinking i decided it needed to go right where the bonnet catch was so i had to come up with a way of getting rid of the std catch.
|
||||||
|
233 Posts Member #: 863 Senior Member Lathom, lancs |
18th Dec, 2008 at 07:26:31pm
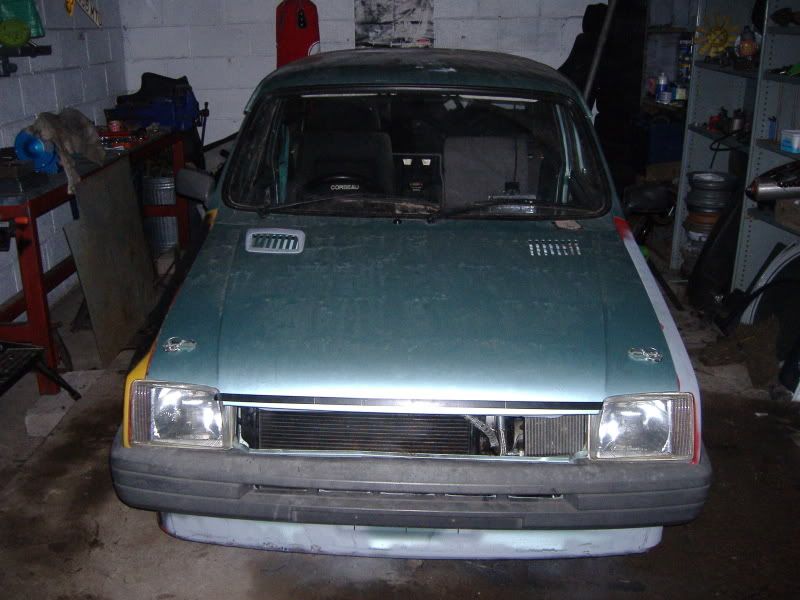
heres abit of an update for everyone,
|
||||||
|
233 Posts Member #: 863 Senior Member Lathom, lancs |
6th Feb, 2009 at 12:51:19am
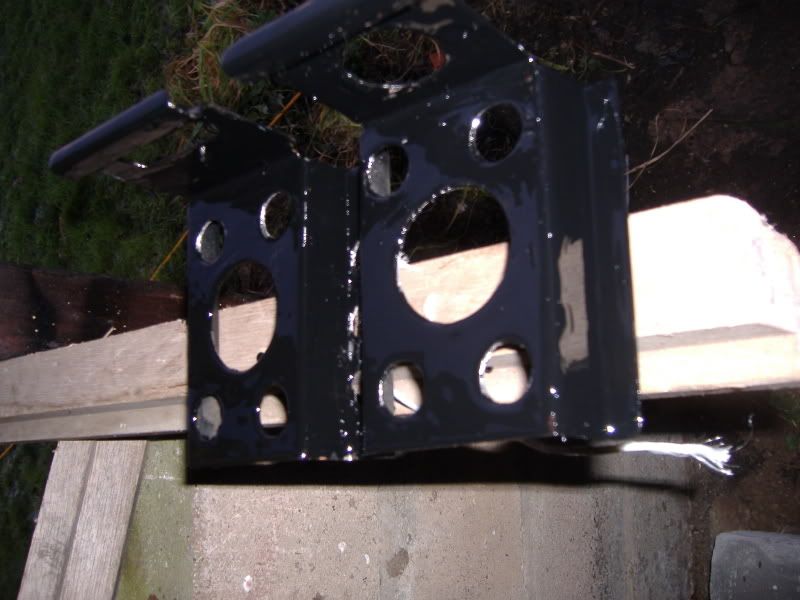
Well I've got 1 rear arch done, I've smashed it out abit further (yes further)....
|
||||||
|
233 Posts Member #: 863 Senior Member Lathom, lancs |
6th Feb, 2009 at 12:51:59am
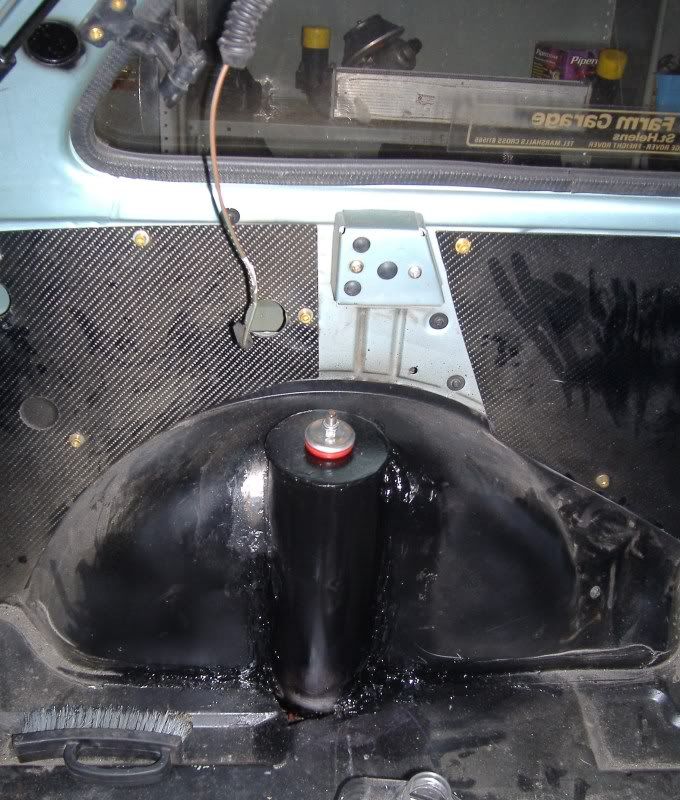
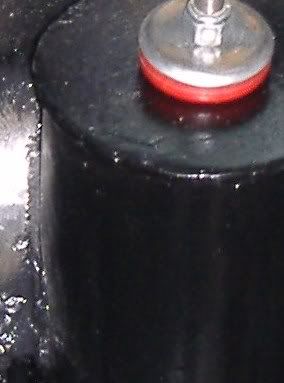
p.s. anyone selling a alloy fuel tank cheap as my current fuel tank is the lowest point on the car so i need to adress that issue before i blow myself up Edited by MINIMON on 6th Feb, 2009. |
||||||
|
233 Posts Member #: 863 Senior Member Lathom, lancs |
9th Feb, 2009 at 09:26:25pm
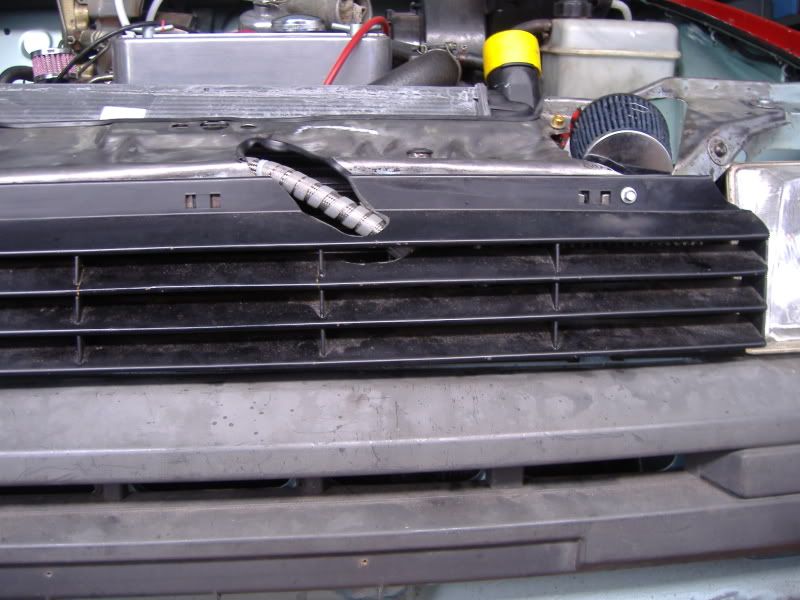
Where my slam panel was in the std position the crease where the grille fastens down and where the top is right infront of the bonnet holes and it was useless having a holey bonnet if it was doing nothing! sooo the slam panel was bin fodder |
||||||
| Home > Show Us Yours! > My mk2 metro, track and show weapon. PIC HEAVY! | |||||||
|
|||||||

 sweeeeet thanks, will save me sooo much time braising in copper pipes, drop em a pm or something for prices and that, thanks again
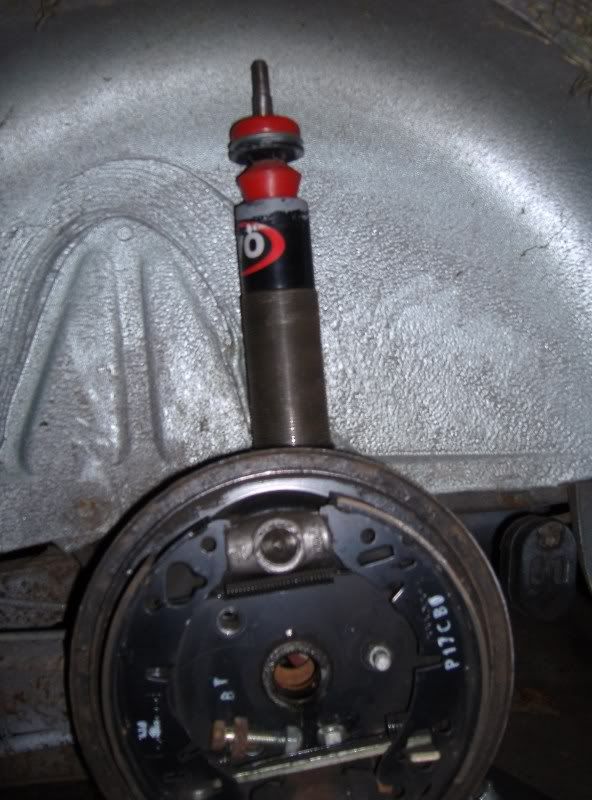


| Page: |