|
Home > Show Us Yours! > Supercharged and injected imp, allowed?
|
nogin

508 Posts
Member #: 487
Post Whore
westbury, wiltshire
|
|
just one little note drom me, that resin you are using needs to be post cured to get best effect, just though i would point that out if you didnt already know
"Can I legally marry people now that I am ordained in the Church of the SubGenius?" aka i know jack sh"t
i also make things
i love coming home to chrome
|
blown_imp

223 Posts
Member #: 598
Senior Member
Gaol
|
|
I cant post cure at the moment, my mum would kill me if she found car bits in the oven! I think im going to have to wait untill its in the hot engine bay environment to cure properly 
J
On 5th of Sep, 2006 at 05:47pm mini13 said:
I reckon if his brains were gunpowder he couldn't blow his own hat off...
|
Joe C

12307 Posts
Member #: 565
Carlos Fandango
Burnham-on-Crouch, Essex
|
|
you got any powder coaters near you? ireckon you could bung it through their oven for a drink
On 28th Aug, 2011 Kean said:
At the risk of being sigged...
Joe, do you have a photo of your tool?
http://www.turbominis.co.uk/forums/index.p...9064&lastpost=1
https://joe1977.imgbb.com/
|
blown_imp
223 Posts
Member #: 598
Senior Member
Gaol
|
|
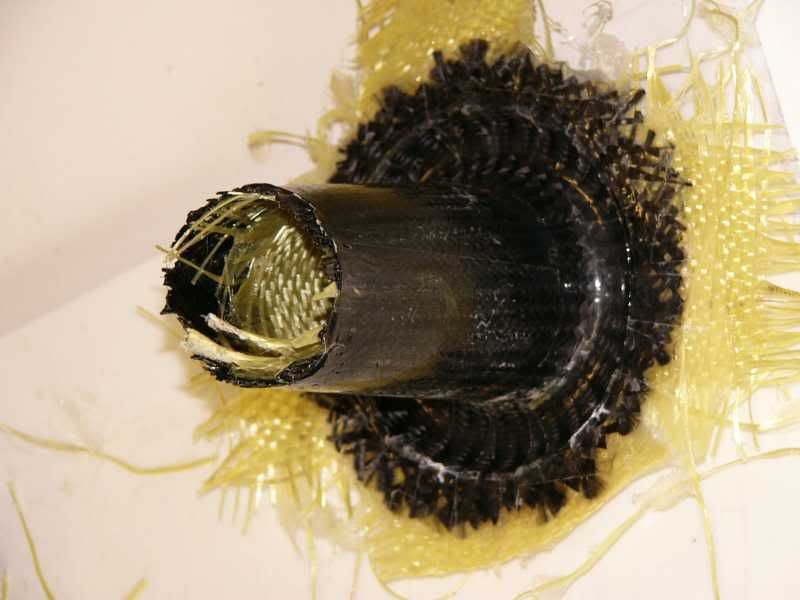
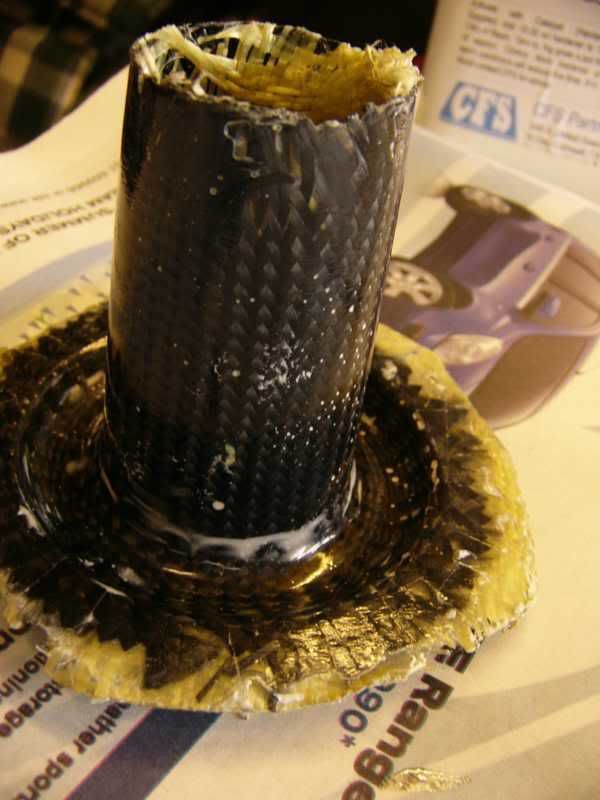
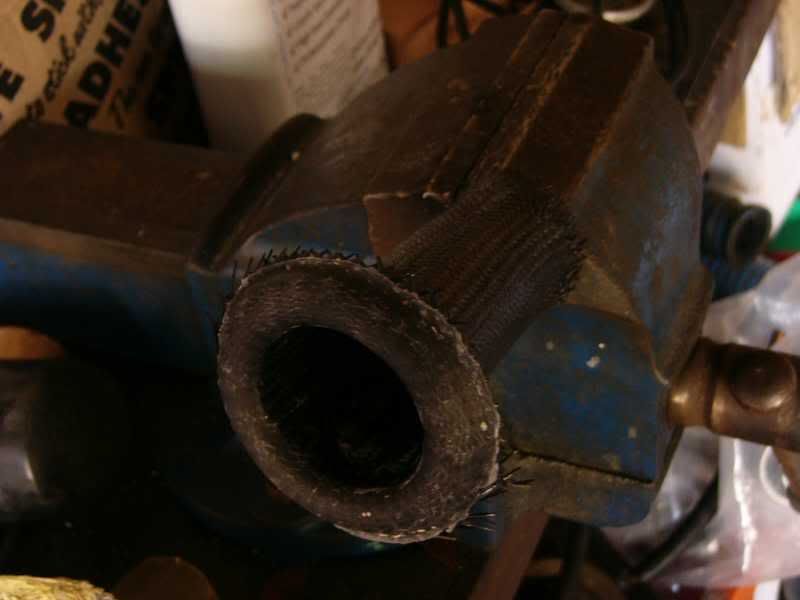
Sept 17th – Blast blast and double blast!
Right well I got onto the trumpets again, polished them up real good, the paint was so smooth and shiny
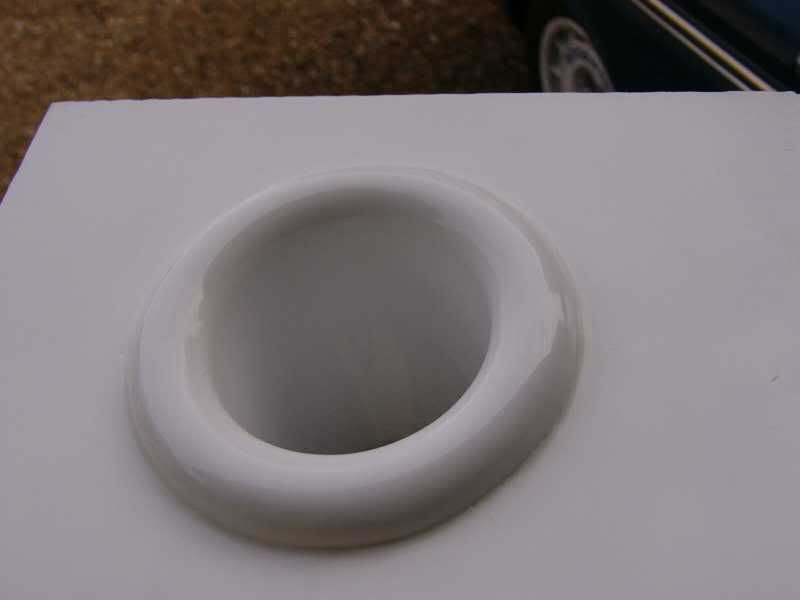
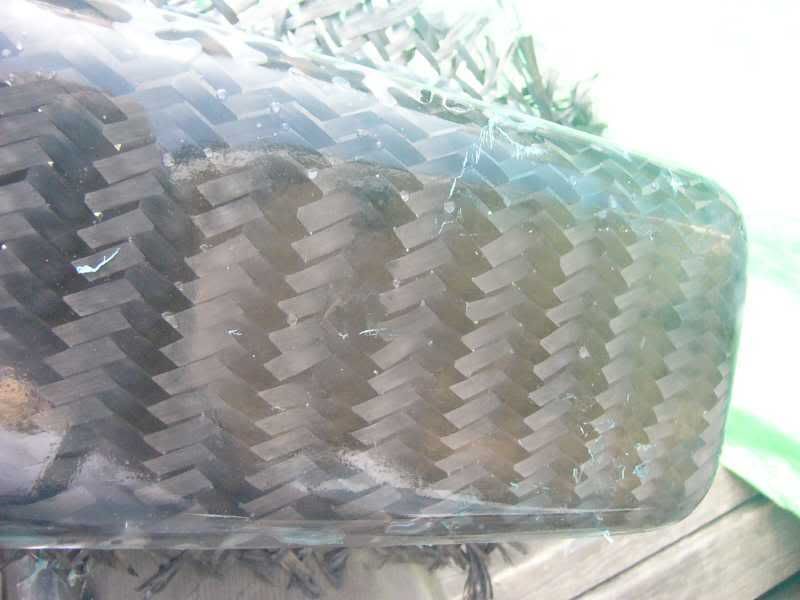
I waxed it up ready to take a final mould, laid some Kevlar on to it and left it to set. Unfortunately I totally forgot the solvent properties of resin, the paint melted and the two parts got covered in lumpy stringy paint!
Bastd bastd! I decided to see if I could recover the mould taken off, I rubbed it back and filled it to smooth the surface. I then covered it with packing tape as a resin proof surface, waxed it and put some carbon on.

The result wasn’t bad, but still not happy with the finish.
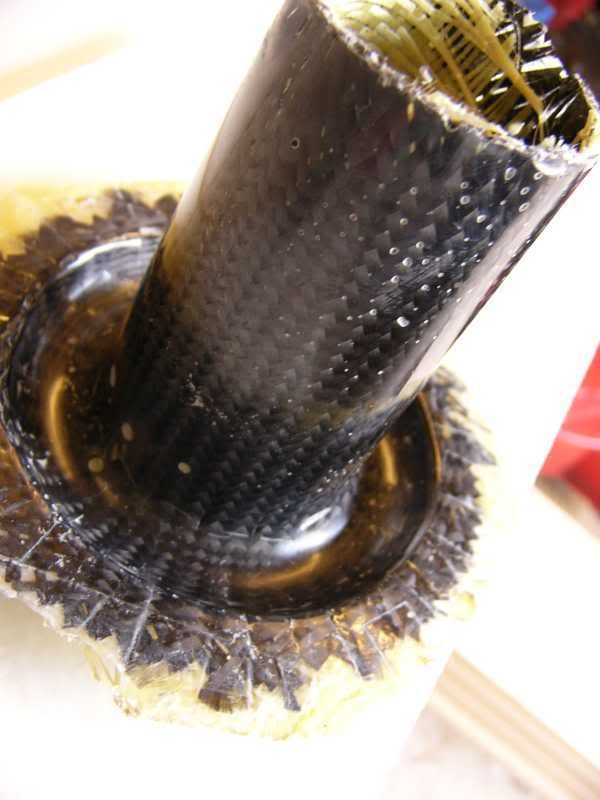
I decided to take the male part of the mould again, but this time I would cover it with tape and use the carbon sleeve instead of the Kevlar. I would use the Kevlar as a strengthening layer over the carbon, the carbon just providing a smooth and conforming surface.
Mixing resin
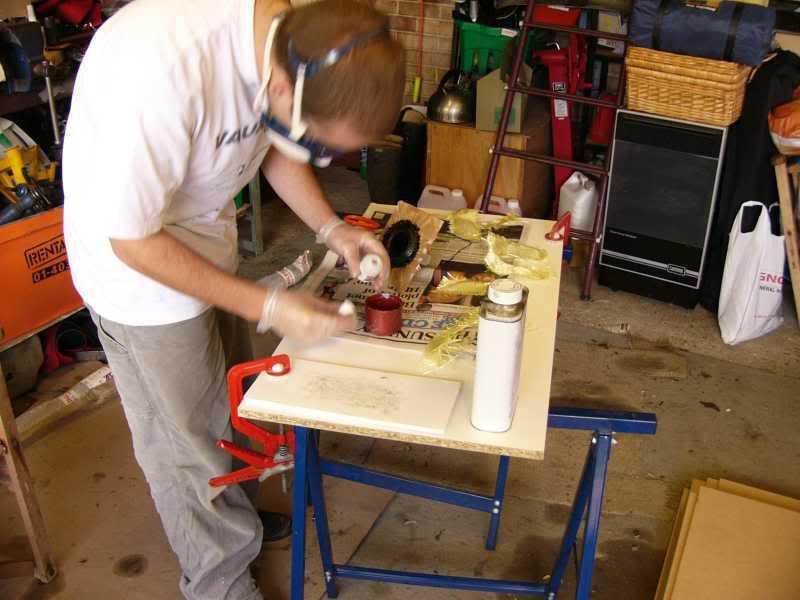
Wetting out some Kevlar ready for strengthening duty

Removing air from between the layers

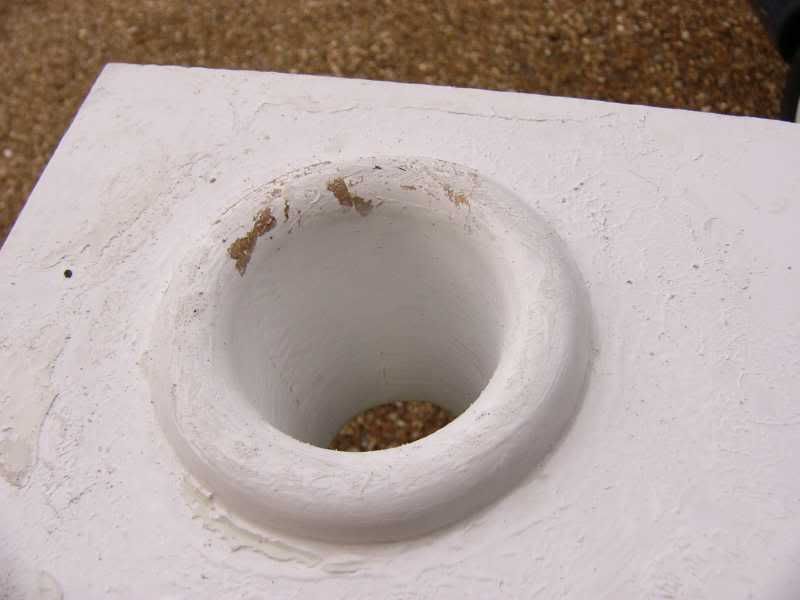
Well it turns out that practice and patience pay off, the female mould was spot on
Tomorrow I will rub this down to get rid of the small tape edge marks polish it, give it some wax lovin, and take my second carbon trumpet. I really hope it works out as well as it has today. I’m thinking of remaking the tapered carbon tube now, I’m sure I can make a better job of it second time round. I’ve got to be careful though, soon ill be remaking everything!
Peace out
J
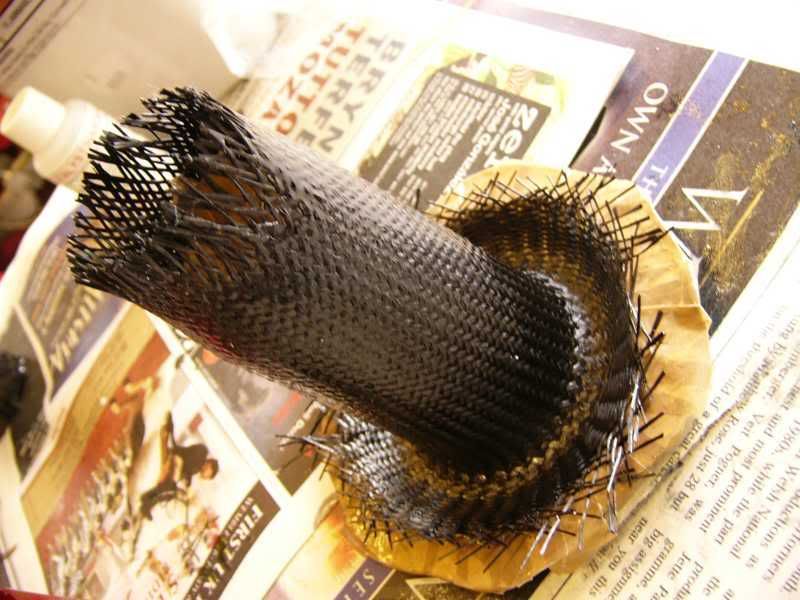
Sept 20th – Stuck fast
Well I polished the mould lots waxed it and laid up some carbon –
I let the resin set and then tried to get the carbon off the mould, it wouldn’t move, at all.
This stumped me for a few days and kinda put me off until today, my friend David Cooper came round and pointed out that I’m missing a few things! First he got the trumpet off the mould, it wasn’t fully stuck, just enough to stop it moving. The surface finish was good enough to pursue the idea, but to make it work I need some gel coat and PVA to make the setup work.
So this weekend I will polish the mould up further lots of coats of wax, then PVA, then some clear gel coat, THEN the carbon. I’ve been missing all these bits out so far, hopefully it’ll work.
Been a bit disheartened but its all back on track now, I’m go up and down like a yo-yo!
Cheers
J
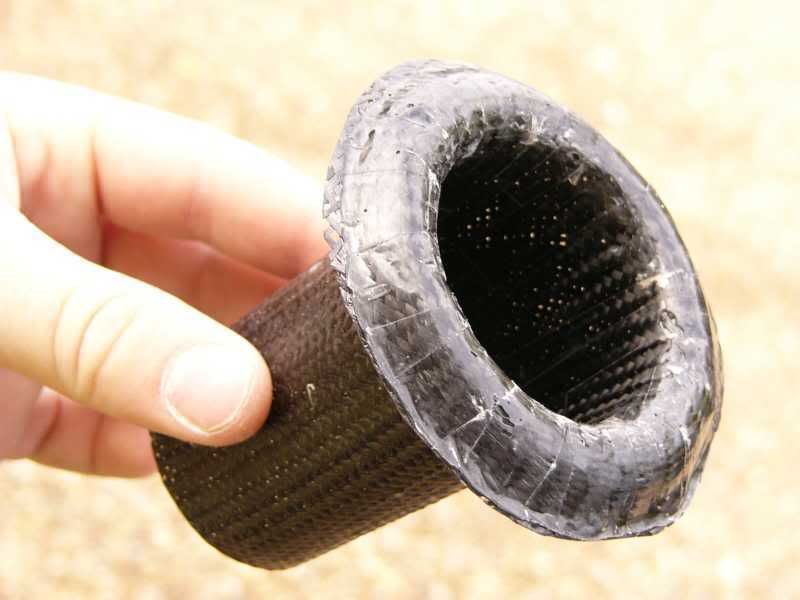
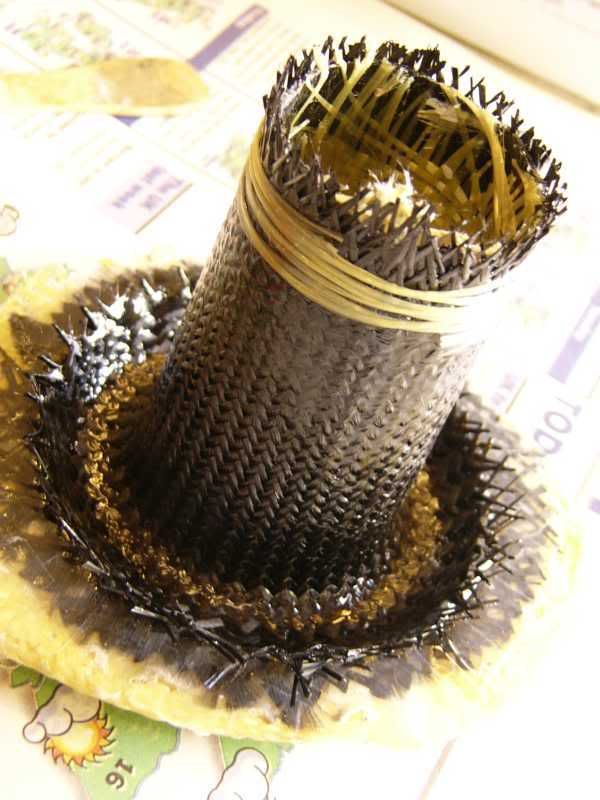
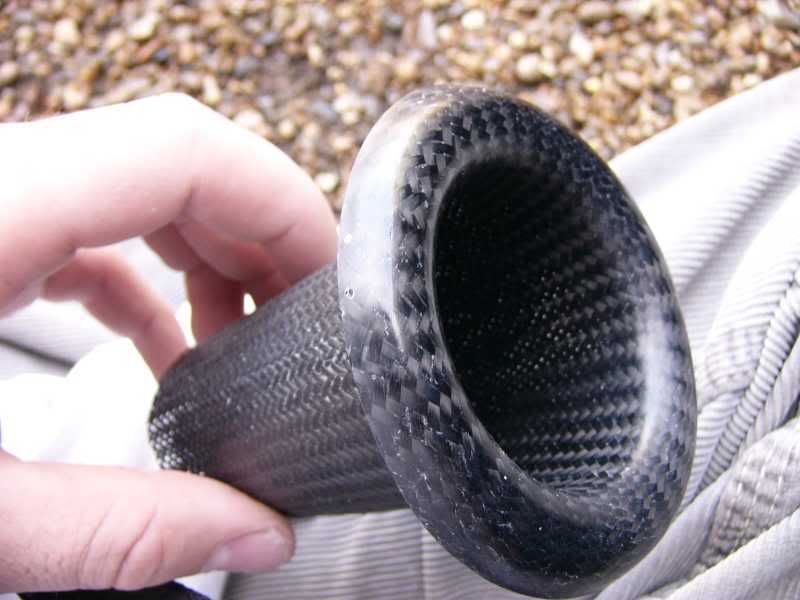
Sept 24th – A Trumpeting Success
Well I have been persevering with making my own carbon trumpets, the problem is getting the carbon to release from the mould, not an easy task! After getting trumpets out with poor finishes or not at all I decided to try using PVA as a barrier between the mould and part to be made.
PVA on the surface –
PVA dry –
I laid up a piece of carbon, let the resin go off over night, then proceeded to try and remove it. HO HO HO! It was stuck on better than any of the previous ones :(
Bastardising basterdiser :(
What next?
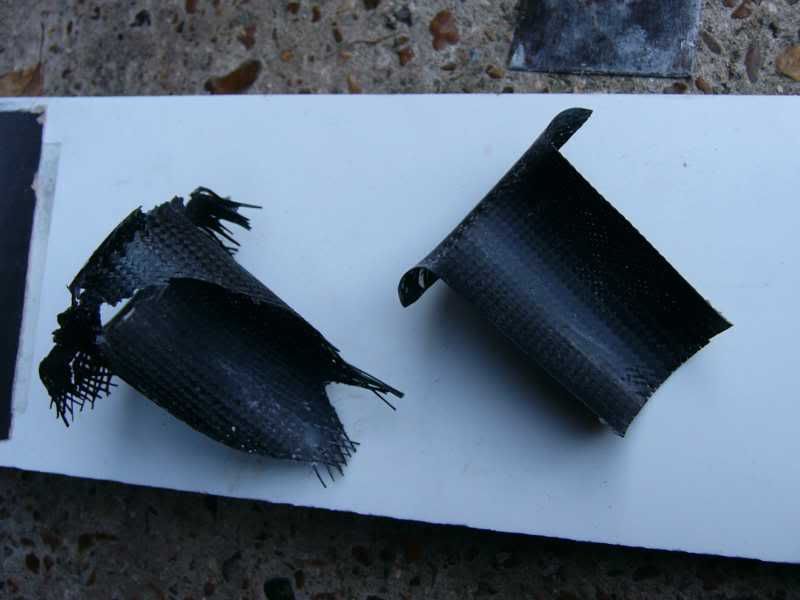
Well after thinking for a bit, I realised that the carbon was only sticking on the neck of the trumpet. Also that the packing tape mould that would release only gave a poor finish around the reverse roll at the top. Perfect solution? Only have the packing tape where it can go on smooth and where the carbon sticks!
So I covered the neck of the mould with tape and left the top roll polished, I have it a good waxing and then proceeded to lay up another trumpet (bear in mind that I was at the end of my tether, if this didn’t work then something else was to be done!).
I let the trumpet go off over night and then tried to get it off, it wasn’t budging :( oh balls indeed! I thought for a bit and then remembered a piece in PPC that told of whacking the part with a rubber hammer to release the two parts.
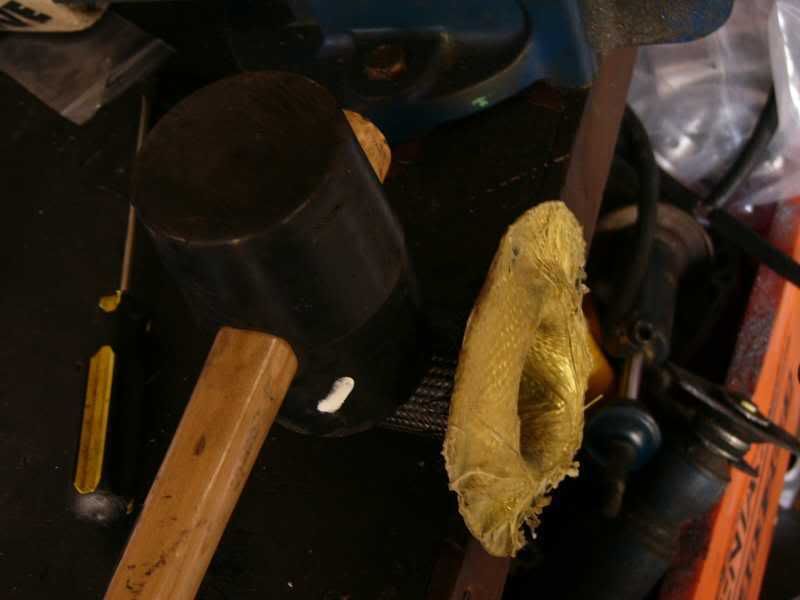
Then I pulled the two parts, one in the vice the other in my hands –
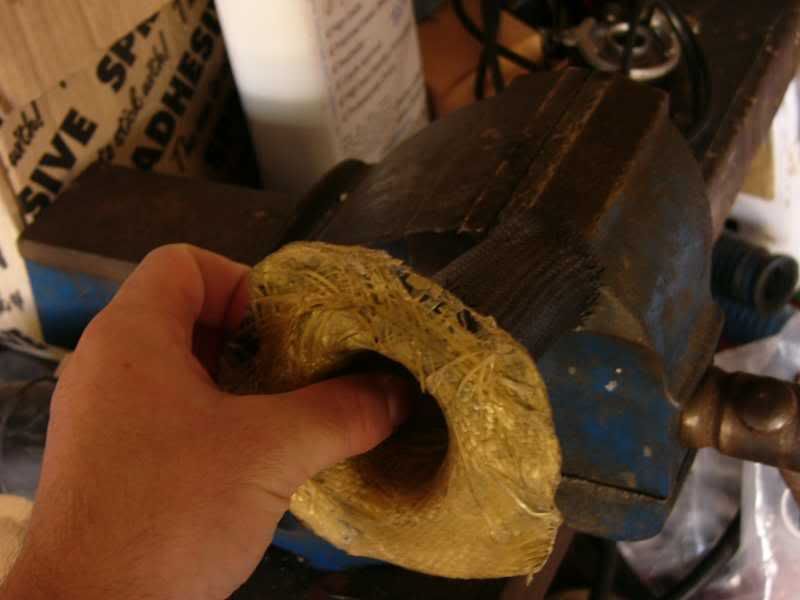
BING! Out she popped! Whoop whoop!
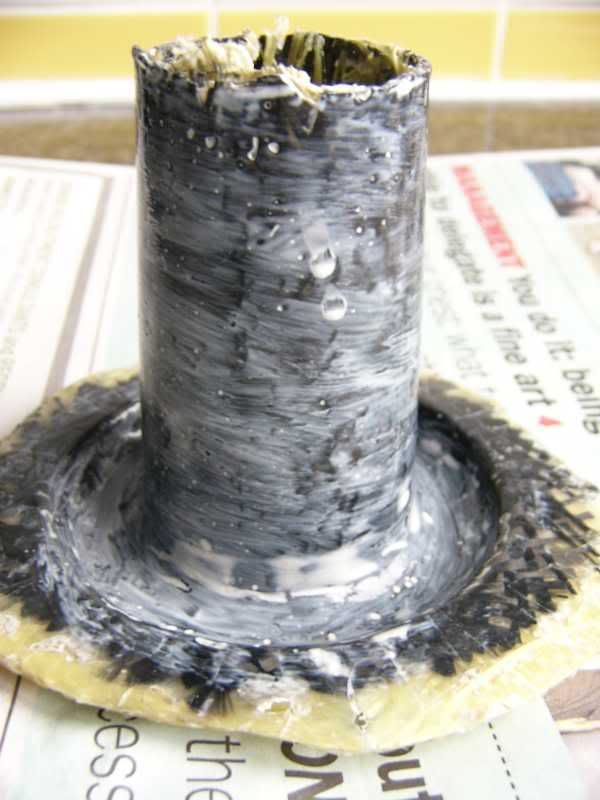
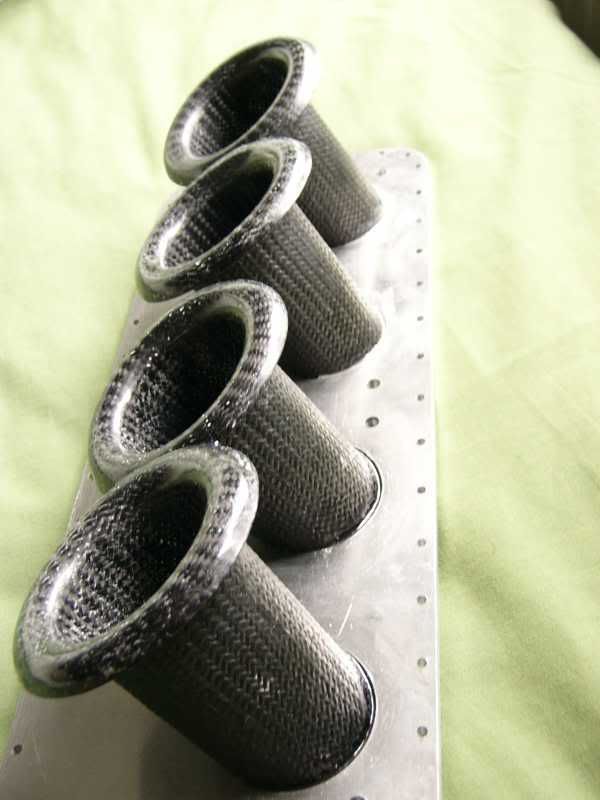
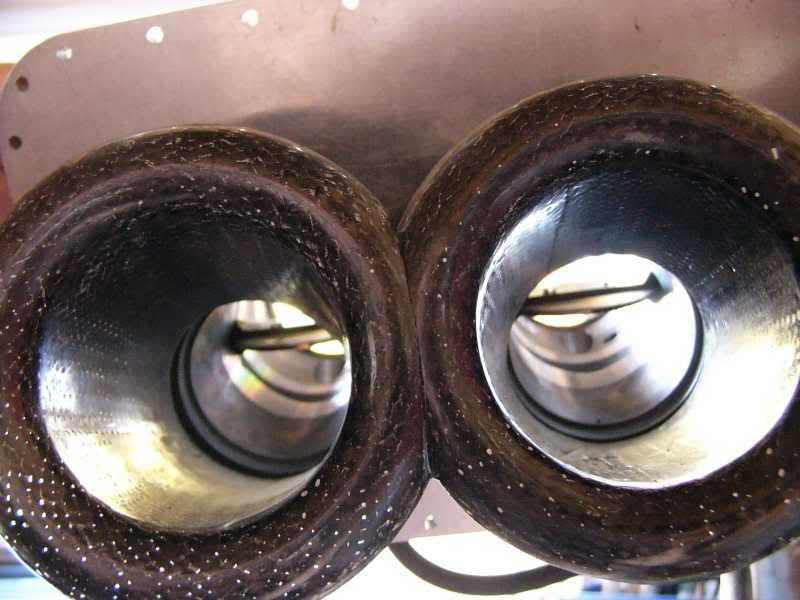
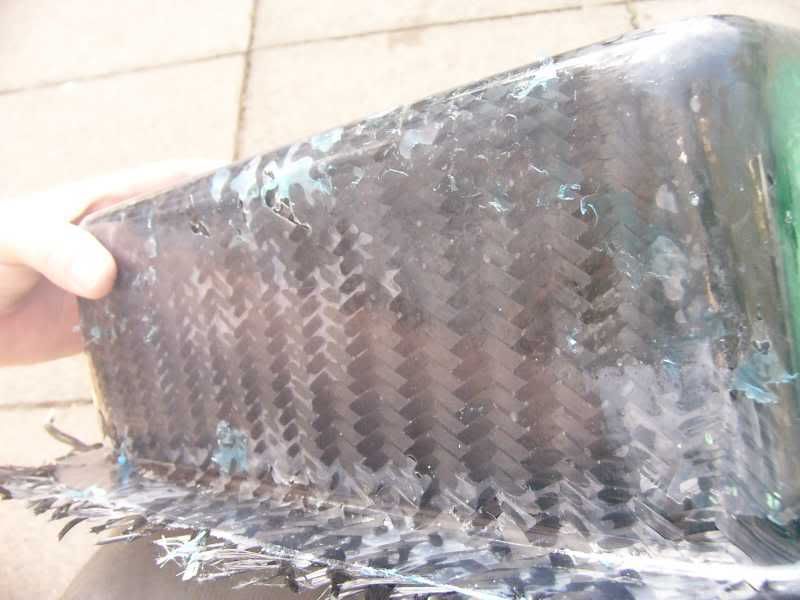
This is the piece out of the mould and ready for wet and dry –
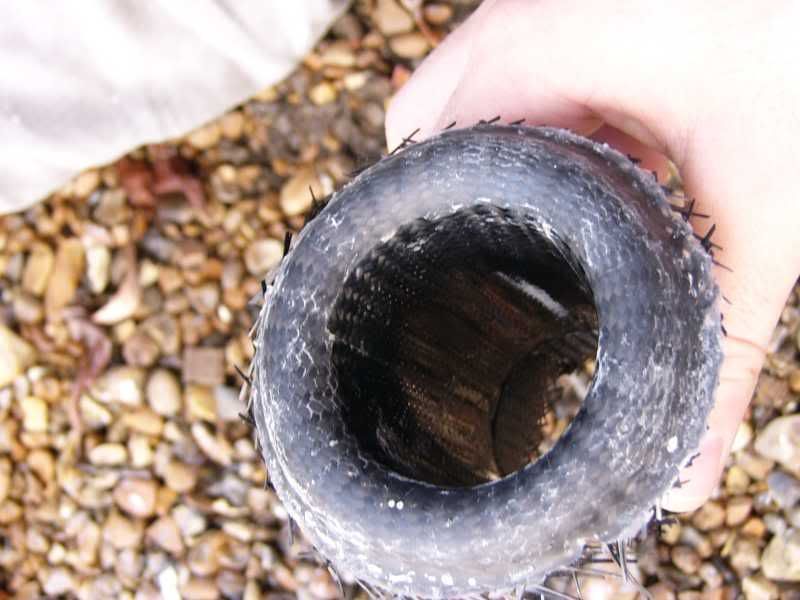
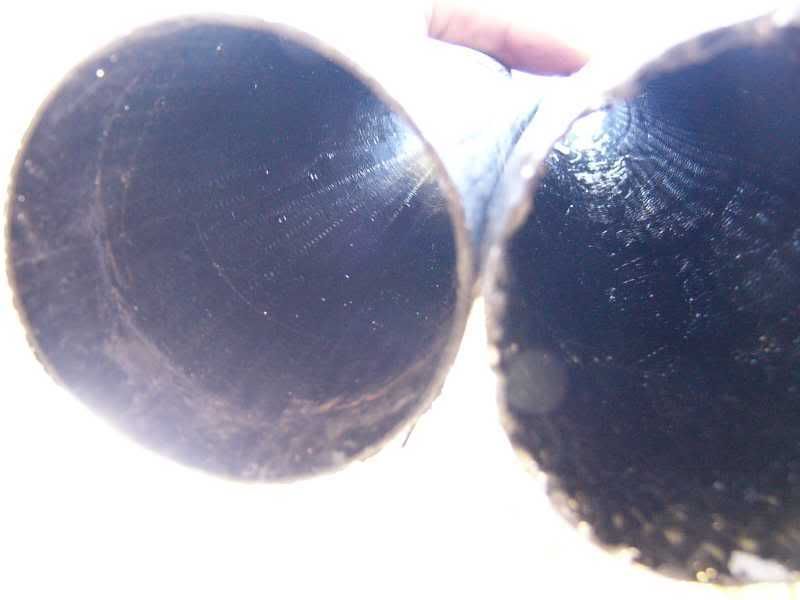
The pieces are only one layer thick and so it’s jolly light, about 10g each! Here you can see light through the resin!
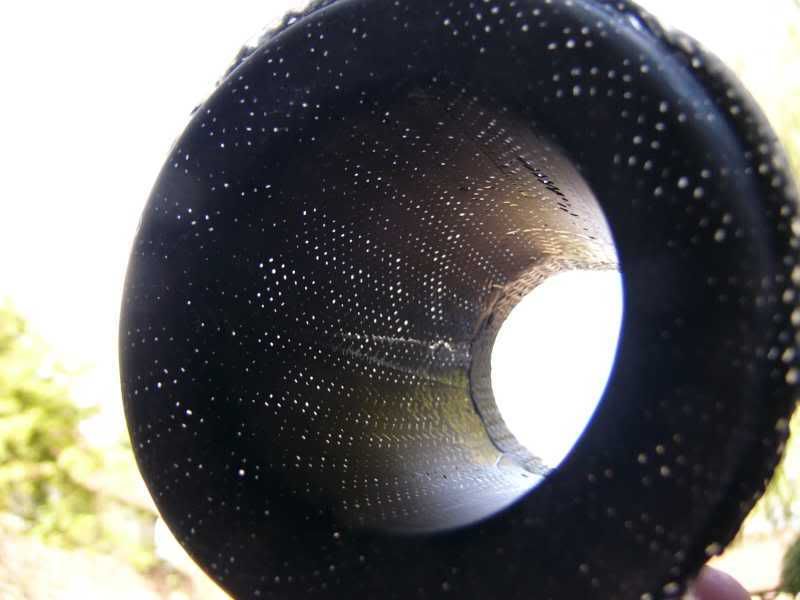
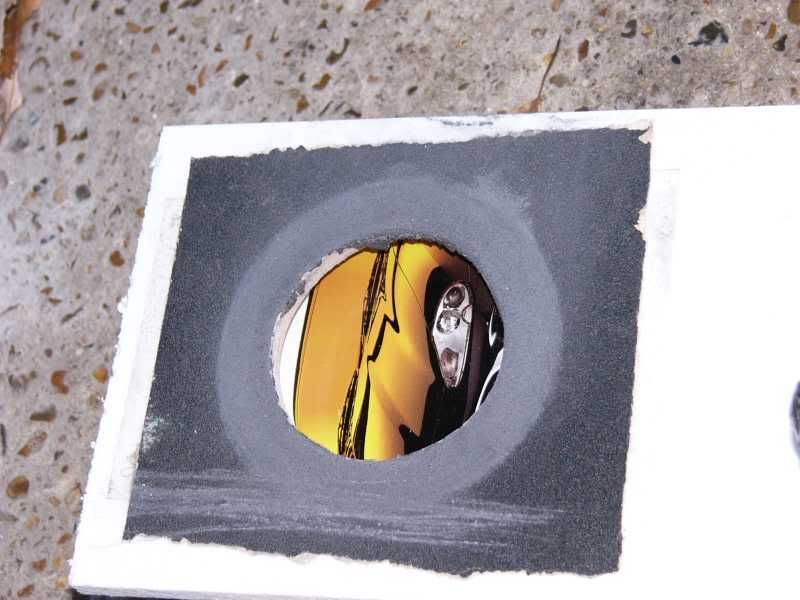
I cut off all the spiky edges and made a sanding board to smooth the edges –
All polished up –
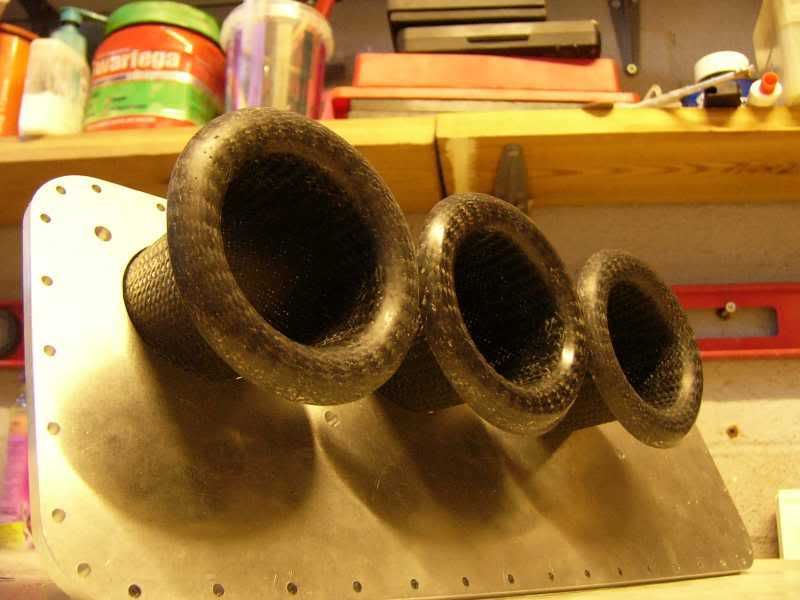
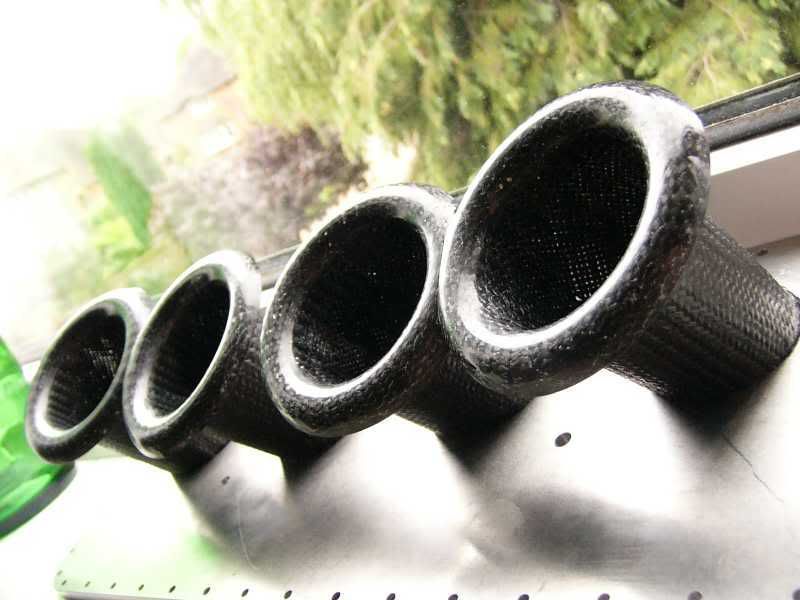
Three popped in the back plate just for reference –
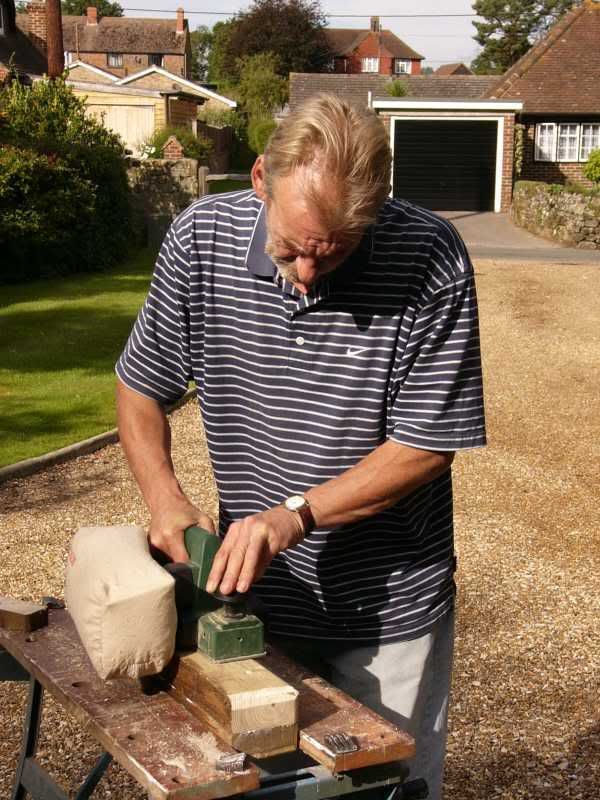
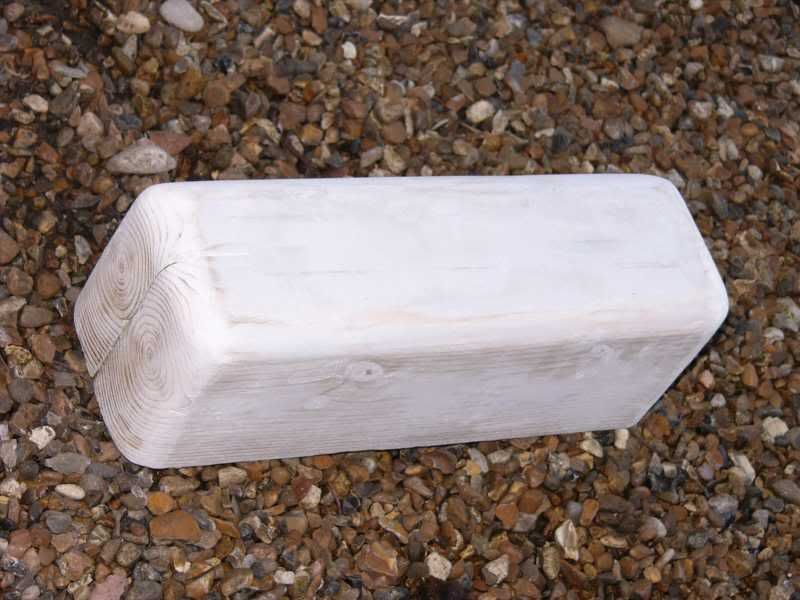
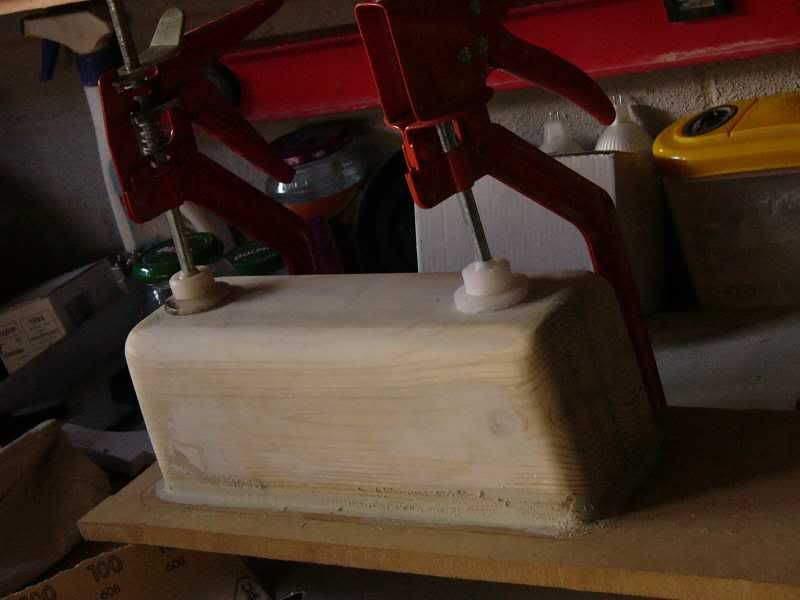
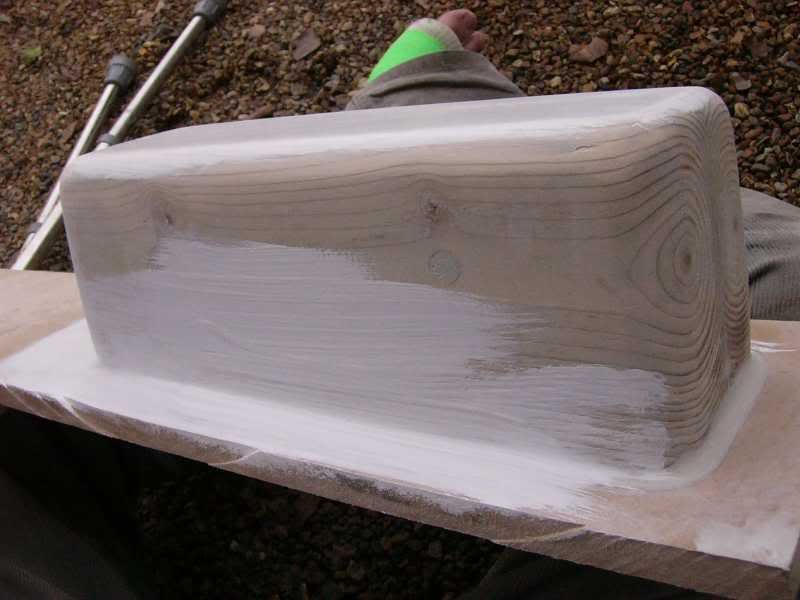
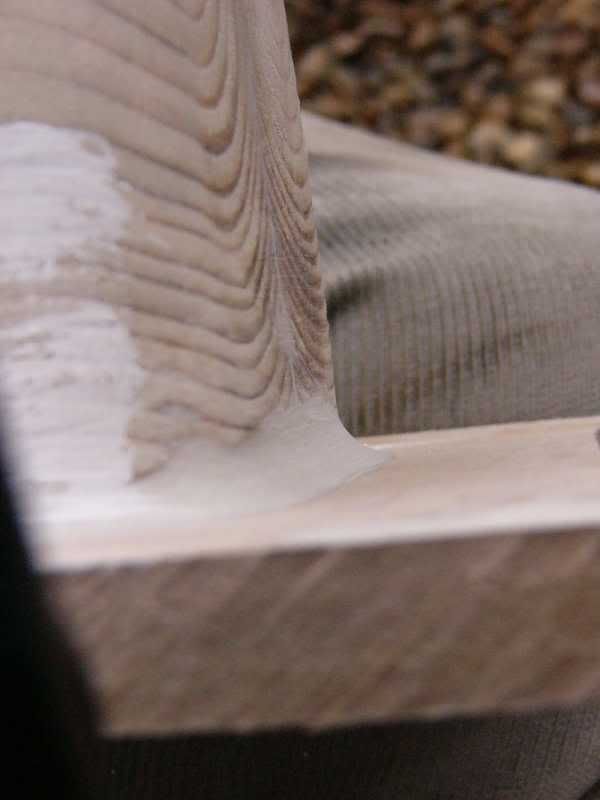
I have also started on the plenum chamber buck, this was made up from two bits of four by two wood screwed together, my dad assisted with this as I’m not very familiar with wood! He planed off the edges and then I stated to san it all nice and smooth.
I’m going to crack on again tomorrow with the plenum chamber buck, and ill finish polishing the trumpets, I might even glue them into the back plate!
Cheers
J
On 5th of Sep, 2006 at 05:47pm mini13 said:
I reckon if his brains were gunpowder he couldn't blow his own hat off...
|
blown_imp
223 Posts
Member #: 598
Senior Member
Gaol
|
|
October 4th – Oksigen xensor
Hi guys,
I though it about time that I did an up date on the ole’ imp S4 ( I’m thinking of changing it to S2, stradale 2, as mine imp isn’t four wheel drive!). I’ve been pretty busy with interviews, and also I’ve been a bit unwell :(
I’ve spent some time trawling egay and managed to pull up trumps on a couple of bits, first of all my oil cooler has split with all the moving around its has endured, so it was time for a new one. I found this –
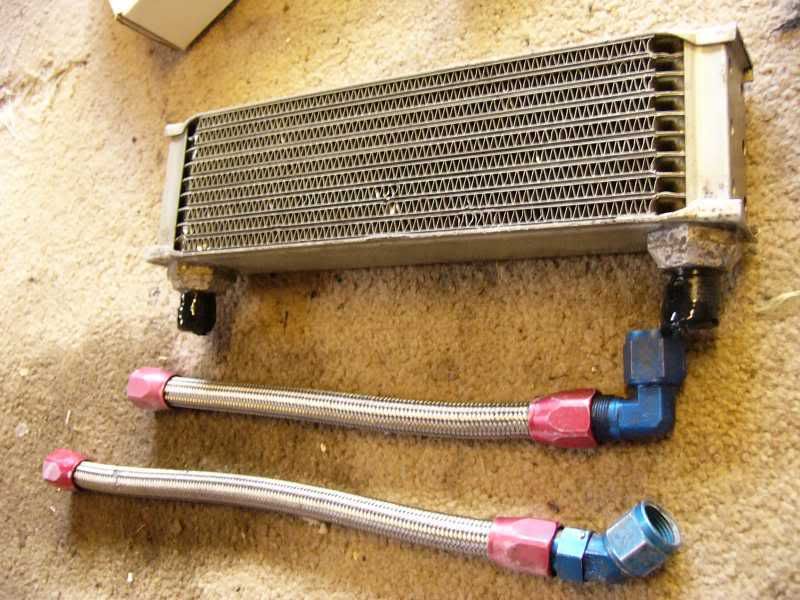
Virtually new 10 core unit with aeroquip fittings, all for £30, bargain!
I’ve also been needing some carbide burrs for my dremely kind of thing for a while, I found these –
http://cgi.ebay.co.uk/CARBIDE-BURRS-ON-3MM...1QQcmdZViewItem
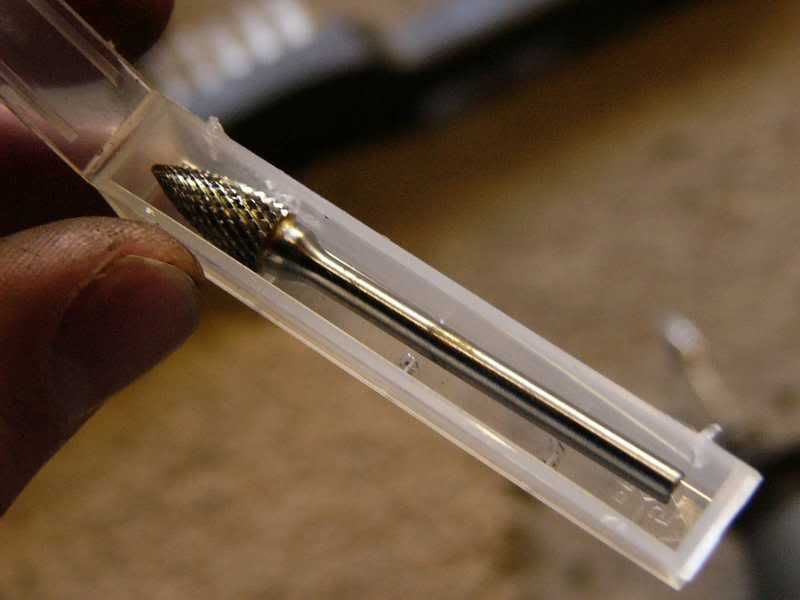
For £1.50 a piece including postage they are a bargain!
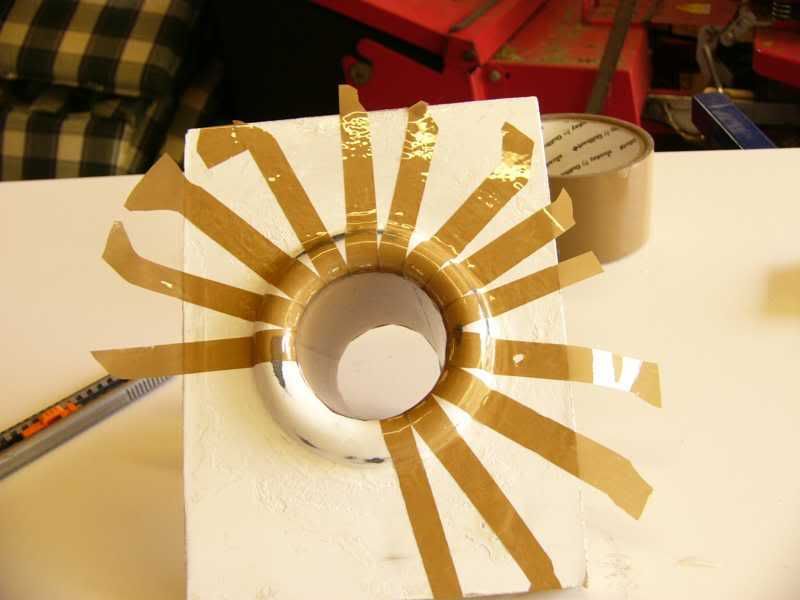
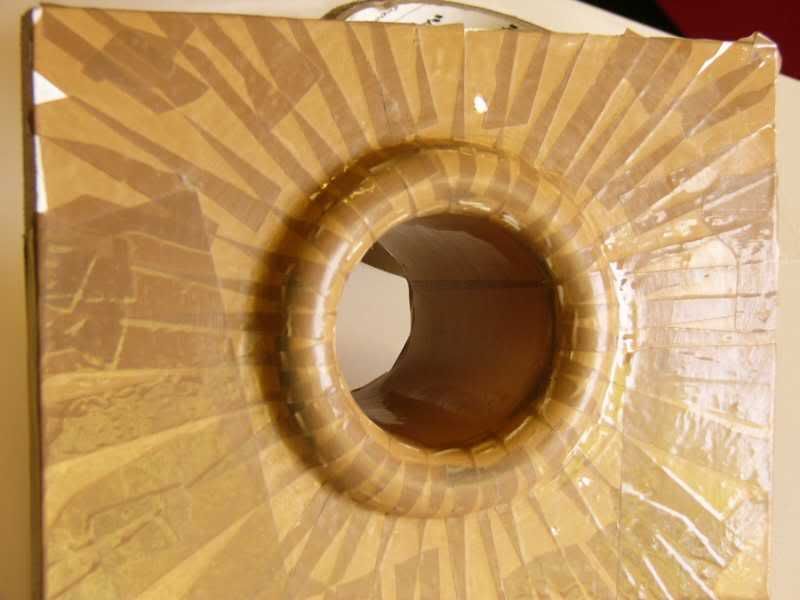
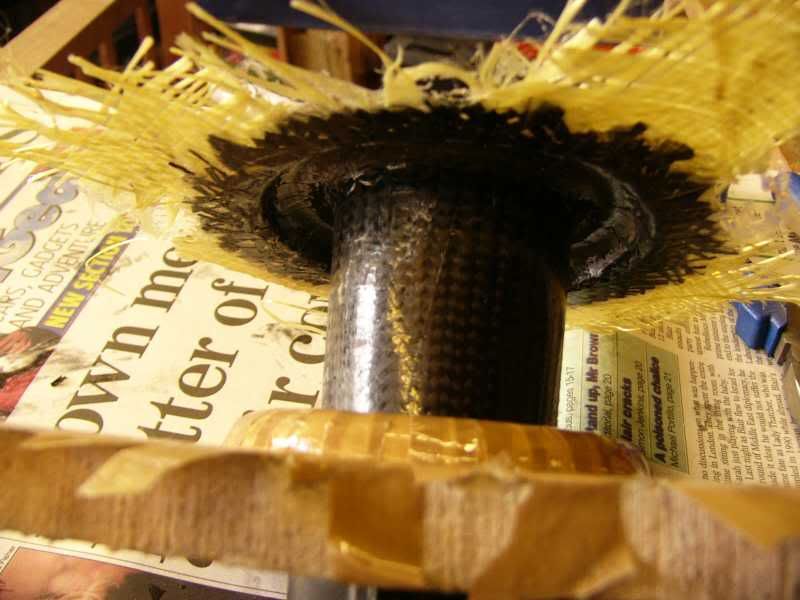
After the success of pulling all the trumpets in one piece I decided to remake the tapered carbon tube, this was the first part I made, and it wasn’t exactly perfect! So I remade the paper tube, filled it with dry plaster, and covered it with brown pacing tape. I laid up two layers of carbon with a piece of glass to provide the radial strength round the clamping area.
The outcome was worth it with the inside and outside surfaces coming up much flatter and smoother than before –
Next on the list was gluing the trumpets into the back plate, I did this using epoxy resin mixed with the carbon dust from sanding the trumpets and tapered tube. They were place into the holes and the gaps filled with the glue carbon mix –
They were taped into the angled position and left to set –

Whilst they were setting I bonded the buck for the plenum chamber onto a board so the flange could be supported by it –
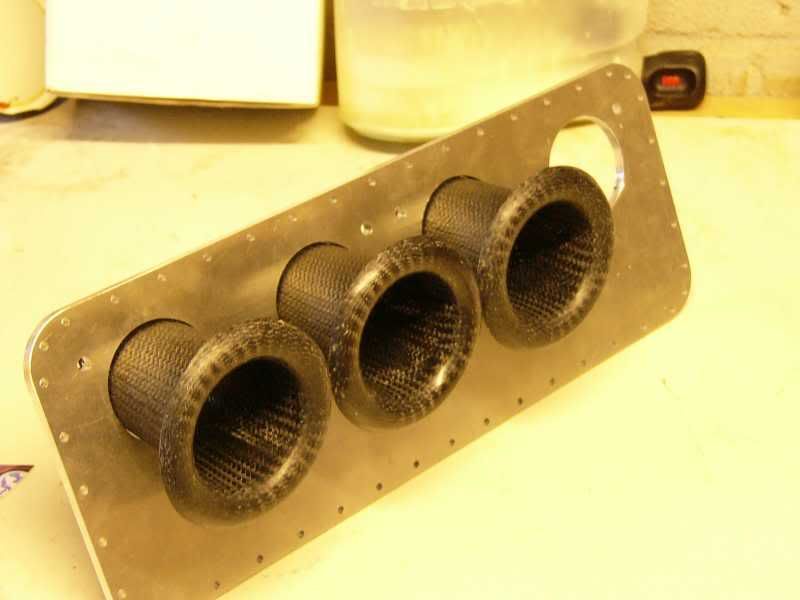
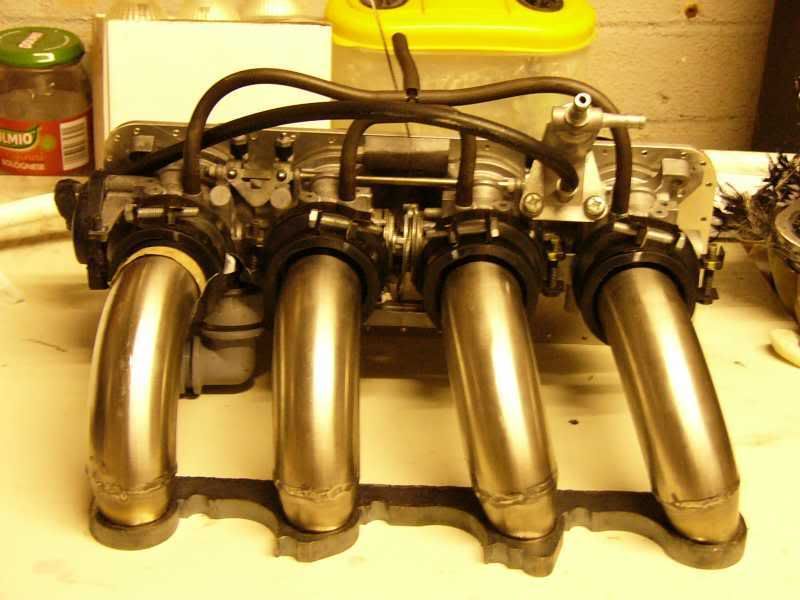
The trumpets were soon dry and I could trim the excess carbon from the back, the final product –
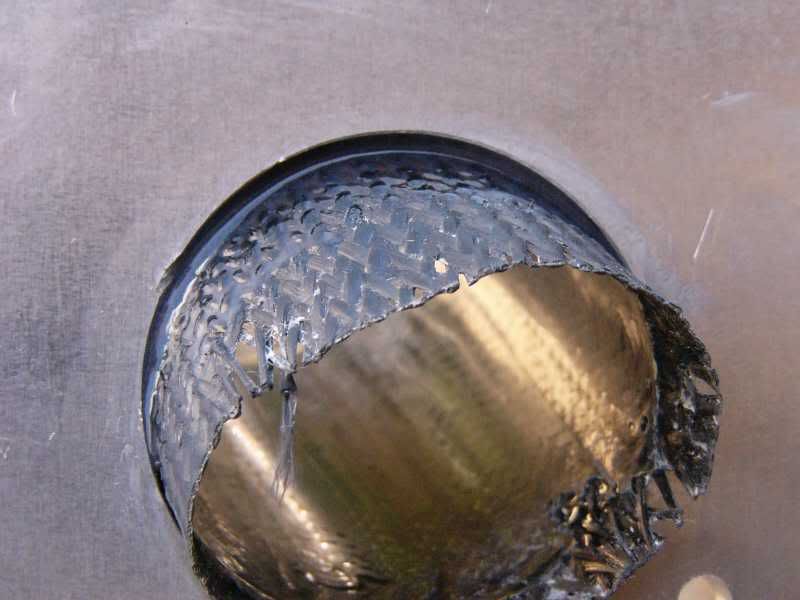
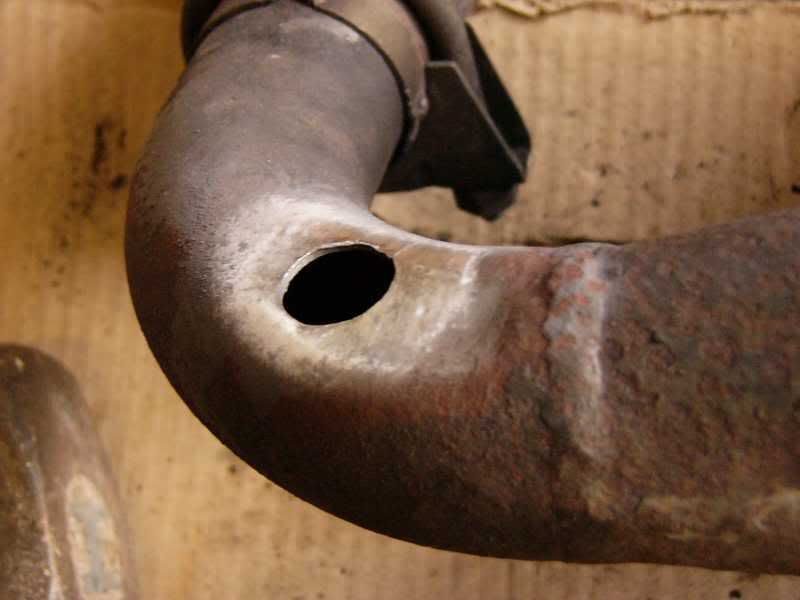
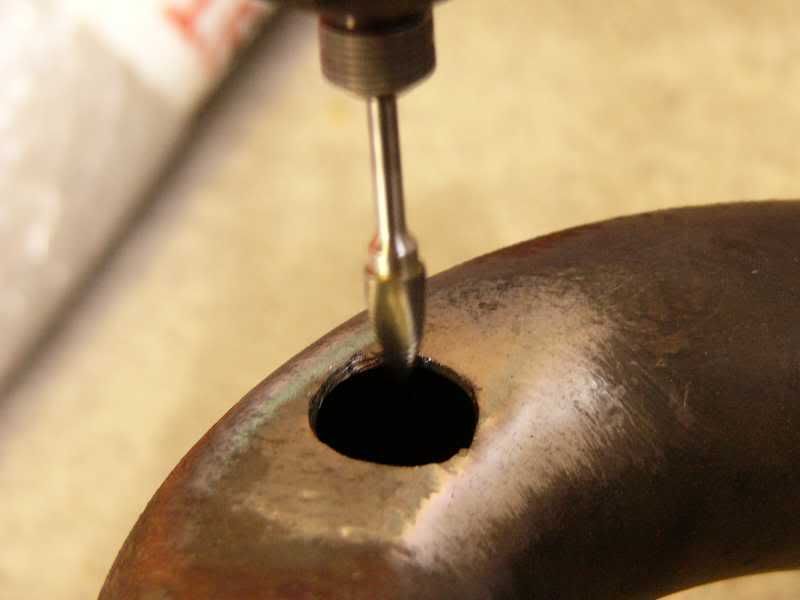
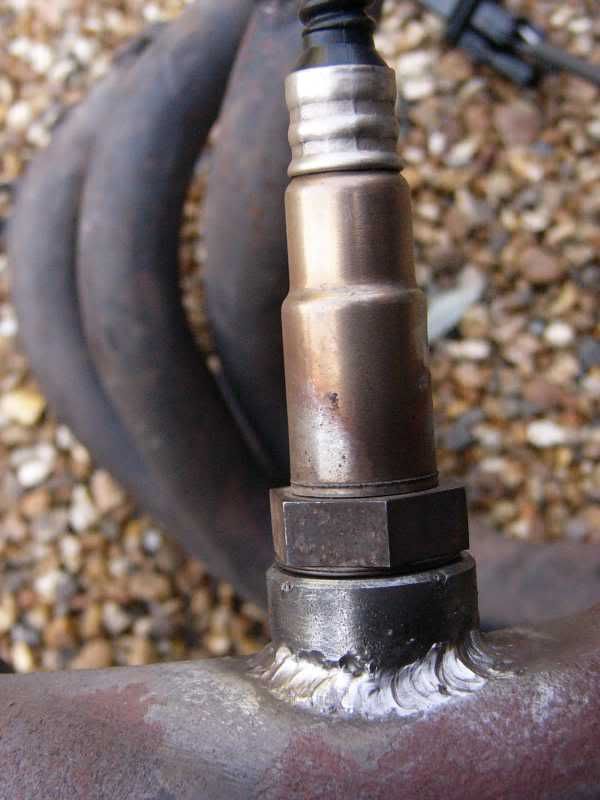
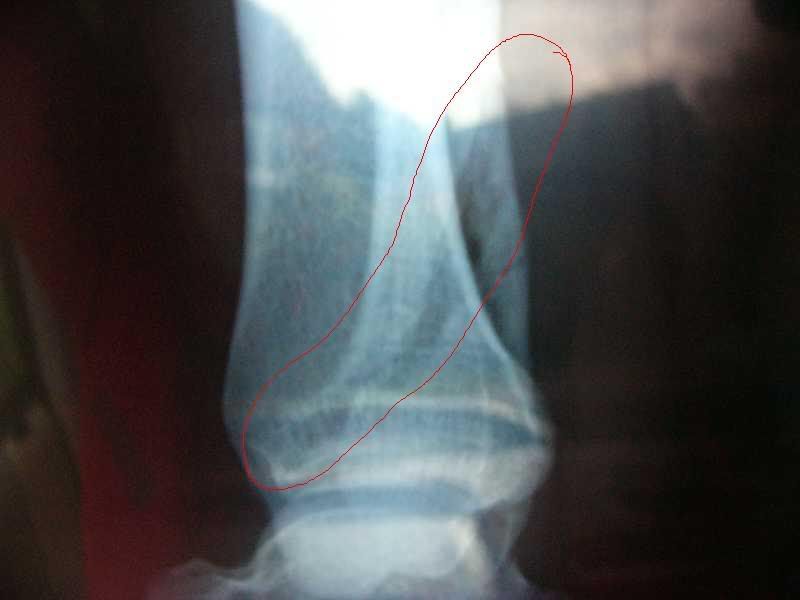
Finally for today I decided to put the oxygen sensor into the exhaust manifold, this necessitates a boss being welded onto the collector before the silencer (if I put one on ). I drilled the manifold out to 13mm and then had to enlarge the hole to fit the M18 boss, I did this using my new carbide burrs. Talk about easy, those burrs should be in everyone’s tool boxes, especially as the dremely type of thing is available for about £15 now!
Hole –
Drememling –
Trial fitting –

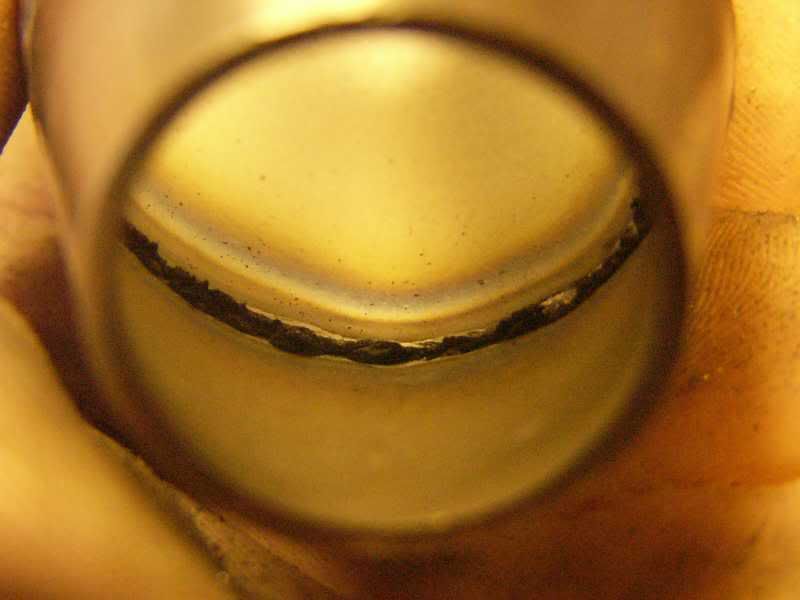
Then it was time to fire up the TIG again, this time was a little more difficult as the radius of the tube meant there were gaps to fill, I minimised the gaps by hammering a small flat on to the tube so only two gaps around 1.5mm were left. I used a 316l stainless steel filler rod, because it was the only one I could find!
All welded in and finished up –
I’ve got another interview tomorrow (its somewhere special too ) so Friday I will crack on with the buck for the plenum.
Cheers
J
On 5th of Sep, 2006 at 05:47pm mini13 said:
I reckon if his brains were gunpowder he couldn't blow his own hat off...
|
blown_imp
223 Posts
Member #: 598
Senior Member
Gaol
|
|
November 6th
UPDATE! - Bad (L)Imp’s Back
Hi guys, for those who don’t know I’ve broken my leg, pretty badly, badly enough to need five screws and a titanium plate!
This has subsequently slowed work to a snails pace, as I have to do everything on crutches, hopping or sat down. But I have finally got together enough work to warrant an update 
I have been thinking about my inlet manifold, initially I was going to get one made by the Bogg Brothers, I sent everything off to them and waited patiently. After five weeks of zero progress I decided to cut my losses and just get them to send it back to me, the £20 postage loss incurred I consider as learning costs!
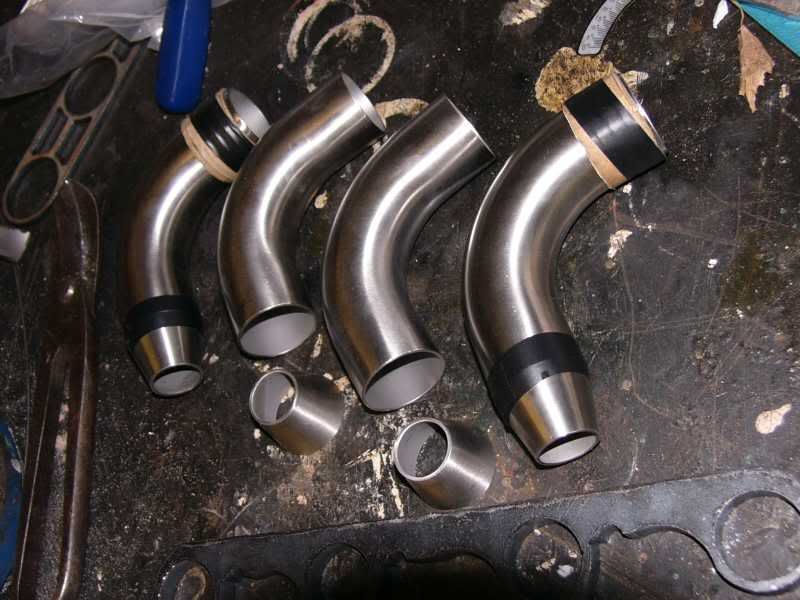
Instead of spending money for them to do it, I am going to spend the money on tools and materials and make it myself. I have a pair of flanges in steel from a nice chap on the imp club, one to suit the imp head and one to suit the CBR TB’s. I decided to join these together using stainless 90 degree bends tapered and shaped to suit, sounds easy doesn’t it? Well its not!
I started by working out the amount of material to remove from each circumference to achieve the correct diameter, this was translated to a card template –
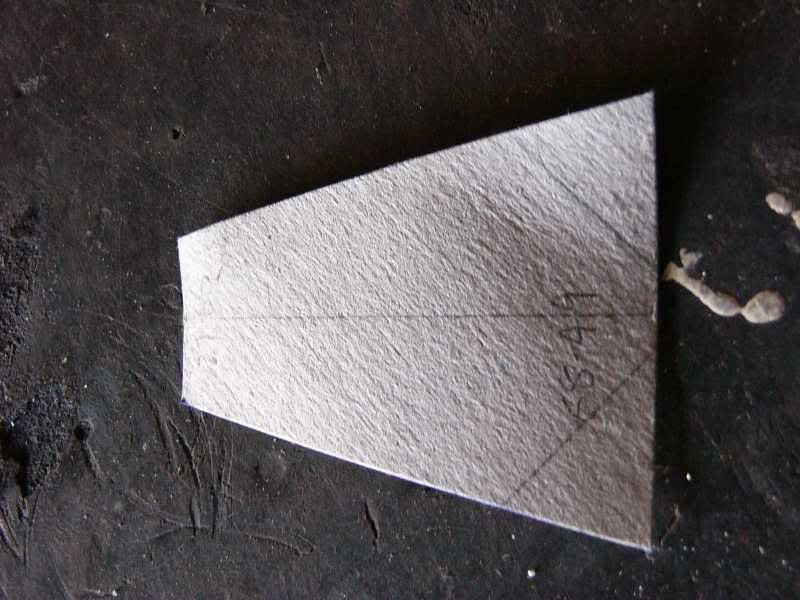
This was then transferred onto a bend –
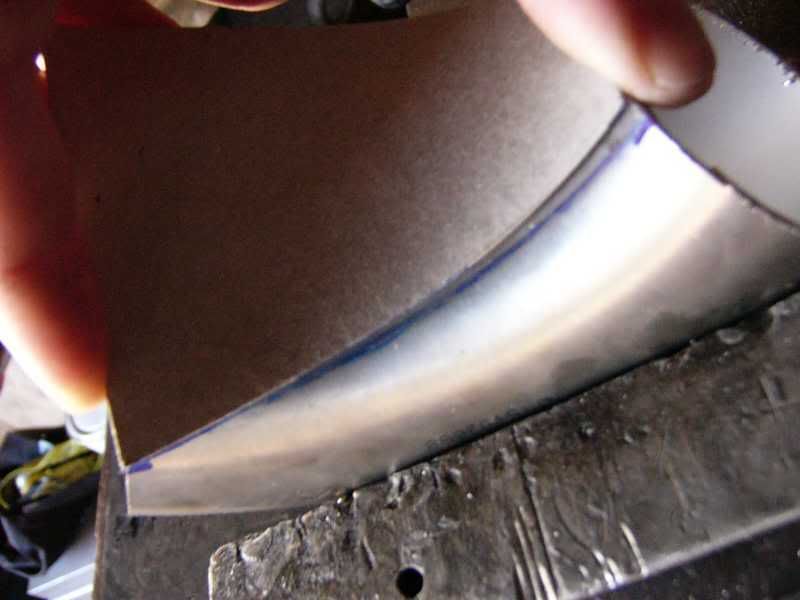
And the section was cut out using a 1mm dick in the angle grinder –
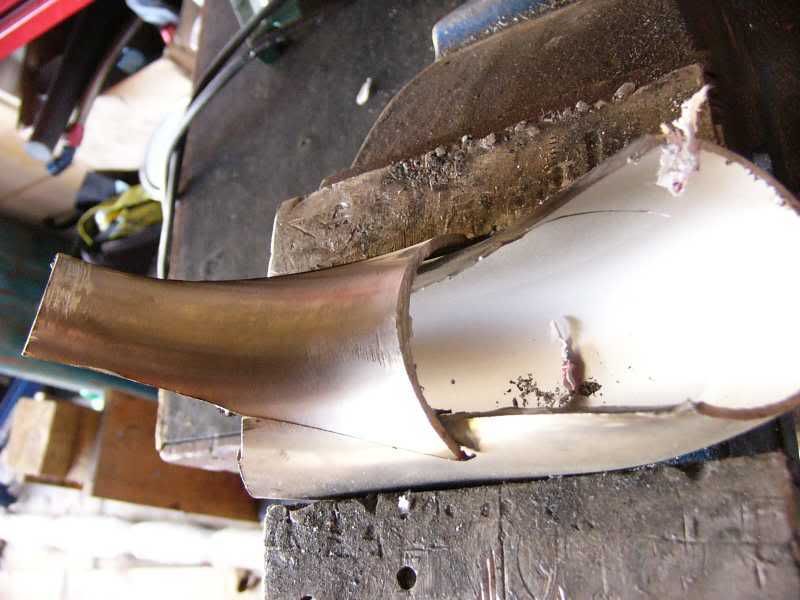
Then the shaping could start, and it went wrong! The material was very difficult to manipulate and ended up in a right state :(
Another solution is needed, I think that I am now going to go with a composite bend made in carbon with the steel flanges at either end, this is one of the many things on the to-do list
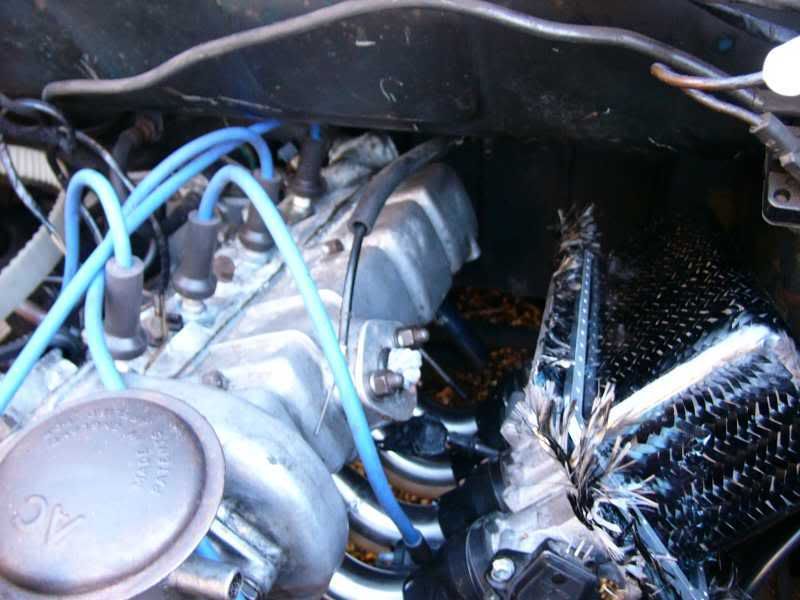
With the TB’s back from the Bogg brothers I could put my finished trumpets on and see how they looked –
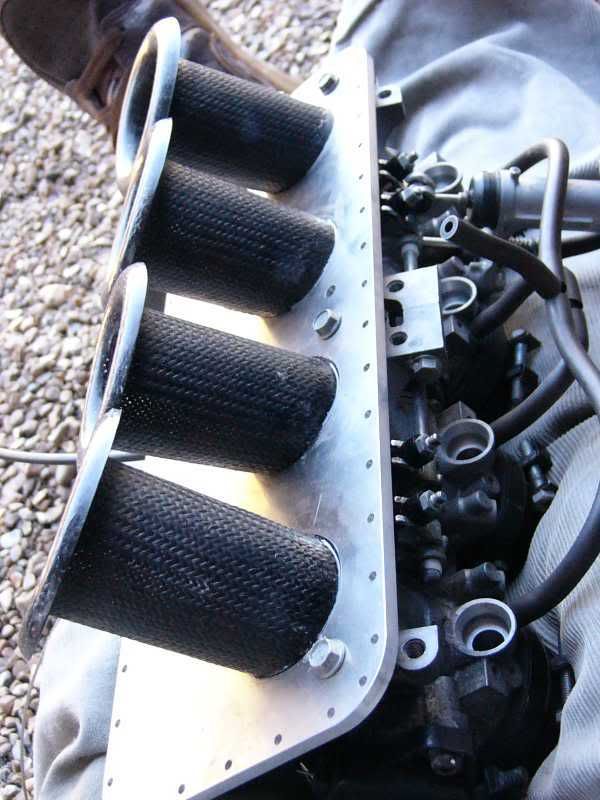
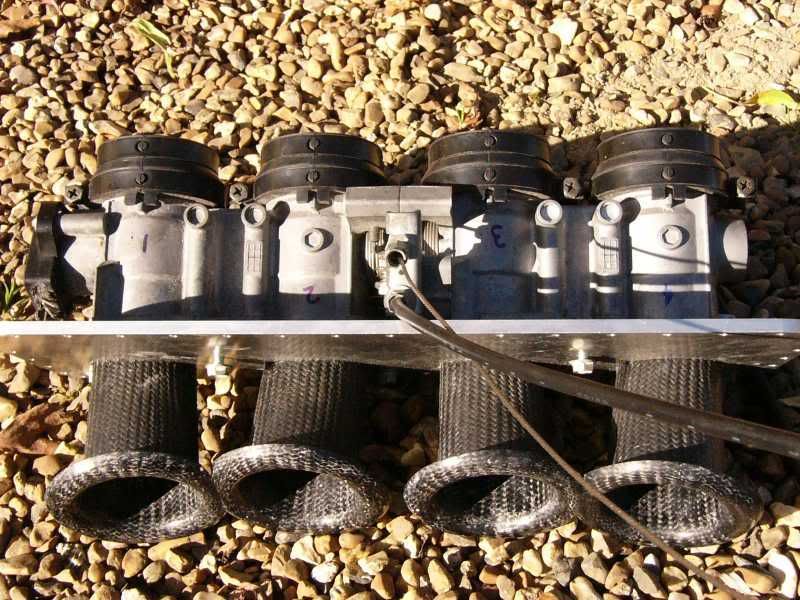
mmmmm, I like! You like?!
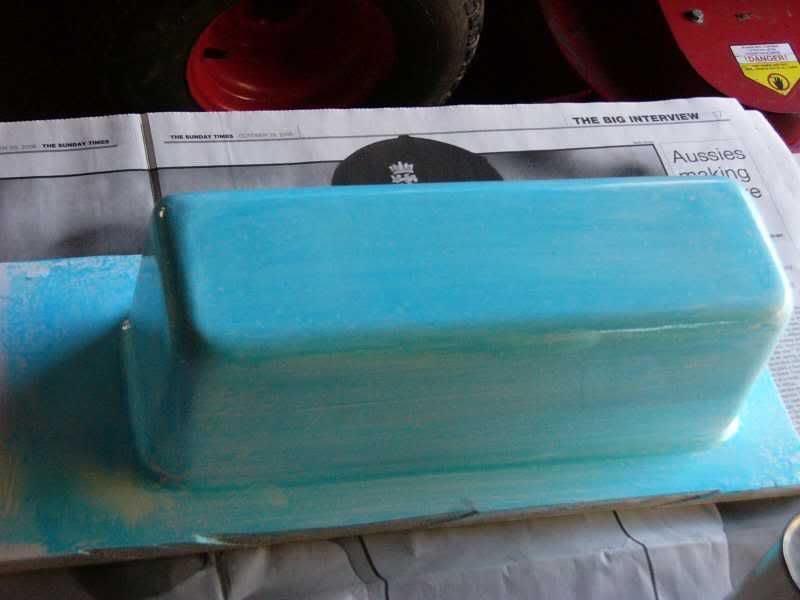
After the little disaster with the inlet manifold, I decided to have another crack at the inlet plenum. With the shape pretty much there I put the fillet around the bottom edge with body filler –
This was smoothed, then painted with primer and sprayed with about 5 coats of white, flatting and smoothing between each coat.
Once the paint had gone hard I could polish it, put a coat of wax on followed by a coat of blue PVA release agent.
I then made up a template for the glass, I allowed for some material to tuck in at each corner to improve strength. This was placed on to the fabric and then a light dusting with grey primer was sprayed on to show the edges –
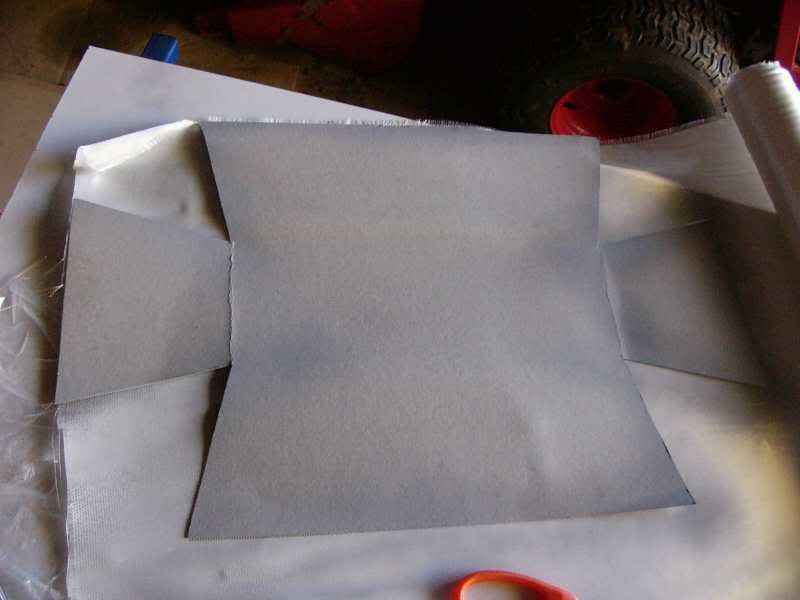
This was then cut out –
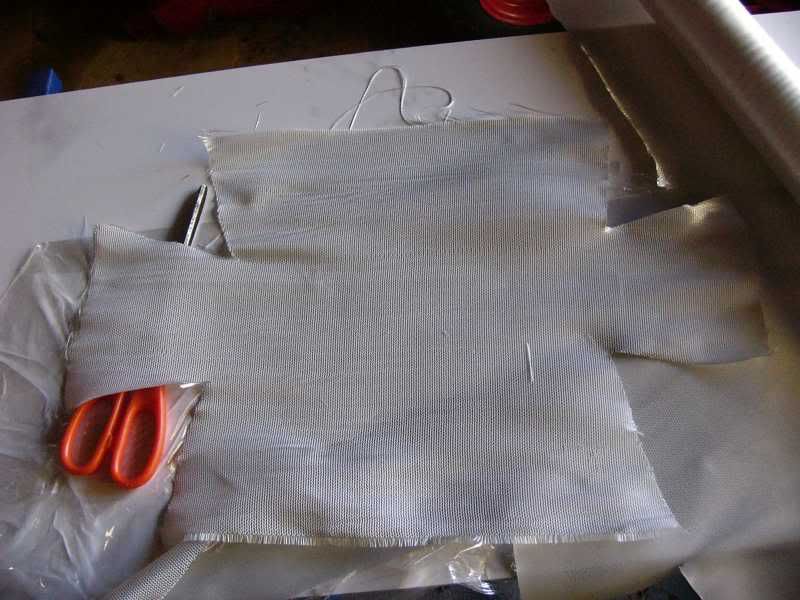
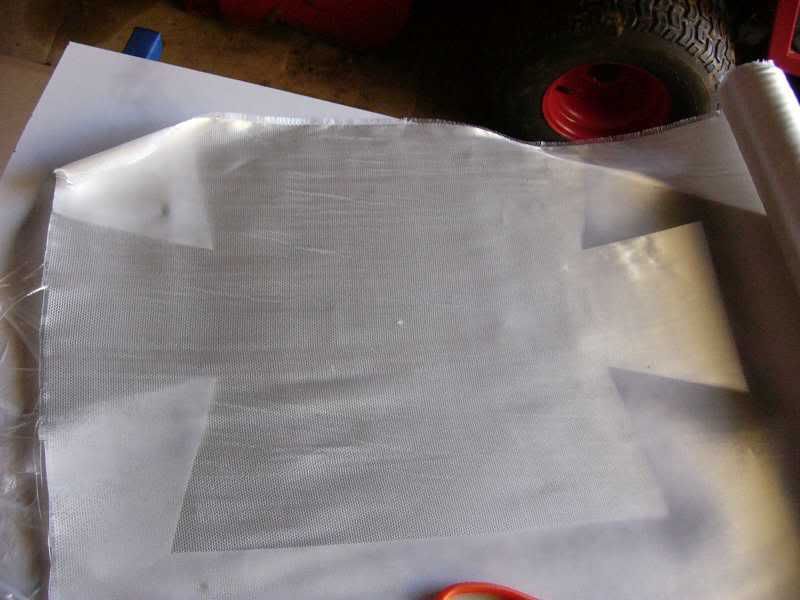
I used three layers of glass and a clear gel coat, this was left overnight to go off completely.
The next day I had to remove the mould from the buck, I was nervous at this point, had it worked? Was it going to release? Would it stay in one piece?
I wacked it with a rubber hammer to break the seal between the buck and PVA –
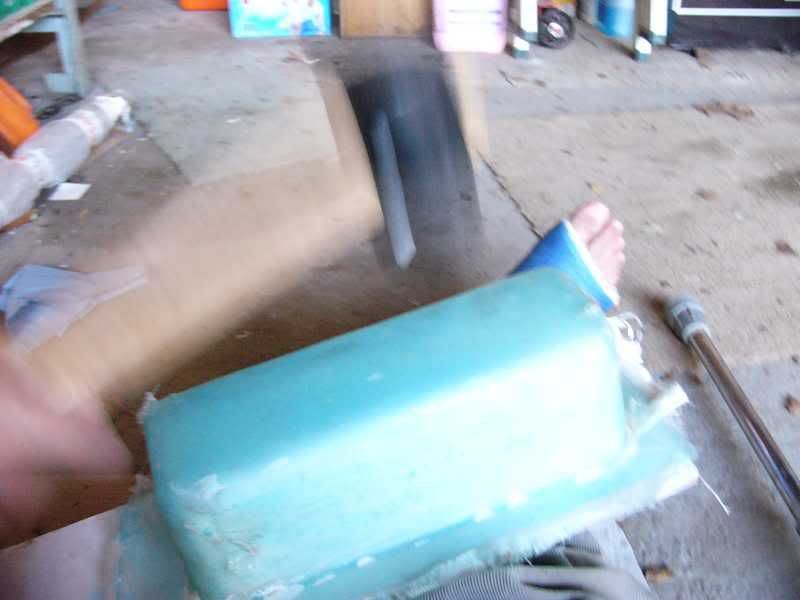
Then levered with a monster screwdriver, it was on there damn tight –
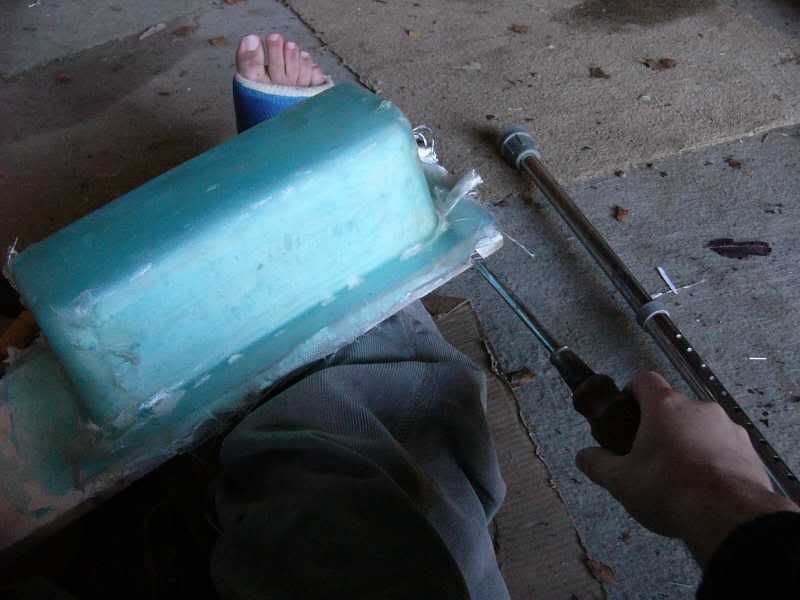
A bit more pulling later and it was off! The buck got mashed in the process, and the mould was slightly damaged from the screw driver, the little gouges were later fixed with a dab of gel coat and some rubbing down.
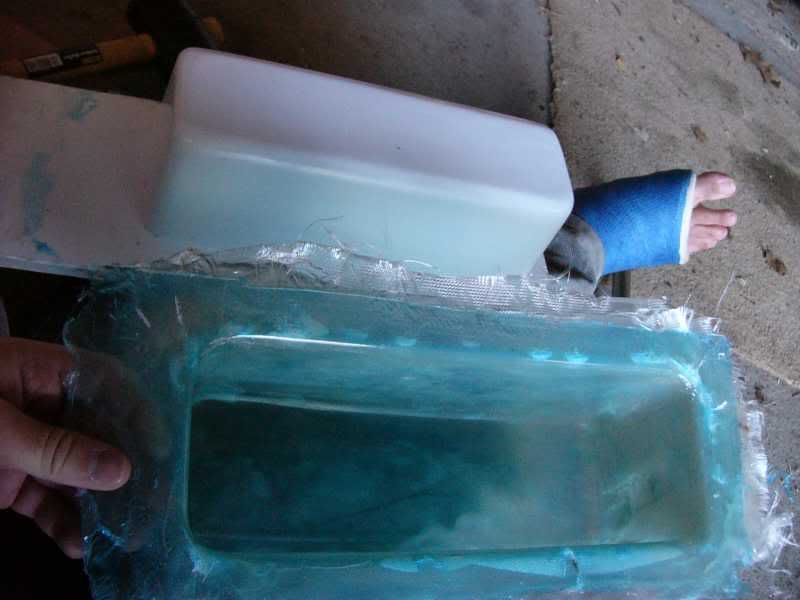
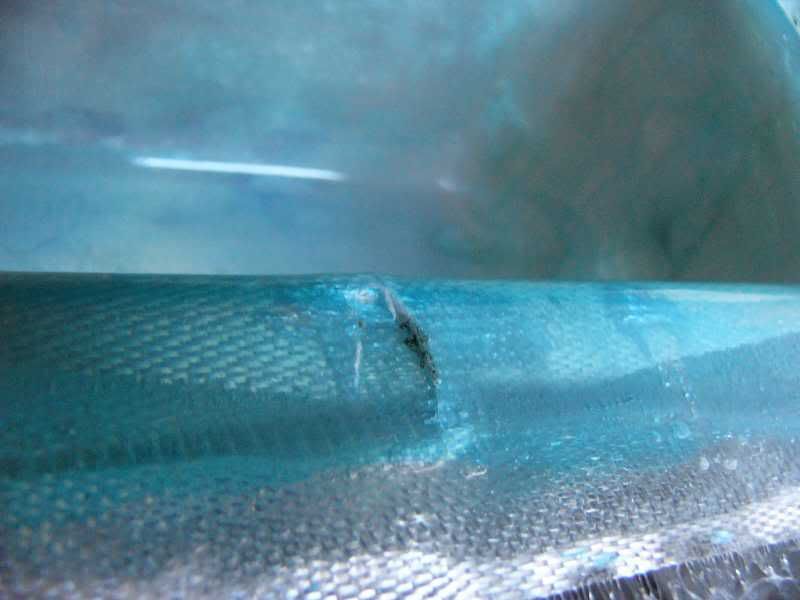
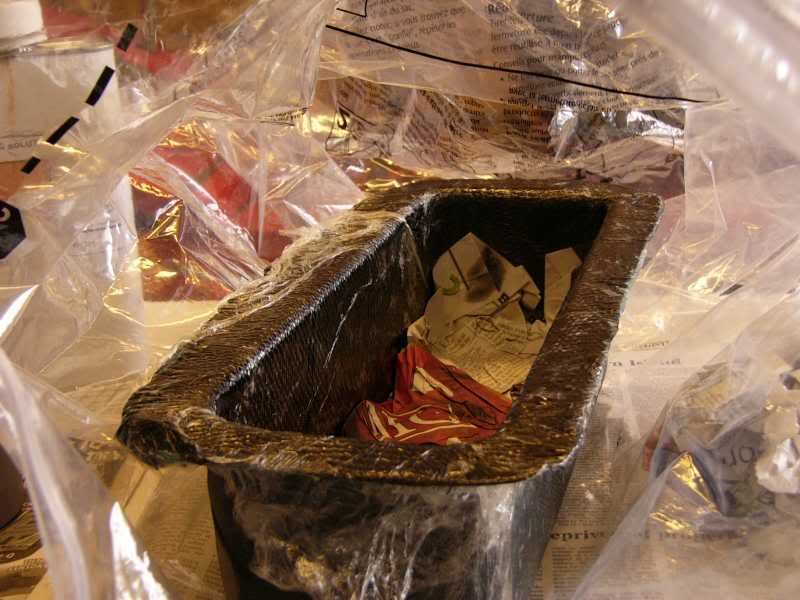
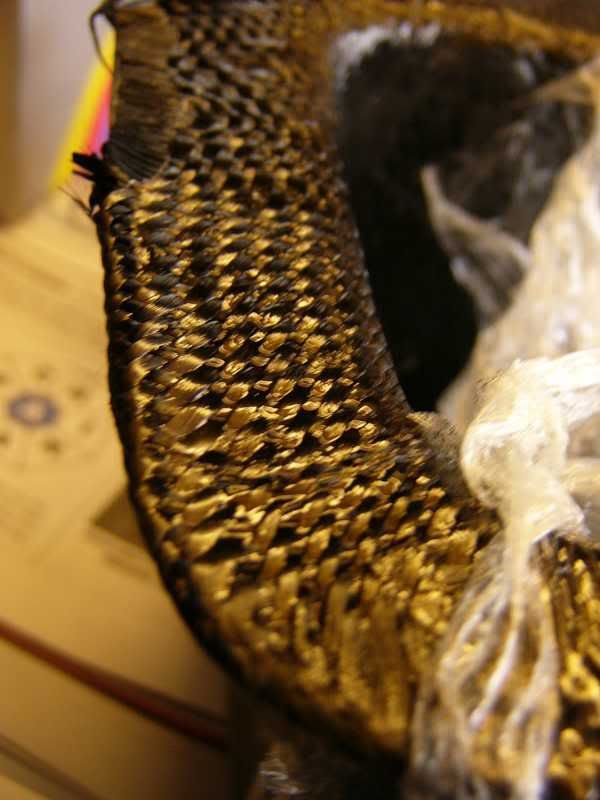
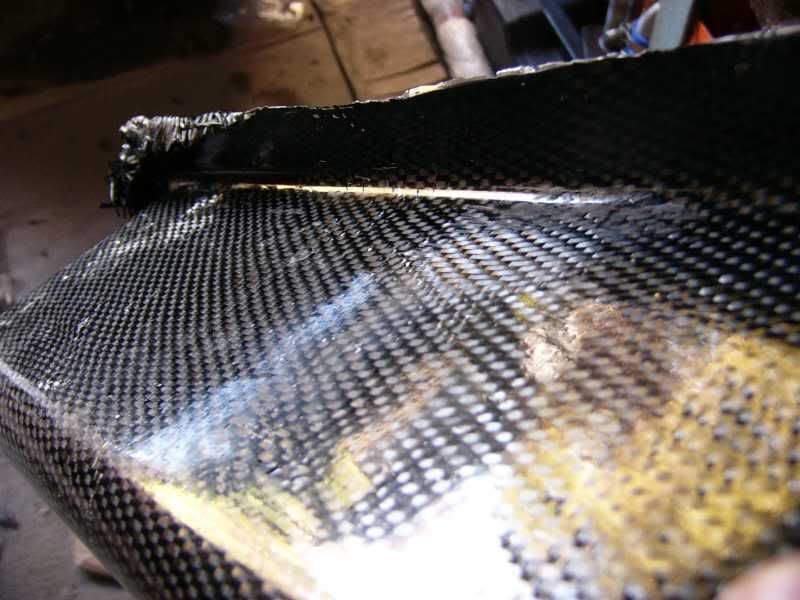
I prepared the mould with a flat back, polish, wax, and PVA as I had with the buck. Then gel coat was applied and left to set, in the mean time I went about cutting the carbon for the plenum. The carbon I have got is much heavier than I initially thought, this makes is hard to form around curves and also cut to shape.
I used the template again –
Then proceeded to lay up the mould, this was difficult with the carbon being very stubborn around the edges and corners. I think that it would be possible to make it easier if cut into separate sections, and also a roller used to expel the air.
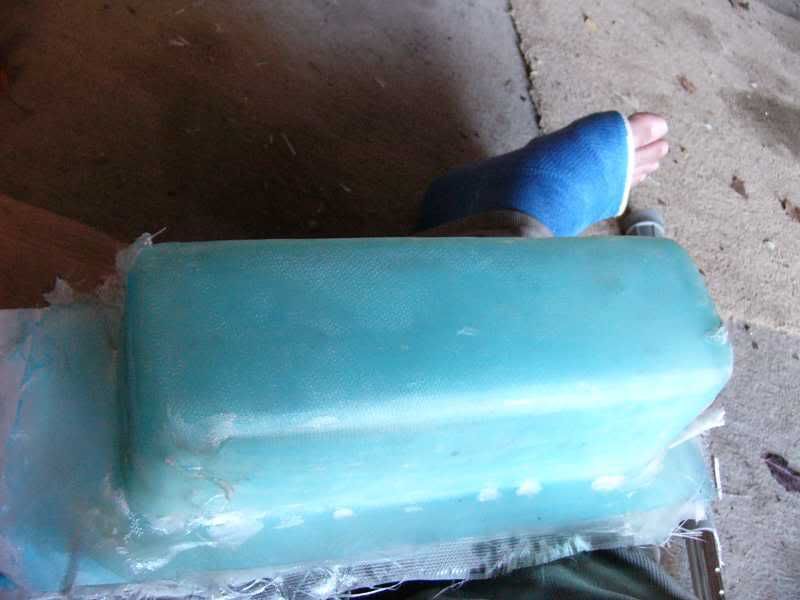
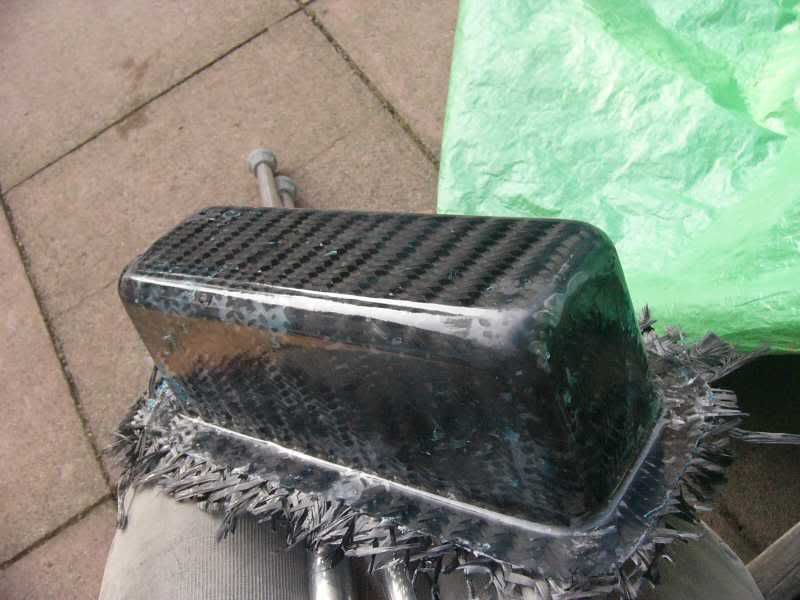
The finished plenum came out better than I had first thought, but not up what I want it to be like. So another shall be laid up, possibly in a lighter fabric?
What it can be like, to top came out fine –
Area where the carbon wouldn’t lay flat –
Doesn’t look too bad –
Once the manifold is made up then I can actually try running the car! Whoop whoop, the end is almost in sight guys!
J
On 5th of Sep, 2006 at 05:47pm mini13 said:
I reckon if his brains were gunpowder he couldn't blow his own hat off...
|
Ric

1566 Posts
Member #: 36
Post Whore
Basingstoke
|
|
This is so impressive! Kicks the shit out of the ripspeed boys stick on stuff.
|
AlexB
Site Admin

6297 Posts
Member #: 1
The boring bloke who runs this place.
Berkshire
|
|
I love this thread.
I hope your interview went well, too.
|
Ric
1566 Posts
Member #: 36
Post Whore
Basingstoke
|
|
and can you make us all custom carbon plenums?
|
Joe C
12307 Posts
Member #: 565
Carlos Fandango
Burnham-on-Crouch, Essex
|
|
Bah!
Why is it someone always comes along just after you've done something and does it far better....
seriously though, that is quality, nice to see it getting there.
Oh and how much power was it putting out with the turbo?
On 28th Aug, 2011 Kean said:
At the risk of being sigged...
Joe, do you have a photo of your tool?
http://www.turbominis.co.uk/forums/index.p...9064&lastpost=1
https://joe1977.imgbb.com/
|
blown_imp
223 Posts
Member #: 598
Senior Member
Gaol
|
|
Im not too sure really, nothing ever got properly set up, it ended up just bein a fun summer transport. I think it was probably about 80bhp, dosent sound like much but its a 100% increase on the stock engine!
I think im going to have a go at vacuum bagging tomorrow using a hoover, should consolidate the carbon a lot better.
I dont know about far better, i would love to be able to ali weld, i just dont have the facilities. The carbon was just the easy option, the problem with it is that if it goes wrong you have to re-do it because it looks shite!
J
On 5th of Sep, 2006 at 05:47pm mini13 said:
I reckon if his brains were gunpowder he couldn't blow his own hat off...
|
Joe C
12307 Posts
Member #: 565
Carlos Fandango
Burnham-on-Crouch, Essex
|
|
well mine looks well shite!! but i guess welds can be touched up...
my tig incidently is one of these cheap chinese imports from ebay, works pretty well ( apart from the footpedal dhl broke in transit), the idea was to use it to finish the car and then flog it, i can see me hanging on to it tho...
On 28th Aug, 2011 Kean said:
At the risk of being sigged...
Joe, do you have a photo of your tool?
http://www.turbominis.co.uk/forums/index.p...9064&lastpost=1
https://joe1977.imgbb.com/
|
carl talbot
326 Posts
Member #: 1323
Senior Member
|
|
Fab work , shitter about the leg though , how did you bust it so bad ?
Nice to see it all up to date , been a bit of a cliff hanger not knowing how far you'd got with the build
Great stuff
Carl
|
antman

966 Posts
Member #: 358
Post Whore
Snetterton, Norfolk
|
|
Yeah i really enjoy the thread. I would love to have the time to produce such a nice carbon trumpet. Will try and produce some for the 16v if i get time.
|
AL

549 Posts
Member #: 1347
Post Whore
Croydon (South London)
|
|
Very very nice carbon manipulation. I can sense a "how to" guide being written for all of us who fancy making our own carbon bits and pieces (as i really want to have a go). So how about it J? A short step by step guide with the do's and dont's would be gratefully received. Cheers dude, keep on updating. As always, very interesting.
AL
|
blown_imp
223 Posts
Member #: 598
Senior Member
Gaol
|
|
November 19th
Slowly slowly catch monkey
Hi guys and gals
I’m slowly working my way toward the ultimate goal of an imp that works, the plenum chamber has been a real pain, only getting one that is acceptable on my third go!
(please excuse the photographs, my camera is on its last legs. It’s not done to bad, it’s been all round the world but has never been the same since I spent three days on an island made entirely from sand. Either way the photos are grainy and slightly blurry, sorry chaps and chapesses.)
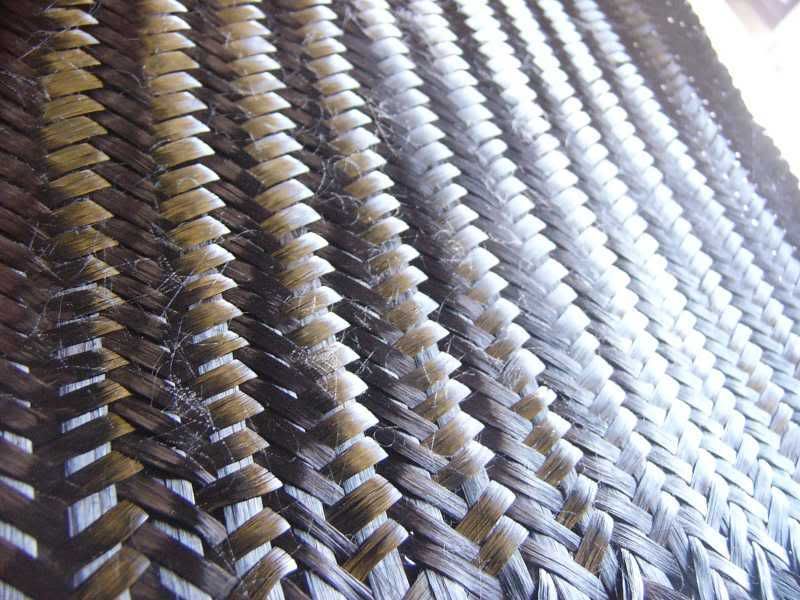
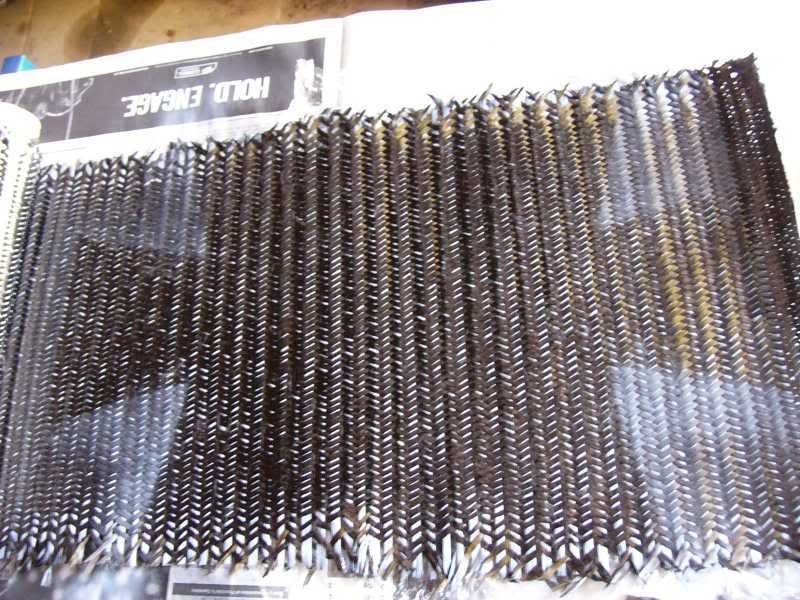
I got some new carbon that was a lighter grade compared to the last stuff I imported from the US.
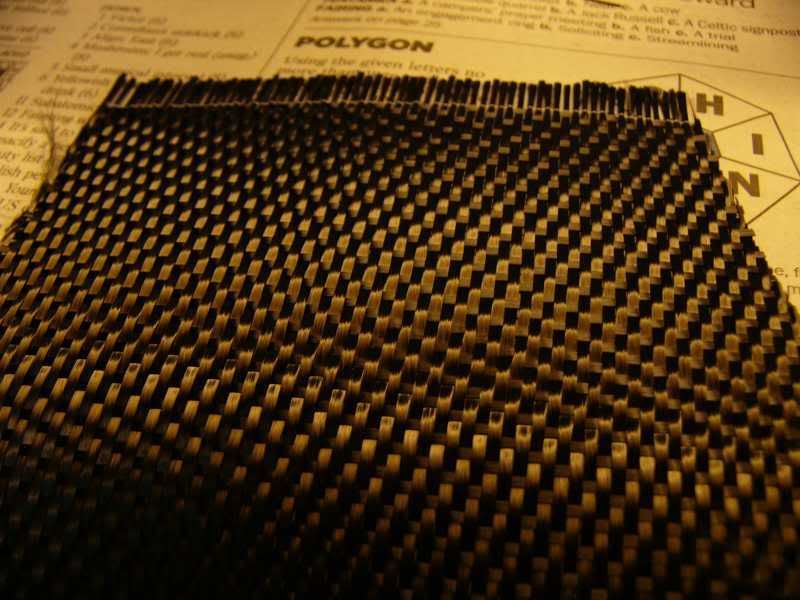
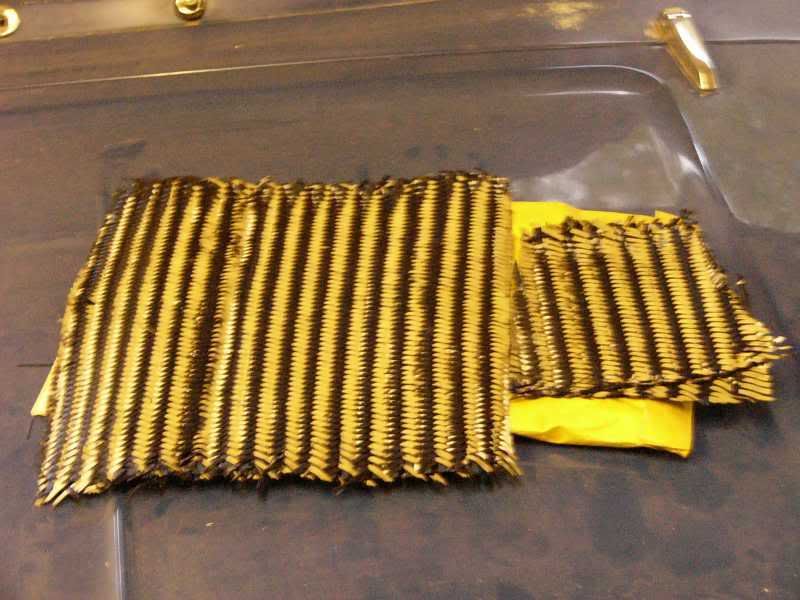
It is a harness weave, this is good for complex curves as it drapes very well. It strangely also holds together well at its edges, compared to plain weave that just falls to bits!
To consolidate the carbon better and remove more of the air bubbles, I purchased some vacuum storage bags from Woolworth’s. These use a household vacuum cleaner to remove all the air through a silicone valve.
I prepped the mould with a wax polish and PVA release agent, the carbon was cut in once section as per last time and laid in the mould. The mould and carbon was covered with Clingfilm to ensure the vaccum bag didn’t stick to the resin, and then the whole caboodle was popped into one of the bags and the air evacuated. It took a while to remove the air and try to remove all of the creases, fortunately it was cold and the resin took a long time to go to the gel stage.
Once the resin had gone to the gel stage but not dried completely, I removed the Clingfilm, if I had not done this at this stage it would have stuck to the resin.
This was left until the next day for the resin to completely cure, and then pulled from the mould. Unfortunately not all of the air was removed, the extra flexibility provided by the lighter fabric caused it to raise up off the mould and follow some of the creases in the vacuum bag.
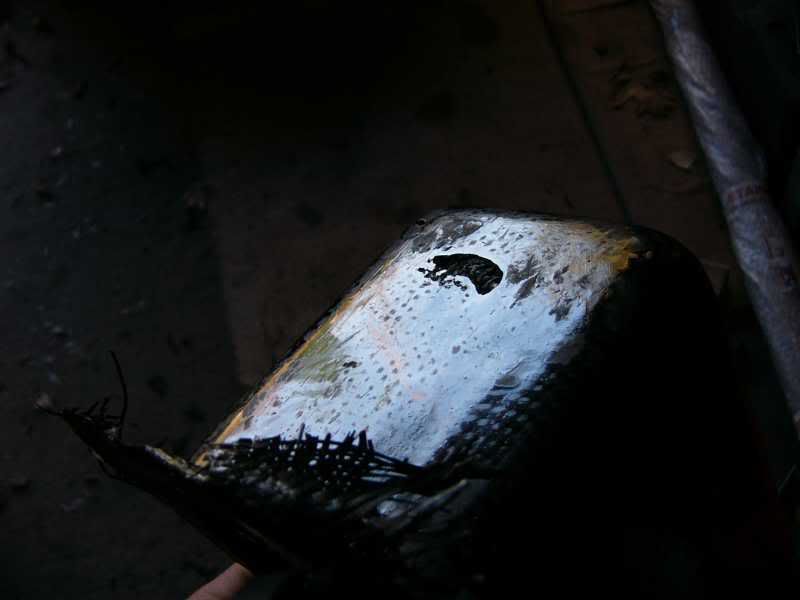
A dry patch can be seen here –
A bubble here –
So yet again I prepped the mould, I decided to use the heavier fabric again but in three separate sections, one main section around the top and sides and two bits for either end.
Bagged –
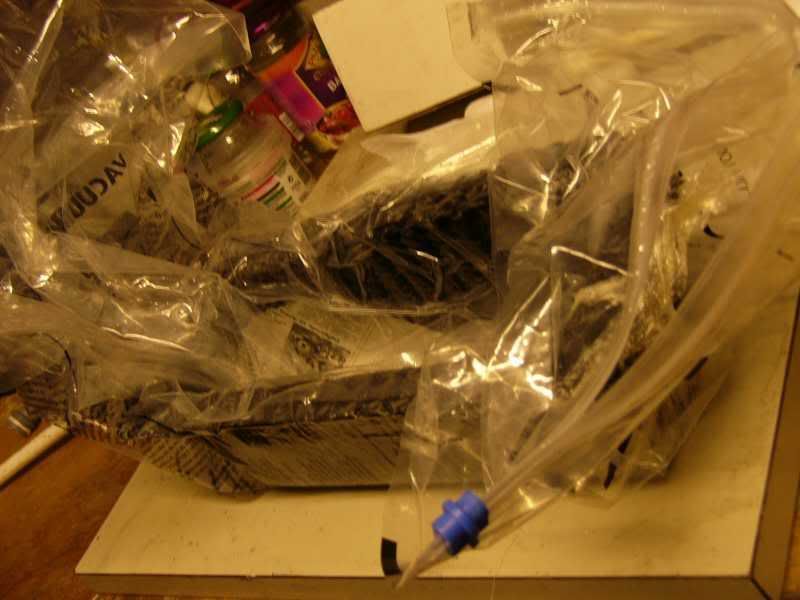
Pulling the Clingfilm –
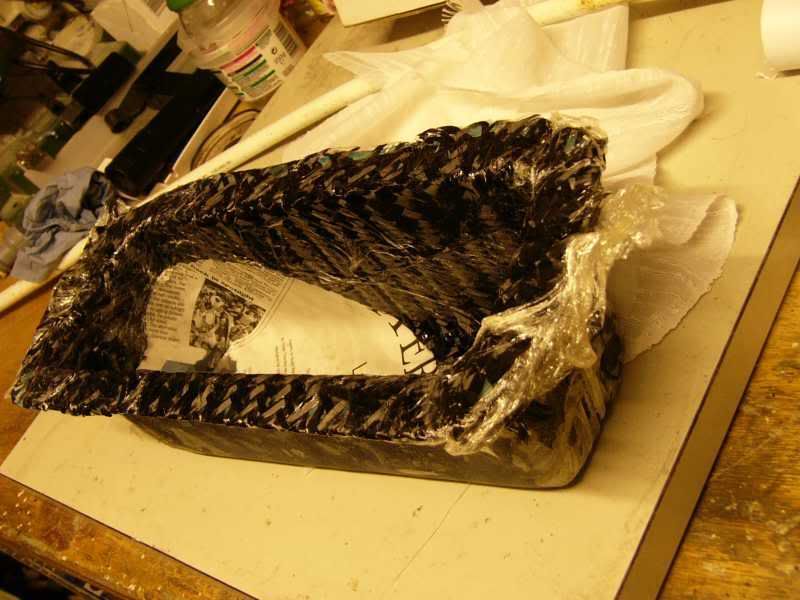
This time it got an almost perfect piece from the mould, there are a few tiny air bubbles and one small dry patch, all easily fixable with final finishing.
Then the stainless parts that I had ordered a couple of days earlier arrived, and they were not the same dimensions as shown on the site :( The reducers were 1/3 the length I had designed for, not good as the flow would be no where near as smooth, but hey, not much I can do really.
I cracked on sizing up the parts –
The bends were to have their straight sections removed to make them as short as possible without ‘cheating’ the bend angle. The cut was made with an angle grinder along a marked line, I worked from four sides to make it as straight as is possible with a hand tool.
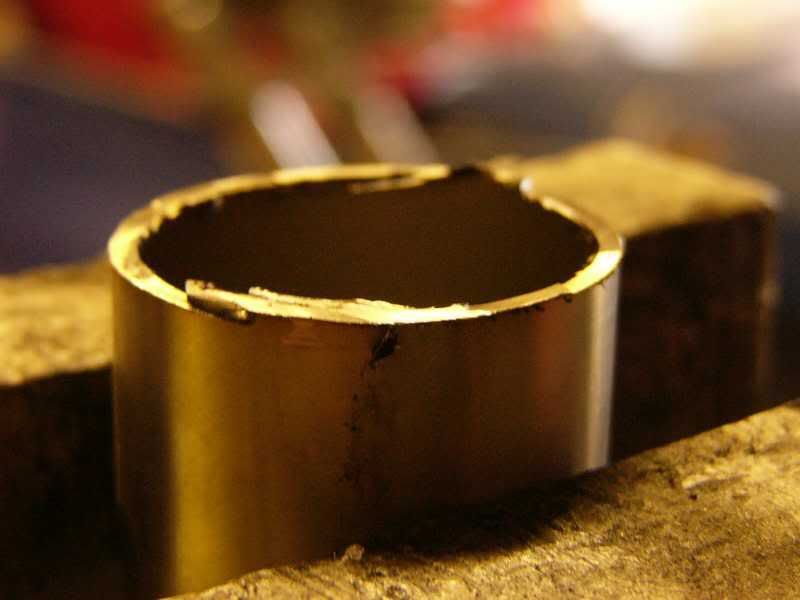
Still not too good! This is where my birthday present comes in, it’s a belt sander supposedly just for wood, but it bashed my stainless pipe in seconds!
Mmmmm straight –
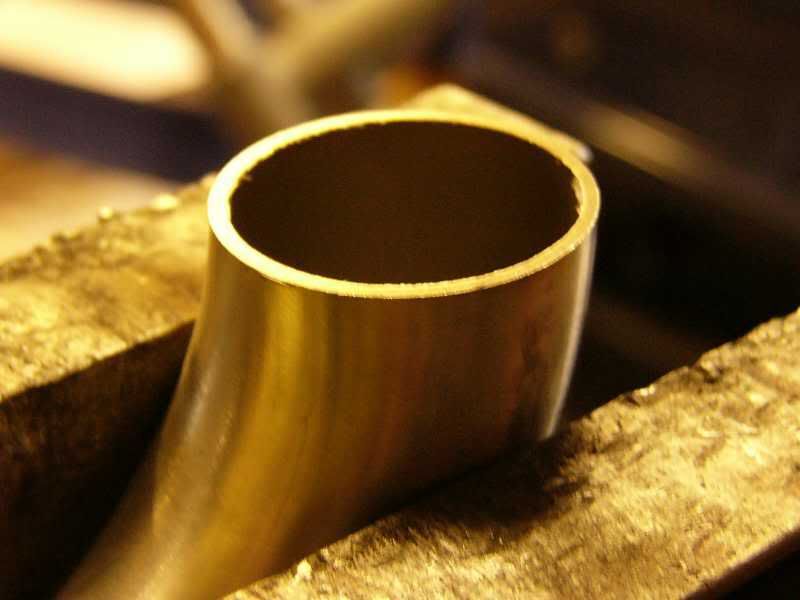
Lined up with the reducer –
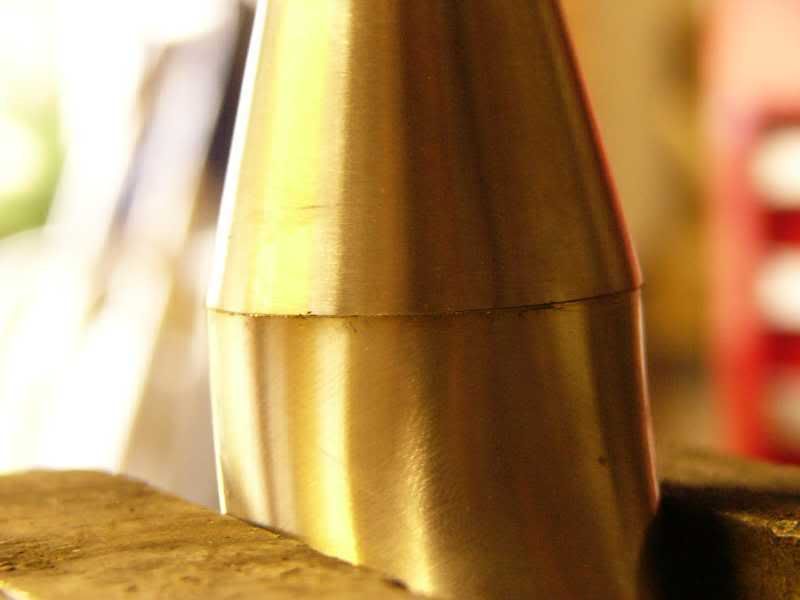
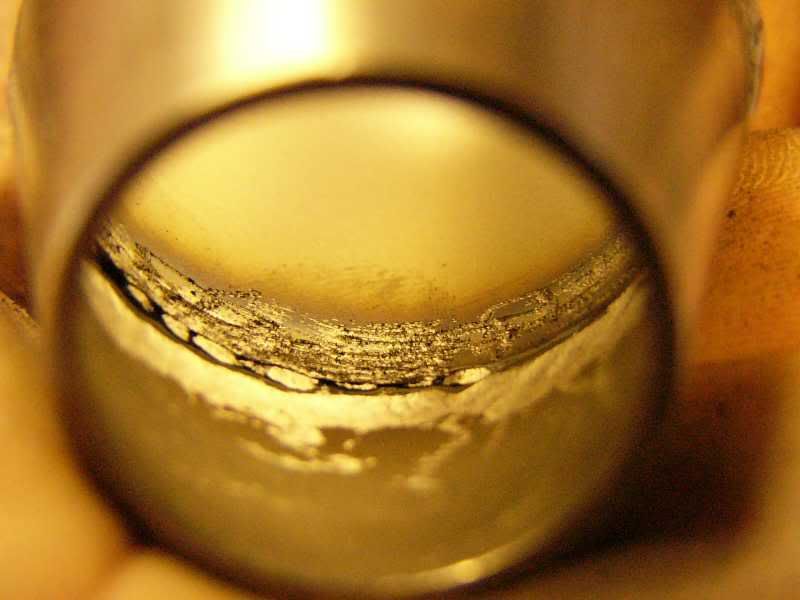
I welded the reducers onto the bends, this left some oxidation on the inside of the join where the weld penetrates –
This was ground back with a tungsten burr –
I balanced the whole assembly together to see how it all looked –
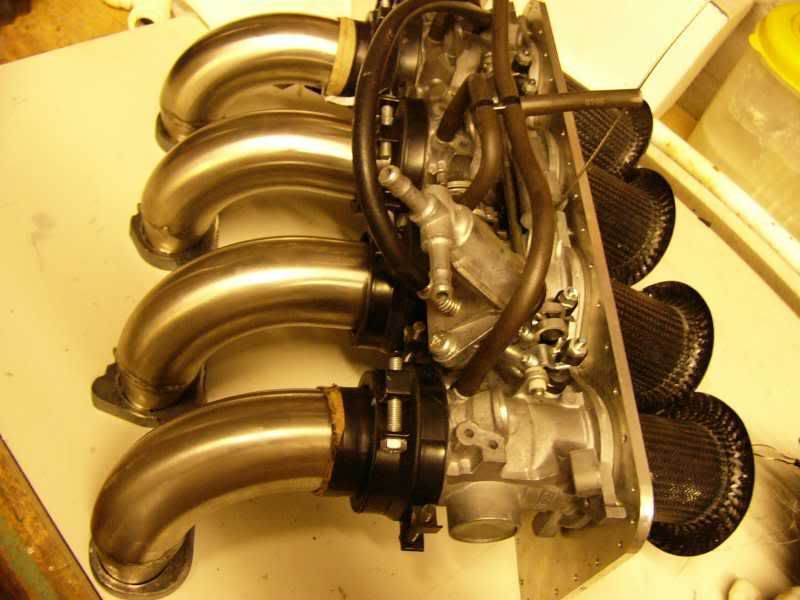
Assembly on the engine to assess the space available –
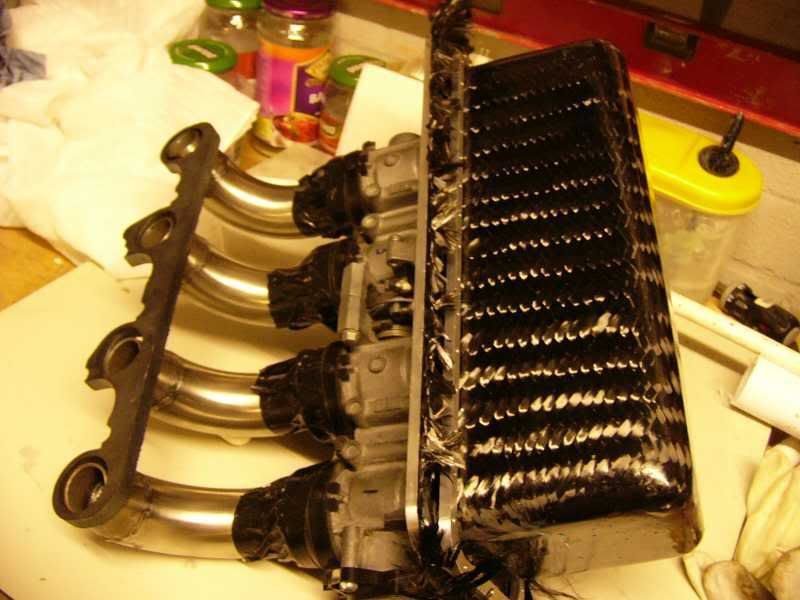
I’m pretty happy with it all really, it’s not perfect as there are many things that I will change over time. Here are all the parts together but unassembled –

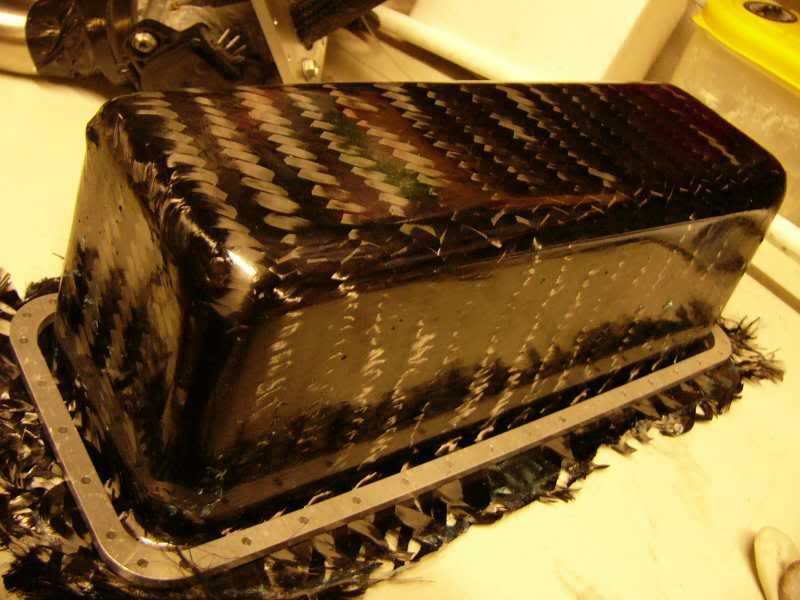
Tomorrow I am going to get a lift into town, there I will get pipe to make some spacers for the end of the intake manifold pipes and an M4 tap for the aluminium back plate. I think I will also put a second layer of carbon into the plenum to make it stiffer and to provide a flat surface to seal the flange.
My leg is really getting me down at the moment too, hopping round the garage is just plain dangerous and I’ve tripped and fallen quite a few times. I really don’t want to do anymore damage, but I hate just wasting time :(
Ahh well, only one more week before the cast comes off, and then I can learn to walk again. The joy!
More soon
J
On 5th of Sep, 2006 at 05:47pm mini13 said:
I reckon if his brains were gunpowder he couldn't blow his own hat off...
|
giallofly

4436 Posts
Member #: 164
The Stig..
Newport Pagnell
|
|
Good work.
Very impressed.
JF.
On 21st Jan, 2011 fastcarl said:
therefore acheiving two things , a sore knob and a beer bellyl
|
Rob H
4314 Posts
Member #: 700
Formerly British Open Classic
The West Country
|
|
Looking good, sorry to hear about your leg. A chap I know is into his Gimps and has got a K series powered one which he's planning on fitting a Binny Blower to.
IIRC when he lowered his he removed the upper spring mounts and welded them in higher up which avoided cutting the springs, and to adjust the camber he cut and rewelded the wish bones, although I think your method of shimming out the king pins is a better approach.
Good luck with the Gimp & finding a job.
Isambard Kingdom Brunel said:
Nothing is impossible if you are an Engineer
|
antman
966 Posts
Member #: 358
Post Whore
Snetterton, Norfolk
|
|
Yeah mate, looking good. I so want to get on with the 16v but i have to go to spain tomorrow with work for 10 days but after that i will be slaving away on the engine!!!
Can't wait to see your whole car finished 8-)
|
Joe C
12307 Posts
Member #: 565
Carlos Fandango
Burnham-on-Crouch, Essex
|
|
looking good! (still LOL)
following on from what british open said about the kingpin's is it worth looking into threading them and aving a bolt and locknut to make the Camber adjustable?
Oh by the way BOC did the pulley turn up ok?
Edited by Joe C on 19th Nov, 2006.
On 28th Aug, 2011 Kean said:
At the risk of being sigged...
Joe, do you have a photo of your tool?
http://www.turbominis.co.uk/forums/index.p...9064&lastpost=1
https://joe1977.imgbb.com/
|
turbodave16v
Forum Mod
10980 Posts
Member #: 17
***16***
SouthPark, Colorado
|
|
Great stuff. Loving the sneak views of your foot in many of the pics! :)
On 17th Nov, 2014 Tom Fenton said:
Sorry to say My Herpes are no better
Ready to feel Ancient ??? This is 26 years old as of 2022 https://youtu.be/YQQokcoOzeY
|
Chris
18 Posts
Member #: 1328
Member
|
|
Nice to see some DIY carbon fibre making and moulding! Not bad results considering the resources u have available!
I do carbon fibre laminating for a living u see Vacuum bagging definately helps consolidate it when curing and will produce better results. At work we vac bag them and when they're being cured
(in a big mofo clave) they have 90psi of pressure pushing down on them aswell as the temp! Not a bad effort! 
Good luck with the remaining parts of the project :cool:
|
blown_imp
223 Posts
Member #: 598
Senior Member
Gaol
|
|
i really need some peel ply, but its a bit of an arse to get hold of.
I may try and do the pressure on the outside thing, wonder if i can do it at home?
J
On 5th of Sep, 2006 at 05:47pm mini13 said:
I reckon if his brains were gunpowder he couldn't blow his own hat off...
|
Chris
18 Posts
Member #: 1328
Member
|
|
Hmmm, not sure how! Dont go blow your mums oven up
You put something heavy on it?.....maybe
We have peel ply  I may be able to get u a small amount and send it on! how much do u need? I may be able to get u a small amount and send it on! how much do u need?
Edited by Chris on 20th Nov, 2006.
|
blown_imp
223 Posts
Member #: 598
Senior Member
Gaol
|
|
what i was thinking was wet layup but with pressure instead of vaccum. I can make lots more pressure than i can vacuum at home!
I know that schwepps bottles can take 120psi easy, so if i make a part, bag it, put a pipe to atmosphere, and then put the part in the bottle, then i should end up with the equivalent of a mega vacuum. hmmmm>>??
There is some peel ply on ebay ive just found, only £2.50 for 100m so i may have a bash!
J
On 5th of Sep, 2006 at 05:47pm mini13 said:
I reckon if his brains were gunpowder he couldn't blow his own hat off...
|
|
Home > Show Us Yours! > Supercharged and injected imp, allowed?
|
|
|
