|
Home > Show Us Yours! > Supercharged and injected imp, allowed?
|
blown_imp

223 Posts
Member #: 598
Senior Member
Gaol
|
|
Hi there
My name is James, im owned the turbocharged (VNT15 turbo) hillman imp that was posted on here quite some time ago.
Well ive started a new project, it is to be finished by july 2006, im quite late! 
Even so am i allowed to post the build up on here? There is quite a lot of it, probably a couple of hundred photos by now. I could put just the most interesting bits in?
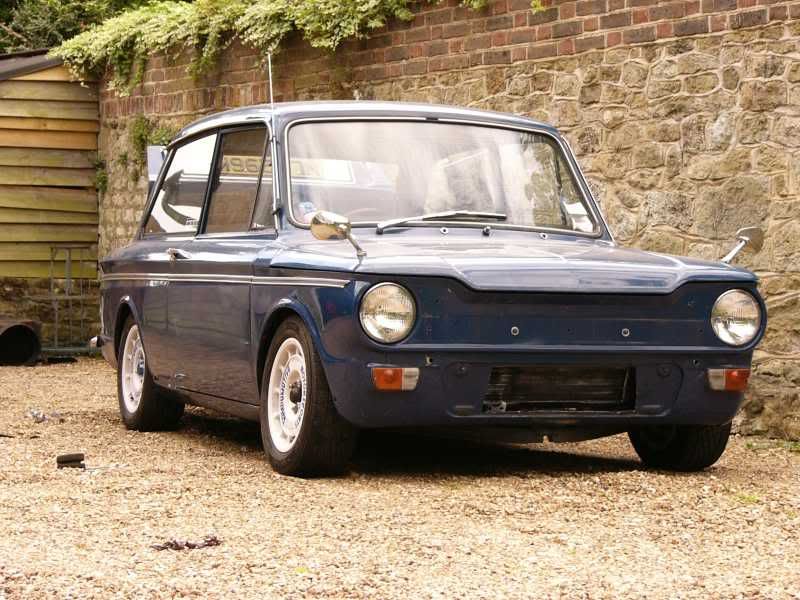
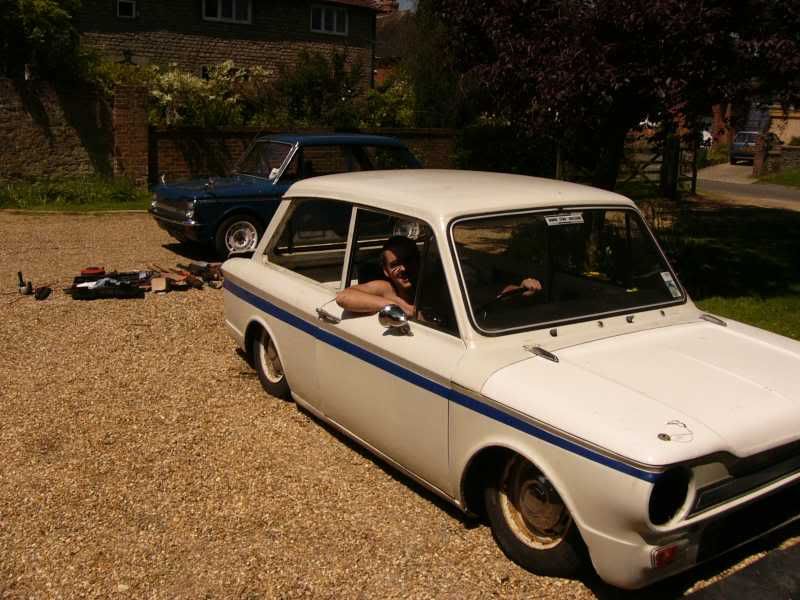
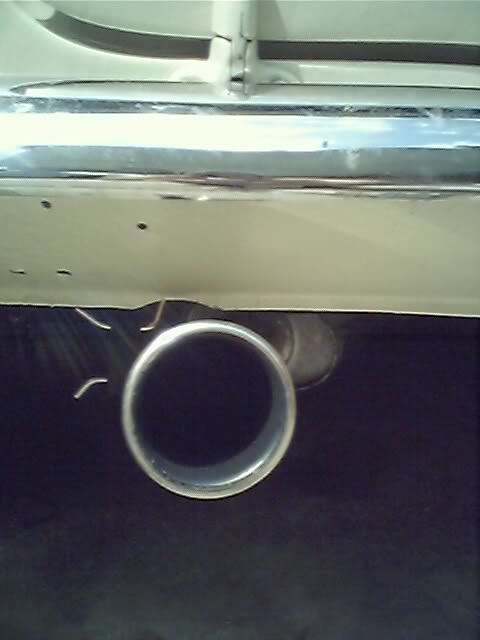
Heres a couple of sneeky ones, if its not allowed i will happily remove it :)
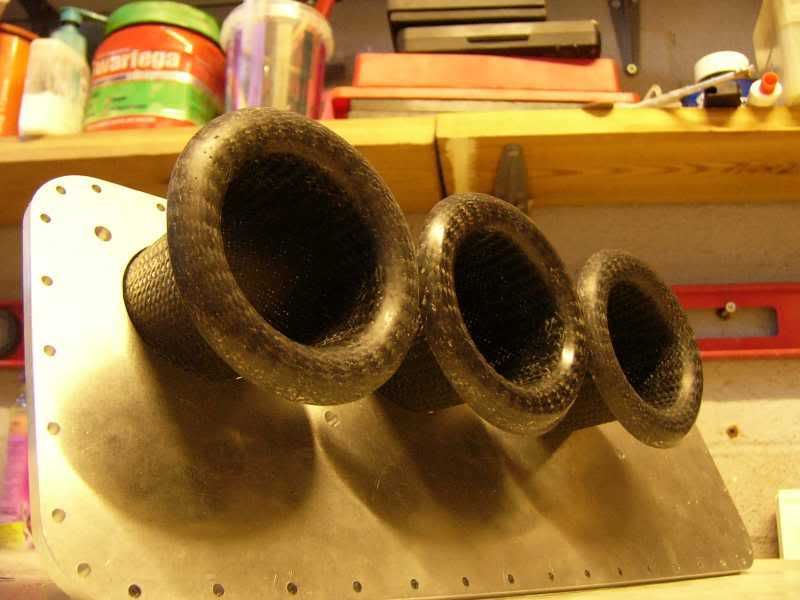
home made carbon trumpets -
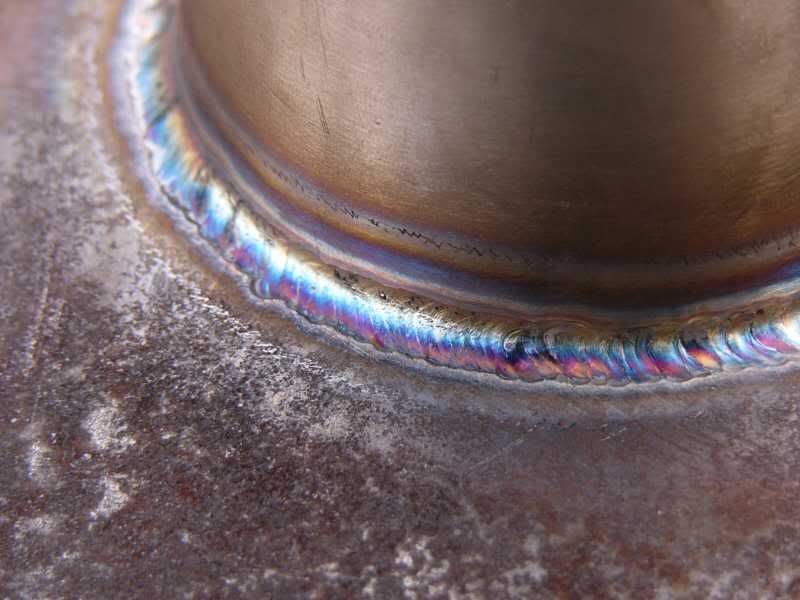
some welding -
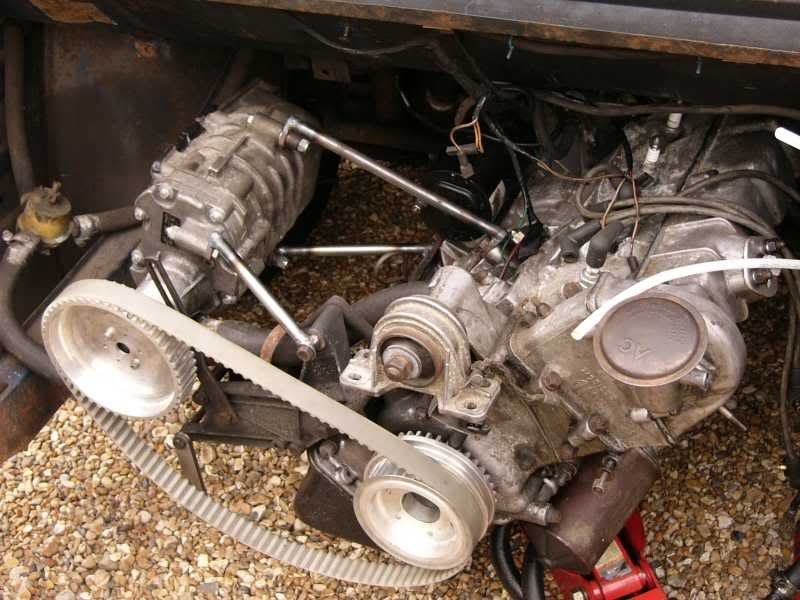
the blower -
The intercooler -
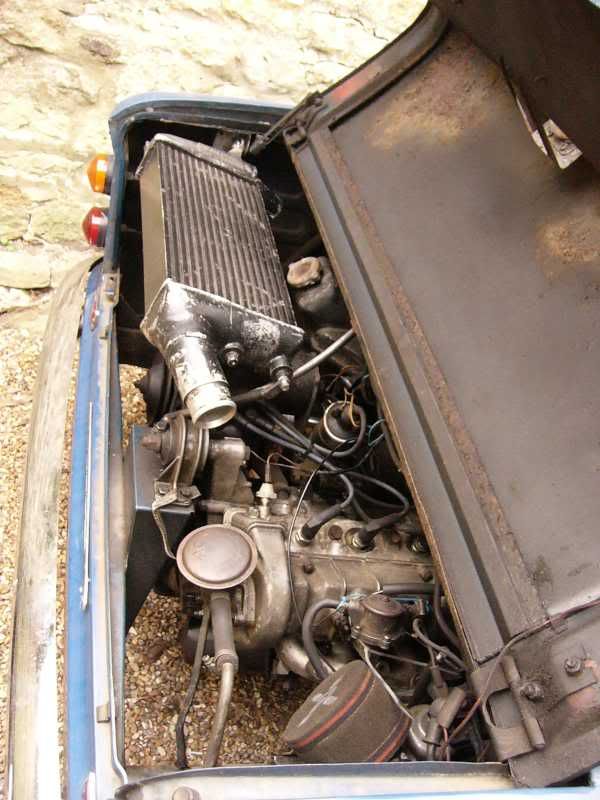
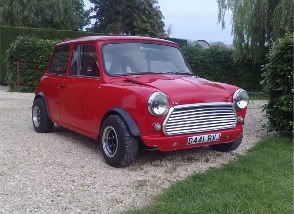
The car -
cheers
J
On 5th of Sep, 2006 at 05:47pm mini13 said:
I reckon if his brains were gunpowder he couldn't blow his own hat off...
|
AlexB
Site Admin
6297 Posts
Member #: 1
The boring bloke who runs this place.
Berkshire
|
|
Awesome project. I really like Imps.
|
turbodave16v
Forum Mod
10980 Posts
Member #: 17
***16***
SouthPark, Colorado
|
|
This is cool. We're petrol-heads on this site, so of course you're more than welcome!!
On 17th Nov, 2014 Tom Fenton said:
Sorry to say My Herpes are no better
Ready to feel Ancient ??? This is 26 years old as of 2022 https://youtu.be/YQQokcoOzeY
|
Ben H

3329 Posts
Member #: 184
Senior Member
Melton Mowbray, Pie Country
|
|
I have seen this build in detail on the imp forum. An excellent machine.
http://www.twin-turbo.co.uk
http://www.hillclimbandsprint.co.uk/default.asp
A man without a project is like a like a woman without a shopping list.
|
blown_imp
223 Posts
Member #: 598
Senior Member
Gaol
|
|
ok ill tell you what, so its not a mega imp overload, ill post two sections a day untill were up to date, how does that sound?
J
On 5th of Sep, 2006 at 05:47pm mini13 said:
I reckon if his brains were gunpowder he couldn't blow his own hat off...
|
Joe C

12307 Posts
Member #: 565
Carlos Fandango
Burnham-on-Crouch, Essex
|
|
Proper nice,
My dad and my bro were both into imps, changed a few rotoflexes in my time
I must say i'm quite partial to a bit of rear engine action... ie Imps and Skoda's.
thats my favorite imp colour too.
On 28th Aug, 2011 Kean said:
At the risk of being sigged...
Joe, do you have a photo of your tool?
http://www.turbominis.co.uk/forums/index.p...9064&lastpost=1
https://joe1977.imgbb.com/
|
blown_imp
223 Posts
Member #: 598
Senior Member
Gaol
|
|
Part 1 - early summer the build for retro cars starts, ambitious? yes!
I bought the car in January of this year, it was totally stock and original, but not for long 
It stayed stock for a bit while I finished uni, only the suspension was lowered at the front and I changed the wheels –
All through the time I’ve been at uni, my main aim has been collecting parts, so far I have –
Megasquirt ECU and all of the relevant sensors and wiring
Relay board for the ‘squirt
EDIS stuff
Supercharger
Pulleys for the blower
Intercooler from an Audi RS2
Silicone hoses and T-bolt clamps
Wideband o2 sensor and controller
Inlet manifold (k series and lancia)
There is still plenty to get but not much!
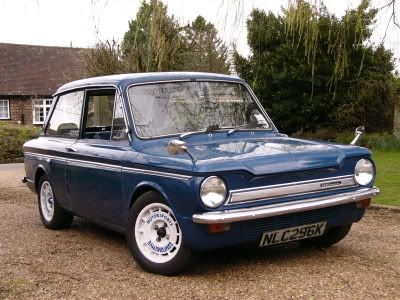
Heres how it looks at the moment
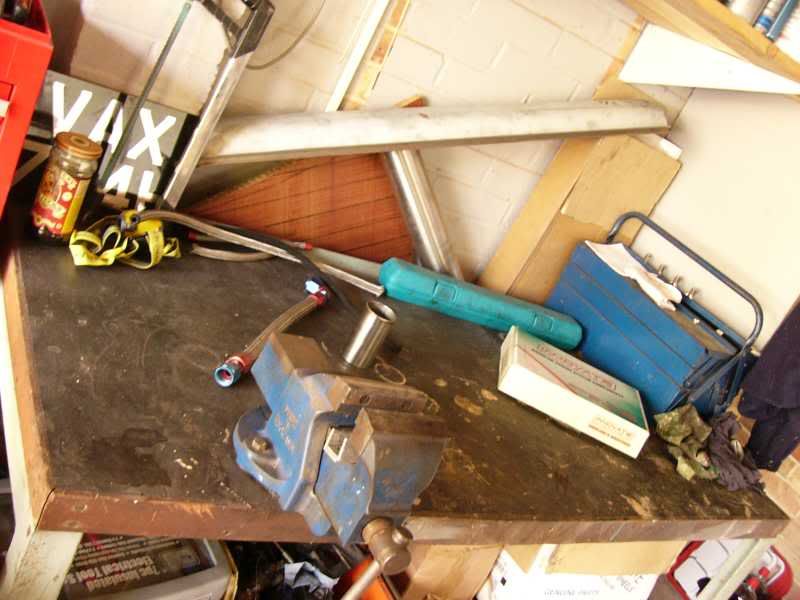
First the workshop and my bench needed a clean and tidy, its got to be tidy to make a tidy car!
So all this came out –
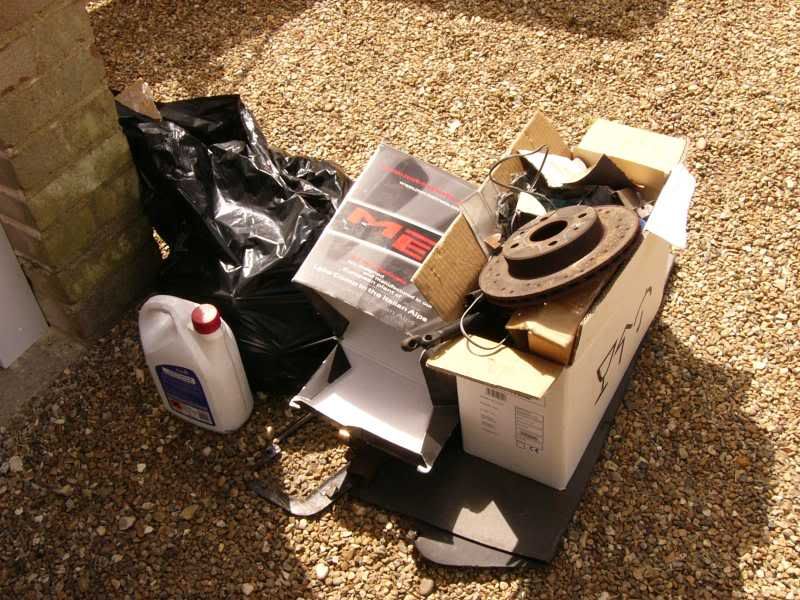
and I was left with this –
Today I have sorted out a few problems, the gear shift was difficult (worn bush on the stick) and it was running poorly. So I have tuned it with the gunsons colour tune, and its running much sweeter.
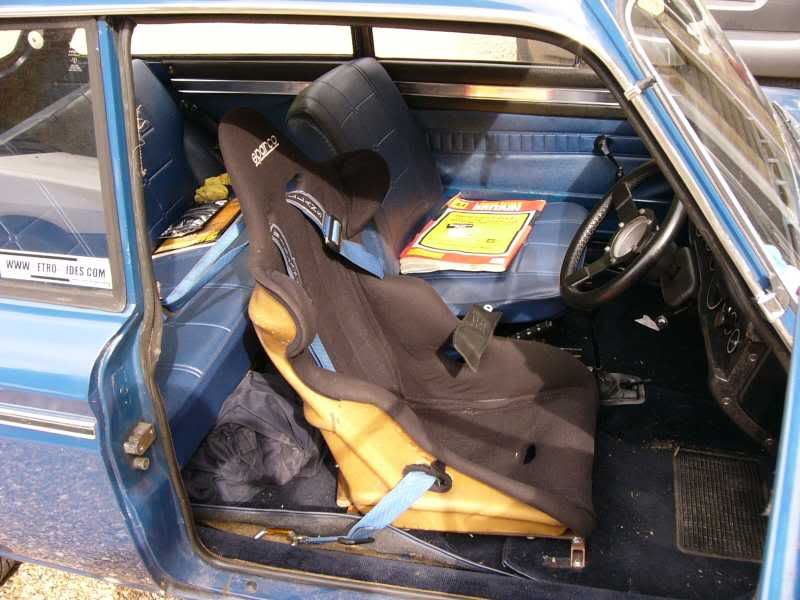
I also sorted out my bucket seat and harnesses
From this –
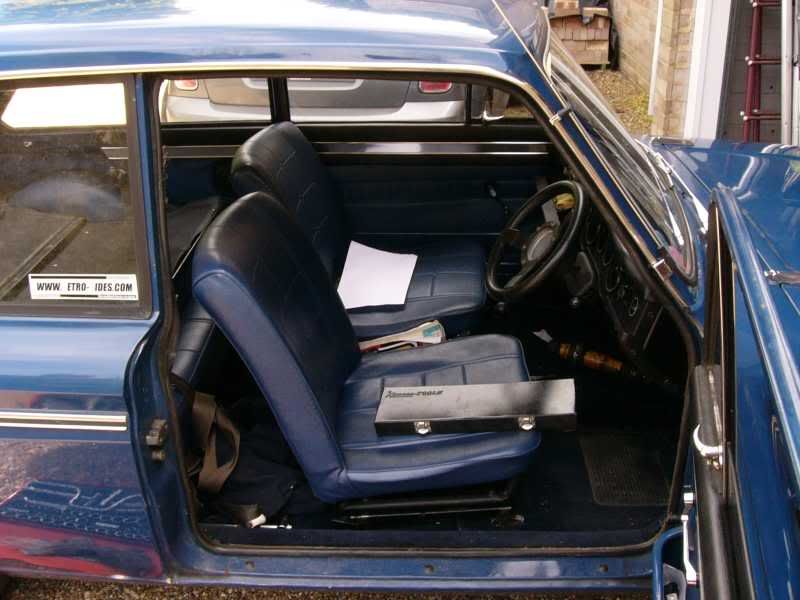
To this –
Right that’s it for now, more tomorrow evening!
Big hugs
J
Today has been pretty productive, here’s what has been completed –
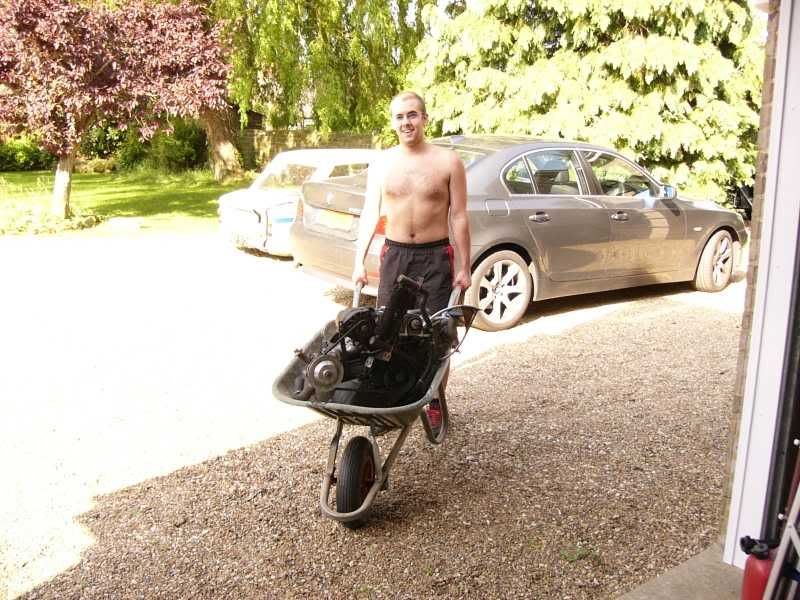
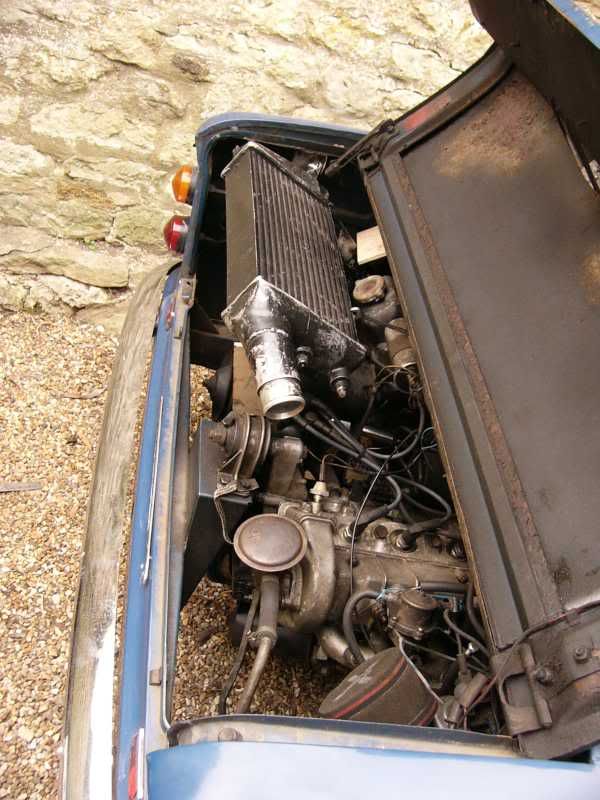
I started with an easy job, taking the engine out of the turbo imp, this was started at 10am and finished at 11am! Its just sooooo easy on the imp, and I’ve done it lots of times!
Here’s where I started –

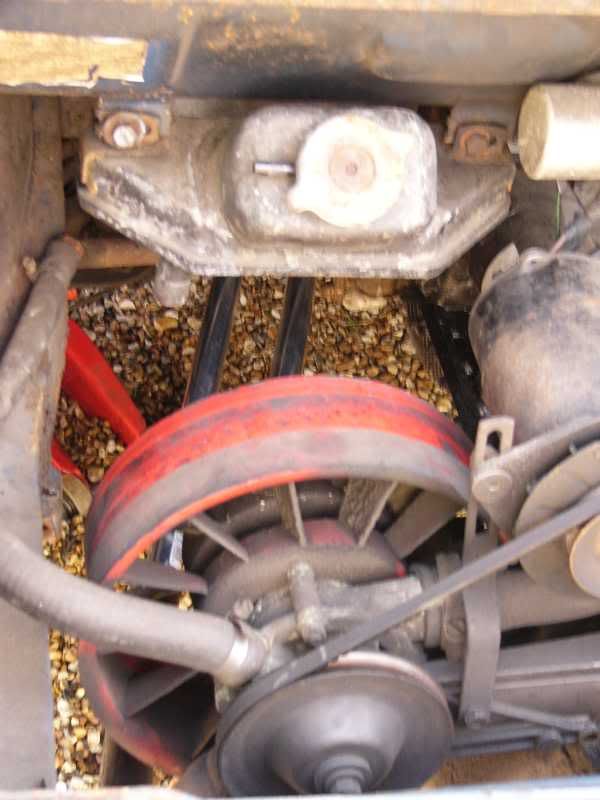
Rear valence off –
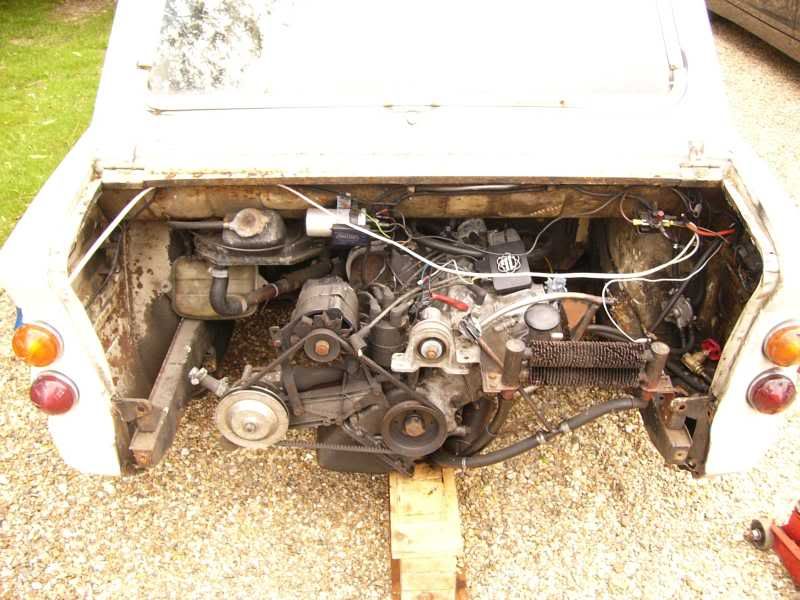
Me under the car –
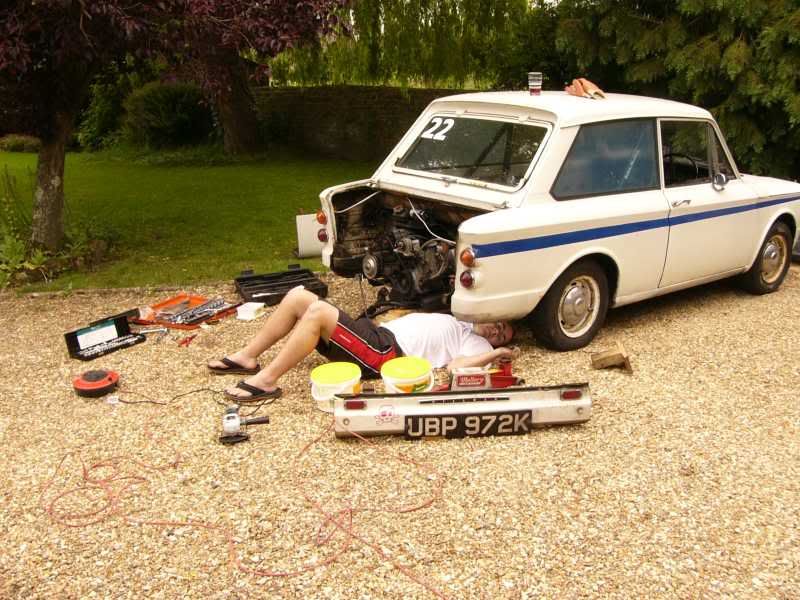
On its way –

And out! –
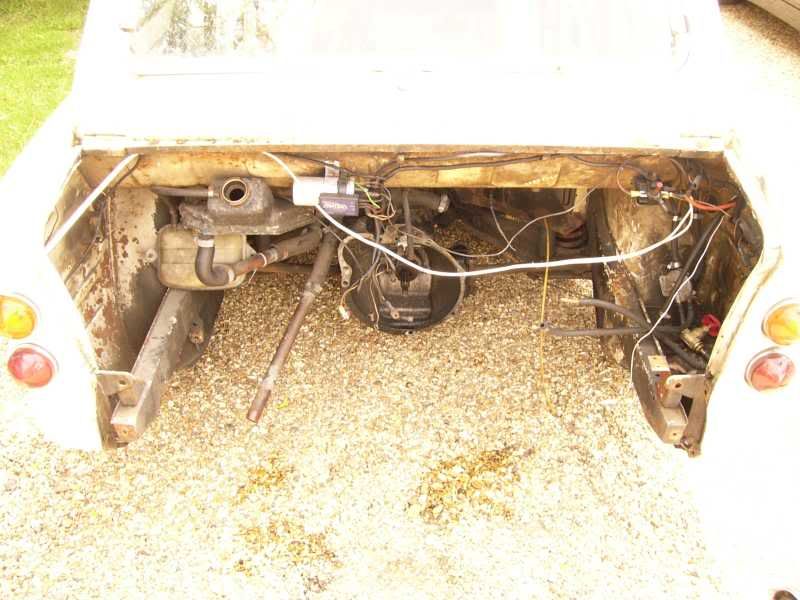
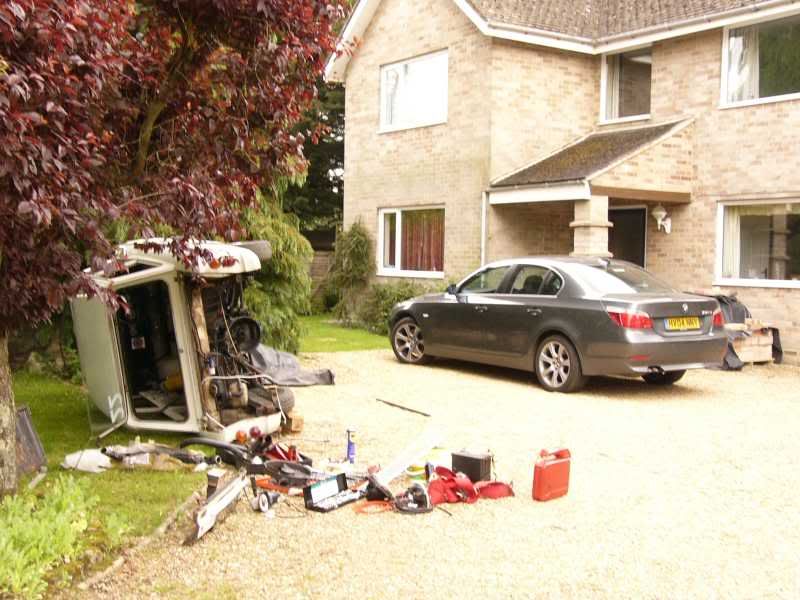
Next I started to strip the car, all of the necessary wiring was removed (cut off switch etc), then the front rad was removed, next the roll cage, then the fuel tank, electronics from the engine bay, lights, and lots of other little bits and bobs. All of the fluids have been removed ready for the scrapping lorry to come round. Then the fun part, as its so light the car can be rolled onto it’s side to gain easy access to the suspension for tomorrows jobs! Three of us lifted the car up and I chocked it in place, its super sturdy now and ready for the suspension action!
Turns out it was bloody rusty, only thing is it had already been wax oiled, and yet it still rusted to buggery?? Strange little thing
Right that’s it for today chaps and chapesses, more tomorrow!
Monster slaps all round
J
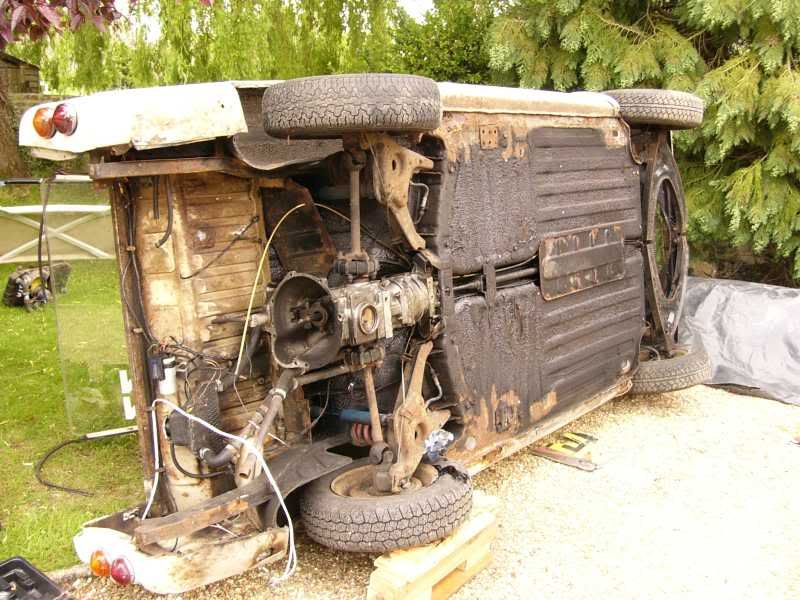
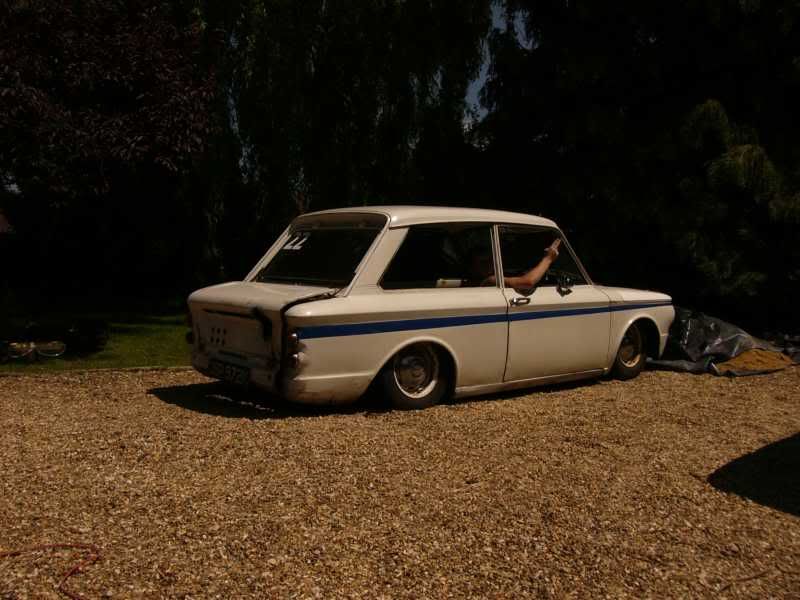
Right day three – and the little one said roll over!
I have taken off the front suspension, as the swing arms are virtually new, and both the rear springs. Once rolled back onto its rear wheels it looked awesome, so I put one of the fronts back in the arch (nowt else in there!) and it looked like a low rider. Super super cool, my dad recons it looks like a drag car, and I agree. I like it so much that the next car I am going to make will be this but with a spaceframe and rotary turbo!

We took a trip to machine mart to get an engine stand, ive always wanted one, and now I have one. The engine was moved around in the wheel barrow, and put on the stand.

Once that was set up and ready to use I decided to break out the TIG and have a practice, I had a go at seam welding the wishbones, and it went just fine.

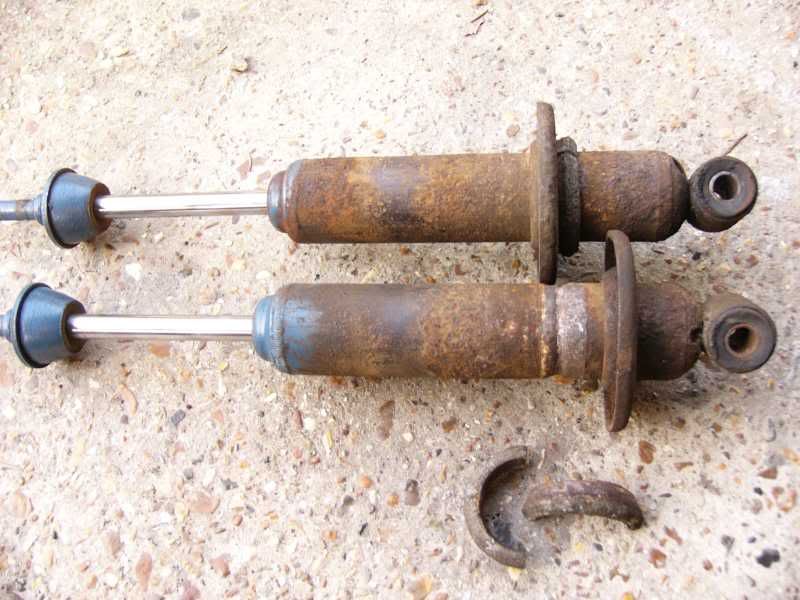
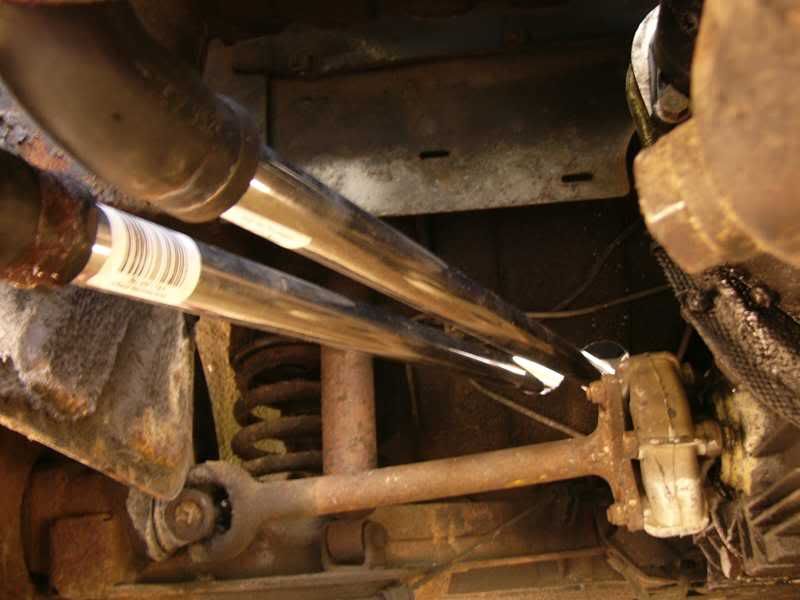
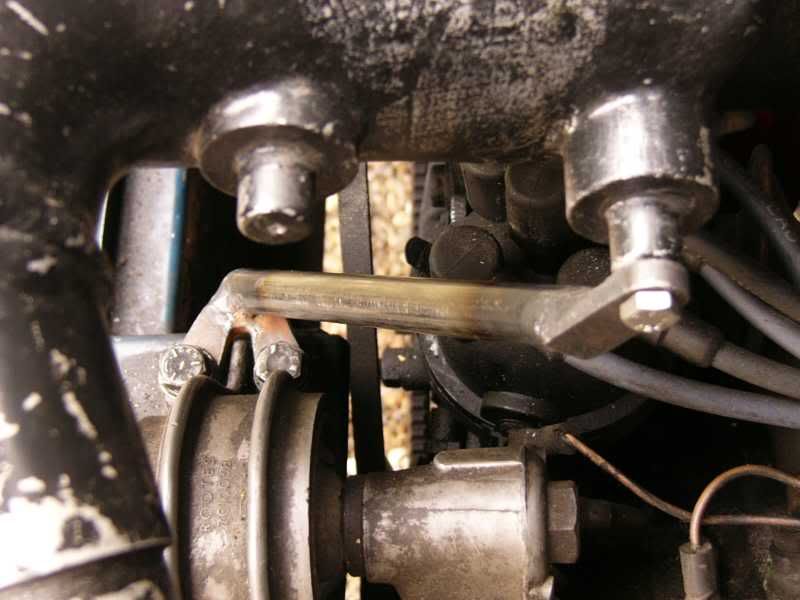
To lower the front end I have decided to move the spring perches down the dampers, originally the dampers used a pair of aluminium collets that are squeezed by the perch its self (the top damper is complete, the bottom is where I’m going to put the perch, and the collets can be seen at the bottom).
I think this is going to work, but if anyone thinks otherwise, please say. This will lower it 1” more than stock lowering springs, ill find out what the camber is with this setup and correct any excessive camber with the stub axle mod.
That’s it for today, more again tomorrow!
J
Edited by blown_imp on 31st Oct, 2006.
On 5th of Sep, 2006 at 05:47pm mini13 said:
I reckon if his brains were gunpowder he couldn't blow his own hat off...
|
AlexB
Site Admin
6297 Posts
Member #: 1
The boring bloke who runs this place.
Berkshire
|
|
This thread rocks.
|
Ric

1566 Posts
Member #: 36
Post Whore
Basingstoke
|
|
yeah, looks like a cracking car.
Just about to search for turbo imp stuff on the net now, i'd like to learn more...
|
blown_imp
223 Posts
Member #: 598
Senior Member
Gaol
|
|
theres not much of it about! This will be my second, there is a couple of turbo davrians, and another turbo imp. Thats it!
Mabe ill post another bit later on
J
On 5th of Sep, 2006 at 05:47pm mini13 said:
I reckon if his brains were gunpowder he couldn't blow his own hat off...
|
vrooom
138 Posts
Member #: 138
Advanced Member
|
|
awesome those imp.
|
fab
1497 Posts
Member #: 100
Parisien Turbo Expert
Paris\' suburb
|
|
I like the look!
and how you managed it, I'm also going aroud the net with google to know a little more about these.
|
blown_imp
223 Posts
Member #: 598
Senior Member
Gaol
|
|
Not quite as productive today as the last few days, I still got a few bits done.
I visited a local industrial estate after being told that there was a small machine shop there. I found the place and the chaps were very helpful, I’m going back tomorrow to show them the pulley and discuss what needs doing.
The engine was properly attached to the stand and ive started to give it a really good clean, I took the chance to pull the sump and have a look at the bearings, as expected on an engine with around 5000 miles on it they are super duper clean. Unfortunately I found some aluminium chips in the sump, I got worried and started to think of all the nasty things that could have happened. Upon further inspection they seem to be machining detritus, fortunately there is no damage from these bits.
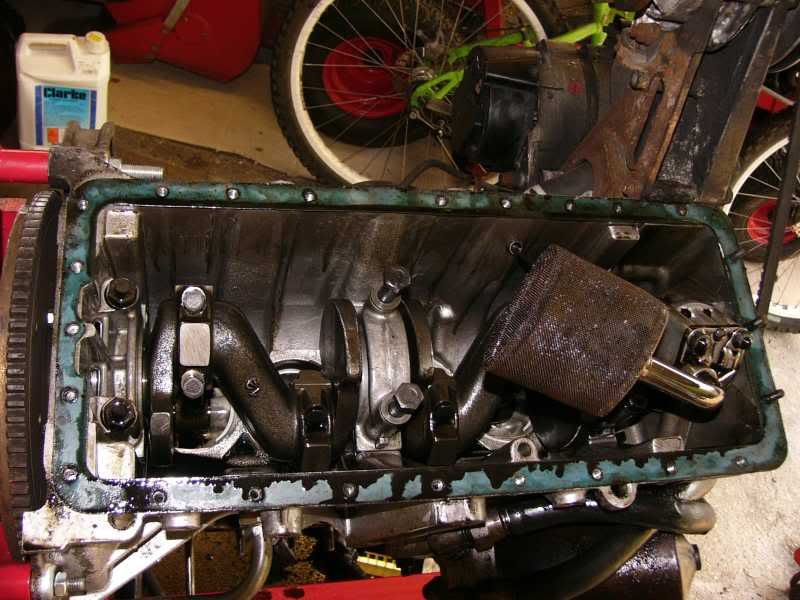
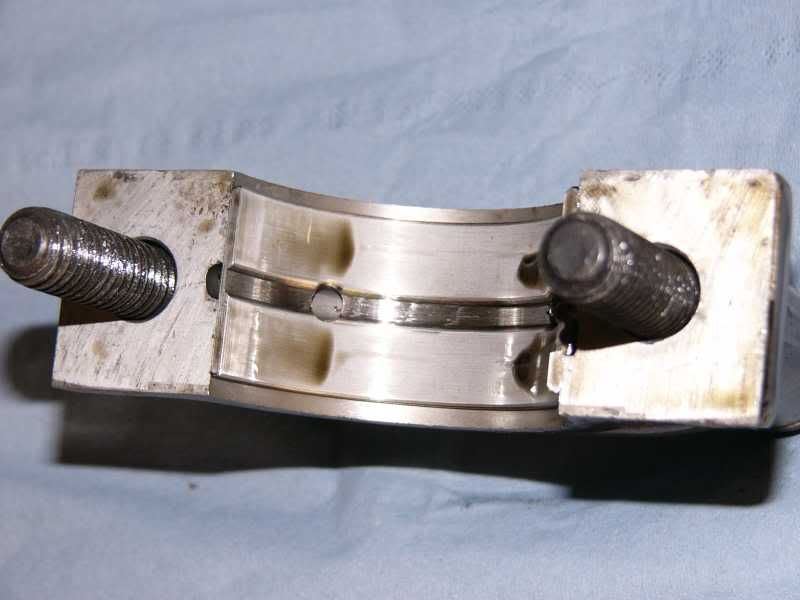
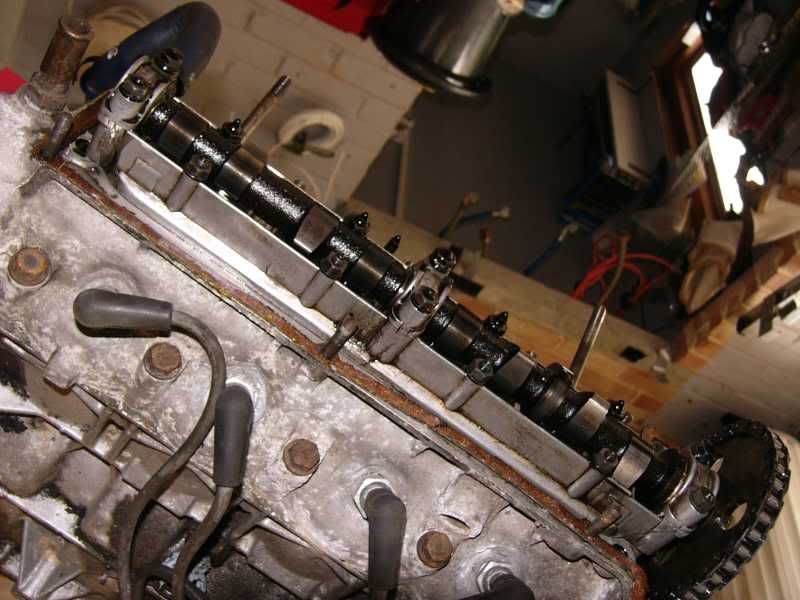
The cam box was also removed and everything is clean and correct, changing the oil frequently does seem to make a big difference.
All of the lights were removed from the car, and the coil and rev limiter.
I also received another part in the post –
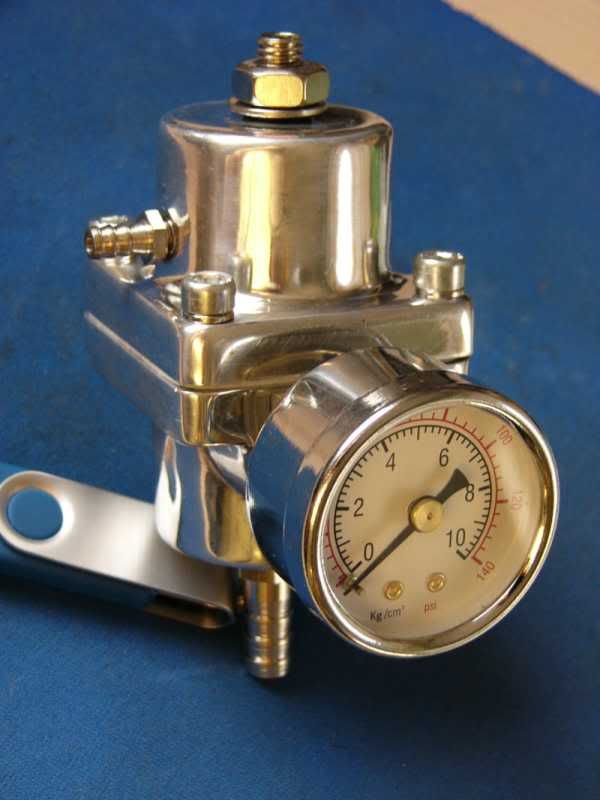
Its my new fuel pressure regulator! This was purchased from Ebay.com for £26 all in, postage and all! I love a good bargain!
That’s it for today more tomorrow.
Cheers
J
Day 5 – Holey-O’s!
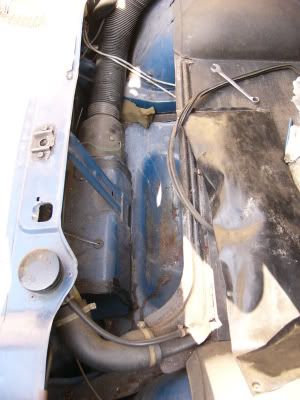
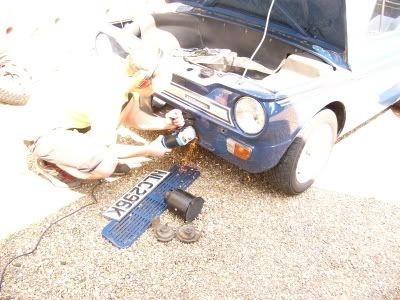
Right well today I started with the front radiator conversion, this involves removing the box that the heater blower sites in, extending the orifice in the front, and creating a path for the air to escape. I went to the local hardware store and bought some laser cut 1mm grinding disks, if you have never used these, they really are fantastic. They will cut through steel like a hot knife through butter!
I proceeded to cut the box from the front panel
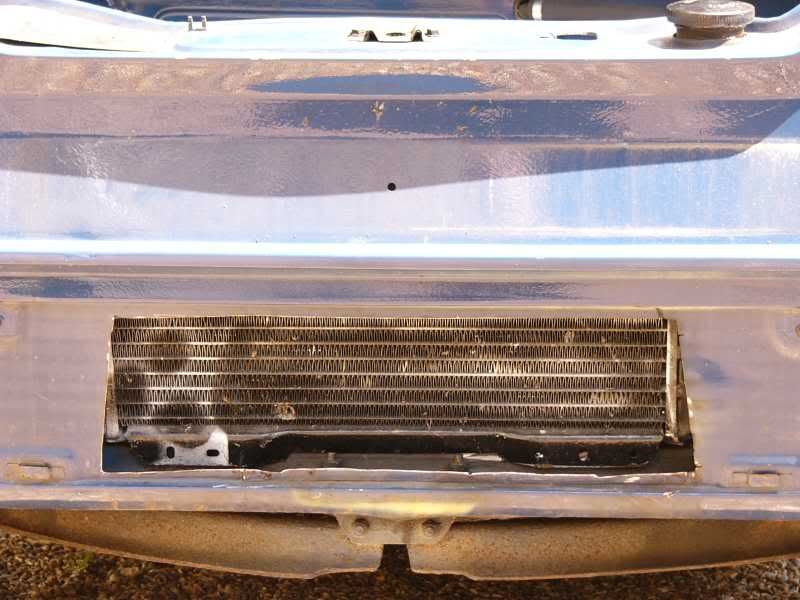
Stock front end –
Cutting! –
Shape of hole in front panel –
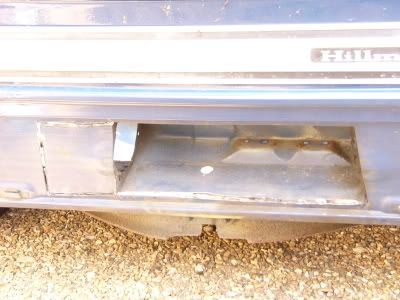
Box removed –
Next is had to decide how to put the radiator, to make the most of the space available I am going to put the radiator in at a 45 degree angle. This makes the most of the air flow (according to Carroll Smiths book – tune to win).
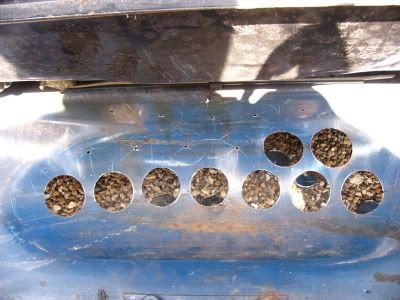
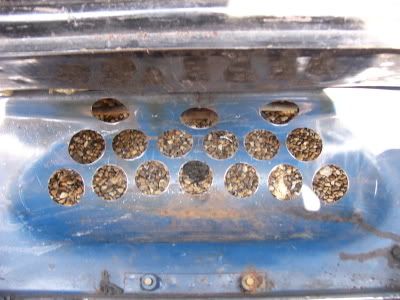
So the air can get in and through the radiator but how will it escape? On the turbo imp the back of the spare wheel well was removed, but I think that this removed too much strength from the front end, so I decided to drill holes. A 50mm hole cutter was purchased (tool of the day!) I had to decide between a cheap one or this cobalt steel one –
Tool of the day, cobalt steel hole cutter -

The holes were marked out so that there was at least 10mm of steel between each, and then the cutter sheared through it with relative ease!
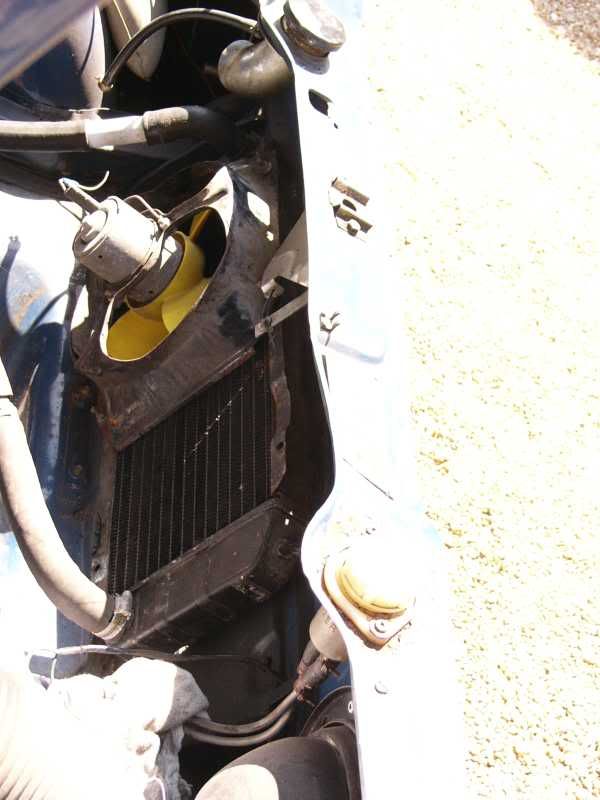
Then the rad was offered up to see how it fitted –
I still have to make up the surround to channel the air to and from the correct places, this will be make in either stainless or ally sheet for a nice clean finish. I also need to get card for templates, that’s what halted the work on it for today!
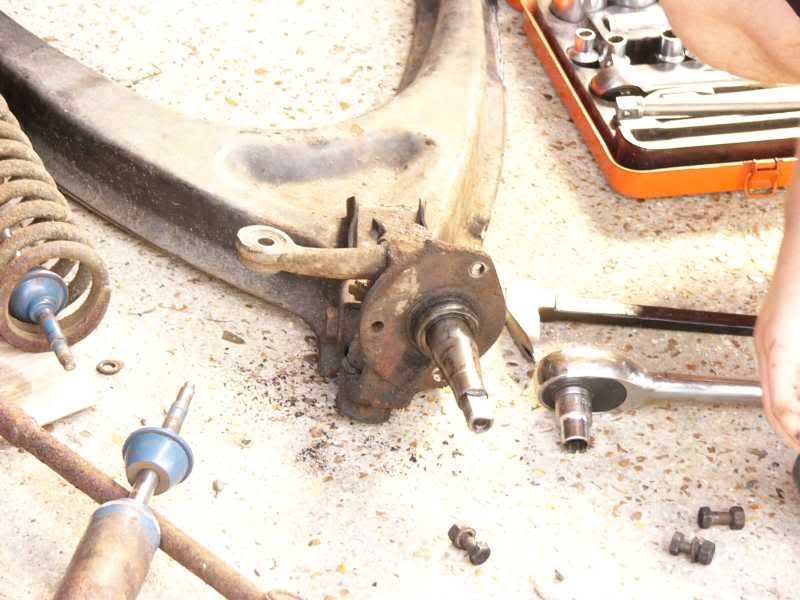
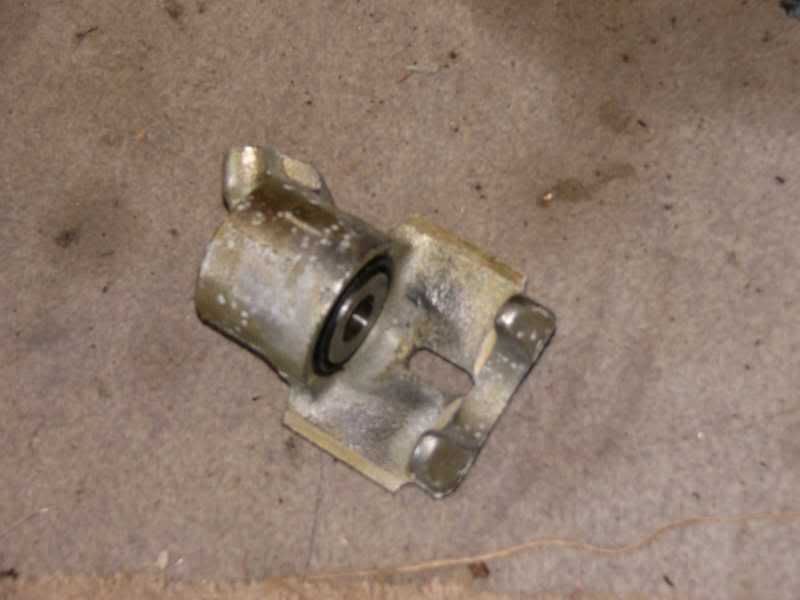
I also dismantled the front stub axles ready for modification and reception of the new disk kit. I have bought a new pair of callipers, so it should be all nice and shiny!
Time to hold you breath until tomorrows exciting events!
Day 6 / 7 – Don’t drink and build!
Hi guys, sorry I didn’t update yesterday, been pretty busy with non car stuff (ive got to do it at some point!).
I have still managed to get a few bits done, the kingpins are now rebuilt, and ive prepared some templates for a strengthening member in front end.
This is the material that I shall be making the strengthening box from –

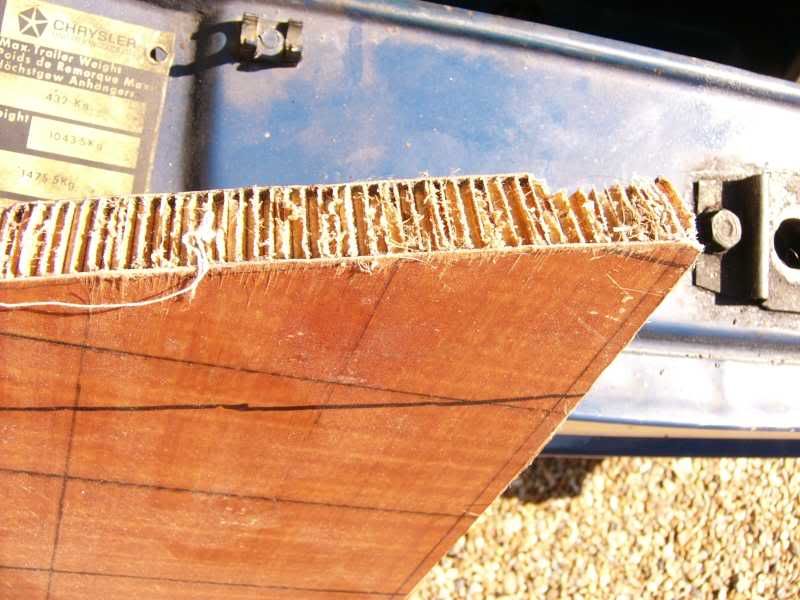
It is a Kevlar and nomex honeycomb sandwich board, jolly strong and light like all exotic materials should be!
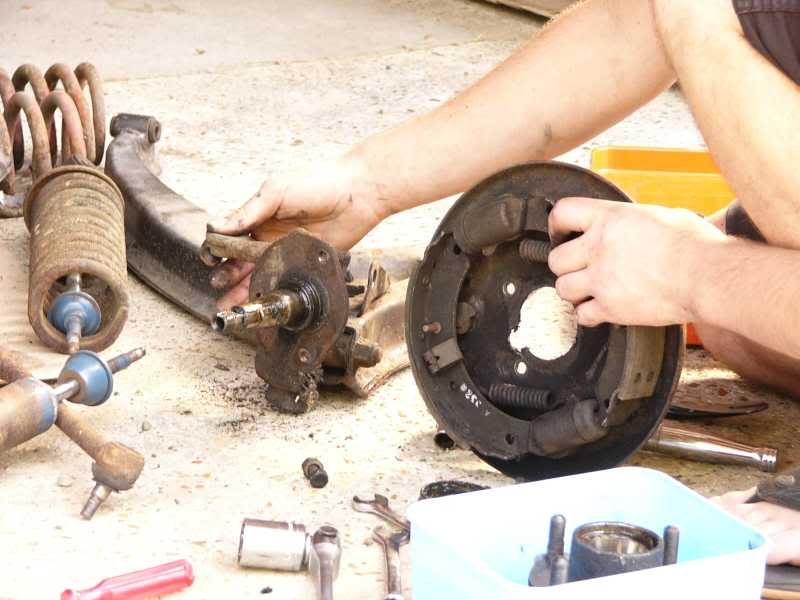
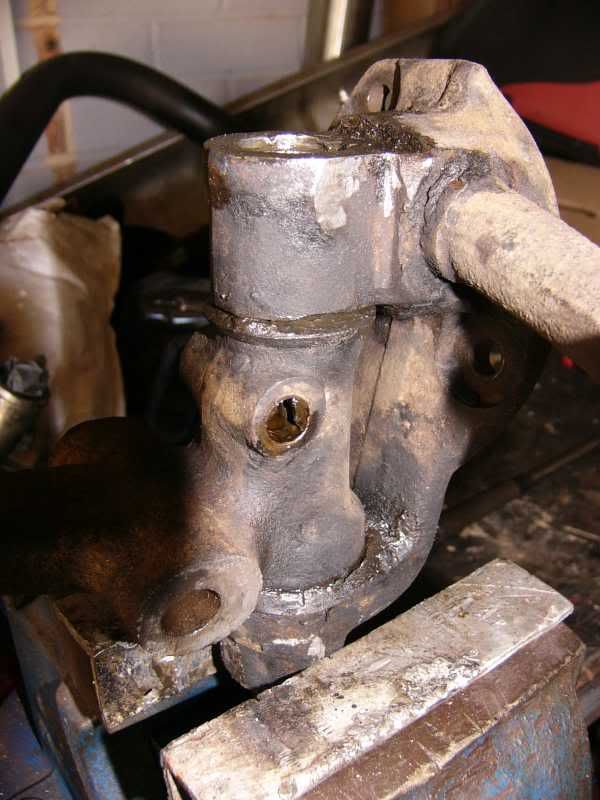
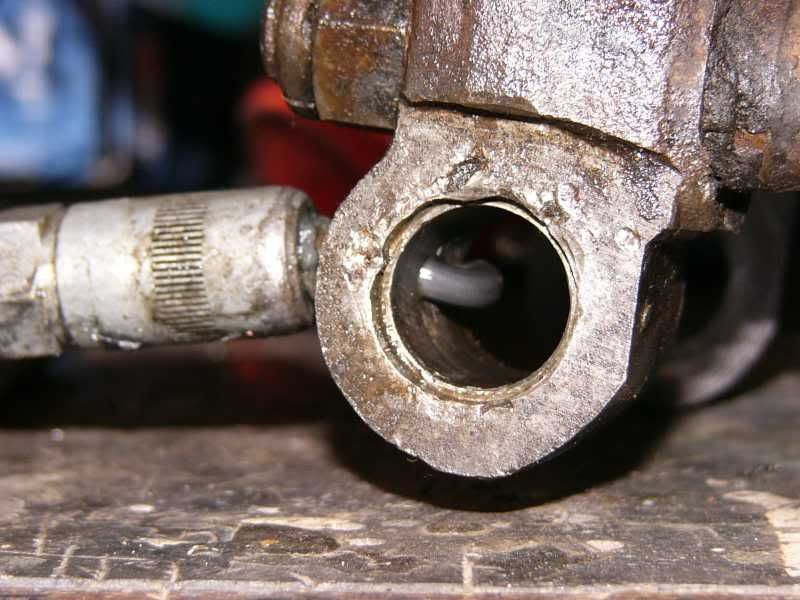
This is the kingpin build, it went much more smoothly that I thought it would, ive heard some stories about them being a royal pain to do. I built up the first one and that came apart very easily and went back together in a similar fashion. Then I started on the second one, unfortunately this one was well stuck and I couldn’t budge it, so I put some WD40 on to soak over night.
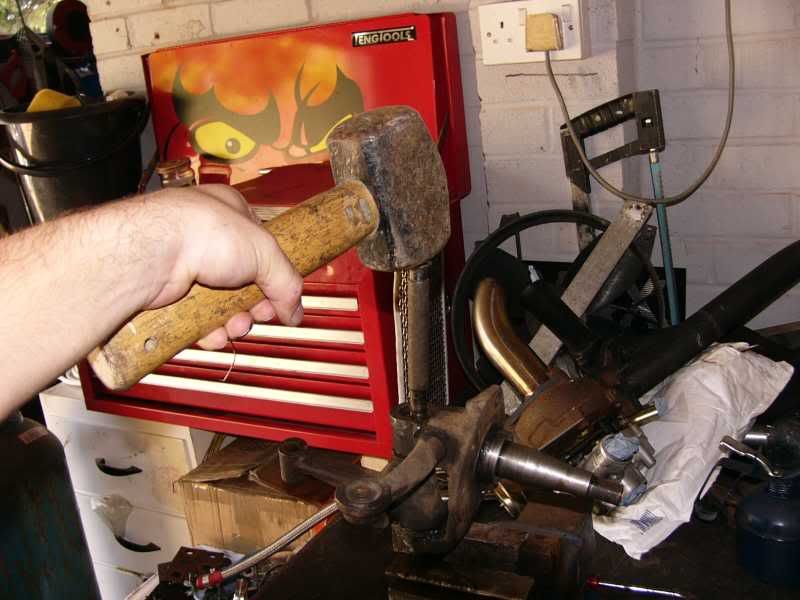
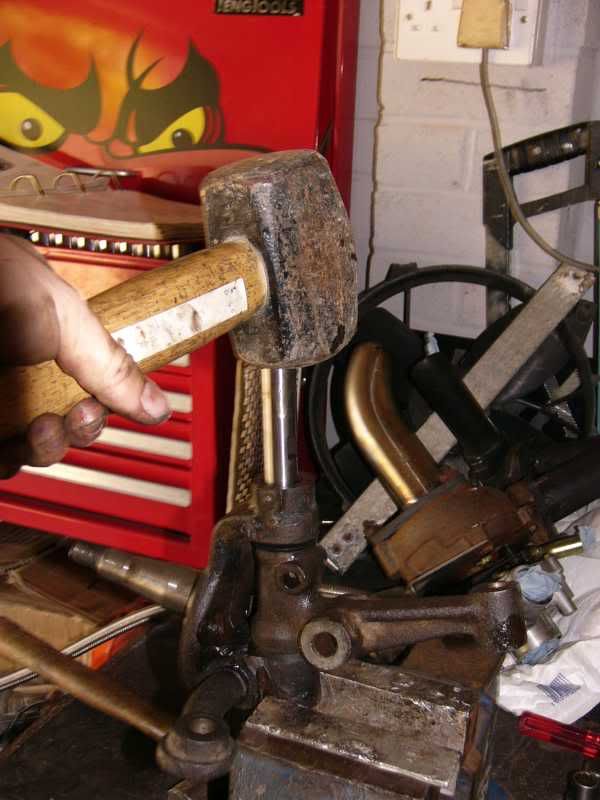
I went out last night and my head was hurting this morning, a hangover cure was needed, and the best one? Building car stuff! The pin came out with the use of the biggest hammer in the workshop and a bit of brute force. Unfortunately building the kingpins whilst still slightly drunk ended up with it built upside down :S, as it was just built it came apart very easily and was quickly fixed.
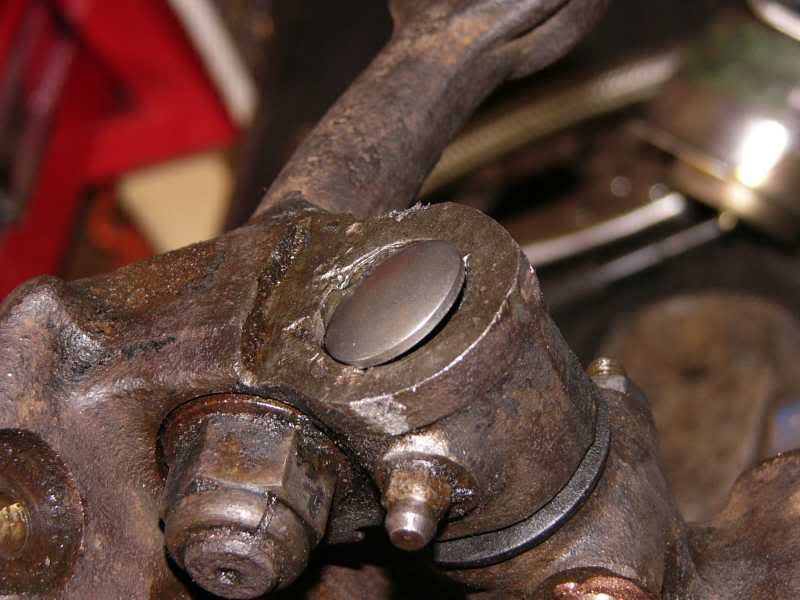
The kingpin assembly –
Getting out the old pin –
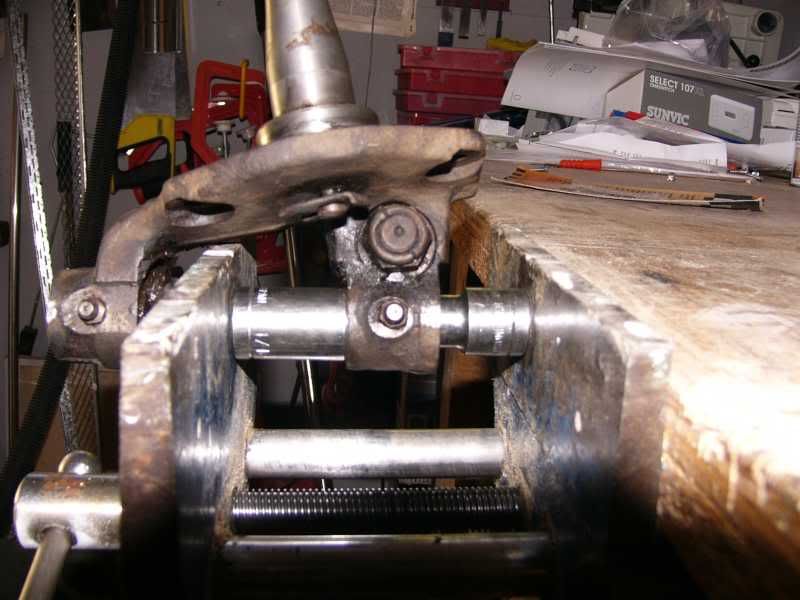
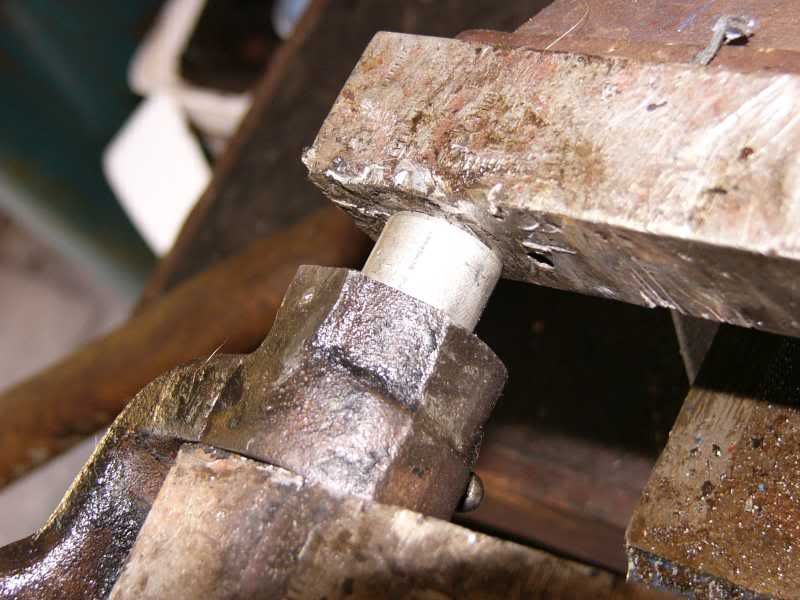
I pressed out the old bushes using a pair of sockets, one the same size as the bush, the other slightly larger, and a vice –
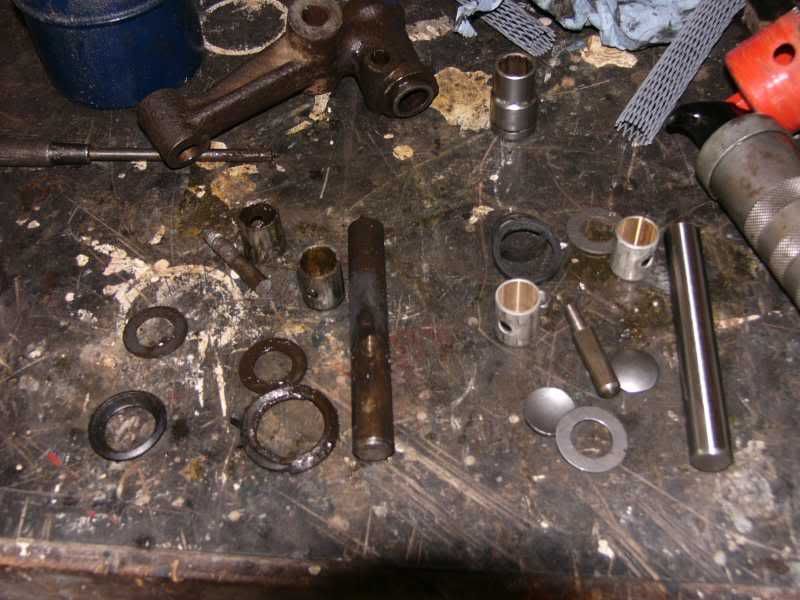
All of the old components, and the nice new shiny bits –
I cleaned out the old grease from the nipples (toight, toight loike a toiger!)
Pressed in the new bushes –
Tapped in the new pin (I haven’t got a picture of the bottom slip washers) –
Copper slipped the retaining pin and popped that in –
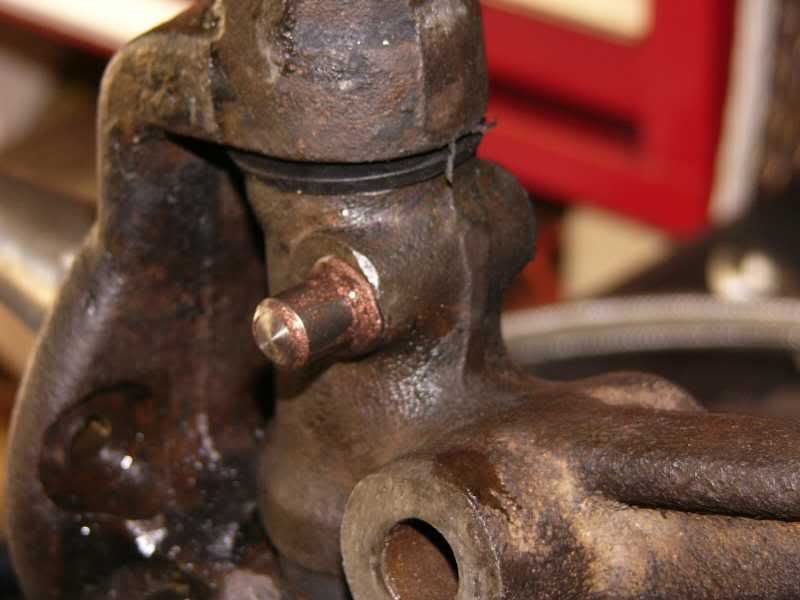
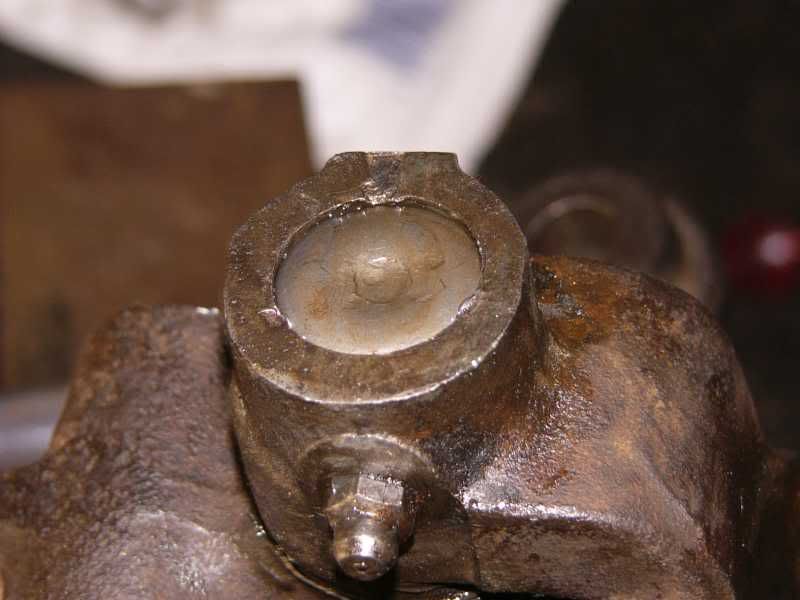
And finally I put in the domed sealing washers, and popped the center to retain them –
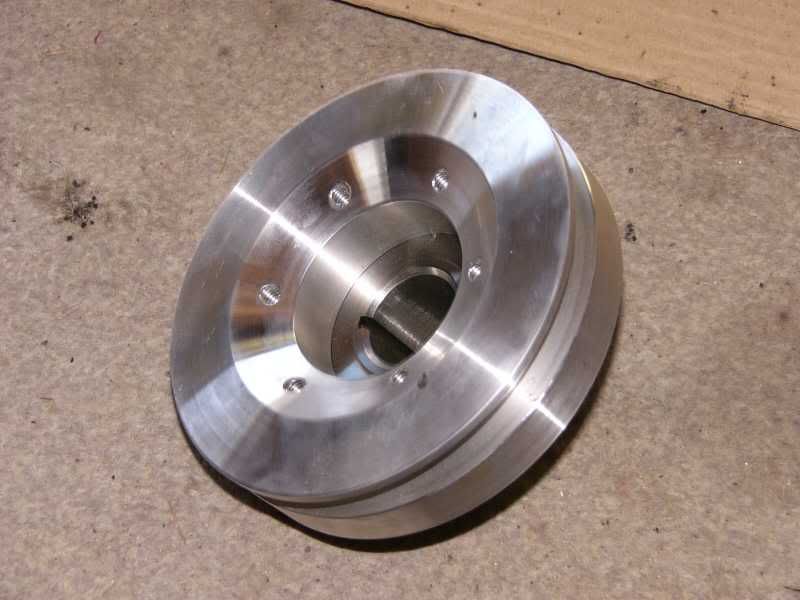
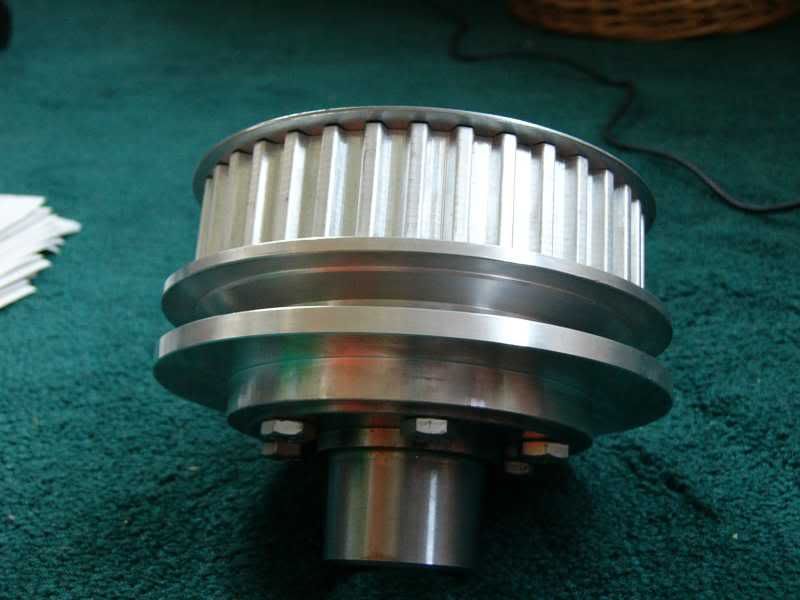
I also got some more bits through the post as well, my new crank pulley arrived that will fit both the blower pulley and the trigger wheel.
And a new pair of callipers, Slater very kindly sent me a pair from his spares, but after thinking about it I decided to replace this safety critical part with new. Only £50 too!
That’s all for today, oh and ive got some bits on ebay if anyone fancies a peruse - 8073715061 and check out my other items
J
On 5th of Sep, 2006 at 05:47pm mini13 said:
I reckon if his brains were gunpowder he couldn't blow his own hat off...
|
AlexB
Site Admin
6297 Posts
Member #: 1
The boring bloke who runs this place.
Berkshire
|
|
Another great update. top stuff!
|
Nic
9327 Posts
Member #: 59
First mini turbo to get in the 12's & site perv
Herefordshire
|
|
where do you live? can you take me out in it when its done??? PLEEEEEEEEASE
|
blown_imp
223 Posts
Member #: 598
Senior Member
Gaol
|
|
Hell yeah, any excuse to drive that suka!
Im near midhurst in west sussex, daaarn saaarf
It will be going to retro cars (if its still on, with the mag folding and all)
And Retro Rides show, thats gonna be a cracker at mallory park
J
On 5th of Sep, 2006 at 05:47pm mini13 said:
I reckon if his brains were gunpowder he couldn't blow his own hat off...
|
Nic
9327 Posts
Member #: 59
First mini turbo to get in the 12's & site perv
Herefordshire
|
|
has retro cars finished?
i must admit i havent bought it for a few months. but i used to quite enjoy it
|
blown_imp
223 Posts
Member #: 598
Senior Member
Gaol
|
|
Yeah i think it has, kind of unfortunate really as it had the market cornered, it was the only mag catering for the retro enthuseast (sp?).
Also they did an article on my last imp, got front cover!!!
PPC now has my vote, and there is a new internet mag on its way called retro drive that should be good.
J
On 5th of Sep, 2006 at 05:47pm mini13 said:
I reckon if his brains were gunpowder he couldn't blow his own hat off...
|
antman

966 Posts
Member #: 358
Post Whore
Snetterton, Norfolk
|
|
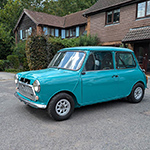
Lovely car u got there J, almost bought a Sunbeam Stilletto instead of the mini. Could be tempted with one if my quest of finding a bmw 2002 turbo is fruitless!
|
blown_imp
223 Posts
Member #: 598
Senior Member
Gaol
|
|
Day 8 – so much going on!
Right well today I have been to the metal suppliers, I got some ally sheet and some steel sheet, also some small diameter steel tube to get some fabrication done. Both the blower and the intercooler will be held on tubular mounts. I can start to fabricate the intercooler mount probably tomorrow, the blower mount however will be a little while, this is because it left my possession today, and is currently with my local machinist! He will be arranging the mounting of the crank blower pulley, and fitting of the trigger wheel. I would like to do it my self but I have no access to the machines , but that’s ok, I’ve placed some trust in them! I shall be dropping off some plate to them tomorrow so that I can get the flange for the blower machined aswell!
I also gained some parts through the post today, all my lovely stainless mandrel bends have arrived for the boost pipes, super duper indeed!
Here’s a piccy of some of the pipes and bits, should be really nice!
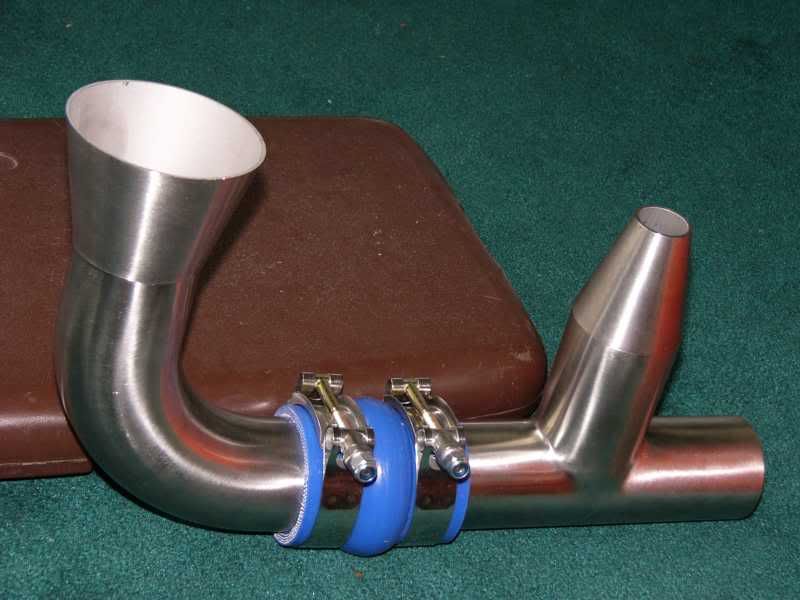
It will all be TIG welded and looks like it’ll dominate the engine bay!
Right im going to go and have a plat in the garage, speak tomorrow
J
Day – 9 getting more fun now!
Well I’ve had a busy few non car days, but I’m getting back on track now. Some more parts arrived through the post, I’ve now got my Megasquirt relay board and connection cable. My fuel lines have arrived and all of the connections, it should be super duper neat, just the way I like it
I’ve got some more done on the radiator today, the pipes are almost in they just need painting and connecting up. I’ve tried to remove as many of the joins as possible, the last pipes had 10 or more joins each! The new ones should have no more than 5 joins, less places to leak!
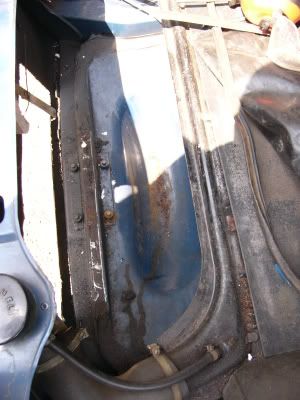
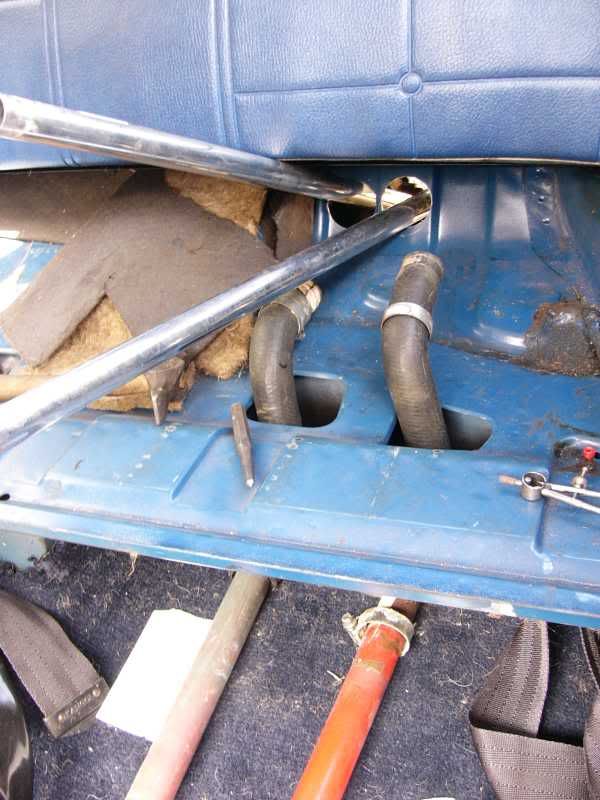
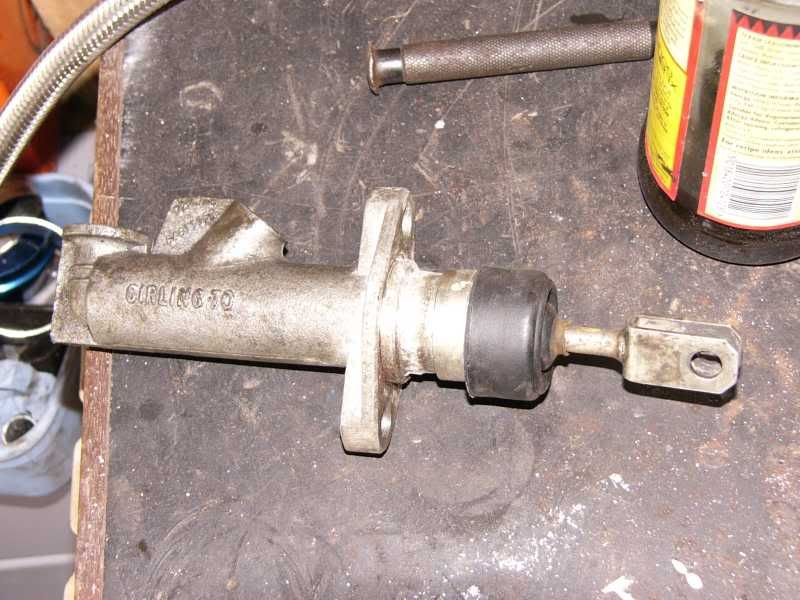
Removing the fuel tank to get to the master cylinder and rad pipes ( the master is to be changed to a 0.7” for the disk setup)
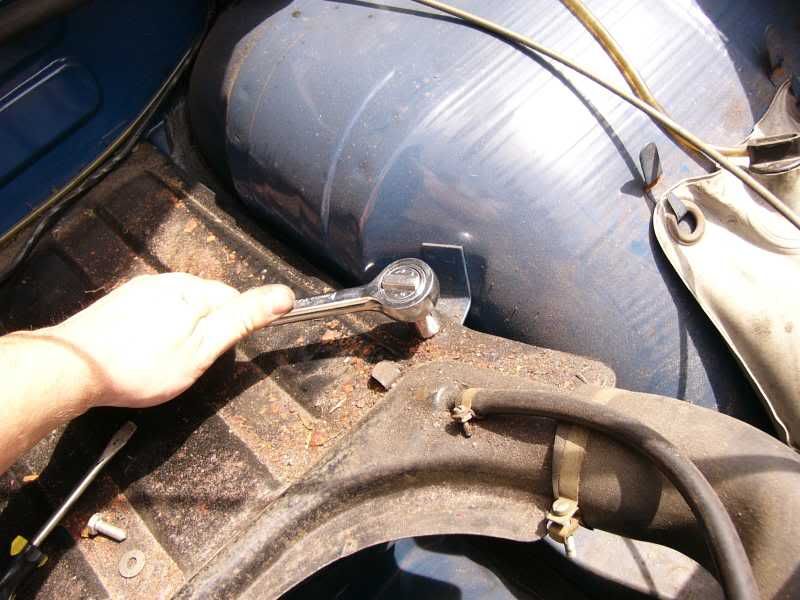
The tank removed, its all so clean and nice down there! The pipes for the rad will go through the small flat on the opposite side to the master cylinders.
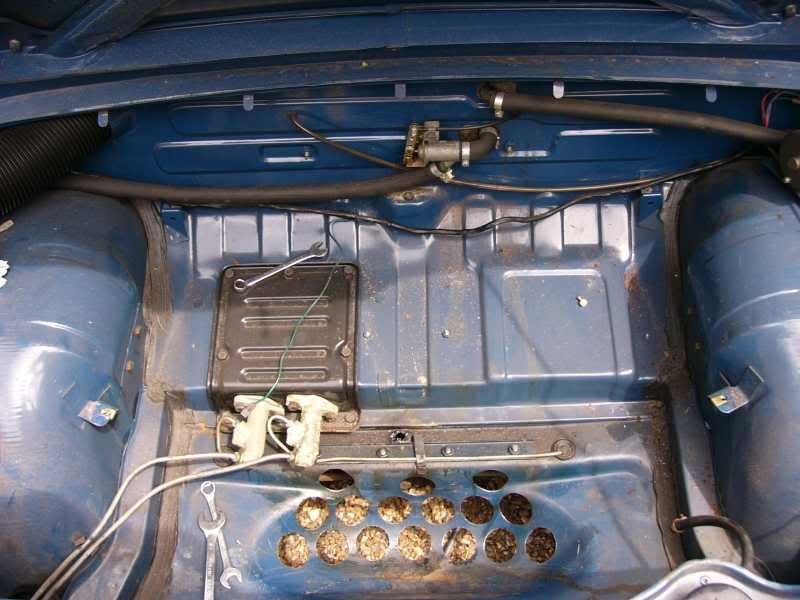
Here is where the rad pipes go up through the rear seat, nice and neat again, the rear seat squab will be able to go back on top, just no one is allowed to sit on it!
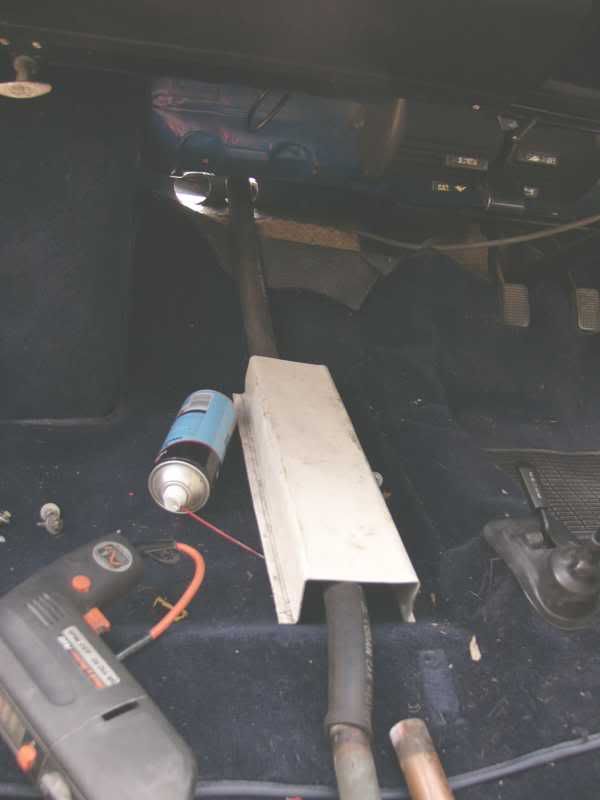
This is where the rad pipes go through the front bulkhead, they will be protected through the sharp hole edges.
These are the new aluminium pipes that go through the rear bulkhead, again less joins so less chance of leaks.
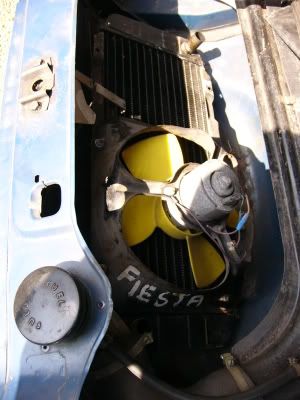
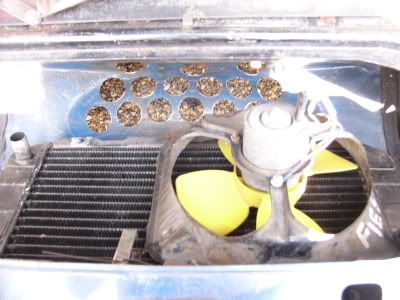
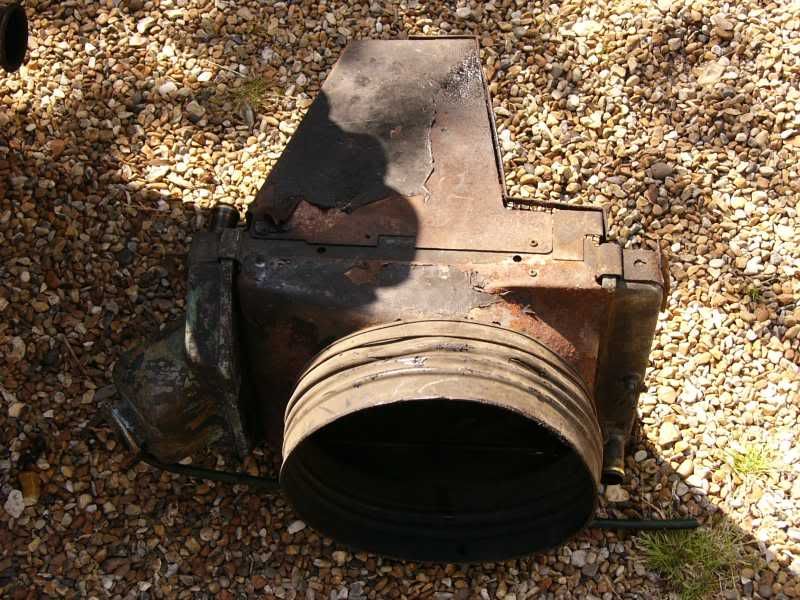
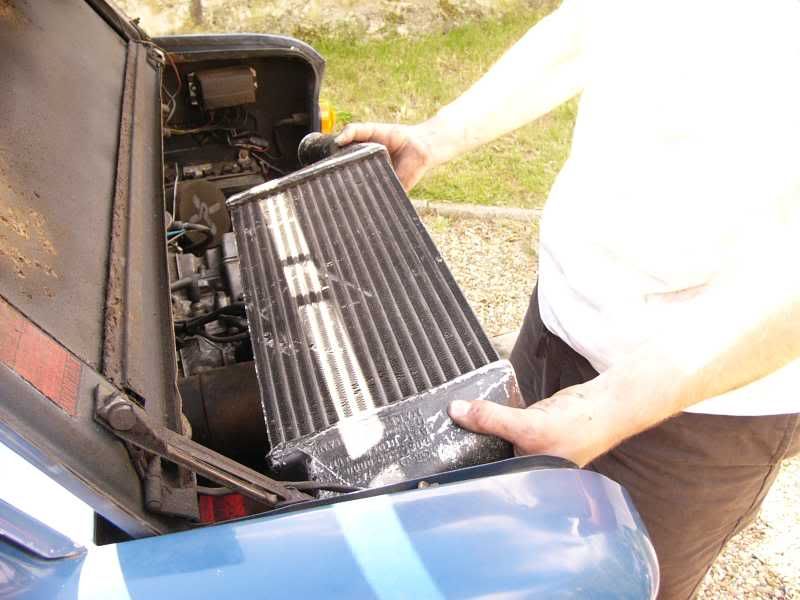
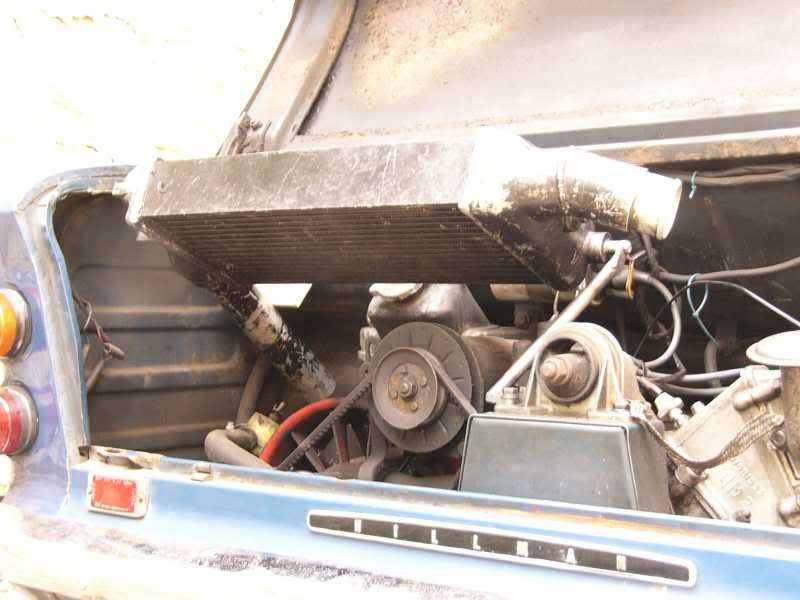
Old radiator out, quite a large bit of kit!
New header tank put in position but not bolted in, this will be re-painted. The old fan will be removed aswell, should free up a couple of HP.
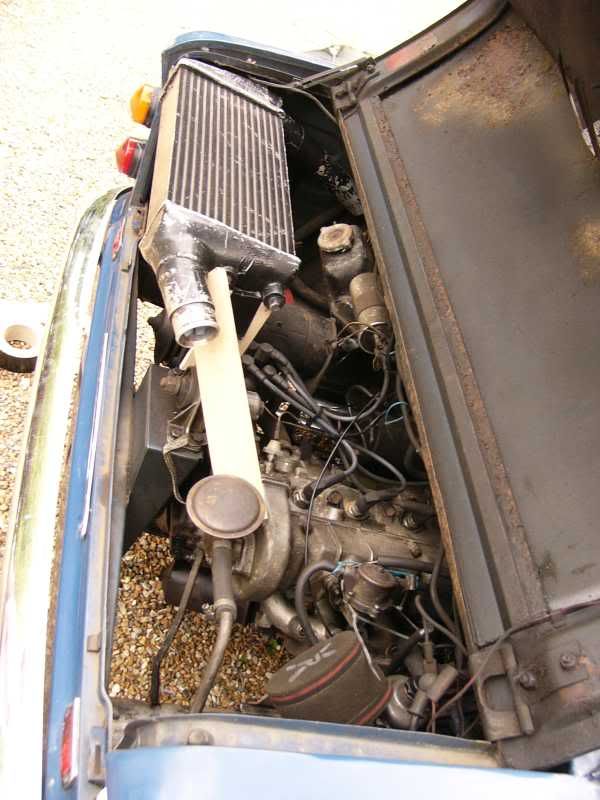
Then as a treat after the radiator work I mocked up the intercooler, it fits like a dream at the top of the engine bay, with plenty of room to get to the header tank. All of the pipes line up beautifully, I cant wait!
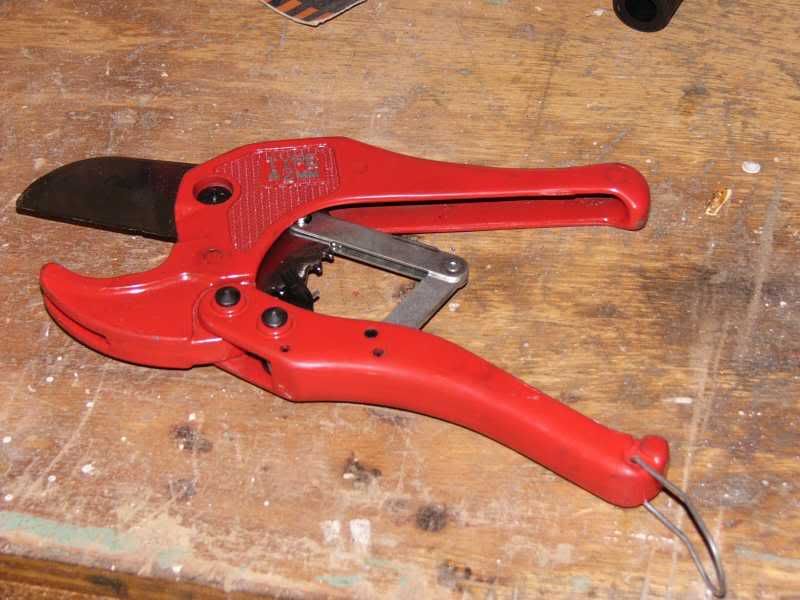
Tool of the day today was the ratchet pipe cutter, made it nice and easy to cut my 1” bore rubber radiator pipe, hot knife through butter!
Tomorrow I shall get the radiator in properly, attach up all the pipes and then make the shroud to direct the air. The master cylinder will be swapped for the 0.7” one, and the intercooler mounts will be fabbed up hopefully.
So yeah, more tomorrow
Cheers
J
Day 10 – Cowling in the corner
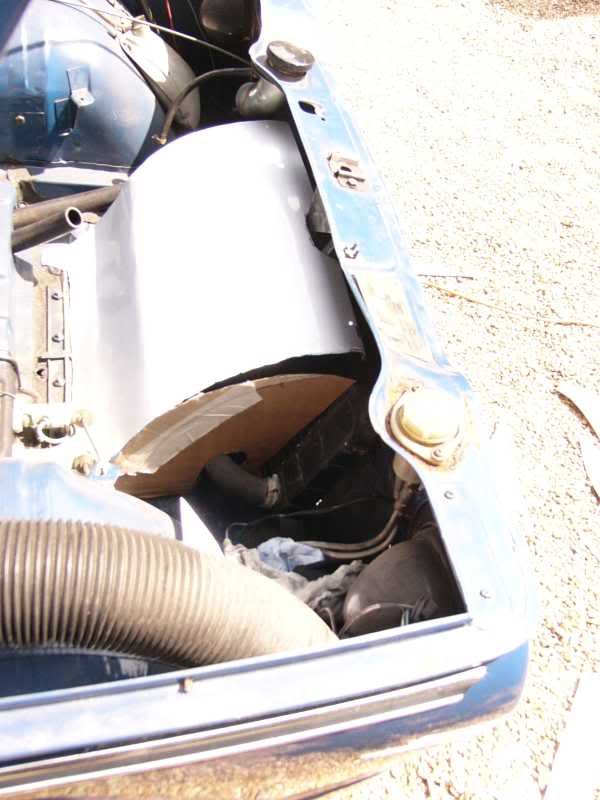
Well today has gone quite well, the radiator is now in and mounted, and the cowling is 90% done. This should direct the air in the correctly, from high to low pressure, hopefully taking sufficient heat with it!
I started by mounting the radiator, I’ve moved it slightly so that it is more upright, this way it is easier to mount and direct air to. Oh and it is a puller fan, so the air is going in the correct direction!
Not so much of the core is directly in contact with the flow stream, but it should be fine
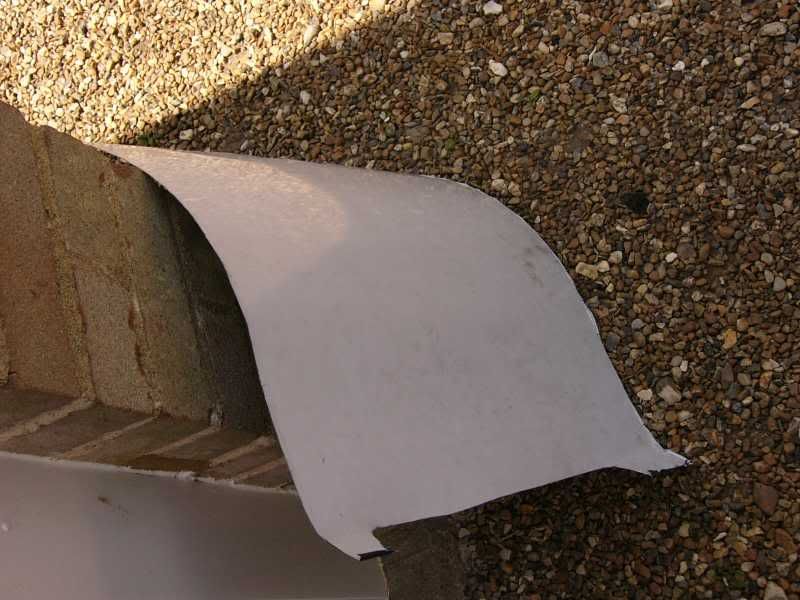
For the shroud I started with some sheet ally
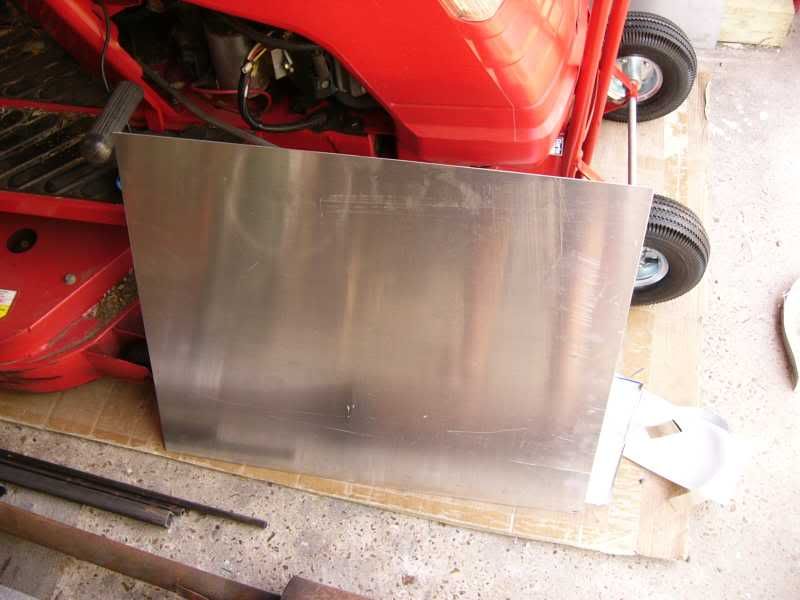
Measured up the space for it at 50cm x 50cm, then I started to cut lots of bits off so it fits the space
And I ended up with this –
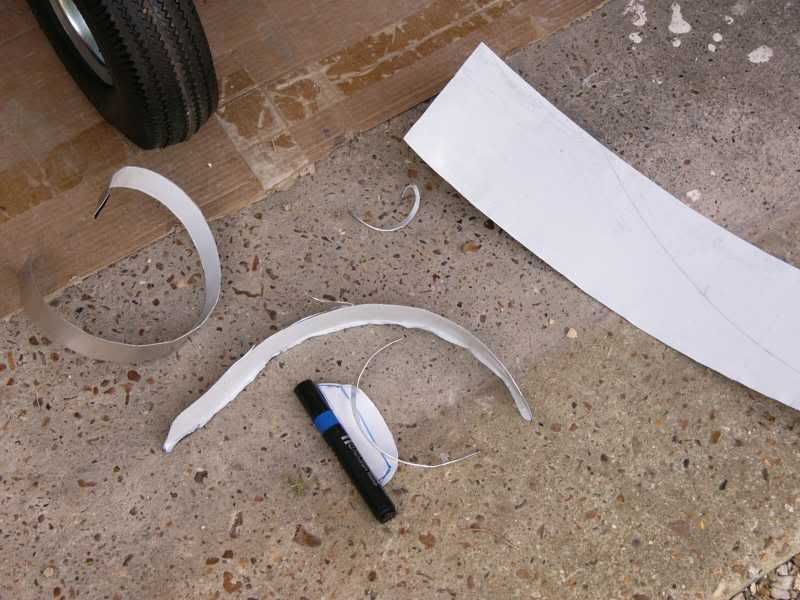
The side sheets were a little more tricky, as they had a specific shape to now fit into. A template was created, and trimmed to fit the space, this was then transferred to the ally sheet and tabs added for joining purposes
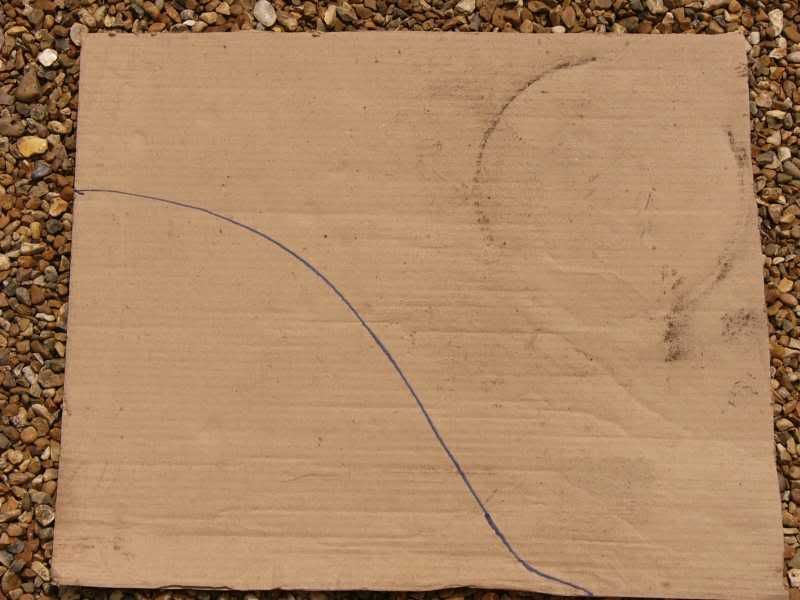
Sheet with tabs

Finished article
The other side will be very similar but with a few subtle differences, itll all be screwed together tomorrow.
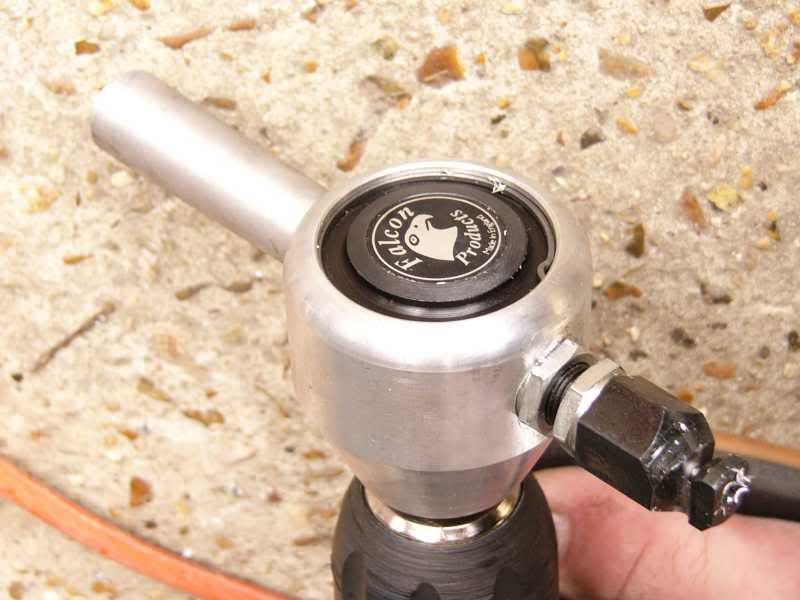
My tool of the day has got to be my falcon nibbler, British made tools FTW!
Tomorrow I really will attack the intercooler mounts and that master cylinder is also going to get it good
For now though I’m going to Goodwood horsey racing! Free booze so I cant complain
Tata
J
On 5th of Sep, 2006 at 05:47pm mini13 said:
I reckon if his brains were gunpowder he couldn't blow his own hat off...
|
AlexB
Site Admin
6297 Posts
Member #: 1
The boring bloke who runs this place.
Berkshire
|
|
Another ace update.
|
Nic
9327 Posts
Member #: 59
First mini turbo to get in the 12's & site perv
Herefordshire
|
|
phwoar youve inspired me to get back in the garage- i hope the neighbours dont mind the grinder
a shame your so far away from me
|
blown_imp
223 Posts
Member #: 598
Senior Member
Gaol
|
|
A dash more?
Day 11 – welcome to James Hill’s “how to fix a car until its borked!”
Well the horses were fun, I won a fiver so can’t complain!
This is a bit of a long post, I do apologise, if people want me to slim them down I will. 
Today started out a little bit frustrating, as I am not happy with the way the radiator cowling is turning out, the back piece is fine, it’s the side plates that are annoying me. I think I may make them in plastic, as this is much easier to manipulate and form to the body shape.
After getting frustrated for a while I decided to give my self another job, take my mind off the radiator for a bit and move on to the intercooler mount. This is going to be attached rigidly to the body, not the engine. It is going to be attached to the rear bulkhead where the coil currently is, the engine mount on the rear cross member, and the side panel where the boost strut currently is. This would hold it in the X, Y, and Z planes, and so it should be jolly secure.
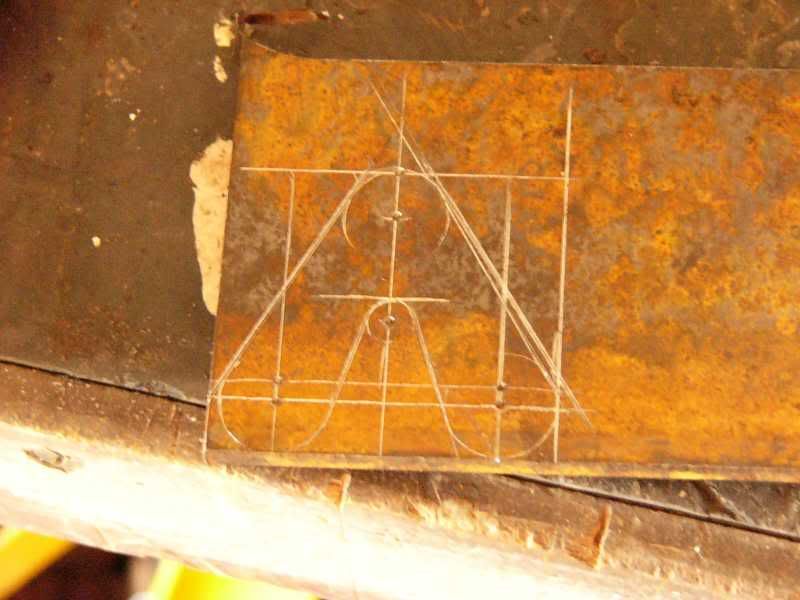
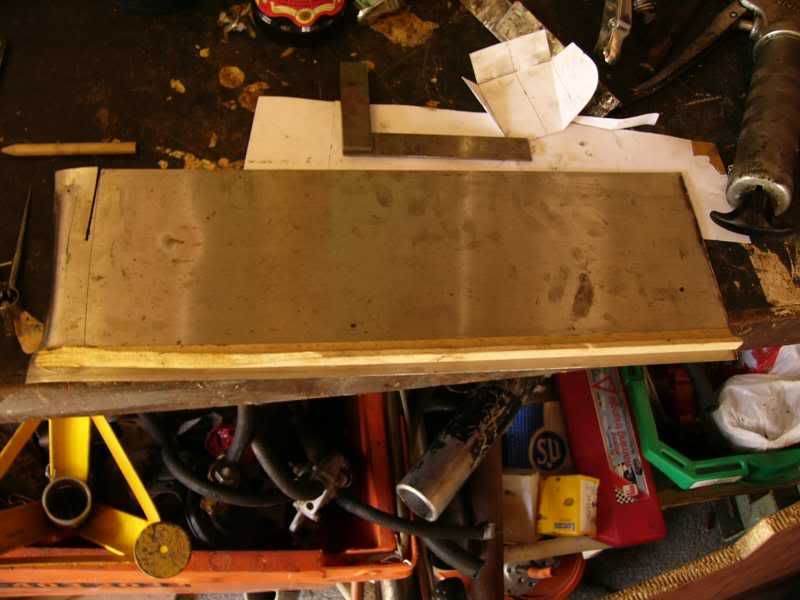
I started with the bottom mount that is going on the rear cross member, I made this from 4mm steel plate, should be strong enough! I marked it out on the steel using a scribe, rule, engineer’s square, and centre punch.
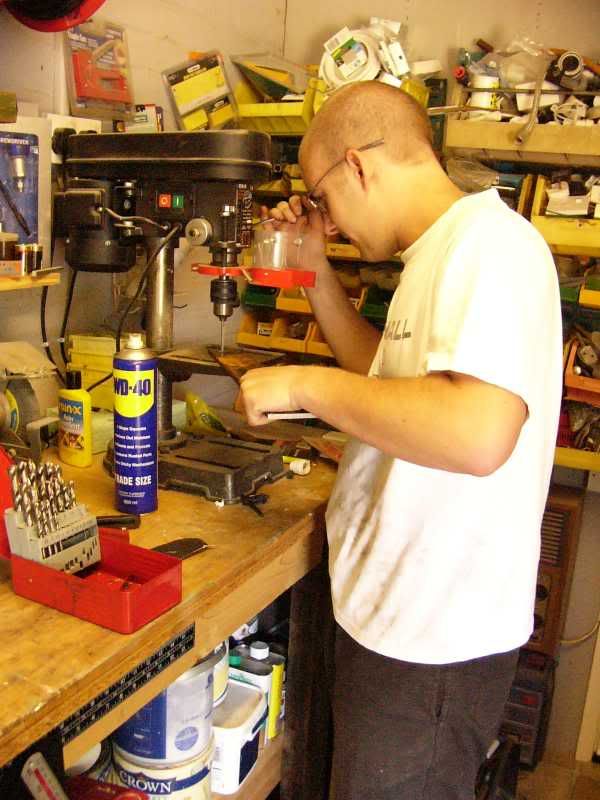
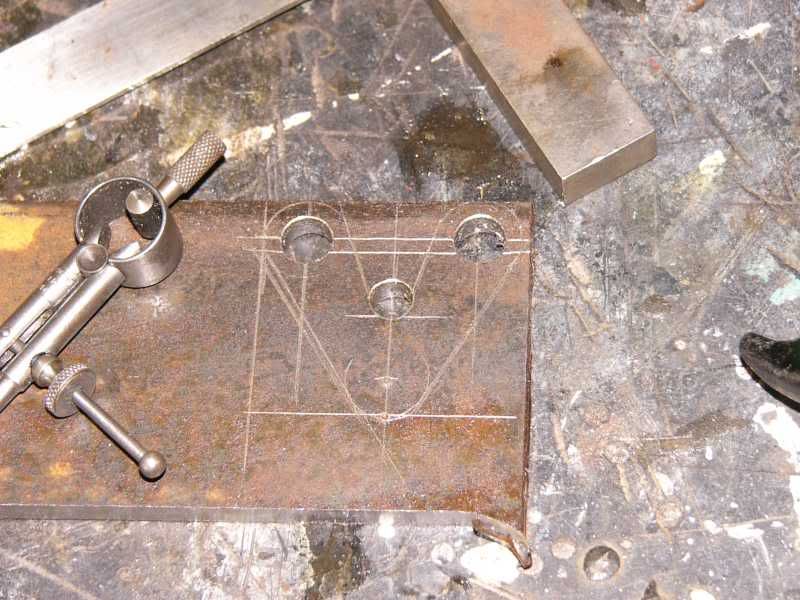
I then drilled the holes for the bolts and the inside of the inner curve
I then cut it out using a hacksaw, this is very good way to get jolly hot on a summers day!
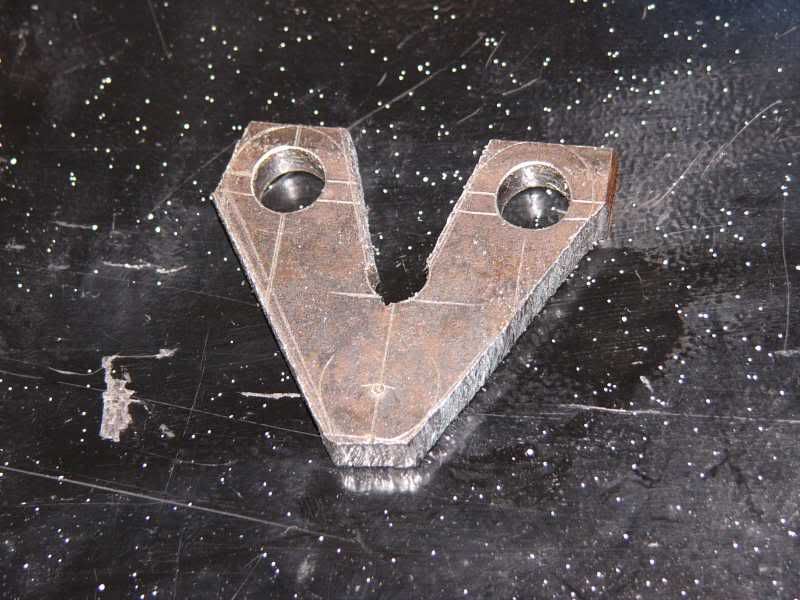
Then it was filed by hand for about an hour, this is a jolly good way to get very very very hot on a sunny summers day!
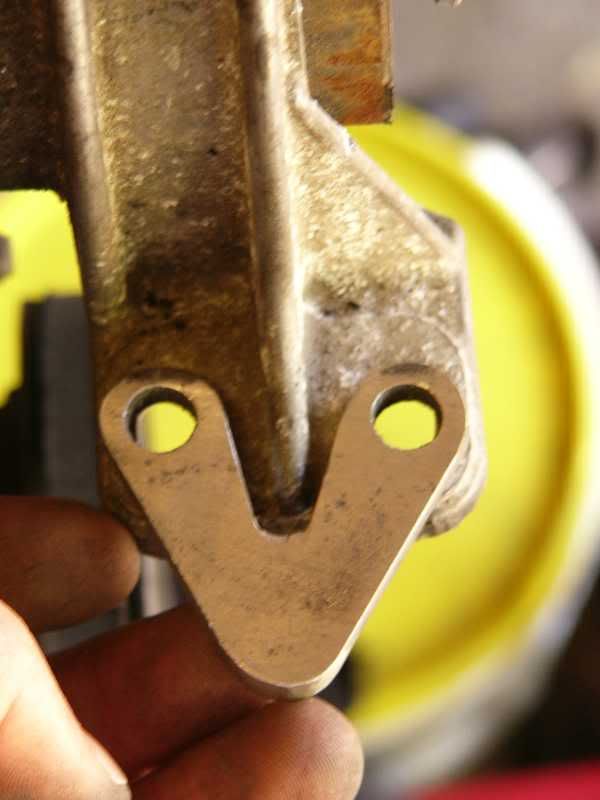
It fits like a dream, and shouldn’t have and fatigue problems being 4mm thick. This will have two tubes welded to the outer edge that will support the intercooler.
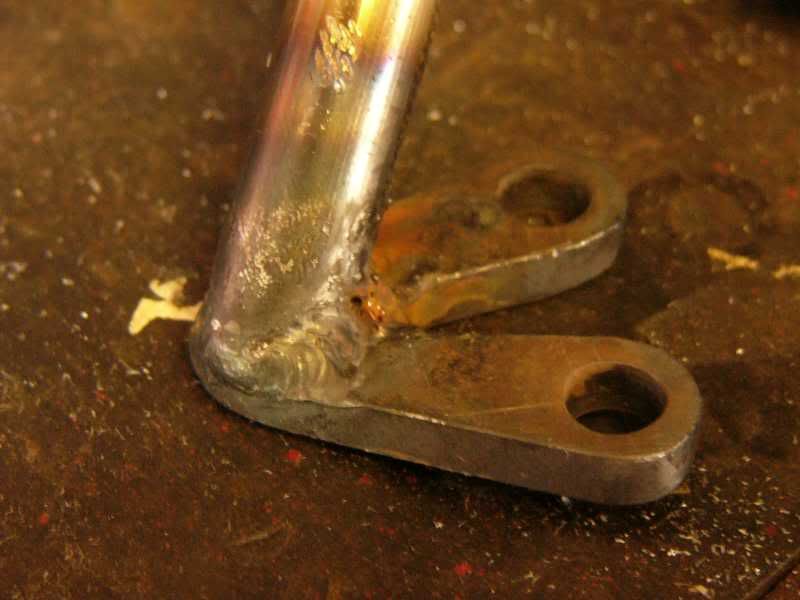
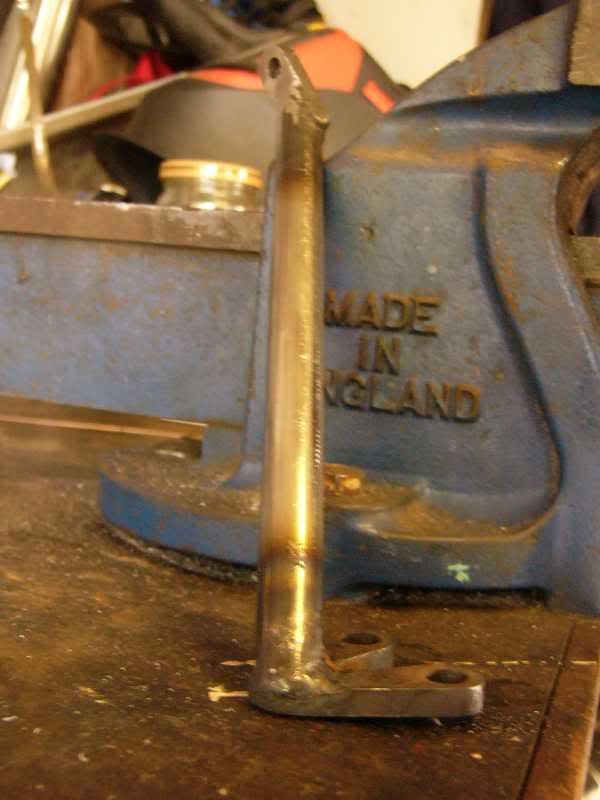
After that little success I decided to move onto another mount for the intercooler, this is the one on the outside edge, mounting to the bonnet stay.
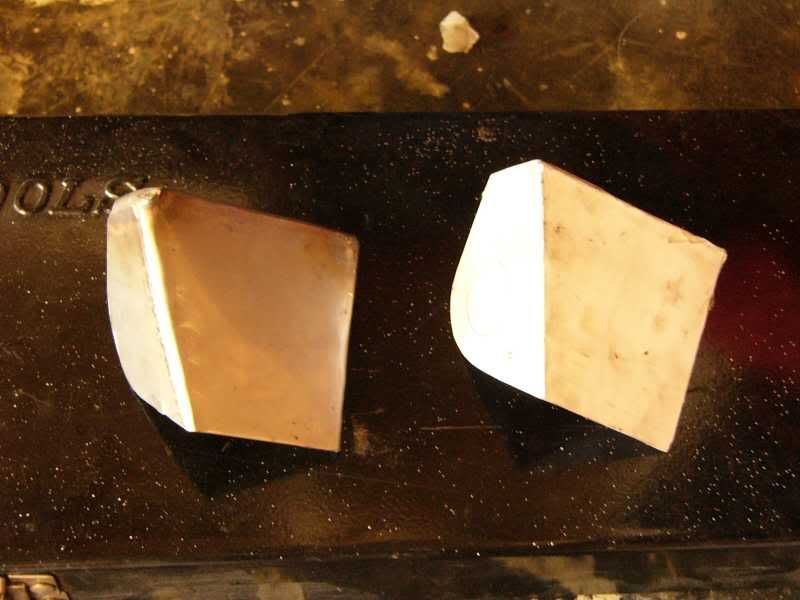
I started with a card template that allowed me to tune the angle that the intercooler will be mounted at.
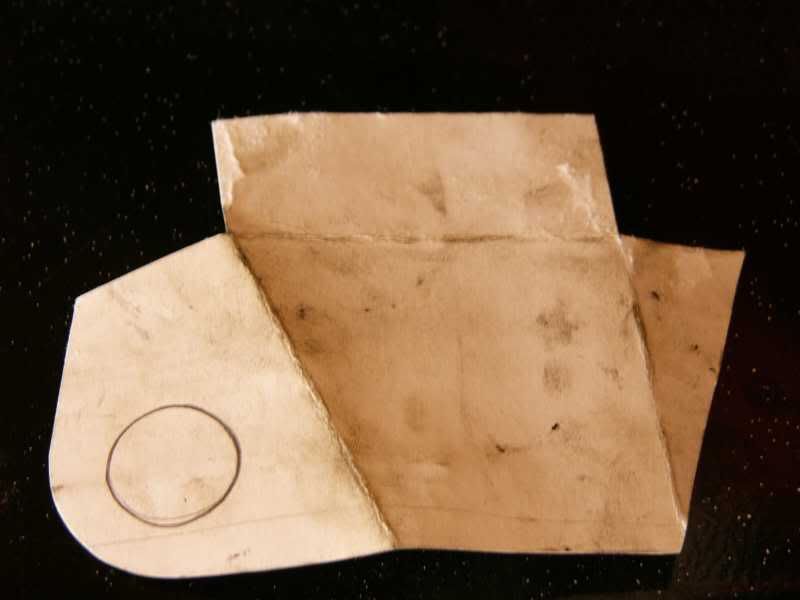
This folded into this shape
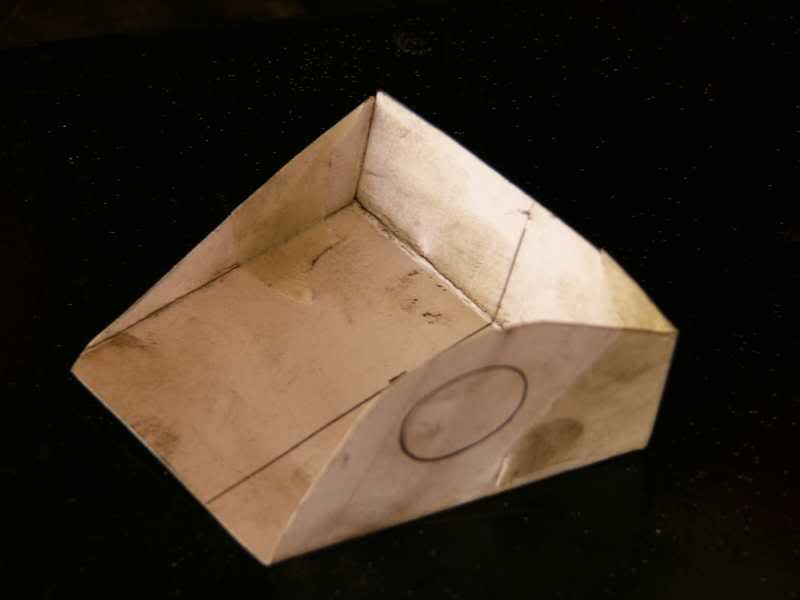
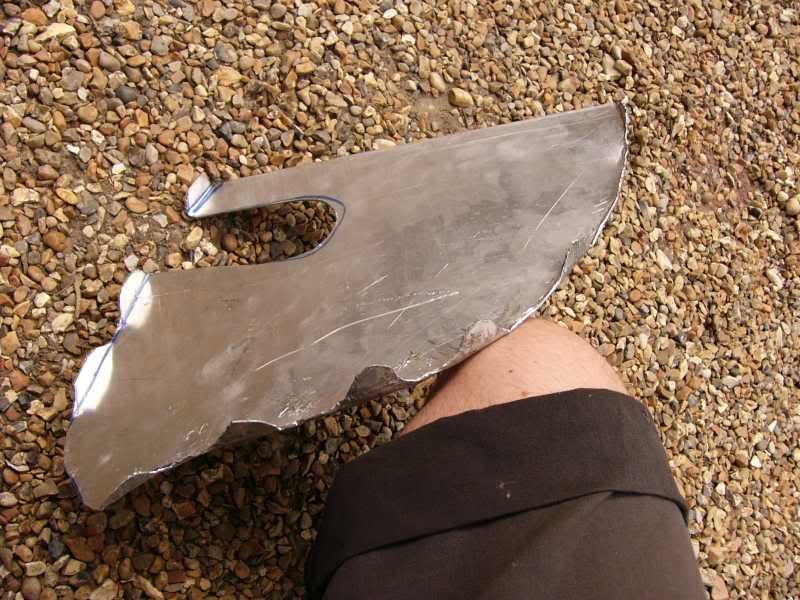
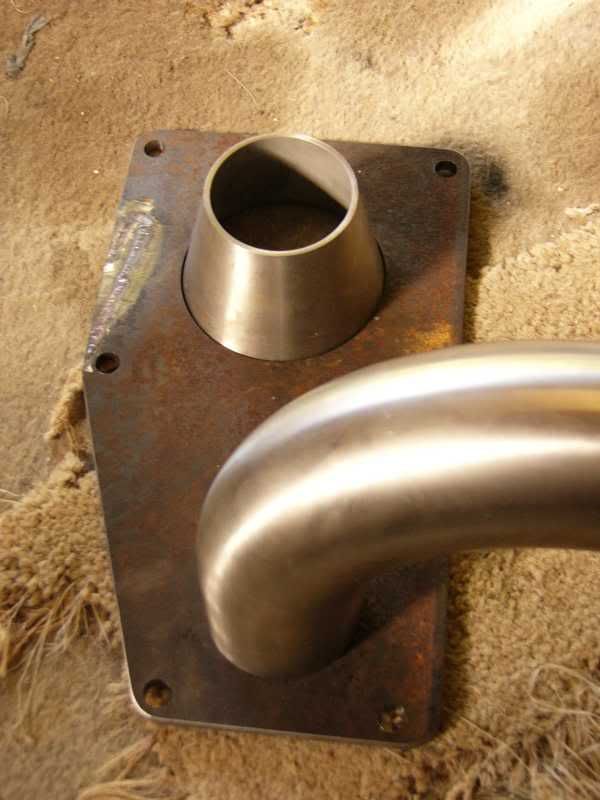
I then found some 1.5mm stainless sheet, this was my parents kick board in the kitchen! So now unused, I cut it up to the shape of the template
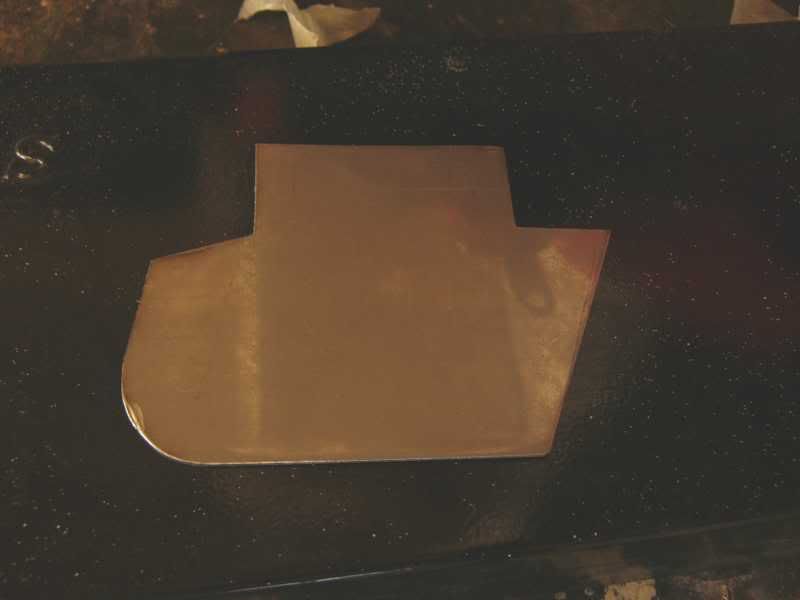
I then folded it just like the card, and welded the contacting edges, the finished product will have a hole put into the side that will mount the intercooler flange.
I then fitted the 0.7” master cylinder to the car, this is a relatively easy job that took all of 1/2hr. Piffling!
I then got a call from the machine shop that are modifying to my parts, they were finished with one small complication!
The pulleys were amazingly finished to a very high standard, and I cant wait to get it all fitted!
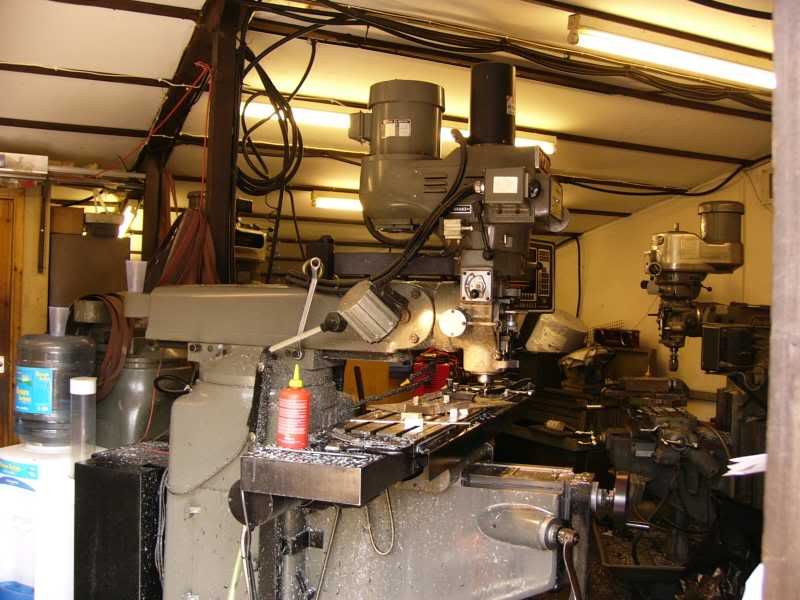
Heres the shop, only wee, but very capable
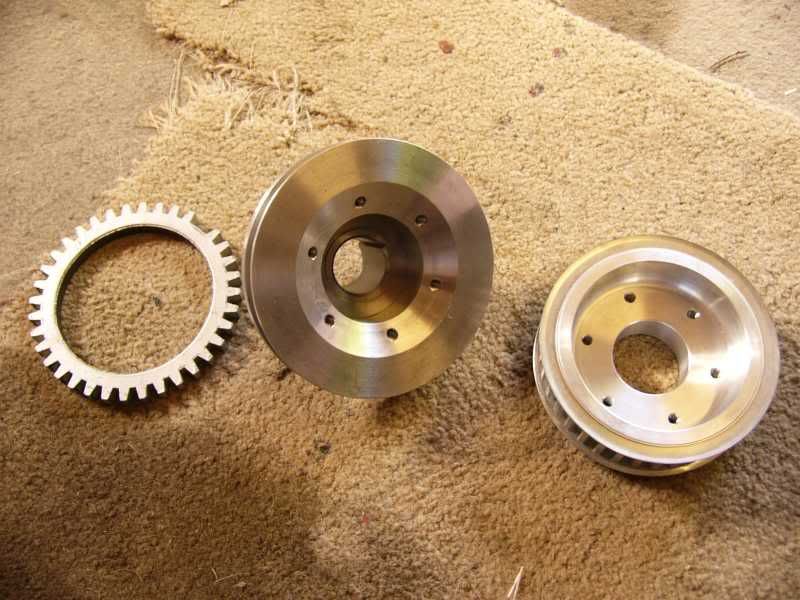
Here are the two pulleys and the trigger wheel
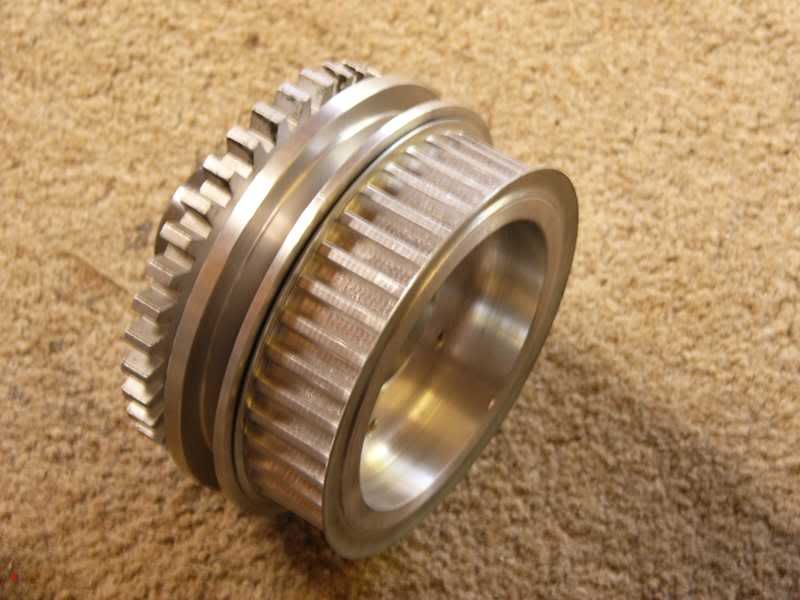
All together
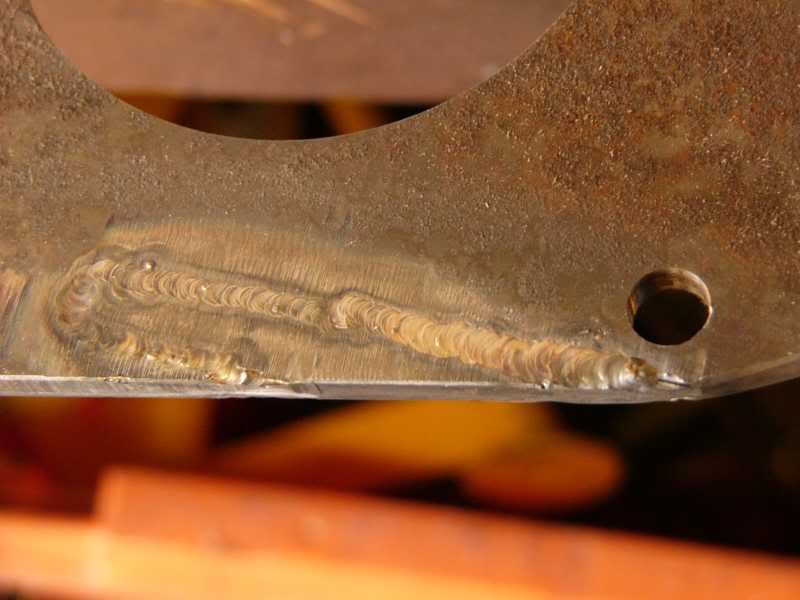
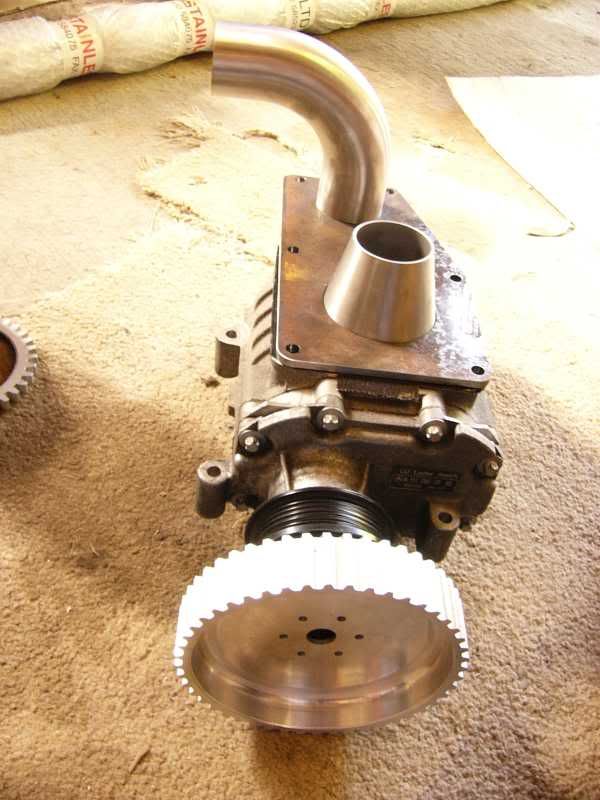
The problem came with the flange for the supercharger, the program for the CNC mill had a small and un-noticed glitch that meant the cutter decided to head right through the plate! Fortunately this was solved with a piece of steel cut so precisely that you would never know it happened! I duly TIG’ed this section into the flange so it’s as good as new
The section TIG’ed into the main flange
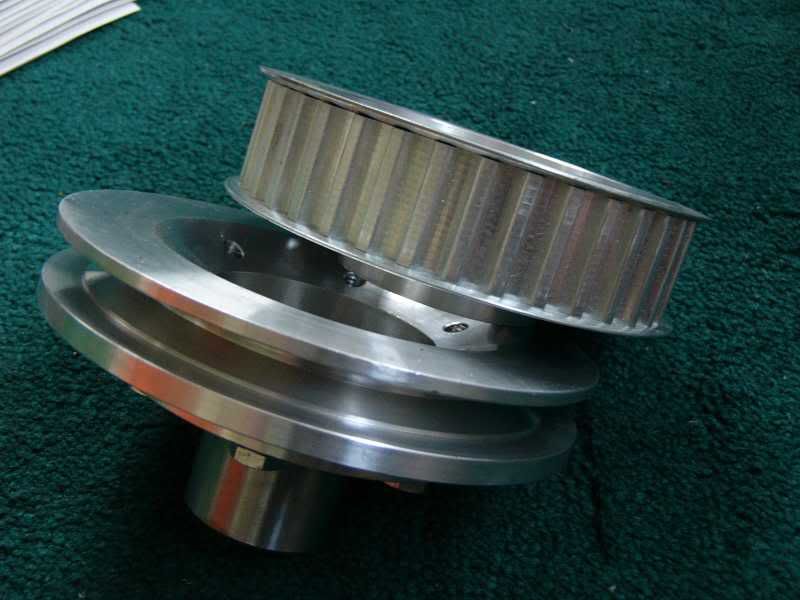
And the whole blower setup
That’s all for today guys and gals, its been quite a productive one and im happy, that’s all that counts!
Tomorrow I shall move on with the intercooler mount, hopefully have this finished and ready to spray up. I will also strip the paint from the intercooler end tanks, as it’s a little worse for wear. I think I will also start the supercharger mount, as once these two are on I can start to think about the inlet and fuel system.
See you tomorrow
:-*
J
Day 12 Hay-fever central
Today I have been struggling with hayfever, its been fine so far this year until today. So I haven’t got as much done as I would have liked, just one part, the quality is quite high though
I started with mocking up the intercooler again, it was made level and straight to the body. I then got the mount I made yesterday and drilled it ready to receive a bolt, this mount was to be isolated using rubber tube between the intercooler and it. The rubber was compressed between a penny washer and the mount its self, and reduces vibration fatigue hopefully.
The mount with the rubber isolation
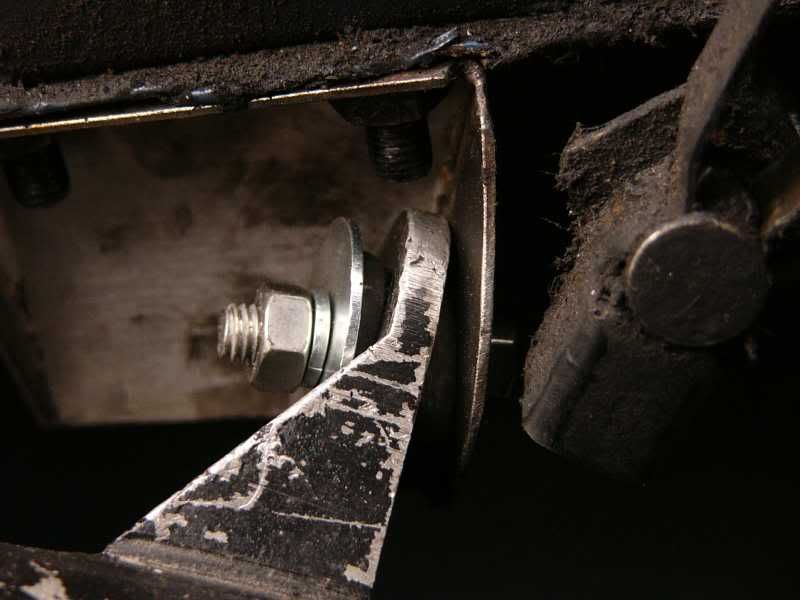
I measured the intercooler position again, to make sure its straight and level, measure twice cut one, really rings true! It was wedged and then the length of the mounting tubes was decided upon.
I then spent quite some time getting the tubes to fit between the intercooler and the chassis. At the intercooler I have drilled and threaded an original mounting lug to take a stainless bolt, a piece of the 5mm steel plate (it was 5 not 4mm!) was then cut and shaped to accommodate the tube. I then spent about 2 ½ hrs filing the tube to fit between the two flanges perfectly, this is the vital element to get good TIG welds, its all in the preparation and fit. Once the tube was flush on the flanges I could weld them on, these fitted perfectly and the welds went very well.
The mount fitted in very well, with no adjustment needed, it’s all in the preparation! It makes the intercooler very sturdy, but I have yet to triangulate it, this will make it totally solid.
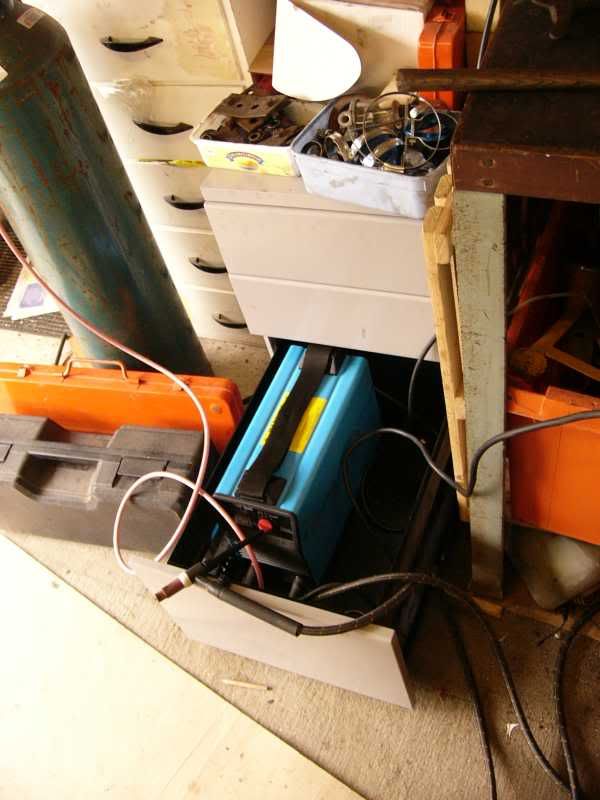
Tool of the day – My TIG in a draw!
I have started to strip the paint off the end tanks, but then it was time for my Sunday roast, so tools down for another day. Tomorrow I am hoping to get the rest of the intercooler mounts in and make the unit totally solid, I am also going to take the old pulley off of the supercharger and fit my new one, this will involve tapping the flange and drilling out the pulley holes slightly. Once the pulley is mounted I can start to think about mounting the supercharger, take measurements and decide on the best plan of action. I may also put the engine back together after the bottom end inspection, and give it a good clean.
So enough for today, more tomorrow, and hopefully less hayfever
Cheers
J
On 5th of Sep, 2006 at 05:47pm mini13 said:
I reckon if his brains were gunpowder he couldn't blow his own hat off...
|
MarkGTT
3249 Posts
Member #: 1194
Post Whore
Shropshire.
|
|
Enjoying reading this, cheers, keep it coming.
really like the car.. wouldn’t mind one myself, however clearly the Mrs wont allow another motor.. now where can I hide a car :)
|
robert

6754 Posts
Member #: 828
Post Whore
uranus
|
|
enthralling .
Medusa + injection = too much torque for the dyno ..https://youtu.be/qg5o0_tJxYM
|
|
Home > Show Us Yours! > Supercharged and injected imp, allowed?
|
|
Users viewing this thread:
none. (+ 1 Guests)
|
Next ->
|
|
