|
Home > How To > Rebuilding your Carb
|
Tom Fenton
Site Admin

15300 Posts
Member #: 337
Fearless Tom Fenton, Avon Park 2007 & 2008 class D winner & TM legend.
Rotherham South Yorkshire
|
|
HOW TO REBUILD YOUR HIF44 TURBO CARB
1) Obviously you need a rebuild kit. Contact user ?Iain? on turbominis.co.uk to get one of these at a good price.
2) Below is a list of tools needed. There is nothing particularly specialised on here, most peoples toolboxes will have all the stuff needed.
Flat Blade Screwdriver, Medium and Small
Phillips Screwdriver, PH1 and PH2
Junior Hacksaw
7/16" Spanner
1/2" Socket and Driver
Small Seal Pick/Spike is useful if you have one
Straight Edge
Loctite
3) If not already, remove your carb from your inlet manifold. Unbolt the Plenum Chamber from the carb using the 1/2" socket on two long bolts.
4) Hold your carb upside down in a vice; wrap it in some rag so you don't damage it.
5) You now need to remove the 4 screws that hold on the float chamber base cover. These are an awkward tamperproof fitting, so the easiest thing to do is cut a slot in the heads using a junior hacksaw and then undo them with a flat blade screwdriver. Lob them in the bin as new ones are supplied.
6) Lift the cover off. It may need a tap from a soft mallet to move it. Don't be tempted to lever in the joint. Once the cover is off, remove the large seal round the edge and bin it.
7) Next job is to remove the jet. To do this, firstly unscrew the mixture adjustment screw. The head is accessed on the outside of the carb. Wind the screw fully out. Remove it from the carb body, and replace the o-ring under the head. Then remove the phillips screw with a spring underneath it that holds the bimetallic jet holder to the carb body.
8) Now remove the float to give better access to the jet. This is done by undoing the float spindle from the outside of the carb, with a 4mm Allen Key. On some carbs there might be a tamperproof plug in the end of the spindle. Remove this by levering it out if necessary. One the float spindle is loose, withdraw it from the carb body, and then lift out the float.
9) Now the jet and bimetallic strip can be carefully lifted out of the float chamber.
10) Next step is to replace the needle valve and seat. Unscrew the brass needle seat using a 1/2" socket and ratchet. Remove from the carb and chuck in the bin.
11) The float chamber should now be stripped down. Clean out the chamber and also the inside of the lower cover using carb cleaner or brake cleaner. If the carb is varnished badly, then a careful rub with some wire wool can help remove the varnish. Once the float chamber is clean, if you can, blow through the internal passages of the carb to clear them out. This should include the fuel in and out hose stubs, and also the passage from the plenum chamber, that can be identified by looking for the hole that has a restrictor in it.
12) Once you are happy that the float chamber and lid is clean, you can re-assemble the float and jet. First of all, re-install the needle seat. Tighten by hand to a 'good nip', there are no torque settings supplied. I used a dab of loctite on the thread to make sure. Bear in mind that the carb is ally and the needle seat brass, so don't go mad, or else you may strip the threads. Pop the needle into the seat. Then check it seals as it should, by blowing into the fuel in hose stub, and working the needle with your finger.
13) Next step is to remove the dashpot assy to make sure you do not damage the needle as you re-install the jet. Do this by unscrewing the 3 screws around the edge, and then lift the complete dashpot, piston and needle assembly away from the carb.
14) Unclip the bimetallic holder from the old jet, and reclip onto the new jet. Make sure the strip is clean. Making sure the jet bore into the carb is clean and free from varnish or deposits, carefully slide the jet and holder down into the float chamber. The jet should slide freely with a very light pressure. If it does not, remove and investigate why. Of course now is also a good opportunity to fit a solid jet holder if you have one.
15) Screw the strip holding screw back in. Again use a dab of loctite on the threads. There should be a spring under the head of the screw above the jet holder.
16) Re-install the mixture screw. The instructions in the rebuild kit detail a basic setting up procedure.
17) Clean the float and make sure there are no holes in it. Position it in place. Make sure the float spindle is not badly worn. This is not included in the rebuild kit but as it sits in a bath of petrol most of the time it shouldn't wear excessively. There is a soft aluminium sealing washer under the head of the spindle, replace this. Now reinstall the float spindle; use a dab of loctite. Make sure the float moves as it should.
18) Check the float level. This is detailed in the instructions, and is not worth me replicating here. If the level is incorrect, then CAREFULLY bend the float lever to correct the float level.
19) Replace the large lid seal onto the float cover, and refit the cover. New screws are supplied in the rebuild kit. They should be fitted with spring washers. Tighten the screws evenly.
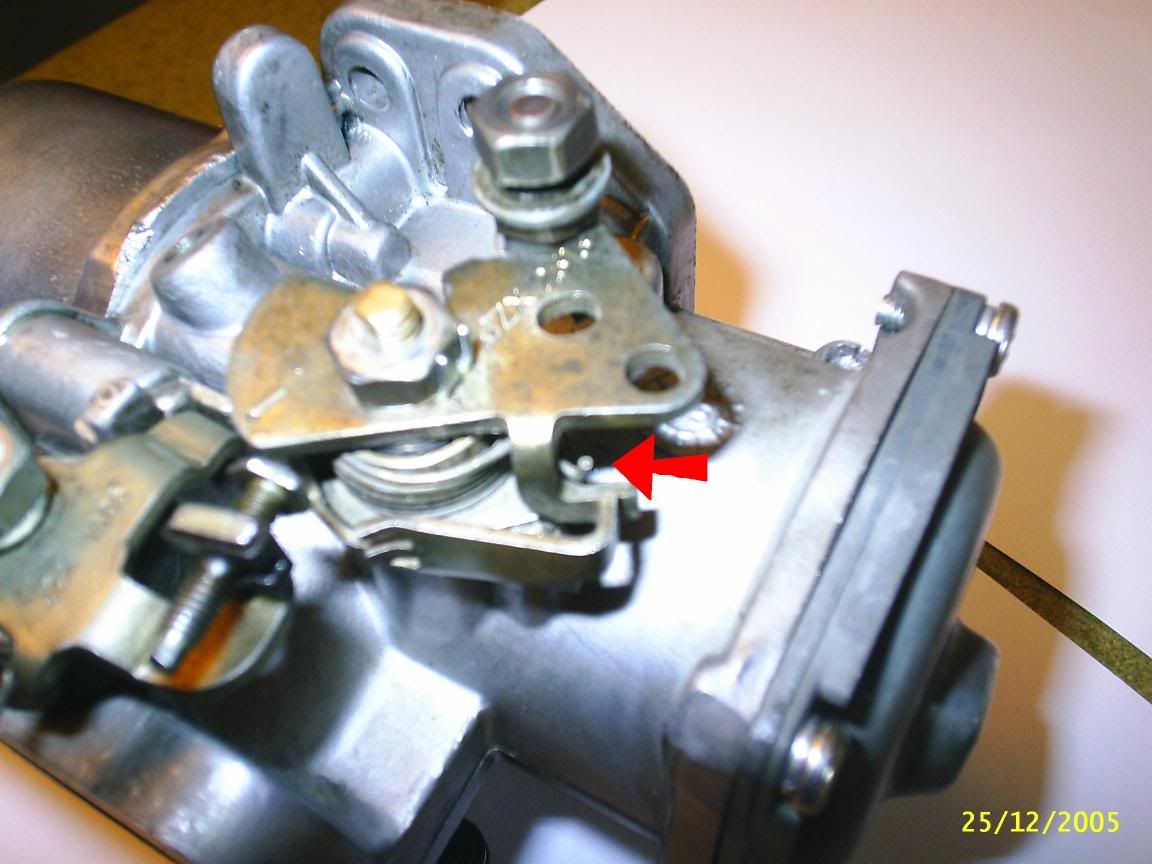
20) Next part is to rebuild the throttle assembly. Start off by removing the throttle cable lever. To do this, flatten the locking tabs and undo the 7/16" nut on the end of the shaft. You can then withdraw the throttle lever, and the return spring. I was lucky to have another complete carb to look at while I did mine to get the return spring locations right when I put them back. If you can I recommend you take a picture of the spring locations to make sure you get them right. Once the lever and spring are removed, withdraw a white nylon washer, and then the spindle seal.
21) Next, on the other side of the carb, remove the fast idle lever from the other end of the throttle spindle. Again, flatten the locktab and remove the 7/16" nut. Then remove the lever and the spring, and then the washer and seal.
22) Now undo the two screws that hold the butterfly to the spindle. Squeeze the spread ends together first of all. Undo the screws, and slide the butterfly plate out of the spindle. The spindle can now be withdrawn out of the side of the carb body.
23) Next job is to replace the spindle bushes. I found the best way to deal with these was to choose a socket out of my 1/4 drive set that matched the outer diameter of the bush. I then pressed them out using the vice.
24) Lightly clean up the bore where the bushes sit with emery cloth. Then press in the new bushes, till they sit flush with the counterbore from the outside. Make sure that they don't protrude inside the carb bore. Test fit the spindle; it should now be a close fit but not take excessive force to turn it.
25) I took the opportuity to smooth out some casting ridges left in the transition area between the carb bore (horizontal) and the piston bore (vertical). I did this using a swiss file, and smoothed out some ridges. It is not worth going overboard on a turbo carb in this area as the forced induction is less sensitive to flow over obstructions.
26) Now install the new butterfly plate. This needs to be done with care. If you look closely you will see that the edges are chamfered slightly to sit on the carb bore when the throttle is shut. Test fit the disc into the spindle. If you have the chamfer the correct way it will sit closely to the bore when the throttle is shut. If it is wrong, then there will be a gap visible.
27) Install the new butterfly screws with a dab of loctite. Spread the ends as well to be double sure.
28) Install the new lip seals either end of the throttle spindle. The lips should face inwards. Also install the white plastic washers.
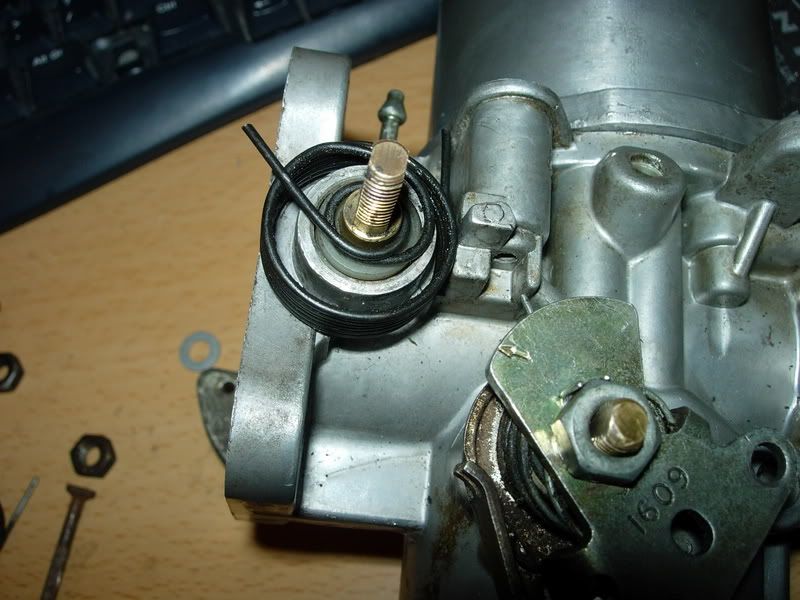
29) Next step is to rebuild the choke assy. This is a similar procedure to the throttle spindle. Flatten the locktabs, undo the nut and remove the lever and spring. Then remove a plate that lifts away. Undo two flat head screws and then lift the entire choke assy from the body. Clean out the bore using carb cleaner. Replace the two O rings fitted to the spindle. Then replace the shaft lip seal, again with the lips facing inwards.
30) Refitting the choke assy is the reverse of removal. (Always wanted to write that!)
31) Now refit the throttle levers and return springs at either end of the spindle. Make sure the return springs are functioning correctly. Using new locktabs, put the 7/16" nuts on either end of the spindle. Do up and bend over the locktabs to secure.
32) Next step is to clean up the piston and dashpot. Unscrew the cap, and push the piston up into the dashpot till the shaft comes out of the top. Lever off the c-clip. Now you can take the two bits apart and thoroughly clean again using carb cleaner. Pay special attention to the three grooves where the piston runs close to the dashpot. When you are happy with this, you can refit the piston into the dashpot. The kit also includes a new screw for holding the needle in place but I didn?t see the point of changing this for the sake of it.
33) Push the piston back into the dashpot, making sure the spring is in there! Push the shaft up through the top and fit a new c clip supplied in the kit.
34) Last step is to refit the dashpot to the carb. Replace the large rubber ring seal that sits between the dashpot base and the carb body. Also replace the fibre washer that fits underneath the dashpot black plastic cap. Screw the dashpot to the carb using three new screws in the kit. You can also now bolt the plenum back on, using the new gasket supplied in the kit. Use a touch of loctite on the bolts.
35) And voila one rebuilt carb! The instructions recommend you pressure test the carb but this will depend on whether you have the equipment to do this. I would guess most of us wouldn?t have. In any case when the carb is first fitted back the engine, pressure the fuel system up and check carefully for leaks before you start the engine up. Also remember that you will have changed the workings of the carb and so as a minimum you will need to have the idle mixture set up properly, and ideally run the car up on the rolling road to adjust the fuelling properly.
Note) These instructions are supplied as a guide only. No responsibility can be accepted by the author for errors or omissions, or any resulting damage to vehicles from following these instructions.
Copyright T Fenton 2004. Feel free to distribute this article freely, as long as no charge is made for it.
Edited by Tom Fenton on 28th Oct, 2004.
On 29th Nov, 2016 madmk1 said:
On 28th Nov, 2016 Rob Gavin said:
I refuse to pay for anything else
Like fuel 😂😂
|
clubman_dan

1128 Posts
Member #: 142
Post Whore
Winchester
|
|
nice one!
well useful
DAn :)
|
TurboDave16V
Forum Mod
10980 Posts
Member #: 17
***16***
SouthPark, Colorado
|
|
Tom, that is excellent.
Well done!
On 17th Nov, 2014 Tom Fenton said:
Sorry to say My Herpes are no better
Ready to feel Ancient ??? This is 26 years old as of 2022 https://youtu.be/YQQokcoOzeY
|
Nick
Forum Mod
4828 Posts
Member #: 154
Post Whore
Midlands
|
|
sweet, i know what i'll be printing out when i rebuild mine!
On 20th Oct, 2015 Tom Fenton said:
Well here is the news, you are not welcome here, FUCK OFF.
|
Tom Fenton
Site Admin
15300 Posts
Member #: 337
Fearless Tom Fenton, Avon Park 2007 & 2008 class D winner & TM legend.
Rotherham South Yorkshire
|
|
Cheers all.
Unfortunately I haven't got a digital camera (or in fact a computer....some barstewards broke into my house and nicked my laptop....) or I would have added some pictures as well.
If anyone has a carb in pieces and wants to add some photos to this thread then that would be good.
On 29th Nov, 2016 madmk1 said:
On 28th Nov, 2016 Rob Gavin said:
I refuse to pay for anything else
Like fuel 😂😂
|
Nick
Forum Mod
4828 Posts
Member #: 154
Post Whore
Midlands
|
|
got my rebuild kit today so i'll see if i can get some pictures tomorrow night when i have a crack at rebuilding mine.
On 20th Oct, 2015 Tom Fenton said:
Well here is the news, you are not welcome here, FUCK OFF.
|
iain
Site Admin

8506 Posts
Member #: 16
Sold the turbo and seeing what the C20XE can do!
Near Lincoln
|
|
Still got one more rebuild kit in stock 
|
Vegard
7765 Posts
Member #: 74
I pick holes in everything..Chief ancient post excavator
Norway
|
|
I could need one :) Although thius is almost a year ago :)
On 13th Jul, 2012 Ben H said:
Mine gets in the way a bit, but only when it is up. If it is down it does not cause a problem.
|
iain
Site Admin
8506 Posts
Member #: 16
Sold the turbo and seeing what the C20XE can do!
Near Lincoln
|
|
I've got one in stock anyway from the latest orders
Cant see postage being that much at all.
|
Vegard
7765 Posts
Member #: 74
I pick holes in everything..Chief ancient post excavator
Norway
|
|
Is it similar to this:
http://www.minispares.com/Product.aspx?pid=36133
On 13th Jul, 2012 Ben H said:
Mine gets in the way a bit, but only when it is up. If it is down it does not cause a problem.
|
iain
Site Admin
8506 Posts
Member #: 16
Sold the turbo and seeing what the C20XE can do!
Near Lincoln
|
|
It's similar but you get that lot and more. Thats the service kit whereas the one i sell is the rebuild kit.
It includes shaft, bearings and plain butterfly so makes a proper job of it. Its all easy enough to do as can be seen with these instructions.
I've sent you a PM regarding price inc postage etc.
|
t3gav
2395 Posts
Member #: 229
Gavin@minispares.com
kent
|
|
old thread i know but did anybody manage to find any pics for this would be a great help, thanks, gav
|
Vegard
7765 Posts
Member #: 74
I pick holes in everything..Chief ancient post excavator
Norway
|
|
On number 28. My carb had the lips of the seals ouwards. Is this wrong?
On 13th Jul, 2012 Ben H said:
Mine gets in the way a bit, but only when it is up. If it is down it does not cause a problem.
|
Tom Fenton
Site Admin
15300 Posts
Member #: 337
Fearless Tom Fenton, Avon Park 2007 & 2008 class D winner & TM legend.
Rotherham South Yorkshire
|
|
Yes. The lips face outwards on N/A stuff as you want to seal against vacuum pulling air in over the spindle bushes.
However in the turbo application the seals should have the lips facing inwards to seal against boost pressure pushing out over the seals.
(Edited to add)
Yes Vegard, this is WRONG!!!!!!!!!!!!
Edited by Tom Fenton on 16th Apr, 2006.
On 29th Nov, 2016 madmk1 said:
On 28th Nov, 2016 Rob Gavin said:
I refuse to pay for anything else
Like fuel 😂😂
|
Dicanio
461 Posts
Member #: 91
Senior Member
Live @ Worksop, Work @ Rotherham
|
|
Made a start on mine last night, thanks Tom a fantastic guide.
Only question, does anyone know what size thread the screws are in section 29, mine sheared off
29) Next step is to rebuild the choke assy. This is a similar procedure to the throttle spindle. Flatten the locktabs, undo the nut and remove the lever and spring. Then remove a plate that lifts away. Undo two flat head screws and then lift the entire choke assy from the body. Clean out the bore using carb cleaner. Replace the two O rings fitted to the spindle. Then replace the shaft lip seal, again with the lips facing inwards.
I know its a 0.8 thread but not sure on diameter.
|
diddy
108 Posts
Member #: 505
Advanced Member
Stockton-on-Tees
|
|
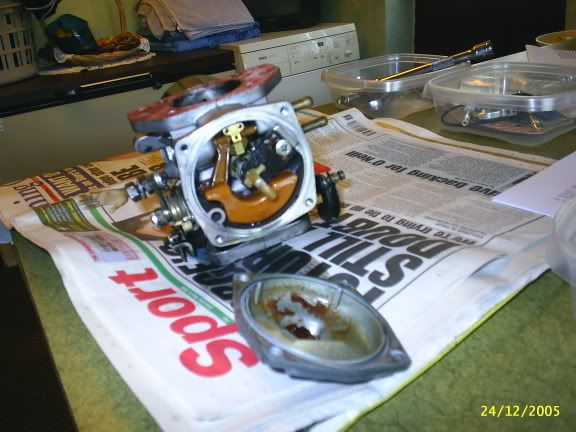
Just finished rebuilding my carb, thought i'd share the pictures
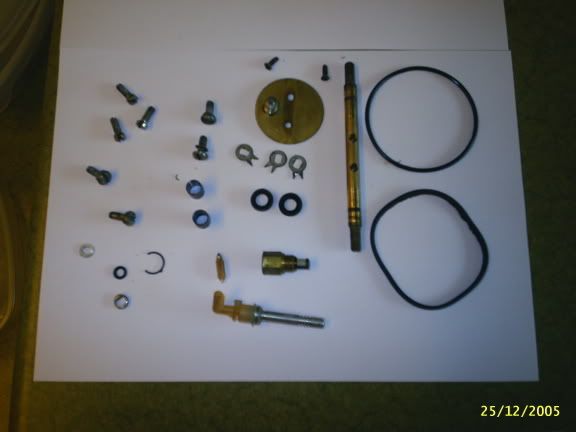
The bits in the kit

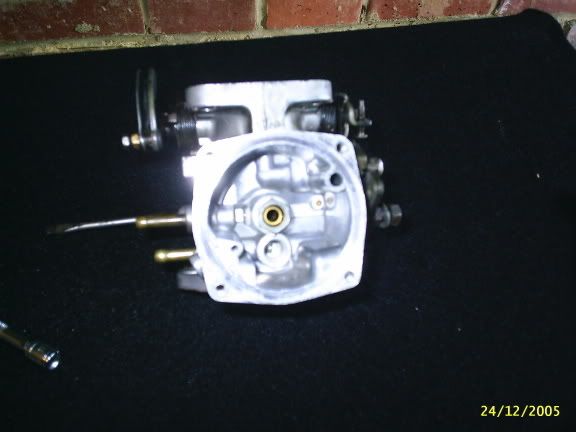
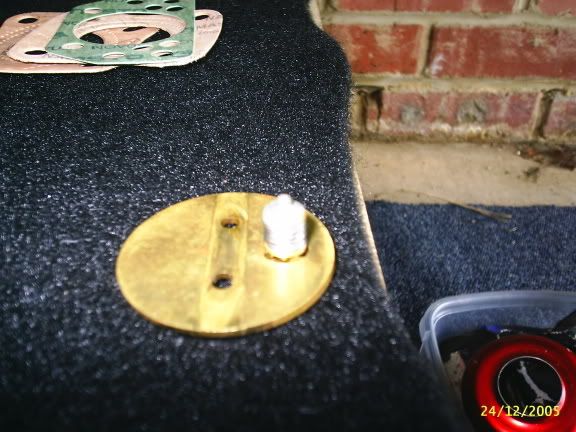
Inside the float chamber
Float chamber stripped
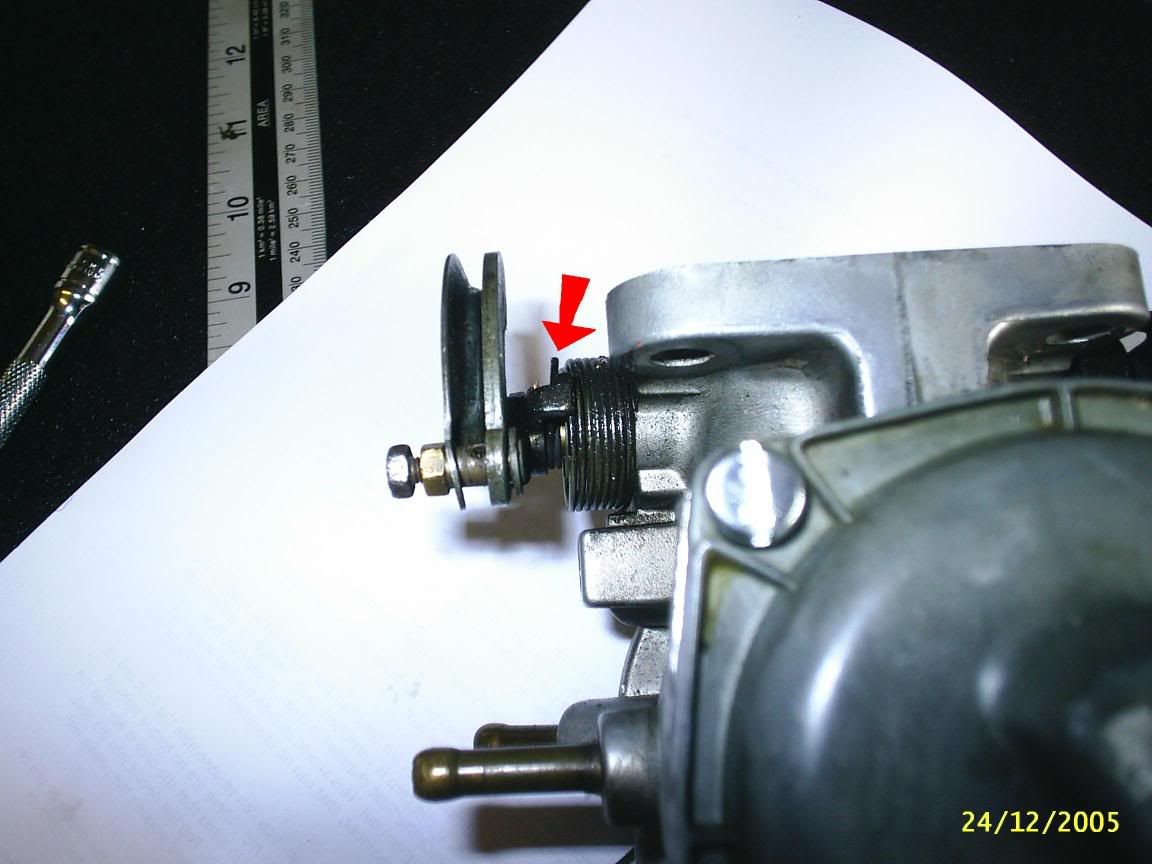
Throttle lever and springs
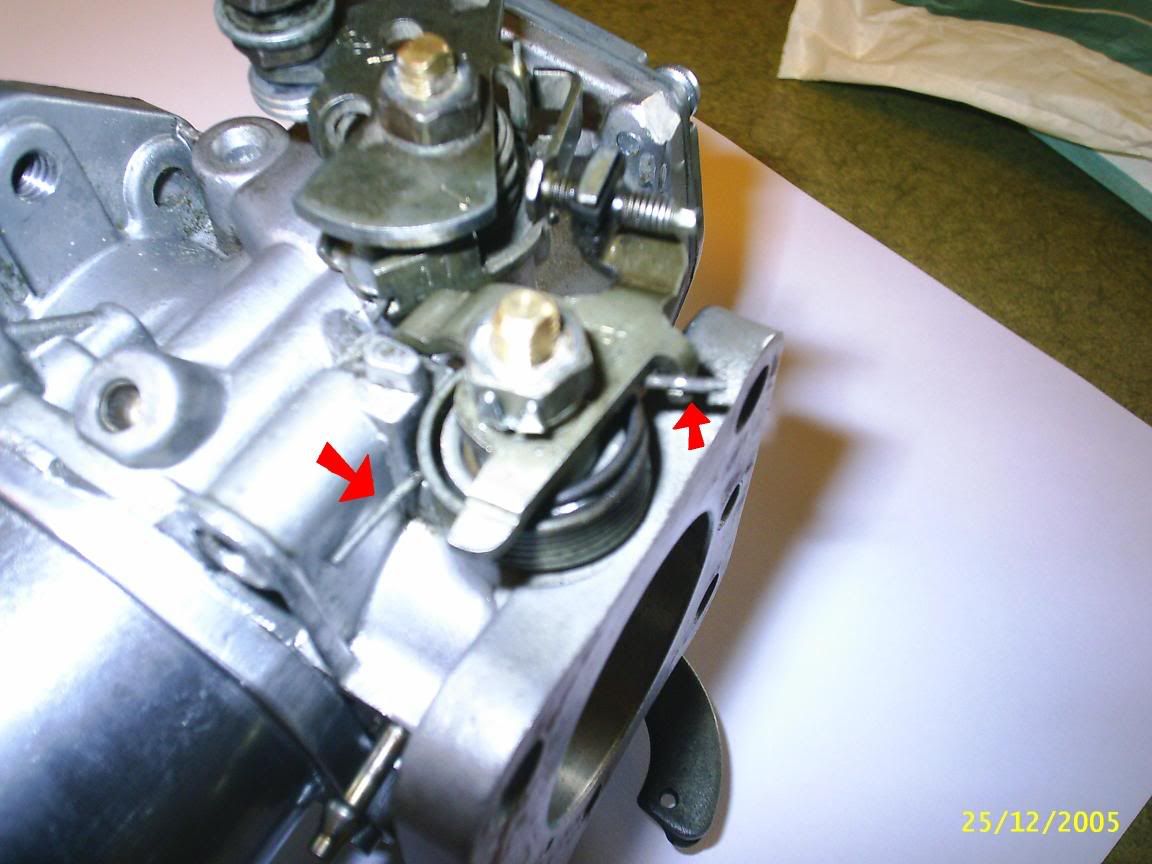
idle lever and springs
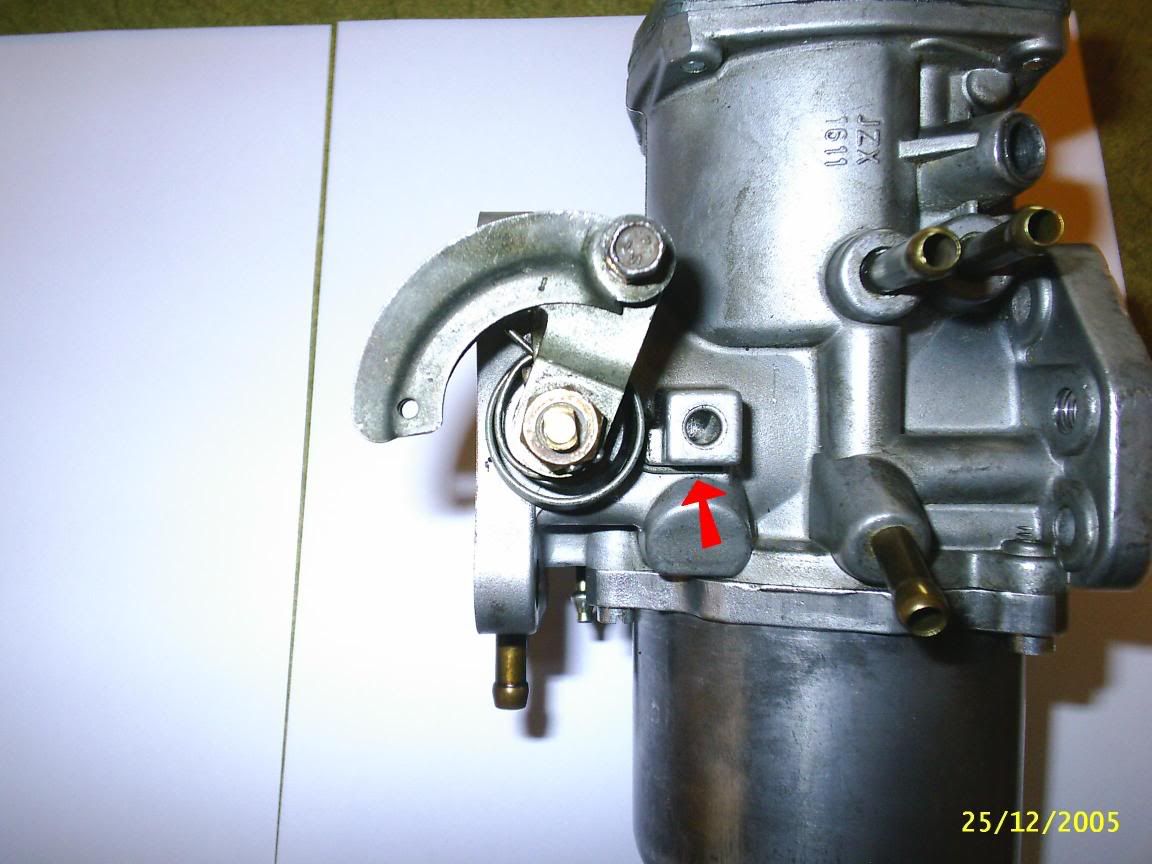
Choke lever

the parts i binned
the throttle disc that was fitted to the carb, should i have put this back on, or used the new one in the kit? i used the new one
<Edited to show Pics TF>
Edited by Tom Fenton on 17th May, 2006.
|
diddy
108 Posts
Member #: 505
Advanced Member
Stockton-on-Tees
|
|
there were several bits in the kit which i didn't use, i guess its for several models of carburetter.
But there was only two spindle seals that were the right size, should there have been three? two for throttle and one for choke?
Anyways, does anyone happen to have a spare lying around, i re-used the old one for the choke but would like to replace it.
Dave
|
Tom Fenton
Site Admin
15300 Posts
Member #: 337
Fearless Tom Fenton, Avon Park 2007 & 2008 class D winner & TM legend.
Rotherham South Yorkshire
|
|
You did right to use the new type throttle disc. The old one had the poppet valve on to allow the turbo to vent pressure when you shut the throttle. However it causes a MASSIVE obstruction to the airflow through the carb at full throttle opening.
The only addition that is necessary is to have a dump valve fitted when changing to a blank throttle disc, as now the pressure has nowhere to go when you close the throttle, and this can lead to turbine stall, when the airflow suddenly stops and so the turbine stops all of a sudden, this is not good for your turbo and repeated occurances can lead to snapped turbo shafts.
On 29th Nov, 2016 madmk1 said:
On 28th Nov, 2016 Rob Gavin said:
I refuse to pay for anything else
Like fuel 😂😂
|
snowfruit

321 Posts
Member #: 557
Senior Member
Ireland
|
|
Great guide Tom, can't believe I've only just spotted it :p
I'll be starting on mine soon (finally)
http://mini.twisted-design.net/blog/
|
G Wood
2 Posts
Member #: 1279
Junior Member
|
|
A really top guide easy understood and easy to follow. How do i order a kit ?
|
joeybaby83

6274 Posts
Member #: 509
Post Whore
Isle of Man
|
|
On 17th of May, 2006 at 05:11pm diddy said:
there were several bits in the kit which i didn't use, i guess its for several models of carburetter.
But there was only two spindle seals that were the right size, should there have been three? two for throttle and one for choke?
Anyways, does anyone happen to have a spare lying around, i re-used the old one for the choke but would like to replace it.
Dave
I thought my kit was missing this, but tbh, it only gets used once per trip, if that, whereas the throttle spindle seals get a work out every time you touch the peddle.
The springs were the most fiddly bit imo, still got a dent in my finger!
"Turbo's make torque, and torque makes fun"
"did you know you can toast potato waffles?"
|
joeybaby83
6274 Posts
Member #: 509
Post Whore
Isle of Man
|
|
Did another one of these last night and made a few mental notes.
In toms guide above (part 23), I used an old 9.5 mm drill bit to press the old throttle spindle bushes out, is just about spot on in diameter.
To press the new bushes back in, take the new throttle spindle (given a quick clean and a drop of oil) and wind a nut fully on one end.
Slide the new spindle bush up to the nut from the the other side and insert the whole assembly into the throttle spindle bore, whack it in a vice, and press it home.
Repeat for the other side...
Another thing id do is wait till the throttle spindle is fully assembled, nuts tightened etc, before 'nipping' the butterfly screws. I noticed the was a hairline of light coming through around the edge of mine the first time i did it, so had to loosen them off and re-align it.
Another slight issue with the rebuild kits from burlen is that the thread does not go quite deep enough on the 'flats' (at either end of the throttle spindle), as in when the spindle assembly was fully assembled, and the nuts on each side would bottom the thread before clamping the throttle cable levers.
I got round this by using 2 small washed to pack out the throttle lever on either side (you could use the discarded locking washers with the 'ears' sniped off).
Again, arent those springs fiddly bastards!
Edited by joeybaby83 on 20th Mar, 2007.
"Turbo's make torque, and torque makes fun"
"did you know you can toast potato waffles?"
|
Markie_D

862 Posts
Member #: 1660
Formally Mini_Uk
London
|
|
I just got my carb kit from avonbar today.
I noticed in diddy's picture of his kit, there's a jet thing, i dont have this in my kit :( should i of had one ?. do i need 1 ? thanks a bunch for ya help
Pic of my kit..
http://allyoucanupload.webshots.com/v/2003753646595086402
Shit Happen's
|
Jason G

4360 Posts
Member #: 1459
En-suite user
Braintree, Essex
|
|
I know this is an old post, but so damn handy!
Noticed as well as couple of people, that there should be 3 large seals (2 throttle spindle + 1 choke). I've only got 2 in the service pack from Burlen.
Took carb apart, found wear on the throttle spindle. So that & the fuel pissing out the choke I need all 3 seals. I think it wise to buy the complete rebuild kit next time!
By the way, Burlen are extremely helpful and will talk through any problems 
edit: damn spring got my finger! need a plaster!
Edited by Jason G on 26th May, 2007.
On 19th Jan, 2010 wil_h said:
I would start the furthest place from the finish.
On 24th Mar, 2012 apbellamy said:
I feel all special knowing that I've given your mum my wood.
Been neglecting Turbo'd 'A' series..............
|
richminiturbo.

2370 Posts
Member #: 719
Post Whore
Horndean - Near Portsmouth
|
|
Guys,
Can someone tell me if this is the right spring for the choke side throttle spindle please?
If so, how do I fit it correctly?
I've tried getting it in the positions mentioned above but cant seem to get it so have succumbed to asking you lot!!
Do i have to spin the top end of the spring all the way round clockwise to sit on the bracket linkage that goes on top?
|
|
Home > How To > Rebuilding your Carb
|
|
Users viewing this thread:
none. (+ 1 Guests)
|
Next ->
|
|
