|
Home > Show Us Yours! > Craigie-B 1310cc t2 mini turbo project :) (updated 17/11/2012) Now MOT'd
|
Craigie-B

1492 Posts
Member #: 9468
Post Whore
Wootton Bassett
|
|
So I figure as i'm now dedicated to the turbo game I would start a project thread on here - here is whats been happening up to now :)
Bought my first mini back in march, previously to that I had a 1996 Mk1 Clio with a renault 19 F7P in it (1.8 16v).
I sold my clio on the saturday, and was pretty down about watching it drive off, so my girlfriend suggested that we go and look at the mini that day (saturday) instead of waiting for the next day (sunday). So quick drive to the bank to take the cash out, and off we went - only it was a 7 hour round trip 
Finally got to Derby and bought it :), got it home, showed my grandparents, my parents, my girlfriends parents and then promptly went to pick up girlfriends brother from a house party he was at 
Got home about 11:30pm and we left to start our Journey at 3pm. Went to bed and was out like a light - woke up 8 hours later and started work on the mini :)
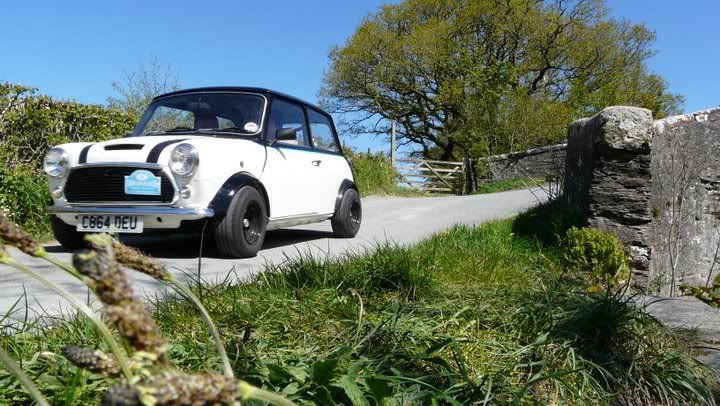
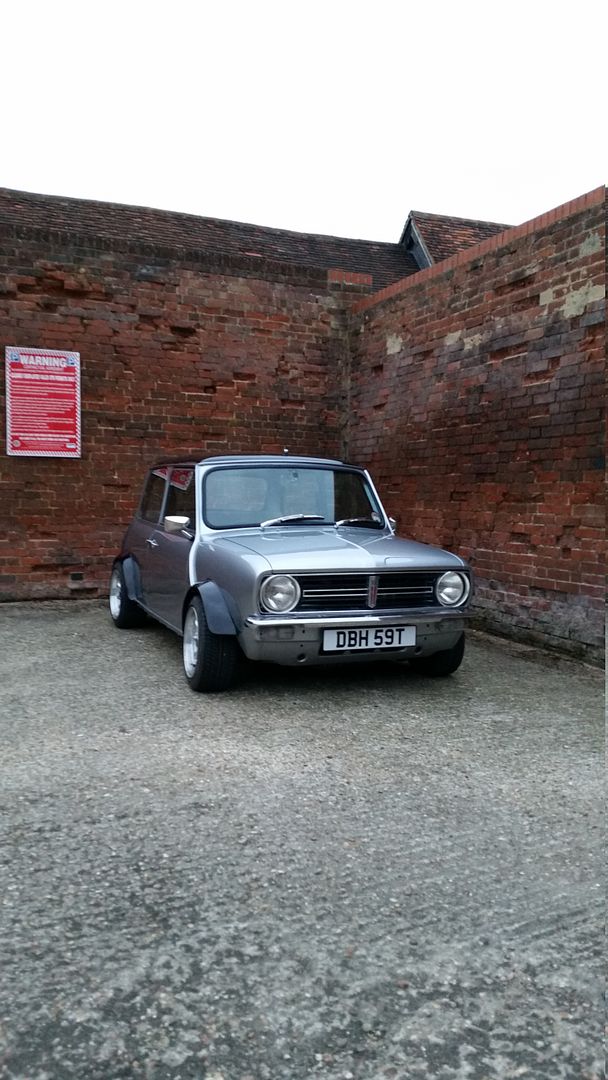
This is how she looked the day I got her:


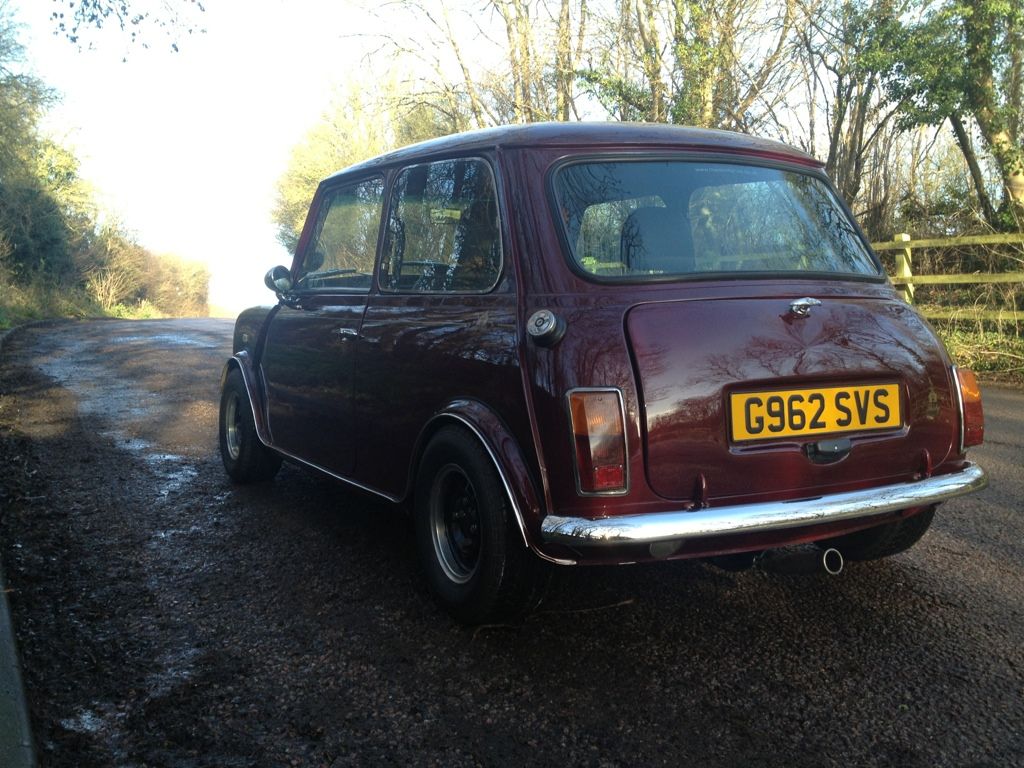
When I bought the car it had a dent in the door, as you can see from the piccies from the advert:


As well as the door there was a small dent in the passenger wing as well:

As we were motivated we jacked the car up and got the block of wood behind it and pushed it out:


Awsome!
Took my car back to uni with me:

Then came home yesturday, took my sister to asda and parked next to this:

Im having fun - can you tell?
I kinda like little things that are for comical value but dont make the car stupid - puts my own touches on it you know, that said went on ebay and bought an 8 ball gear knob
Old gearknob:

New one

When I bought the car the CD Player kept cutting out every now and then at first I thought it was the CD Player that was bust so I plugged my alpine head unit in and no joy - wouldn't even turn on. So I took the permanent live from the sat nav charger I wired in a couple of weeks ago and as soon as I added that the CD Player kicked into life straight away - so I guessed I needed a permanent live for it.
Went and got the live wire I used for my sub that I used in the clio, so I attached it to the battery (obviously) then put it into the main car, luckily for me I don't have rear seatbelts which means that I can use the mounting points that are for seatbelts to put the cable through looking like this:

I had to leave the chunky fuse on the wire because the cable is in two pieces and having £5 to your name means you can't afford to buy new cable or get joining pieces so I simply used that to join the wire again :)
I finally got the cable routed all the way through the car and had stripped down alot of the existing connections and re-joined them the car was looking like this atm:


Was looking a bit daunting to me because I never did anything with wire and cables before now
About an hour or so later I mangaged to finish all the connections (including re-wiring the speakers back as well) and the result was looking like this:

CD Player came on when I started the car and when I was on ignition so was looking hopefull, went for a drive and it was still cutting out Meaning the last 3 hours of joining, breaking and re-making connections was for nothing :(
Got back from the quick drive and was pretty motivated I had already narrowed it down to the ignition live or the earth so I got under the dash and traced the earth first as that was the easiest one, got all the way under the dash to find that it was VERY loosley connected to a bit of thread and held on by a 12mm nut that wasn't tight - tightend it up and moved the ignition live wire from the front of the dash to the back to end up like this:

Went for another drive and it didn't cut out once. WINNER - I was so happy I took another picture so you can see it stayed on:

Happy Days
I was advised by the guys on Minifinity to get some rubber grommets for my speaker cables in case they chaffed and set me on fire, well I didn't really fancy a black paintjob inside the car so I went out and bought some, a couple of quid and 10 minutes later this was the result:


The live wire now runs into the pocket and then out the pocket and under rear bench behind my speakers so isn't visible at all. I also moved the fuse right next to the battery and wrapped it in masking tape as it was sparking a bit occasionally, Job Sorted!
The grill fell apart on me because the rivets have rotted away and as a joke I put some teeth on it to fill the gap temporarily:


I got a bit fed up of this and my granddad bought loads of rivets for his green house so i robbed them off him and got some hammerite:


And back on the car:


Looks fantastic in my opinion!
Unfortunately my MOT ran out (20th April) but over the past week or so days me and my dad have been working solid on the car. We started looking at the steering rack as there was play in the steering and my dad said it wouldn't pass the mot like that so we started to have a look and as we went things started falling apart and became obvious I needed to replace different parts.
Day 1:
An hour in and the car was up on the stands, bonnet open and steering wheel removed:


Took us a while to get the subframe lowered enough at the back, by the end of day 1 we had loosend or removed:
Engine steady
Carb
AirBox
Master Cylinder
Subframe
Steering Rack
Steering Column
Tie Rod Ends
Brake Discs
Brake Pads
Brake Calipers
Drive Flange
Shocks
Had found out we needed to replace the following:
Steering Rack
Top Ball joint Passenger Side
Top subframe bolt rubber (right hand side)
Pinch Bolt for column
Brake Discs
Brake Pads
I figured since the brakes were out I may as well upgrade to metro Turbo setup, got the vented type on order so that's happy days :)
By the end of Day 1 Bernie looked like this:


I think she looks really sorry for herself in the end picture :(
Day 2 :
So as 3/4 of the parts we needed arrived at about 11am this morning we set about
refitting the lot of it.
New steering rack (only cost £39!!)


Was so nice and shiny I wanted to take pictures :)
I didn't take any pictures as we went along as we have been pretty busy here. Today we managed to get the following refitted to the car:
Front Subframe
Engine Steady
Master Cylinder
New and Shiny Steering Rack
Tie Rod Ends
New ball joint installed
Shocks
Carb
Found a local mini specialist today who managed to get me the rubber for underneath the sub frame bolt (you know that huge chunky one).
So by the end of Day 2 the car was pretty much put back together with the following parts replaced:
Steering Rack
Top Ball joint (passenger side)
Subframe Rubber Mount
I'm waiting on the brake setup to turn up next week.
We currently have the following left to do:
Install new brakes
Weld passenger side door step
Inner wheel arches may need welding
Check the rear of the car
So this is how Bernie looked when we packed up and left her today:


Kind of felt like she was smiling at me again :) My dad said it should feel like a new car with the amount we will have replaced haha
Day 3:
So its been almost a week since me and my dad did anything to the mini, and christ what a day
I bought myself a metro turbo setup for the car since i needed to replace the discs and pads.
Finally got a knock on the door at about 9:30 today, with a nice gentlemen giving me this:

Woohoo finally here, so my dad was sleeping off nights and whilst he was doing that I set about mounting the brakes.
I got the car to this stage:


By this time my dad had come outside to lend a hand and proceeded to tell me I had mounted the calipers upside down Lmao so we just swapped them over - great.
before messing around with brake lines we thought it would be good idea to get the steering column back in and mounted:

Woo I have a steering wheel again :) and whats really good is it no longer lifts up so im really happy and confident my steering will be good - and not loose as a fart like before.
So we set about attaching the brake lines and OMFG what a fucking nightmare
The passenger side went on okay, leaked a bit of brake fluid but not a huge amount - not really an issue. Got to the drivers side and jesus christ, 4 hours later and we still hadn't got the brake line connected to the banjo connection. The bolt that went through it into the hose fitted great the problem we had was trying to get it all connected together with the copper washer, as there is fuck all room to move your hands in it took us forever to get it sorted.
When we finally got it bolted on tight we set about bleeding the brakes - only it pissed out all over the banjo because the bolt was way too long, so we removed it and nabbed another copper washer off my neighbour and then took another 15 minutes to get it back together (good timing compared to before), however the banjo was still wobbly so was still going to piss out everywhere.
We got fucked of with it and went to local motorsave to buy a T piece to use instead, got back and connected it to the main hoses and then went to connect to the goodridge hose , took us half an hour of trying to get it connected then in the end we took off the good ridge hose and gave it a go in the open air - and it was a completely different thread type ( FFS ) One was UNF and the other was Metric.
So we got angry again because at this point we'd been trying to attach this part of the system for 3 and a half hours. We went back to the original Banjo and Bolt system, only what we decided to do was see how much extra the bolt needed to go down the goodridge hose - we put the two washers on and there was another washers width so we got an ordinary steel washer, drilled out the middle because it was just too small, then put it between the two copper washers - tried it on for size again and it fit snug - WINNER
Now all we had to do was attach it like this on the car, It was hard enough with one washer let alone three!!
We just went for it, attached the three washers and after about 3 attempts we managed to get it on, tightened it up and it all seemed a little bit too easy. 
Poured the rest of our brake fluid into the reservoir, and then set about bleeding them. As we had lost so much brake fluid and wasted so much of it trying to keep the system topped up.
So heres what we got done today:
Brakes bolted to hubs
Discs and drive flanges attached
Brake pads in
Steering Column attached
Steering Wheel attached
Brake lines attached :rock:
Oh and I got round to attaching the air box too
Heres how shes looking right now:


We had the following left:
Finish bleeding brakes
Start welding
Finish welding
Underseal
Start praying theres nothing else
Check the back end for anything
Throw it in for MOT
Dance when it finally passes
Day 4:
Me and my dad were getting tired now =[ and I had forgotten what it feels like to drive the mini :(
So today was a lot more productive than yesterday, but it still feels like we have a long road ahead of us.
We got outside at 9am to crack on with the mini, first thing was to tighten up the calipers and put on the front drive shaft nuts. These went on like a dream, put in some new split pins to keep things fresh and then moved on to the rear end.
Jacked it up and did the old wheel shake to test the bearings - Oh dear, you guessed it both were knocked which told us they too were shagged, took off both the hubs to have a gander.
Here is my dad enjoying working on my car... NAHT

Went to undo the hub nut and it wasn't even done up finger tight?

It looked pretty new so we were optimistic, got out dads torque wrench and tightened it up, popped the hub back on, adjusted the brake and then had to wait till we put the wheel back on to test the bearing again.
Dragged tools over to other side and started again, things seemed to be looking up so we were feeling pretty optimistic - had "American Anthems" blasting so we were feeling pretty good at this point.
Keeping him busy:

Got into the hub and this was the split pin holding it on:

I mean WTF is that!? We replaced it with the one on the right, tightened that basterd up and woohoo looked great! re-built the hubs up and was ready for brake bleeding!
Yes we still hadn't finished the brakes yet :( - started loosening the bleed nipple on the passenger side and SNAP , clean in half ffs - here we go again we thought. Dad tried drilling the old nipple out so we could put a new on in but the drill bit snapped in what was left of the bleed nipple:

This left the passenger hub looking like this:

Loosened off the bleed nipple on the drivers side and then dad had to shot off for physiotherapy in his hands, so I nabbed my girlfriends clio and went to local mini specialist to pick up a new slave cylinder (£8.50 Bargain!!!) and some shiny wheel nuts!! Pictures I took while we stopped:

Big Brakes - Looked real chunky so I wanted more piccies:


Dad came back 5 minutes after I did so we got on with it again, got it put back together, bled the brakes through and then re-bled the fronts just to check and then the brakes were FINALLY FINISHED.
Time to start the welding! Did I mention we found some rust?
Drivers Side Footwell:


Major hole there!!
Passenger Side door step:

Drivers door step need welding as well but was too busy to get a picture there.
I had to go pick the girlfriend up from work at this point, so I left my dad to finish bashing out the old rust (was 4:45pm at this point) so I stayed over her house feeling pretty depressed as I really needed the car for 11:30am tomorrow so I bought some beers and steadily got mery
Got home later on and took some end of the day pictures:


(yes this is at 9pm looks morning to me)


So whats left:
Start welding
Finish welding
Underseal
Start praying theres nothing else :/
Throw it in for MOT
Dance when it finally passes
Day 5:
So I haven't got much to write today guys.
Got up at 7ish to take the gf to work today because I was borrowing her car to go back to Coventry for a business meeting
My dad started the welding at 9am this morning, was cutting plates and making shapes to weld into the holes of the car.
When I left him he was about to start the welding, I left at 10:50am, the car looked exactly as it does in the last pictures above
I got back at 4:50pm and the car looked like this:


Bernie the MOT nightmare:

Finished at last!
So booked the MOT and tracking for the end of that week and SHE PASSED first time

SO I was excited that bernie passed the mot and went straight over to the local specialist to get a new set of arches as the ones on the mini were tatty and held on with tie raps.
Before:


During:
So I got all the rivets out and then unfortunatly the front arches had ALOT of bubble, so attached the wirebrush to the drill and set about getting out the rot:


Slapped a bit of hammerite smooth silver on:


So while I waited for that to dry I got the rear arches on, put some waxoil on the metal then put the arch over the top:


The next day the hammerite was dry, so I cracked on and put some wax oil on top, put on the drivers side and passenger arches - Great, and then I put on the rubber strips for the sill I bought extra as well. Made sure I cut the strips a bit longer than required so if the sun shrank them it wouldnt be an issue - put some tension on and woohoo here is the result:


Unfortunatly where the car has wider wheels, the front wings have been cut to allow for this, I didnt realise that when I put the screws in the front arches and when I went for a drive I snapped the front drivers arch off :( so my dads fibreglassing it back together for me :)
At this point I bought a 1293cc Metro turbo engine off of ebay :)
My dad has had some mini spotlights in the garage for years - im a sucker for minis with 4 front lights so I had to put them on bernie


I found this wiring diagram on google:

and am currently half way through wiring them all in
I've been shopping for parts for my turbo conversion and currently have this little lot:
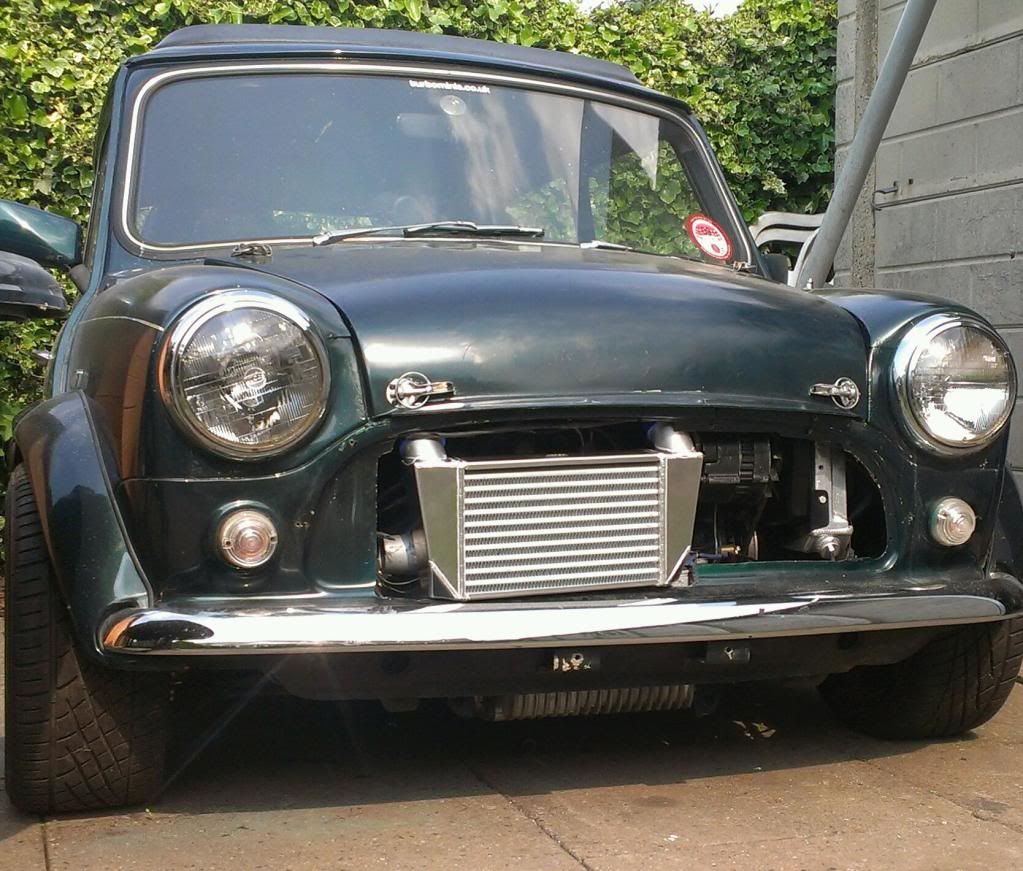
1293cc Metro Turbo engine with turbo head, plenum and dump valve:

Mk1 Metro Turbo ignition system:

Volvo 480 t2 Turbo:


Thanks for reading chaps hopefully will have more progress in the future
Edited by Craigie-B on 17th Nov, 2012.
On 10th Mar, 2012 theoneeyedlizard said:
Hypothetically speaking, where would you stick your nozzle?
On 22nd Jun, 2012 apbellamy said:
my wife doesn't know what.head is never mind compression ratio.
|
tadge44
3006 Posts
Member #: 2500
Post Whore
Buckinghamshire
|
|
And I thought gnu,s were extinct !
|
madmk1

5417 Posts
Member #: 6181
Double hard bastard
brookwood woking
|
|
Hi mate,
That is one mad turbo.
[quote=Craigie-B,6th Jun, 2011]The live wire now runs into the pocket and then out the pocket and under rear bench behind my speakers so isn't visible at all. I also moved the fuse right next to the battery and wrapped it in masking tape as it was sparking a bit occasionally, Job Sorted![quote]
Are you sure its sorted 
Edited by madmk1 on 6th Jun, 2011.
I have started posting on Instagram also my name on there is turbomk1golf
Nothing is impossible it just costs more and takes longer.
On 1st Nov, 2007 Ben H said:
There is no such thing as 'insignificant weight saving', it all adds up.
|
hazpalmer
1648 Posts
Member #: 9038
Post Whore
Carlisle, Cumbria
|
|
welcome, and i agree with madmk1
|
Utking
162 Posts
Member #: 9342
Advanced Member
Southern Norway.
|
|
Nice thread mate, and welcome :) btw can you use that turbo? seems a bit big with the exhaust manifold but nice car!
|
james962
74 Posts
Member #: 3663
Advanced Member
Banbury
|
|
Nice project you've got. You don't happen to go to Coventry Uni do you?
|
bennyy
2233 Posts
Member #: 9037
Post Whore
Doncaster, yorkshire
|
|
not a bad start there, ps. fancy swapping dads?
Audi s4 b5 - 470bhp & 486ft lbs
On 15th Mar, 2012 wil_h said:
Yes, Carl says he gets requests for rimming all the time
On 30th Apr, 2012 Brett said:
yeah stick the bit in and give it a wobble 
|
mini_mad69
257 Posts
Member #: 7048
Senior Member
Bridgend
|
|
Fuse sparking from the main battery cable? i'm assuming it's for an amplifier here.
Tape is not the answer, I'd say get a proper fuse on it, within a couple of inches from the terminal. Spend some decent money on it, you wouldn't want it to go up would you?
Turbo parts collector at the moment, almost ready.
|
Craigie-B
1492 Posts
Member #: 9468
Post Whore
Wootton Bassett
|
|
On 6th Jun, 2011 james962 said:
Nice project you've got. You don't happen to go to Coventry Uni do you?
Yes mate I do, have you seen my car at singer hall????
With regards to the sparking - its the wire that goes into the fues its got too much of the plastic taken off - Ill chop it off and do it again when I take the fuel tank out to put the spi tank in. :)
Edited by Craigie-B on 4th Apr, 2012.
On 10th Mar, 2012 theoneeyedlizard said:
Hypothetically speaking, where would you stick your nozzle?
On 22nd Jun, 2012 apbellamy said:
my wife doesn't know what.head is never mind compression ratio.
|
Rob Gavin

6729 Posts
Member #: 618
Post Whore
Glasgow
|
|
looks like you've been busy!
I'd go straight to the point everyone else seems to have picked up on - if you've got sparking cables, get them sorted asap. The risk list is endless
|
Craigie-B
1492 Posts
Member #: 9468
Post Whore
Wootton Bassett
|
|
Hey guys!
So I bought a new turbo engine as i worked out everything that would have to be bought for the old one would be about £2k and tbh I wasn't sure of everything sooooo I sold that engine and bought this one as it was complete:

Luckily I got the same price for my old one as this one so essentially this one only cost me the same £130 as I paid for the last - Happy days
Took the cylinder head off when it arrived to find scorched bores =/ so a rebore is needed. Found this one has already been bored out to 1293cc which is a basterd because if I hadnt sold the other engine the night before then I could of swapped the bottom ends and I'd be boostin happy!
So I started to strip it all down today and get it rebuilt.
Bear in mind I have never done anything like this before and am a complete newbie to engine building etc.
Started like this:
Got to work straight awa took off the manifolds from the head:

Didn't want to leave them on the head for two reasons - I want to get an unleaded conversion on it.
so got all the nuts off apart from the very last one and guess what - It fooking rounded, basterd! Shouted to the old boy (my dad) to help me out - sharpened his chisel and basically cut the nut off:

By this time the engine was looking like this:

w00t!
Spent another couple of hours loosening and learning shizzle - took the altenator off and found it was the original from when the engiene was made (1989!!!) iPhone is shit so you cant read it but here it is:

Removed all of the ancileries and then went to start on the clutch to find i needed a special rover tool to release it:


Bugger so went down to a local garage/workshop with my neighbour and borrowed something similar to what I need. Unfortunatley he gave us bolts that were the wrong type of thread! Unfortunatly managed to strip the thread off them before - left my dad using his dies to repair said tool and started tidying up (it was 5pm at this point)
Got some more threads that were correct for the clutch and then used them alongside the tool and went about removing the clutch - tightend up the center bolt as much as we could and the clutch hadnt moved a mm sooo out came the blow torch left it on there for 5 minutes and this loud bang appeared - gave it some more levvy of off it popped - yeahh!!!

Said flywheel:

The clutch plate looks very low and theres some markings on the springs - will deffinatly be getting a new one:


Heres the engine after today:


Gotta wait for dad to finish work on saturday because he has his precious goldwing in the garage and is paranoid im going to damage it - so to keep the peace im going to have to wait till Saturday before I can carry on.
Cheers for reading! :)
Edited by Craigie-B on 4th Apr, 2012.
On 10th Mar, 2012 theoneeyedlizard said:
Hypothetically speaking, where would you stick your nozzle?
On 22nd Jun, 2012 apbellamy said:
my wife doesn't know what.head is never mind compression ratio.
|
Rob H
4314 Posts
Member #: 700
Formerly British Open Classic
The West Country
|
|
On 6th Jun, 2011 Craigie-B said:
my sister
Isambard Kingdom Brunel said:
Nothing is impossible if you are an Engineer
|
madmk1
5417 Posts
Member #: 6181
Double hard bastard
brookwood woking
|
|
On 19th Jul, 2011 Rob H said:
On 6th Jun, 2011 Craigie-B said:
my sister
Nice find Rob.
I have started posting on Instagram also my name on there is turbomk1golf
Nothing is impossible it just costs more and takes longer.
On 1st Nov, 2007 Ben H said:
There is no such thing as 'insignificant weight saving', it all adds up.
|
Craigie-B
1492 Posts
Member #: 9468
Post Whore
Wootton Bassett
|
|
Lollll there will be no pictures
On 10th Mar, 2012 theoneeyedlizard said:
Hypothetically speaking, where would you stick your nozzle?
On 22nd Jun, 2012 apbellamy said:
my wife doesn't know what.head is never mind compression ratio.
|
Tom Fenton
Site Admin

15302 Posts
Member #: 337
Fearless Tom Fenton, Avon Park 2007 & 2008 class D winner & TM legend.
Rotherham South Yorkshire
|
|
I can feel a ban coming on.
On 29th Nov, 2016 madmk1 said:
On 28th Nov, 2016 Rob Gavin said:
I refuse to pay for anything else
Like fuel 😂😂
|
JT
2742 Posts
Member #: 637
Post Whore
Hertfordshire
|
|
On 19th Jul, 2011 Craigie-B said:
Lollll there will be no pictures
i think you need to read the tm rules carfully mate 
My build thread..
http://www.turbominis.co.uk/forums/index.php?p=vt&tid=542985
|
Craigie-B
1492 Posts
Member #: 9468
Post Whore
Wootton Bassett
|
|
ahaha!!
On 10th Mar, 2012 theoneeyedlizard said:
Hypothetically speaking, where would you stick your nozzle?
On 22nd Jun, 2012 apbellamy said:
my wife doesn't know what.head is never mind compression ratio.
|
haimesyboi

392 Posts
Member #: 5702
Senior Member
Cornwall
|
|
Sorry to repeat what others have already said but sort that cable before you change the fuel tanks, we all know what happens when fuel vapour and sparks meet!
Nice work on the mot stuff your going to end up with a really good car in the end.
|
Craigie-B
1492 Posts
Member #: 9468
Post Whore
Wootton Bassett
|
|
Thanks buddy :) - the cable just needs shortening a tad will probably get round to it today when im fixing the annoying rattles :)
On 10th Mar, 2012 theoneeyedlizard said:
Hypothetically speaking, where would you stick your nozzle?
On 22nd Jun, 2012 apbellamy said:
my wife doesn't know what.head is never mind compression ratio.
|
Tom Fenton
Site Admin
15302 Posts
Member #: 337
Fearless Tom Fenton, Avon Park 2007 & 2008 class D winner & TM legend.
Rotherham South Yorkshire
|
|
On 19th Jul, 2011 Tom Fenton said:
I can feel a ban coming on.
Cough.
On 29th Nov, 2016 madmk1 said:
On 28th Nov, 2016 Rob Gavin said:
I refuse to pay for anything else
Like fuel 😂😂
|
John
10023 Posts
Member #: 1456
Mongo
Barnsley, South Flatcapshire
|
|
On 20th Jul, 2011 Tom Fenton said:
On 19th Jul, 2011 Tom Fenton said:
I can feel a ban coming on.
Cough.

If something is worth doing, it's worth doing half of.
|
Craigie-B
1492 Posts
Member #: 9468
Post Whore
Wootton Bassett
|
|
Okay so dad went to work on the motorbike therefore space to continue engine stipping.
Start of Day 2:

So started undoing some of the flywheel housing bolts and then I relised I hadnt yet drained the oil, so managed to maneuver the engine ontop of some wooden blocks so it'd be higher than the drip tray and undid the sump plug and started draining the oil :)


About 45 mins later it was all drained and I could then crack on with the flywheel housing :)

Had left the timing chain on after removing the flywheel so had to think about how to get it off for a sec.

Behind the water pump is a bit grotty :(

So managed to get the timing chain off by jamming the crankshaft against the floor with a tyre iron :)


Few hours later had removed all of the bolts holding the block to the gearbox and removed the cylinder head.

One almost naked cylinder head on the floor

Ready to be seperated from the gearbox.

After a bit of a fiddle managed to sepearte the two and get it on the table on my own :)

Gearbox on its lonesome

Bottom of the engine

Camshaft and oil pump removed

Where the oil pump once sat

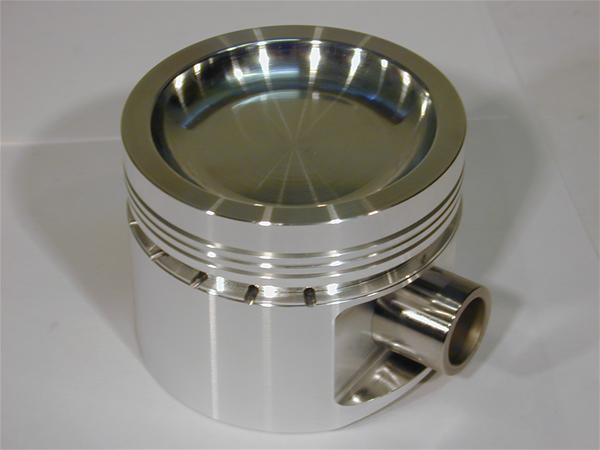
Pistons outside

Crankshaft Removed!

Naked engine block - ready for rebore tomorrow

End of day 2 :)

cheers again guys :)
Edited by Craigie-B on 4th Apr, 2012.
On 10th Mar, 2012 theoneeyedlizard said:
Hypothetically speaking, where would you stick your nozzle?
On 22nd Jun, 2012 apbellamy said:
my wife doesn't know what.head is never mind compression ratio.
|
james962
74 Posts
Member #: 3663
Advanced Member
Banbury
|
|
On 7th Jun, 2011 Craigie-B said:
On 6th Jun, 2011 james962 said:
Nice project you've got. You don't happen to go to Coventry Uni do you?
Yes mate I do, have you seen my car at singer hall????
I thought I recognised the picture being at Singer :$ I was a student there from '07-'10
Keep up the work. Lots of pictures is always a good thing :)
|
george91
1083 Posts
Member #: 8932
Post Whore
|
|
Looking good so far. My computer has just crapped itself from all the pictures though!
|
robert

6754 Posts
Member #: 828
Post Whore
uranus
|
|
blimey !!! is that 4 turbo pistons with all thier ring lands still there ??
previous owner not from tm then!
Medusa + injection = too much torque for the dyno ..https://youtu.be/qg5o0_tJxYM
|
|
Home > Show Us Yours! > Craigie-B 1310cc t2 mini turbo project :) (updated 17/11/2012) Now MOT'd
|
|
Users viewing this thread:
none. (+ 1 Guests)
|
Next ->
|
|
