
| Page: |
| Home > Show Us Yours! > 998 Turbo Build - Slow Progress | |||||||
|
8604 Posts Member #: 573 Formerly Axel Podland |
13th Feb, 2014 at 11:24:18am
On 10th Feb, 2014 Mike-998 said:
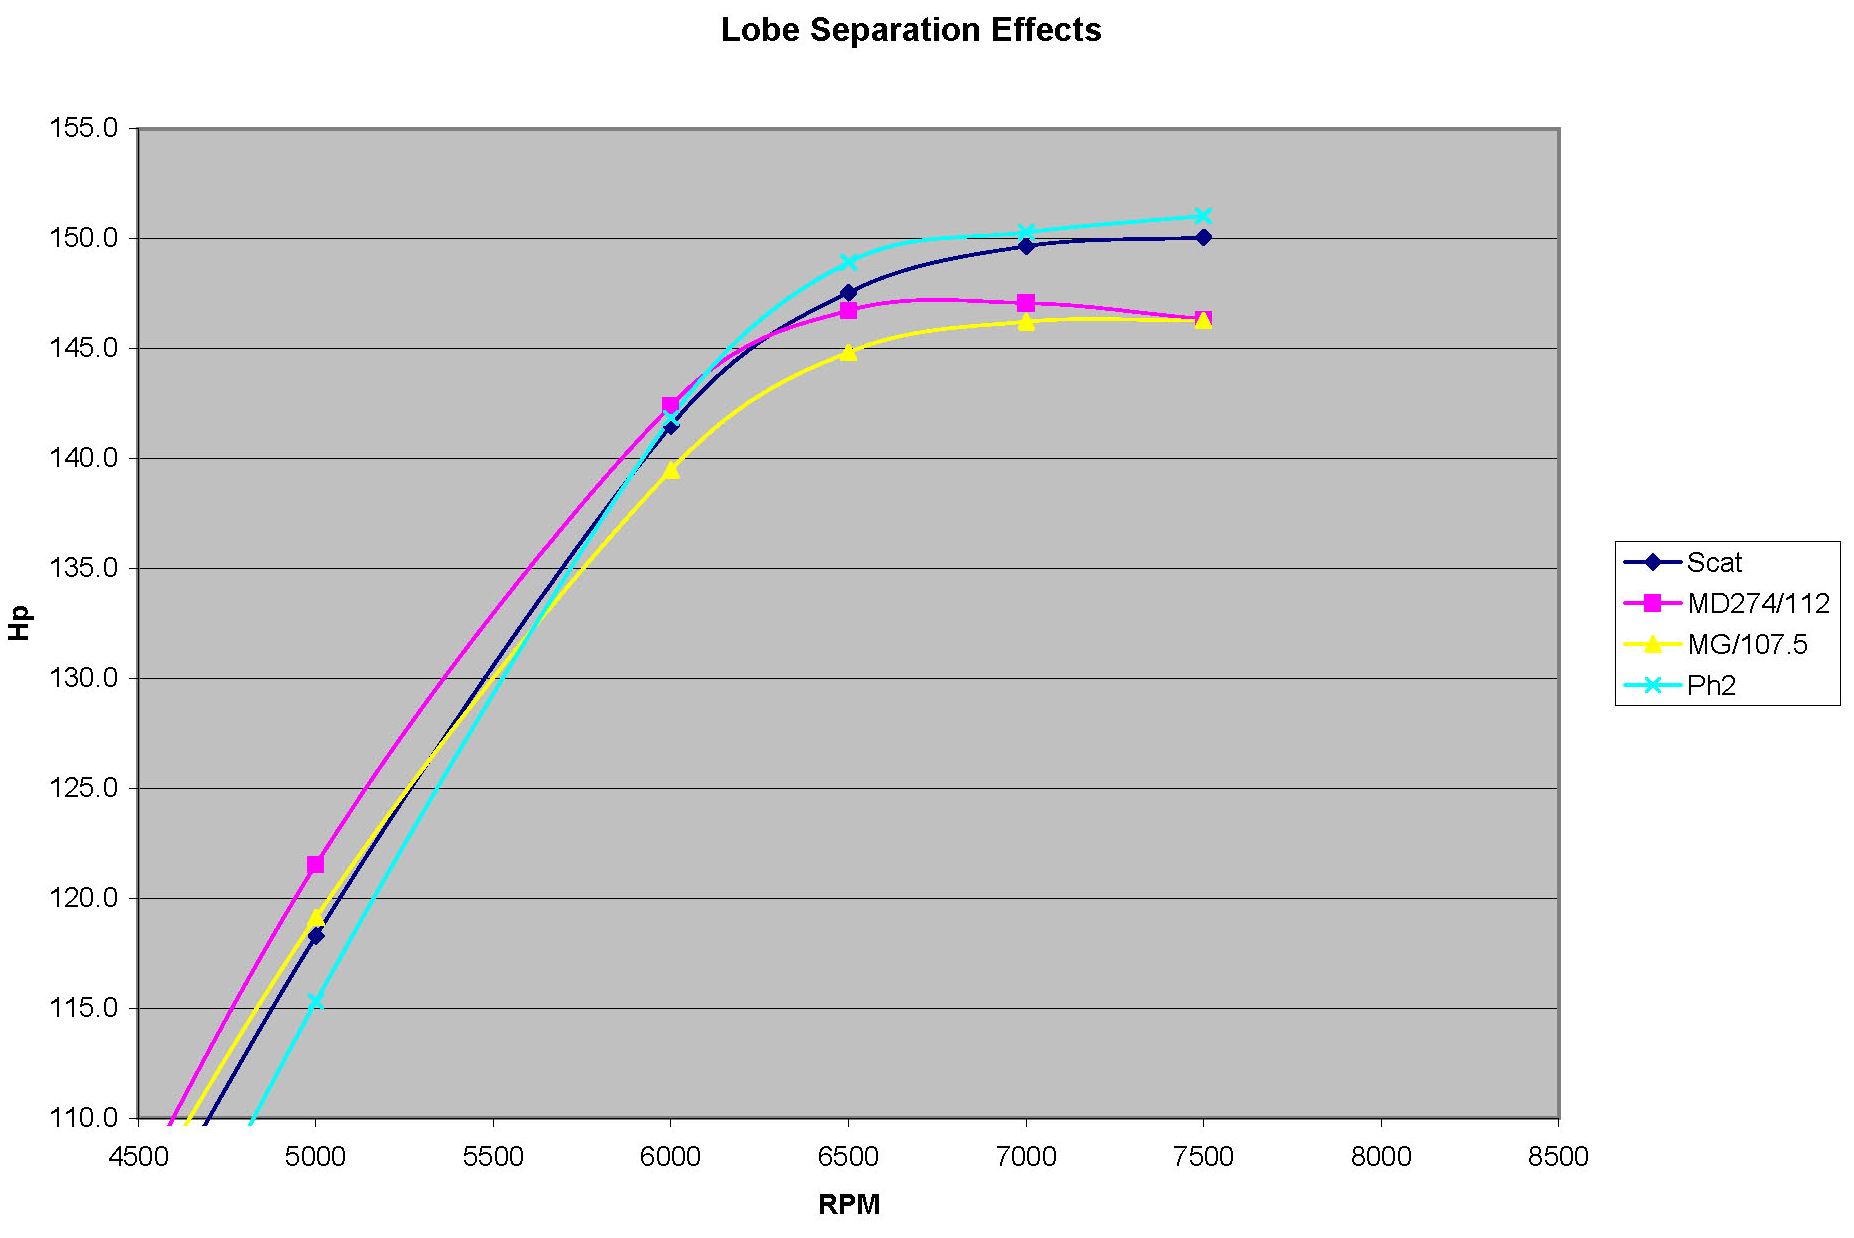
Also been thinking about cams, I already have an MG Metro cam lined up but after having a read through some topics on here it seems Paul S recommends the Kent MD 274. There is also the Piper BP 270 cam that seems to have similar figures to the 274. Does anyone have any experience as to what these cams are like to drive in 998 engines? Just seen this. Be very careful about quoted figures for cams. The MD274 is quoted at 248/274 inlet/exhaust duration but I've measured a couple and they were more like 250/260 degree duration. The key thing is the LSA though. The Piper BP270i does look very similar. Not the standard BP270 though. Saul Bellow - "A great deal of intelligence can be invested in ignorance when the need for illusion is deep."
|
||||||
 882 Posts Member #: 9774 Post Whore Buckinghamshire |
13th Feb, 2014 at 01:03:18pm
So is there a noticeable difference between the MG Cam and the 274? http://www.turbominis.co.uk/forums/index.p...tid=469104&fr=0 |
||||||
|
8604 Posts Member #: 573 Formerly Axel Podland |
13th Feb, 2014 at 01:29:39pm
I don't believe that anyone has actually done and back to back tests, but the science suggests that the higher LSA is better with a turbo A-Series.
Edited by Paul S on 13th Feb, 2014. Saul Bellow - "A great deal of intelligence can be invested in ignorance when the need for illusion is deep."
|
||||||
|
882 Posts Member #: 9774 Post Whore Buckinghamshire |
13th Feb, 2014 at 06:38:52pm
Interesting that the theory suggests that there isn't much difference. Is that simulation for a 998? some big numbers there.
http://www.turbominis.co.uk/forums/index.p...tid=469104&fr=0 |
||||||
|
8604 Posts Member #: 573 Formerly Axel Podland |
14th Feb, 2014 at 11:27:35am
It's a highly developed 998 sitting on my workbench. Running 0.8 bar boost in the simulation.
Saul Bellow - "A great deal of intelligence can be invested in ignorance when the need for illusion is deep."
|
||||||
|
882 Posts Member #: 9774 Post Whore Buckinghamshire |
27th Feb, 2014 at 08:11:56pm
Thanks Paul, MG cam it is then.
http://www.turbominis.co.uk/forums/index.p...tid=469104&fr=0 |
||||||
|
882 Posts Member #: 9774 Post Whore Buckinghamshire |
12th Mar, 2014 at 08:52:30pm
Progress is slow and money is thin, and the work seems to be mounting up rather than diminishing. Sent some testers off to the platers to have a look at the colours and finishes they do.
Edited by Mike-998 on 12th Mar, 2014. http://www.turbominis.co.uk/forums/index.p...tid=469104&fr=0 |
||||||
 1767 Posts Member #: 9165 Previously josh4444 Australia, brisbane |
13th Mar, 2014 at 09:10:05am
I had the piston buttons drilled to save a 10th gram and let them breath also are you going to dome them or leave square?
|
||||||
|
1767 Posts Member #: 9165 Previously josh4444 Australia, brisbane |
13th Mar, 2014 at 09:20:19am
i like that pleating you done too.. i can image how it would look on a previously polished casting nice and smooth almost like a cnc part from solid! |
||||||
|
882 Posts Member #: 9774 Post Whore Buckinghamshire |
13th Mar, 2014 at 10:17:01am
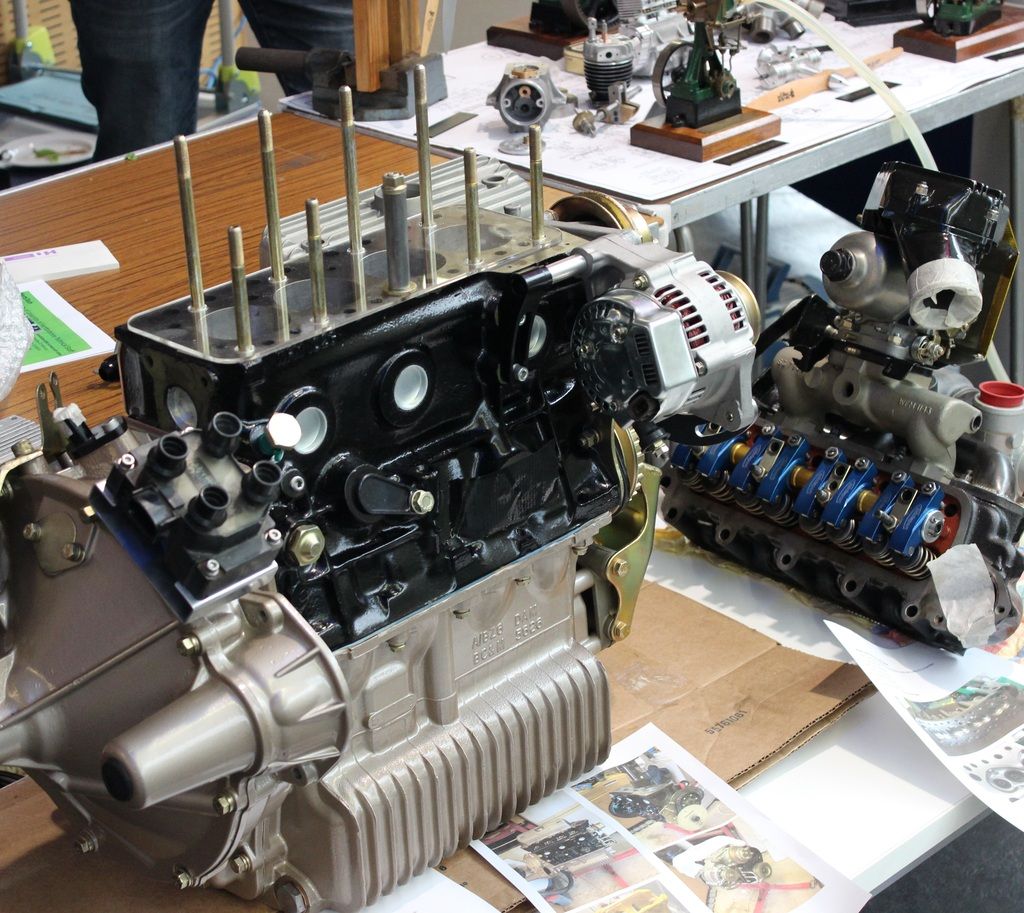
I wasn't planning on drilling them no, do you think it would help? They will all be rounded off yes, you can see the one I've done on the bottom left, the others are fresh off the lathe.
http://www.turbominis.co.uk/forums/index.p...tid=469104&fr=0 |
||||||
|
1767 Posts Member #: 9165 Previously josh4444 Australia, brisbane |
13th Mar, 2014 at 11:12:59am
ive found it helps in getting them out of the pin via a bent spike to get behind them n push pull them out
|
||||||
|
882 Posts Member #: 9774 Post Whore Buckinghamshire |
13th Mar, 2014 at 12:40:37pm
That's a good idea, struggled to pop them out a few times because they've suctioned themselves in. Is it just a small hole down the centre?
http://www.turbominis.co.uk/forums/index.p...tid=469104&fr=0 |
||||||
|
1767 Posts Member #: 9165 Previously josh4444 Australia, brisbane |
13th Mar, 2014 at 08:05:28pm
|
||||||
|
882 Posts Member #: 9774 Post Whore Buckinghamshire |
13th Mar, 2014 at 08:18:04pm
They look good, I don't know what other people have done but I cant see it doing any harm, so long as it's all deburred.
http://www.turbominis.co.uk/forums/index.p...tid=469104&fr=0 |
||||||
|
1767 Posts Member #: 9165 Previously josh4444 Australia, brisbane |
14th Mar, 2014 at 06:35:53am
not sure exactly on the material but its what the shop supplied apparently they do them free for the big dolla builds as it is farly quick to spit them out once set up |
||||||
|
882 Posts Member #: 9774 Post Whore Buckinghamshire |
20th Apr, 2014 at 12:06:28pm
Had the block and head crack tested, block is fine, so can start the build up on the soon - cam bearings in, paint etc.
http://www.turbominis.co.uk/forums/index.p...tid=469104&fr=0 |
||||||
 644 Posts Member #: 9371 Post Whore East Yorkshire |
20th Apr, 2014 at 01:23:13pm
Bad news on the head Mike. Hope it can be sorted BHP sells engines, but Torque wins races! |
||||||
|
882 Posts Member #: 9774 Post Whore Buckinghamshire |
25th Apr, 2014 at 07:51:32pm
Thanks, would be gutted if it scraps the head after Benross has done all the work on it.
http://www.turbominis.co.uk/forums/index.p...tid=469104&fr=0 |
||||||
|
882 Posts Member #: 9774 Post Whore Buckinghamshire |
6th May, 2014 at 08:28:42pm
Latest hiccup is that the OD of the RTS spacers is too big, it fouls on the pivot ring. They're too small to put on a lathe and machine down, what would be the best way of doing it?
http://www.turbominis.co.uk/forums/index.p...tid=469104&fr=0 |
||||||
 12307 Posts Member #: 565 Carlos Fandango Burnham-on-Crouch, Essex |
6th May, 2014 at 08:45:08pm
for a crack like that on the head, I would look at brazing it, On 28th Aug, 2011 Kean said:
At the risk of being sigged... Joe, do you have a photo of your tool? http://www.turbominis.co.uk/forums/index.p...9064&lastpost=1 https://joe1977.imgbb.com/ |
||||||
 1030 Posts Member #: 1291 Post Whore Suffolk / Birmingham |
7th May, 2014 at 07:56:54am
For your spacers just stick them on a bolt and hold that in the lathe.
|
||||||
|
882 Posts Member #: 9774 Post Whore Buckinghamshire |
7th May, 2014 at 10:32:10am
I'll ask the welders about brazing Joe, thanks.
http://www.turbominis.co.uk/forums/index.p...tid=469104&fr=0 |
||||||
|
1030 Posts Member #: 1291 Post Whore Suffolk / Birmingham |
8th May, 2014 at 04:34:35am
Sounds good as that's what i did on mine! Untested so far tho! |
||||||
 1750 Posts Member #: 10190 Post Whore belgium |
8th May, 2014 at 05:06:17pm
Brazing works. I had a head with was ported to big and in and outlet broke trough the oil way. My mate brazed it and no problems so far ( one year now on a 1293 with 13,7 compression ratio) you can do anything if you set your mind to it...
|
||||||
|
882 Posts Member #: 9774 Post Whore Buckinghamshire |
8th May, 2014 at 06:05:13pm
Thanks - May not be the end of the head then.
On 8th May, 2014 Rammie2000 said:
Brazing works. I had a head with was ported to big and in and outlet broke trough the oil way. My mate brazed it and no problems so far ( one year now on a 1293 with 13,7 compression ratio) http://www.turbominis.co.uk/forums/index.p...tid=469104&fr=0 |
||||||
| Home > Show Us Yours! > 998 Turbo Build - Slow Progress | |||||||
|
|||||||


| Page: |