
| Page: |
| Home > Show Us Yours! > 998 Turbo Build - Slow Progress | |||||||
 6729 Posts Member #: 618 Post Whore Glasgow |
6th Aug, 2012 at 07:39:24am
good progress |
||||||
 7260 Posts Member #: 1268 The Boom Boom speaker Police! Essex |
6th Aug, 2012 at 09:26:25am
Nearly there now.
In the 13's at last!.. Just |
||||||
 882 Posts Member #: 9774 Post Whore Buckinghamshire |
6th Aug, 2012 at 10:38:55am
Cheers guys, plan is to clean and tidy everything up, sort the old wiring out, paint it, the drop the new engine in (hopefully) Saturday, won't be at MITP though as I want to get it on a RR before I do loads of miles in it. http://www.turbominis.co.uk/forums/index.p...tid=469104&fr=0 |
||||||
|
882 Posts Member #: 9774 Post Whore Buckinghamshire |
27th Aug, 2012 at 07:22:34pm
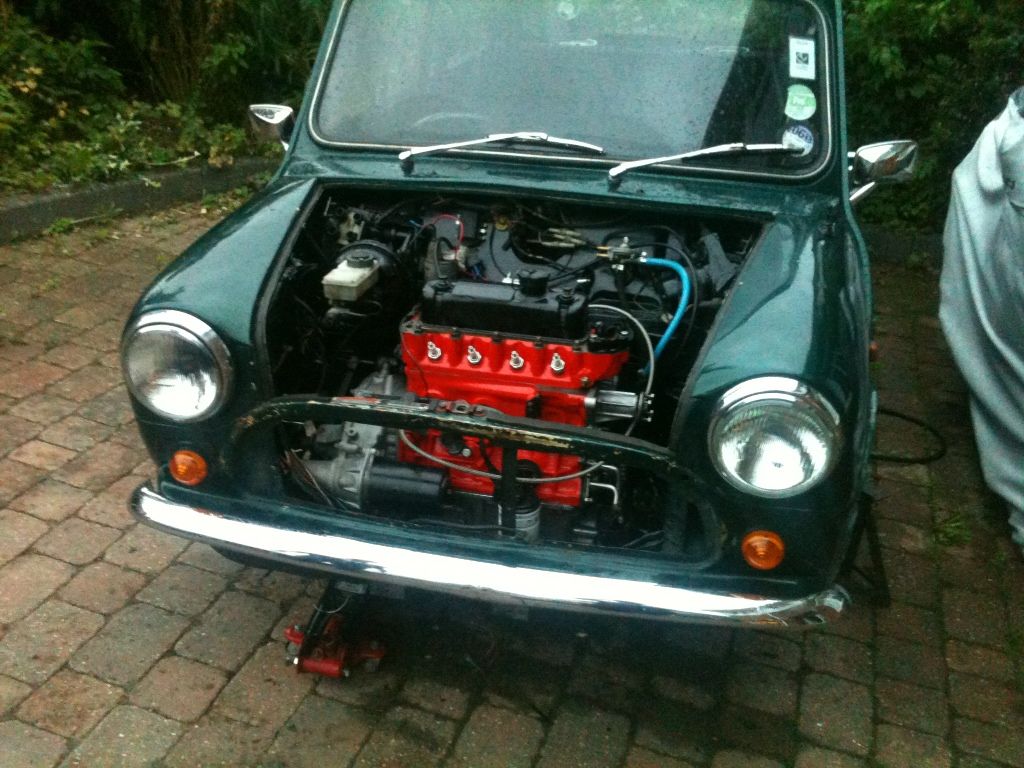
So, had the day off work today, so have spent the whole of it working on the car. Managed to make some really good progress though, even if there were a few glitches along the way..
Edited by Mike-998 on 27th Aug, 2012. http://www.turbominis.co.uk/forums/index.p...tid=469104&fr=0 |
||||||
 3329 Posts Member #: 184 Senior Member Melton Mowbray, Pie Country |
27th Aug, 2012 at 08:29:25pm
Good progress. We don't normally run the tappet breather, it just gets in the way. http://www.twin-turbo.co.uk
|
||||||
|
882 Posts Member #: 9774 Post Whore Buckinghamshire |
27th Aug, 2012 at 08:38:34pm
So do you have crankcase/flywheel breathers instead? if it is removed is it necessary to put breathers back on?
http://www.turbominis.co.uk/forums/index.p...tid=469104&fr=0 |
||||||
|
3329 Posts Member #: 184 Senior Member Melton Mowbray, Pie Country |
28th Aug, 2012 at 06:57:06am
I have on on the rocker box and one on the transfer case. If you really want to use the tappet cover for breathing then modify the breather to get rid of the flame trap. Unless you are breathing into the carb you don't need it. http://www.twin-turbo.co.uk
|
||||||
|
6729 Posts Member #: 618 Post Whore Glasgow |
28th Aug, 2012 at 07:05:20am
coming on well; it is always good to see the engine back in the bay |
||||||
|
230 Posts Member #: 1131 Senior Member |
1st Sep, 2012 at 06:33:35pm
very nice mate whats the expected power gain |
||||||
|
882 Posts Member #: 9774 Post Whore Buckinghamshire |
1st Sep, 2012 at 08:56:51pm
I would like to see 100 horses, no idea whether I'll get anywhere near that or not.
http://www.turbominis.co.uk/forums/index.p...tid=469104&fr=0 |
||||||
|
882 Posts Member #: 9774 Post Whore Buckinghamshire |
7th Sep, 2012 at 08:15:04am
Finished my summer job at the end of last week, so have been trying to get as much as I can done while I have the free time, but it always seems to fill up with other stuff..
http://www.turbominis.co.uk/forums/index.p...tid=469104&fr=0 |
||||||
|
337 Posts Member #: 399 Senior Member Austria |
7th Sep, 2012 at 08:27:06am
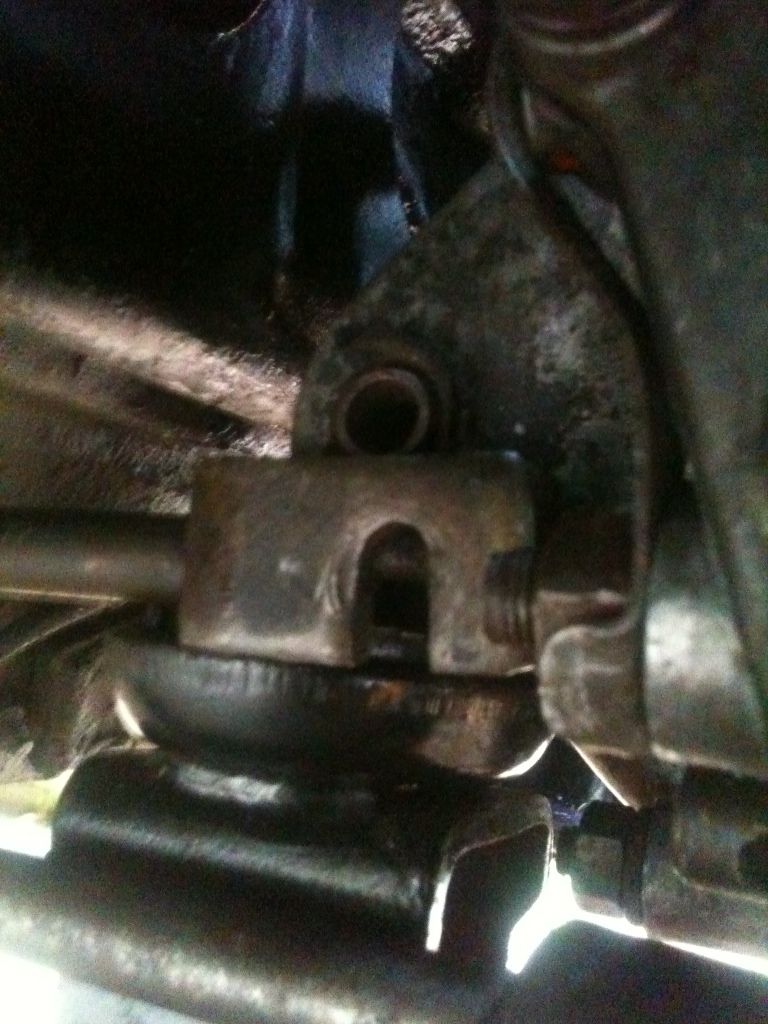
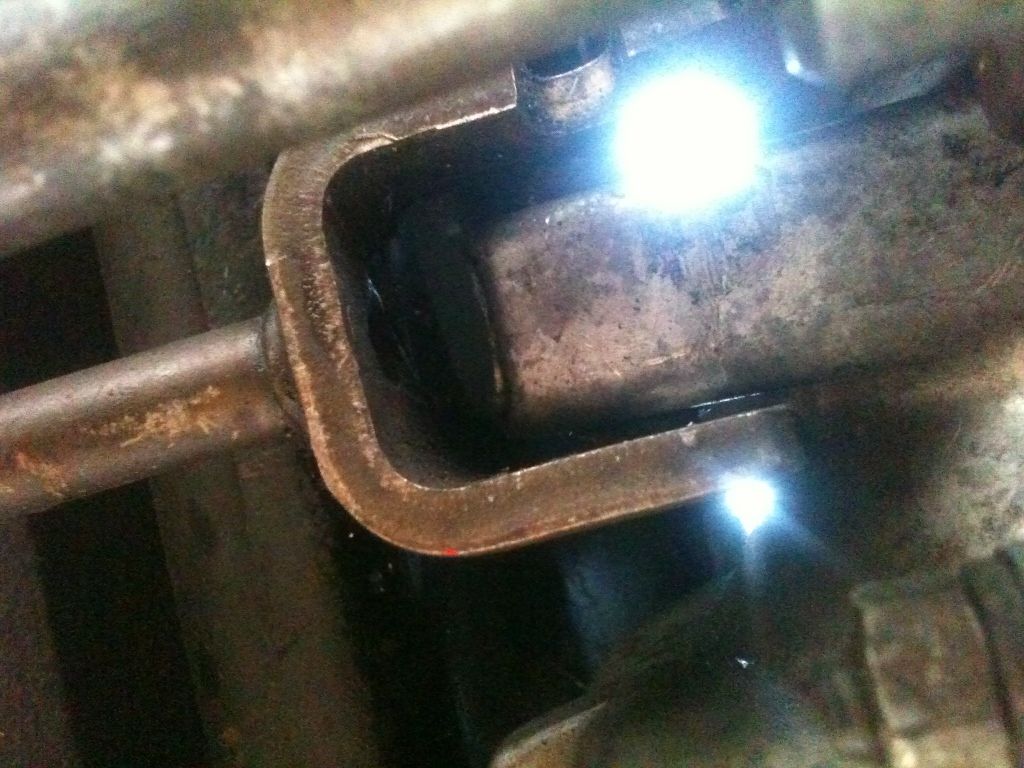
"the 'u' shaped part just won't go over the bush on the back of the gearbox?"
|
||||||
|
337 Posts Member #: 399 Senior Member Austria |
7th Sep, 2012 at 08:28:23am
Or shorten the bush, if this is possible. |
||||||
|
7260 Posts Member #: 1268 The Boom Boom speaker Police! Essex |
7th Sep, 2012 at 09:35:48am
Just spread it a bit Mike. It'll soon go back to shape when you bolt it up.
In the 13's at last!.. Just |
||||||
|
882 Posts Member #: 9774 Post Whore Buckinghamshire |
7th Sep, 2012 at 09:46:19am
Ive tried, I couldn't see how to do it without ripping the gear stick box off the car, I tried levering it with a large screwdriver but I have no way of holding the rod so that the force isn't transmitted to the rubber cotton reel mounts?
Edited by Mike-998 on 7th Sep, 2012. http://www.turbominis.co.uk/forums/index.p...tid=469104&fr=0 |
||||||
 16540 Posts Member #: 4241 King Gaycharger, butt plug dealer, Sheldon Cooper and a BAC but generally a niceish fella if you dont mind a northerner Rotherham, South Yorkshire |
7th Sep, 2012 at 10:15:40am
File down the thingy in the gearbox a bit On 11th Feb, 2015 robert said:
i tried putting soap on it , and heating it to brown , then slathered my new lube on it 
|
||||||
 26 Posts Member #: 10040 Member Essex |
7th Sep, 2012 at 11:16:12am
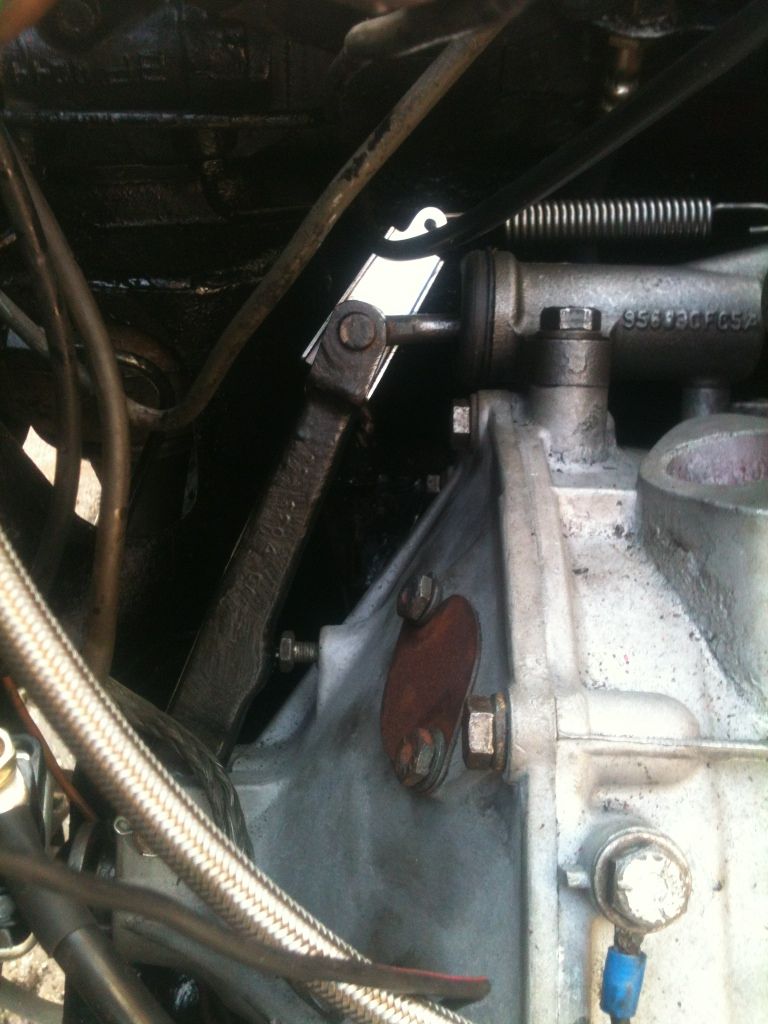
As apbellamy said or take off the gear change unit open out the fork a bit then put it back on. its only a couple of bolts and a wire to take it off anyways. just a thought there isn't anything pushing the engine right forward is there? in the first pic it looks like the engine needs to be rocked back towards the bulkhead a bit. Right where do i start! |
||||||
|
882 Posts Member #: 9774 Post Whore Buckinghamshire |
7th Sep, 2012 at 01:35:49pm
I'll give it a go.
http://www.turbominis.co.uk/forums/index.p...tid=469104&fr=0 |
||||||
|
882 Posts Member #: 9774 Post Whore Buckinghamshire |
7th Sep, 2012 at 05:49:12pm
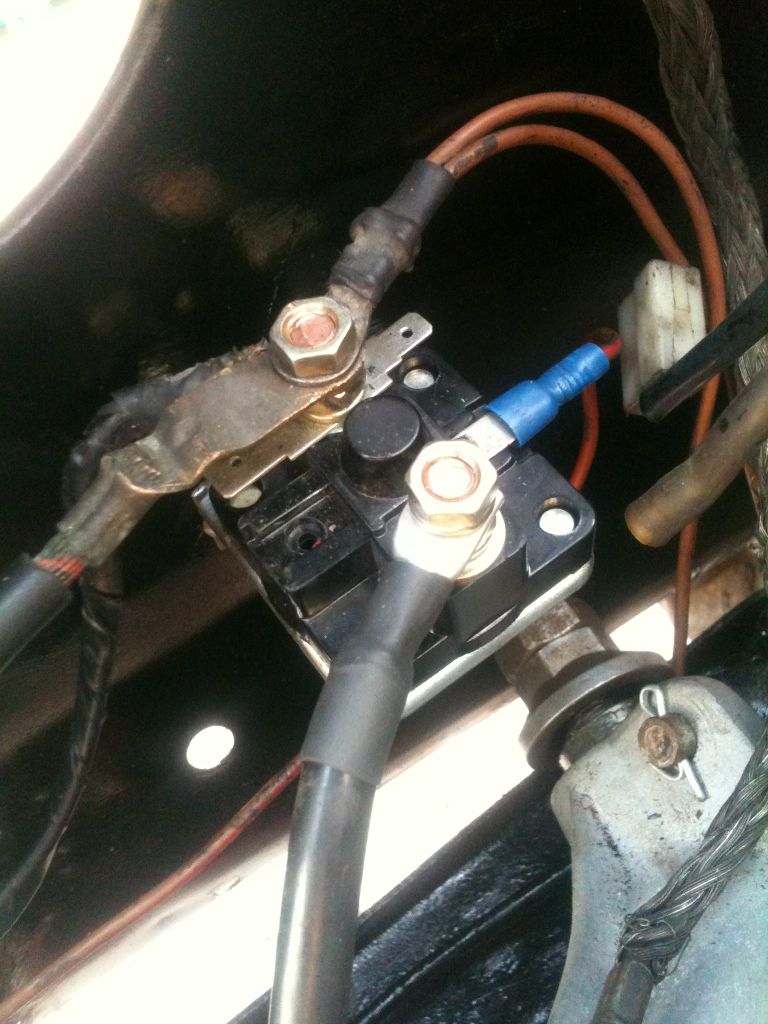
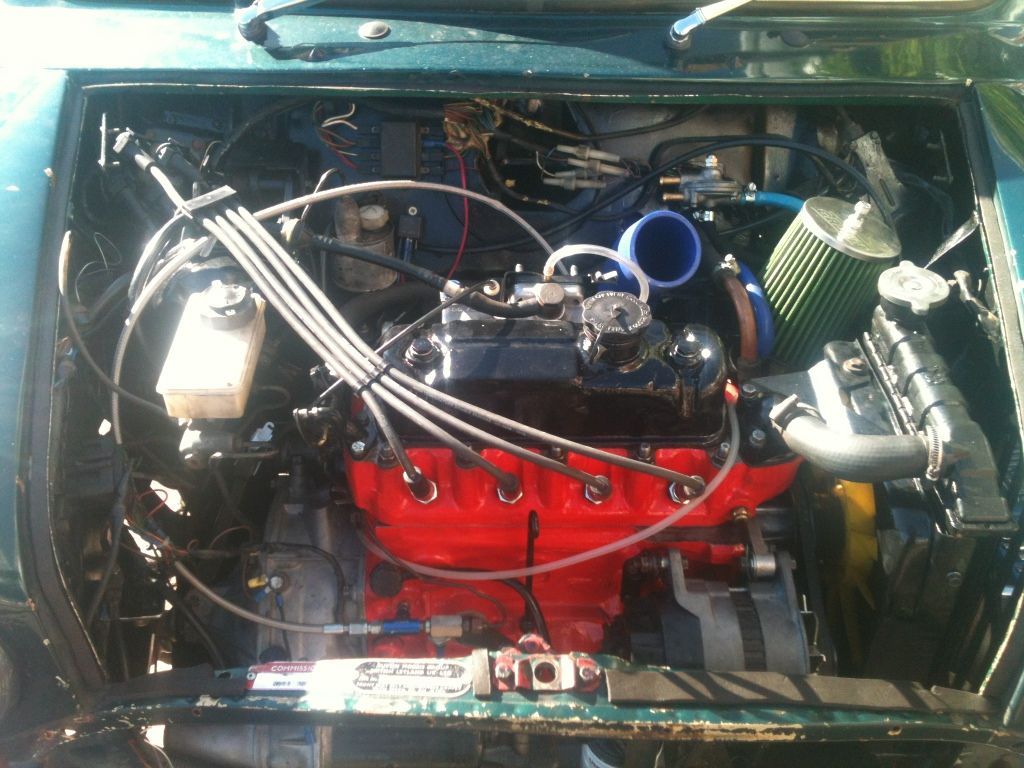
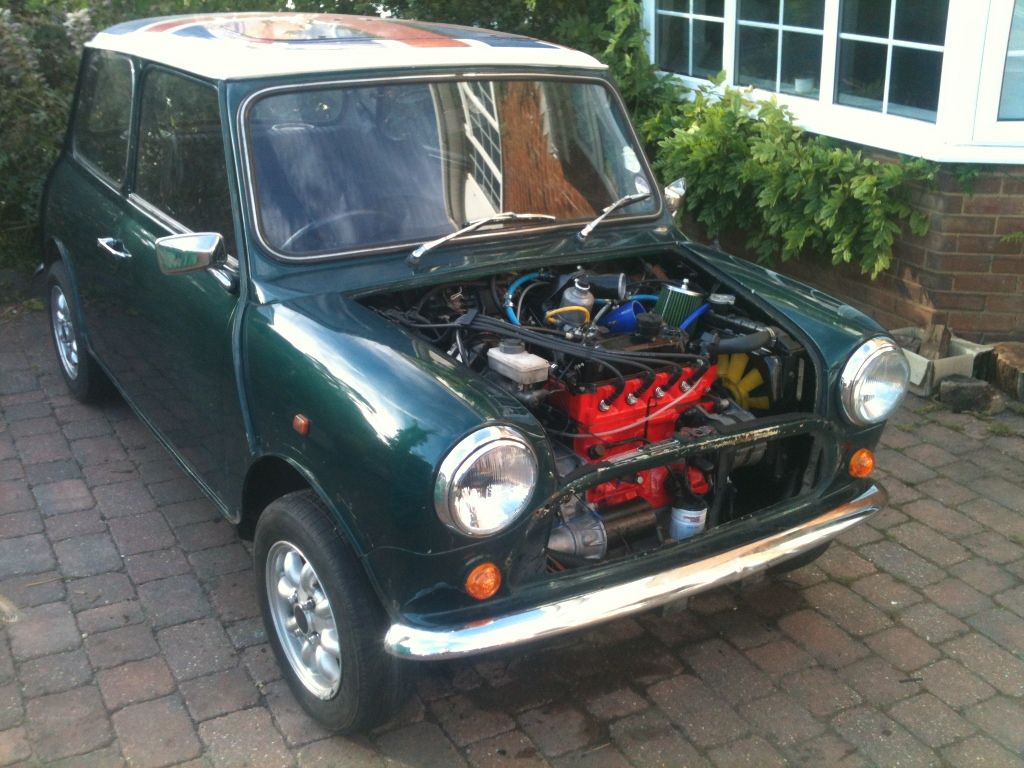
A productive day, got the rad in and gear selector on, got all the electrics sorted so that I could turn it over. Managed to try the clutch but the battery went flat before I could do a compression test.
Edited by Mike-998 on 7th Sep, 2012. http://www.turbominis.co.uk/forums/index.p...tid=469104&fr=0 |
||||||
|
16540 Posts Member #: 4241 King Gaycharger, butt plug dealer, Sheldon Cooper and a BAC but generally a niceish fella if you dont mind a northerner Rotherham, South Yorkshire |
7th Sep, 2012 at 06:04:18pm
Adjust the clutch using the two nuts on the end of the plunger on the wok. sounds like they need backing off a bit to allow more pedal travel. Don't forget to adjust the return stop on the wok. On 11th Feb, 2015 robert said:
i tried putting soap on it , and heating it to brown , then slathered my new lube on it
|
||||||
|
882 Posts Member #: 9774 Post Whore Buckinghamshire |
8th Sep, 2012 at 04:21:48pm
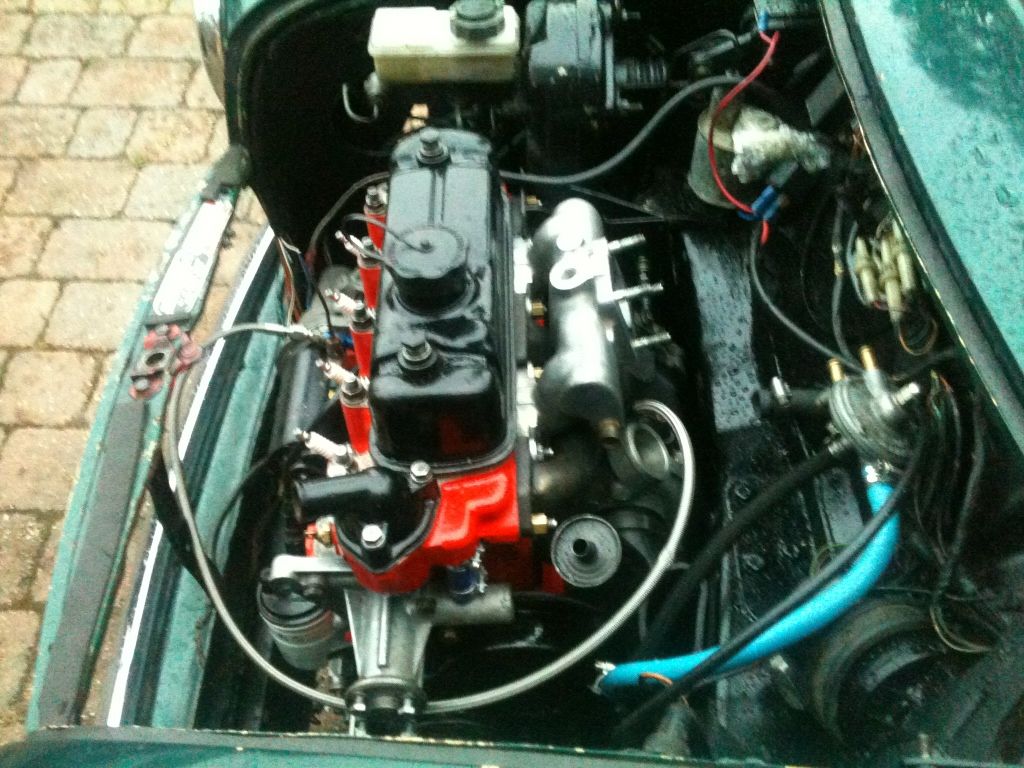
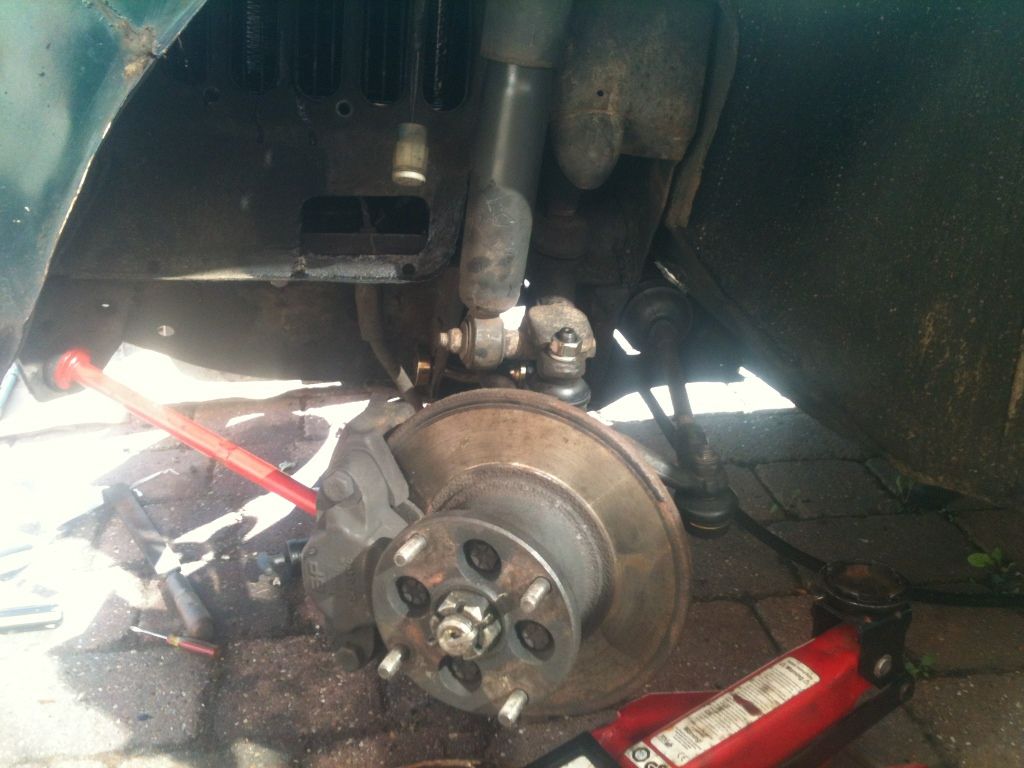
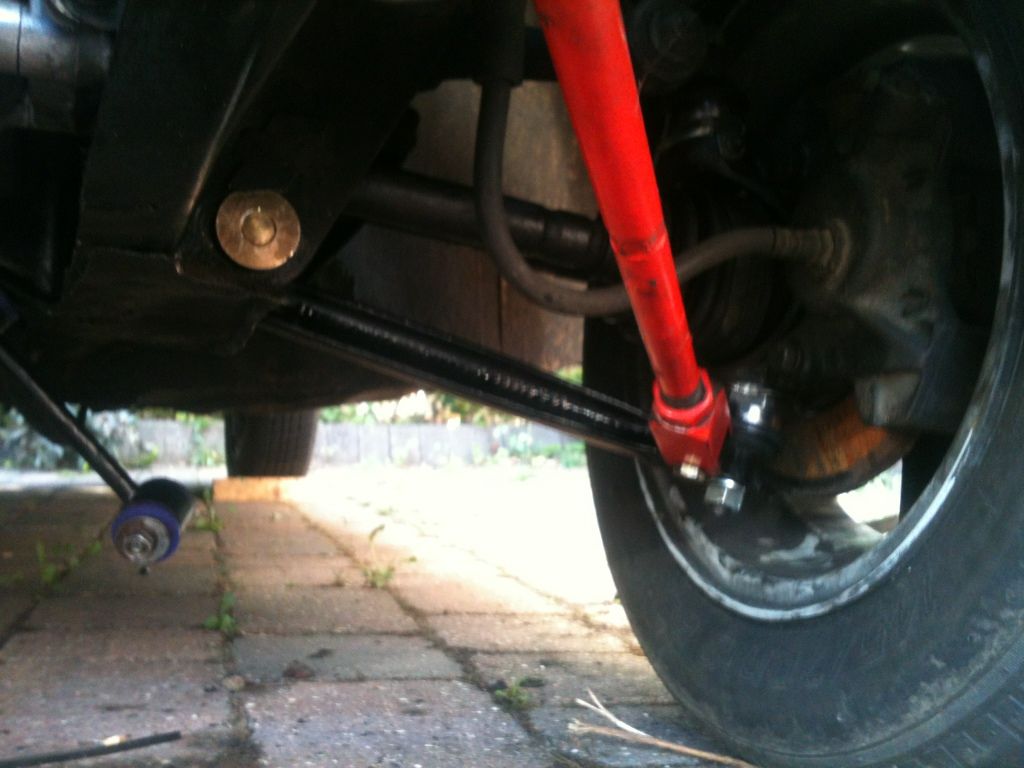
Another productive day, got the hubs etc on and then got the wheels on, so it's now sitting on its own accord :)
http://www.turbominis.co.uk/forums/index.p...tid=469104&fr=0 |
||||||
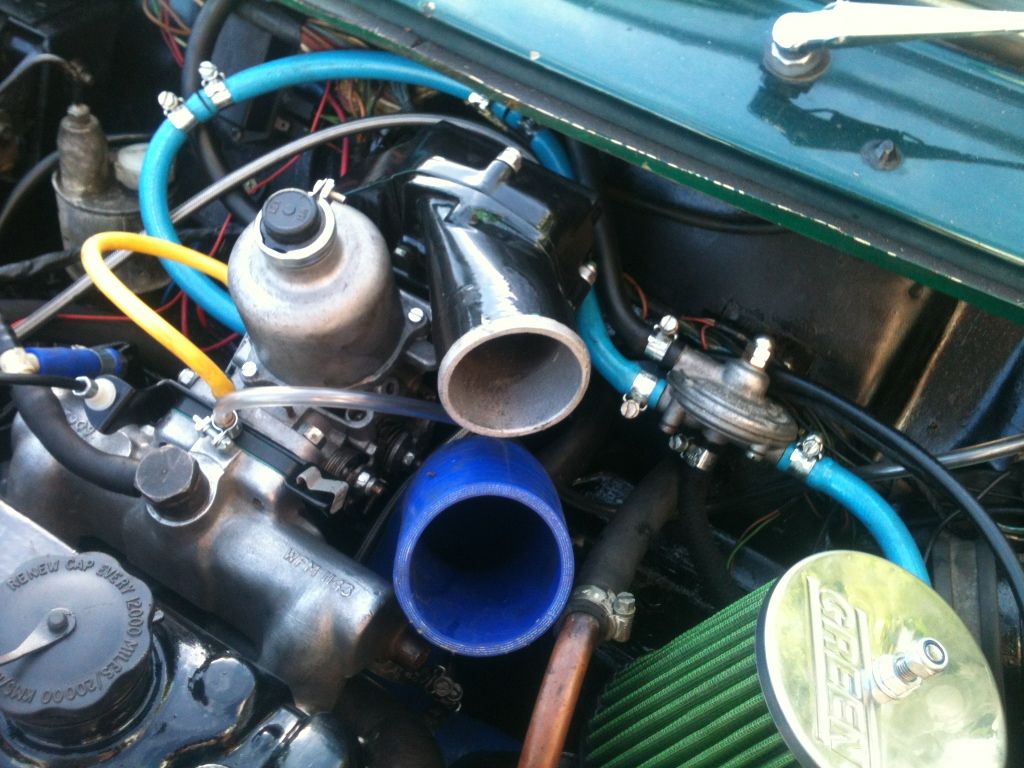
 2057 Posts Member #: 9252 Post Whore Cleethorpes |
8th Sep, 2012 at 04:40:13pm
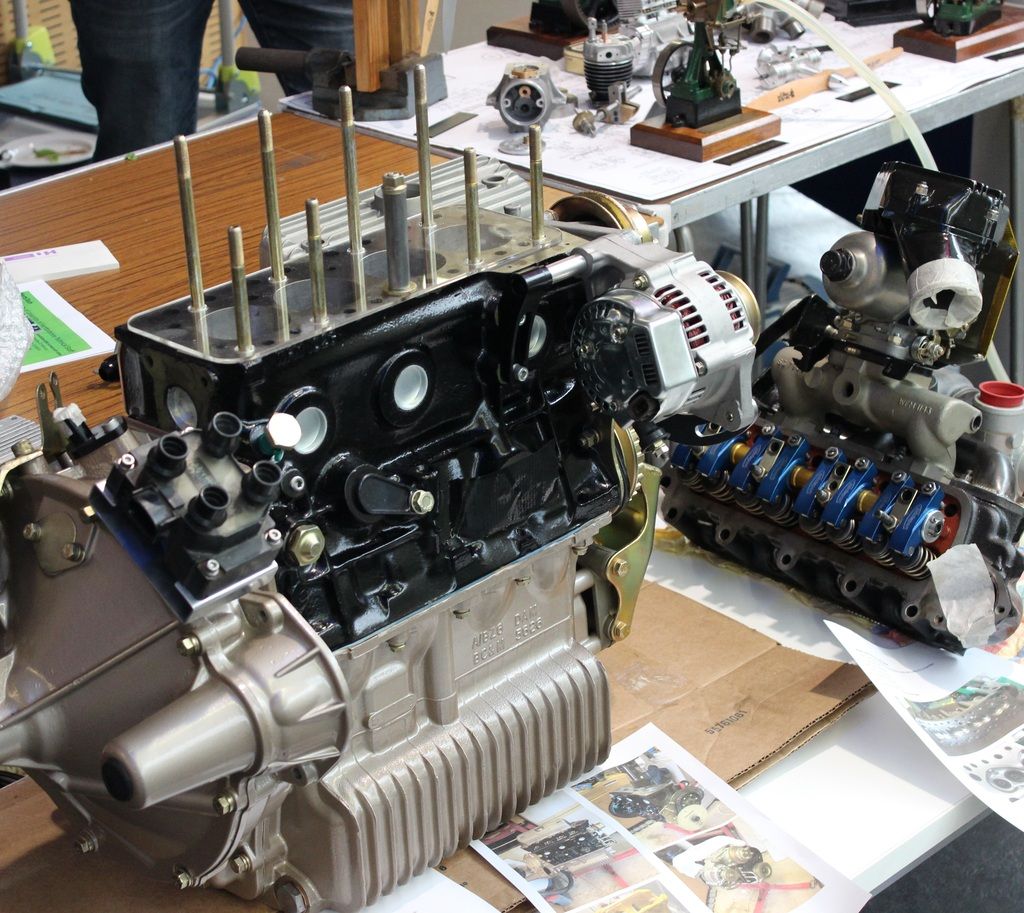
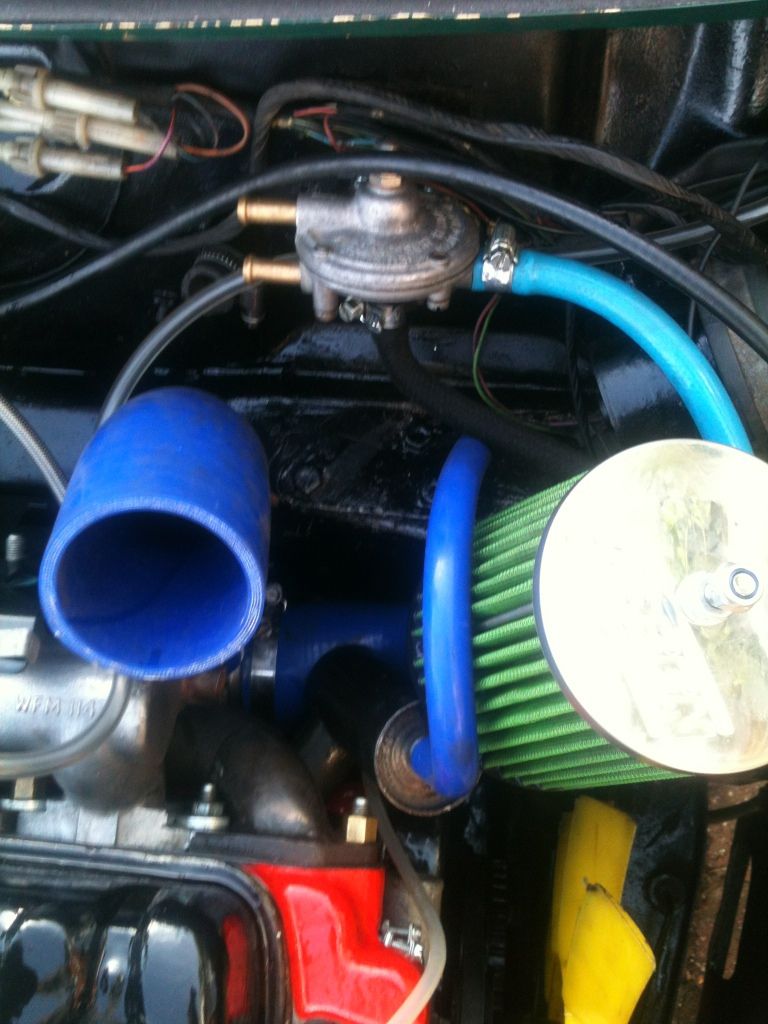
plenum looks very nice have you cleaned it up and repainted? Done now needs redoing lol |
||||||
|
882 Posts Member #: 9774 Post Whore Buckinghamshire |
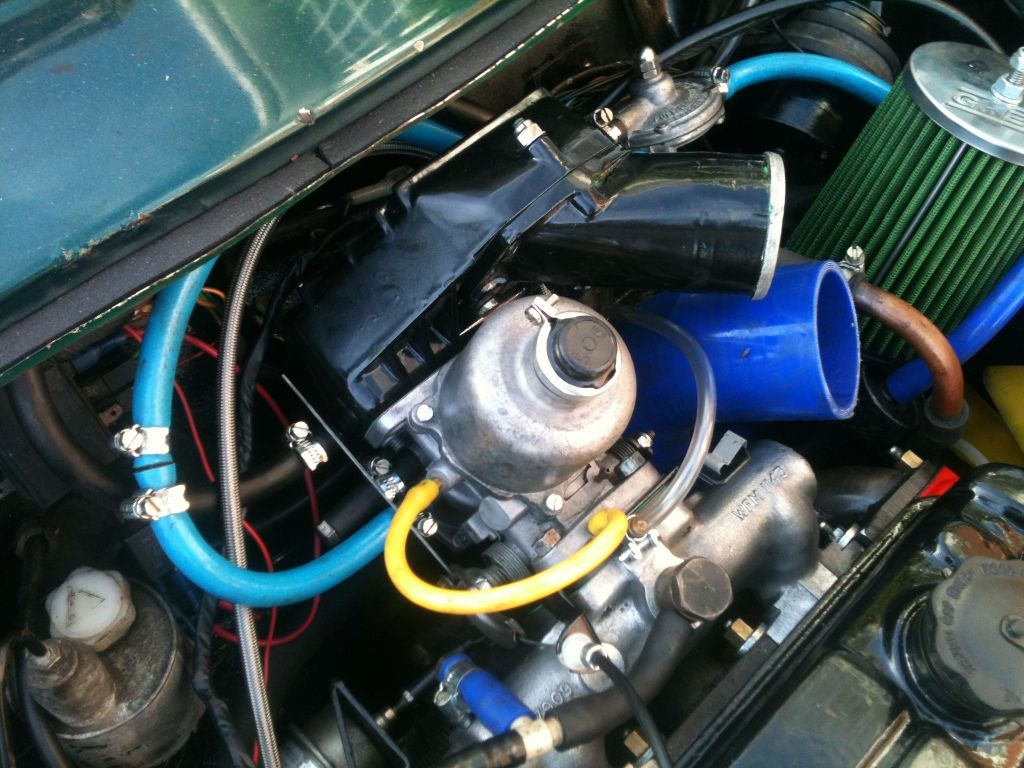
8th Sep, 2012 at 05:29:53pm
I didn't do it myself, but I believe it is a Montego plenum, that was sandblasted inside and out, the valve has been blanked off with a welded plate I assume (unles the Montego one didn't have one) and then it looks to have been sprayed. http://www.turbominis.co.uk/forums/index.p...tid=469104&fr=0 |
||||||
|
2057 Posts Member #: 9252 Post Whore Cleethorpes |
8th Sep, 2012 at 06:37:21pm
the difference with the montego is just the out let i have the sameone but not as shiny Done now needs redoing lol |
||||||
 361 Posts Member #: 114 Senior Member Porto/Portugal |
8th Sep, 2012 at 06:47:25pm
Hi Mike,
Pedro Silva
|
||||||
| Home > Show Us Yours! > 998 Turbo Build - Slow Progress | |||||||
|
|||||||
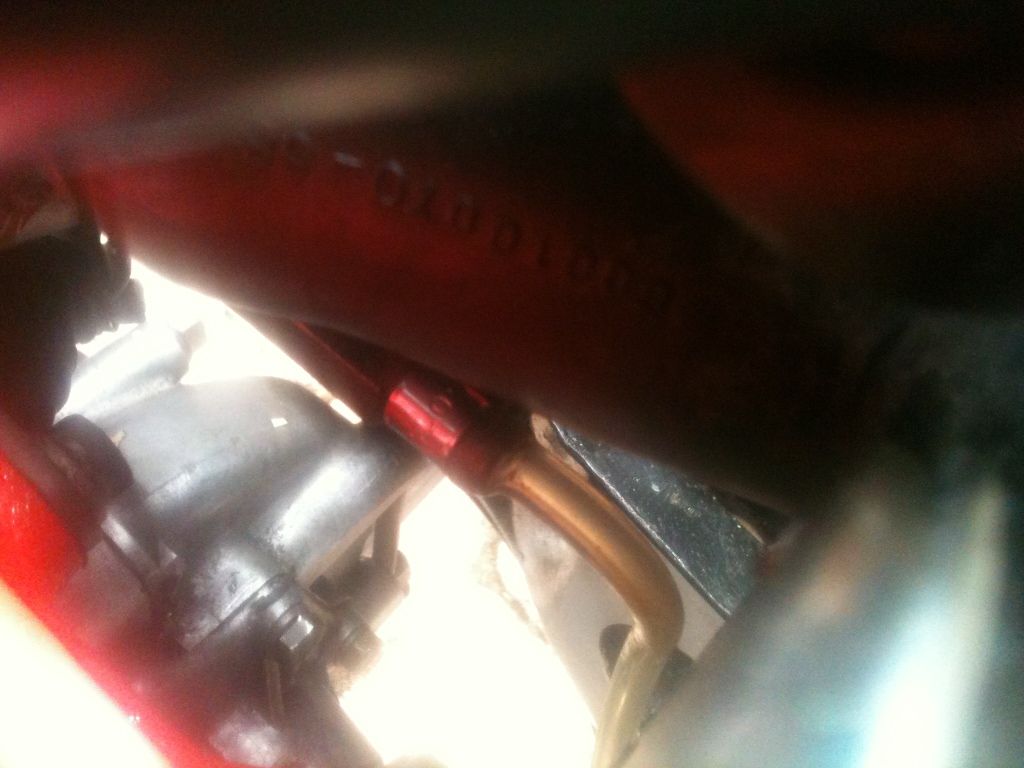
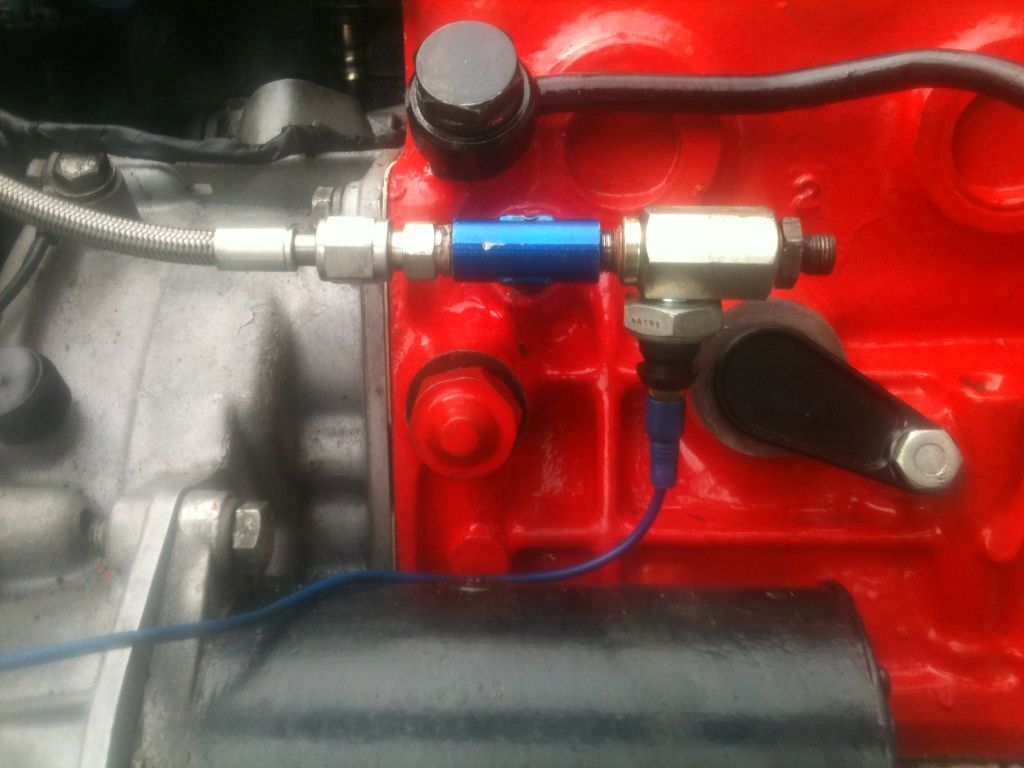
 and fitted the crank pulley and sensor.


 so here's the pictures I have:


| Page: |