Donations towards server fund so far this month.

 
£0.00 / £100.00 per month
Page:
Home > Show Us Yours! > Big Bore Supercharged Estate

robert

User Avatar

6744 Posts
Member #: 828
Post Whore

uranus

terrific thread and workmanship.

Medusa + injection = too much torque for the dyno ..https://youtu.be/qg5o0_tJxYM


Tupers

User Avatar

324 Posts
Member #: 9441
Senior Member

South Devon

Thanks Robert, it's a bit of a marathon but I'm getting there honest.


I got the mech and rods bolted up to the tailgate and it all works quite nicely. I just need to sort of a couple new bushes for the rods.


Locked


Open


I'm having trouble with the brake pipes out of the pedal box at the moment. I'd like to run bango joints but the thread in the MC is tapered and I can't find any bango bolts that will fit.


The headlamps still needed sorting so I abused my bank account and bought a full set of lights with H4 bulbs.


Unlike the Ford ones I was going to use these have proper bowls on them and look much tidier.


After a lot of measuring I came up with the shape of the headlight mounting plates I need to make.


It's gonna be cool!


I also messed about with the camber on the front again, maybe too much?


evad1980

1142 Posts
Member #: 10165
Post Whore

Stansted, Essex

Awesome work... Making me want to go out and work on mine. Finally got my garage back on track so hopefully soon!!

I see you have the rear window frames drilled out as I do on mine. Are you still thinking about elec windows on the back or have your plans changed?


Brett

User Avatar

9502 Posts
Member #: 1023
Post Whore

Doncaster, South Yorkshire


On 23rd Jul, 2014 Tupers said:

I also messed about with the camber on the front again, maybe too much?


no no perfect, just needs dropping 5 inch, not great for grip though *happy*

Yes i moved to the darkside *happy*

Instagram @jdm_brett


Tupers

User Avatar

324 Posts
Member #: 9441
Senior Member

South Devon

On 23rd Jul, 2014 evad1980 said:

I see you have the rear window frames drilled out as I do on mine. Are you still thinking about elec windows on the back or have your plans changed?

I'm still doing electric side windows, I'm just messing with a few different mechanisms at the moment.


On 23rd Jul, 2014 Brett said:
no no perfect, just needs dropping 5 inch, not great for grip though *happy*

I can only just roll a coke can under it at the moment, I don't think a 5 inch drop is on the cards. *tongue*


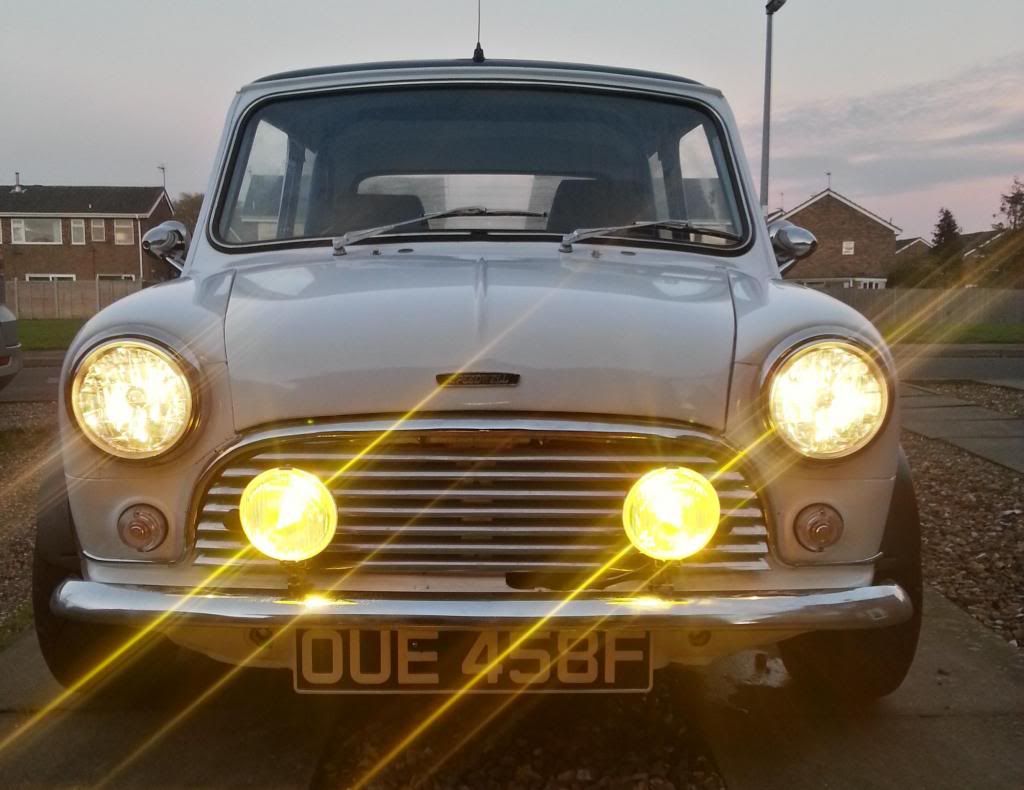
I spent my lunch brake transfering the card template onto 1MM steel added a few folds and got a pair of headlight backings made.


Both fit very snugly, I just need to pop some holes around the edges for plug welds.


It is looking pretty sweet with all 4 lights mounted.


They sit a little further back than standard 7" lights so I should be able to get a nice sunken look with some deep headlight rims.


D4VE

User Avatar

2974 Posts
Member #: 10749
Post Whore

lowestoft suffolk

Looking gooood!

On 24th Oct, 2015 jonny f said:
Nothing gets past Dave lol

NOTHING GETS PAST ME!! *tongue*

1/4 mile 14.7 @ 96mph 12psi boost
Showdown class A 2nd place 18.6 @ 69mph


wng691s clubby

User Avatar

2057 Posts
Member #: 9252
Post Whore

Cleethorpes

looks great

Done now needs redoing lol


Tupers

User Avatar

324 Posts
Member #: 9441
Senior Member

South Devon

It's been far too long since I last did any work on this but it turns out that buying yet another set of wheels was just the jolt I needed to drag it out from the corner of the workshop and start tinkering again.

The wheels in question are a set of 5x10" ATS Classics. I've been on the look out for a set for years but never managed to bag any until now.


It only seemed right to dust the poor estate off and try them on. I've been fairly uncertain about what wheels where going to end up on this but I'm pretty sure these are the ones.


In my regular trawling of ebay I also for this Innocenti steering wheel. It had to come all the way from Italy but it was well worth it and should compliment the muscle car style interior I'm planning.


I also dropped a hefty chunk of my pay packet on this Lucas 608 rear view mirror as fitted to various '60s Jags, Astons and coachbuilt Minis. Totally worth it not to have a plastic one fitted.


I haven't just been buying parts though. After Christmas I realised that the front seat weren't able to slide & tilt forward enough to allow access to the rear seats. Kind of a problem on a estate car although I doubt I'll be letting many people in it.

To remedy this rather fundamental issue I've knocked up this pair of hinged seat brackets.


Their mounting tags will be welded onto the new seat crossmember and hinge the seat forward to allow people to get into the back.


I even got all fancy and fitted a nylon bush to each hinge to make sure they don't lock up.


Just to make sure they're nice and strong I also added a gusset to the front.


Chalkie

1909 Posts
Member #: 9764
Post Whore

Northamptonshire.

Looking good man but question

throttle before or after charger?


moke123

38 Posts
Member #: 4584
Member

Perth, Australia

The front looks great. Reminds me of my old Datsun 510, which was its north American name. Elsewhere was called a Bluebird I think. Even the bumper looks the same!


Tupers

User Avatar

324 Posts
Member #: 9441
Senior Member

South Devon

On 29th Apr, 2015 Chalkie said:
Looking good man but question

throttle before or after charger?


Before the charger with a recirculating valve like the BMW Minis run.


On 30th Apr, 2015 moke123 said:
The front looks great. Reminds me of my old Datsun 510, which was its north American name. Elsewhere was called a Bluebird I think. Even the bumper looks the same!


Thanks Moke, odd as it may sound the Datsun 510 is actually one of my favourite cars. Sadly there aren't many of them over here.


I tried watching the F1 this afternoon but nearly fell asleep so I thought I'd pop down the workshop and get the new seat hinges tacked in place.


They don't swing forward by a huge amount but it's certainly more than it had originally and should dissuade any monsters from trying to get in the back. *tongue*


Seen as I was in the mood to play with seats I picked a pair of head rest out my pile of parts and tried them on the rear seat. They're from an '80s Mini originally are but exactly the same design as the rests on the front seats so should compliment then nicely.


They don't do much for rear visibility but I'm not sure I'll be seeing much more than bumpers with the ride height I want.


D4VE

User Avatar

2974 Posts
Member #: 10749
Post Whore

lowestoft suffolk

Thatll be a nice neat interior...

On 24th Oct, 2015 jonny f said:
Nothing gets past Dave lol

NOTHING GETS PAST ME!! *tongue*

1/4 mile 14.7 @ 96mph 12psi boost
Showdown class A 2nd place 18.6 @ 69mph


madonminis

User Avatar

644 Posts
Member #: 9371
Post Whore

East Yorkshire

Still love this build. Long project but will be totally worth it

BHP sells engines, but Torque wins races!


Tupers

User Avatar

324 Posts
Member #: 9441
Senior Member

South Devon

I decided to stay on at the workshop this evening and get some long awaited work done.

I've have the headlight backing panels kicking around for a while but finished them off this evening with a little filler piece on the inner corner.


It's really good to see them welded in a linished down. Now I just need to put some rivnuts in to mount the headlamp bowls.


One of the big stumbling block as far as progress goes was the mechanism for the rear side windows. I've had a play with a few modern OEM options as the majority of side windows are curved now so none of them really worked. Fortunately I was able to pick up a set of these straight tracked universal mechanisms.


They do need about 8 inches chopping off the top but aside from that they're perfect.


Now that I know what I'm building the windows around I've started making more pieces for the side window frames starting with this piece of steel with lots of lines on.


After lots of folding and twisting I got this tapered section with a different profile at each end.


It's hard to see in the light but the profile is flat at the top and then rotates 45* at the bottom to push the bottom of the glass away from the body like it is on the doors.


It's all looking like something that might actually work now.


Tupers

User Avatar

324 Posts
Member #: 9441
Senior Member

South Devon

So I'm back on the side windows again. My sheet metal folder is only 1 meter long so I had a fabrication company around the corner fold some 2 meter long pieces to hold the window channel.


I notched the corners and folded the ends in to make one continuous frame for the side window.


It fits in the back quite nicely so the next job is to make mounts for the window motor.


D4VE

User Avatar

2974 Posts
Member #: 10749
Post Whore

lowestoft suffolk

Rare to say but never seen that done before in the mini scene

On 24th Oct, 2015 jonny f said:
Nothing gets past Dave lol

NOTHING GETS PAST ME!! *tongue*

1/4 mile 14.7 @ 96mph 12psi boost
Showdown class A 2nd place 18.6 @ 69mph


Tupers

User Avatar

324 Posts
Member #: 9441
Senior Member

South Devon

I've had a bit of down time between customer project at the workshop recently so I decided to jump back onto the roll down side window project.

I started by making a new intermediary pillar to support the back half of the drop glass frame. It also incorporates the flange for the rear quarter window seal and is tapered to account for the angle of the window frame.


Here you can see how the outer face of the pillar transitions from 90* the to top of the frame to 45* at the bottom allowing the glass to sit away from the quarter panel.


I wanted to move the drop glass frame as high as I could within reason so elected to remove the strip that the old window channel screwed to and cheat another 15MM of room.


With the strip gone the frame can sit right up against the cant rail.


I then marked out the remanning over hang and cut it off below the black line to reveal the entire wind opening.


The next issue to deal with was the step between the top of the quarter panel and frame.
As the frame will be welded in I elected to cut the outermost section off allowing the top to sit further out effectively using the quarter panel as the 3rd side of the channel.


The top of the frame and quarter panel are now flush and will blend into one another once everything's welded.


Another challenge having the frame welded in threw up was that one side would need to be removable to allow the glass to be fitted.
To save the removable to section from flapping about I made a brace to hold each side together using some flat steel bar.


This end is doglegged to stop the fittings from interfering with the glass as it moves up and down.


Each brace was welded on before the frame was split just bellow waist height at the B-pillar.


So here's how it will be assembled.
You start with the 3/4 section of the frame permanently welded into the body with its felt runners fitted.


The window can then be slid in from the front and pushed to the top.


Once the window's held at the top the remaining 1/4 section is bolted in place completing the frame.


After I lot more trail fitting, fabrication and head scratching I got the universal drop mechanism cut down to size and bolted in place.


I also folded up and new waist rail which will be welded in continuing the profile from the back and locating the inner weather strip.


Here it is in action.
https://www.youtube.com/watch?v=CGEFgtuM_p0&feature=youtu.be

https://www.youtube.com/watch?v=WC48VR_WsEI


Tupers

User Avatar

324 Posts
Member #: 9441
Senior Member

South Devon

I've also been messing about with some slightly more detailed work for the interior Allegro/Marina door pulls I'm using.
The pulls themselves are nice chromed pieces but the original surrounds were black plastic which I'm not fond of so I started making templates for new steel replacements.


Once I'd settled on the new dimensions transferred them onto some 4MM steel and chain drilled out the centre section.


It was then clamped in the vice and I used a rotary bur to remove the excess before finishing it with a few files.


A quick test fit to make sure I was heading in the right direction.


The bucket on the back was a simple piece to fold up and was then gas welded on.


The pulls are nice and snug in their new homes. The plan is to have whole lot chromed and paint the inside black to add a little contrast.


I've also managed to finally get ahold of a set of innocenti door windows with opening quarterlights to add to the luxury theme I'm going for.


Rob Gavin

User Avatar

6729 Posts
Member #: 618
Post Whore

Glasgow

Nice custom touches.


D4VE

User Avatar

2974 Posts
Member #: 10749
Post Whore

lowestoft suffolk

Very trick!

On 24th Oct, 2015 jonny f said:
Nothing gets past Dave lol

NOTHING GETS PAST ME!! *tongue*

1/4 mile 14.7 @ 96mph 12psi boost
Showdown class A 2nd place 18.6 @ 69mph


gr4h4m

User Avatar

4890 Posts
Member #: 1775
Post Whore

Chester

Very nice

I run a supercharger and I don't care the TB is on the wrong side.
VEMS + 12 PSI + Liquid Intercooler = Small Bore FUN!


tadge44

3004 Posts
Member #: 2500
Post Whore

Buckinghamshire

Really good to see more progress on this.

I,m still deeply impressed by the attention to detail and clever ideas.


Tupers

User Avatar

324 Posts
Member #: 9441
Senior Member

South Devon

Cheers guys, I haven't been able to work on this for ages so I've got plenty of ideas to get out of my system. *happy*


Tupers

User Avatar

324 Posts
Member #: 9441
Senior Member

South Devon

As I was happy with the fit on both window frame I warmed the MIG up and get them all welded in. I do enjoy welding thick steel.


There was a lap joint between the quarter and the section that holds the weather strip so I brazed it up.


I also welded the new waist rail sections in at each end and brazed the top edge


With most of the structure and mechanism sorted I moved onto deciding how to hide it all.
To try and keep an OEM feel to the conversion I decided lengthen the channel that holds the quarter trim in a Mini saloon.


Each side took 1 & 1/2 channels to equal the new waist rail and were clamped onto my bench to be welded together.


They were then clamped into the body and brazed on in a few spots.


Here's a test fit of an saloon quarter trim, obviously I'll be making new cards to span from the B-pillar to the seat back mounting post.


Bill

51 Posts
Member #: 10080
Advanced Member

Holland, Eindhoven

And did you made any more progress?

Home > Show Us Yours! > Big Bore Supercharged Estate
Users viewing this thread: none. (+ 1 Guests) <- Prev   Next ->
To post messages you must be logged in!
Username: Password:
Page: