
| Page: |
| Home > Show Us Yours! > Turbo Cooper - floor repairs | |||||||
|
696 Posts Member #: 10034 Post Whore Birmingham |
21st Jul, 2012 at 11:59:15pm
Just taking the first steps on what will hopefully turn into a turbo project Edited by PhilR on 2nd Feb, 2016. |
||||||
|
1909 Posts Member #: 9764 Post Whore Northamptonshire. |
22nd Jul, 2012 at 08:13:43am
Wow got a few parts and good luck with the 8 week deadline you are brave!! http://turbo-mini.com/62147.html did that in 24 hours :)
|
||||||
 825 Posts Member #: 9661 Post Whore Sheffield South Yorkshire GB. |
22nd Jul, 2012 at 01:23:00pm
If you have the money, I think your dead line can be achieved easy, nice mini..
Main Build
|
||||||
 9812 Posts Member #: 332 Resident Cylinder Head Modifier Mitsi Evo 7, 911, Cossie. & all the chavs ...... won no problem |
22nd Jul, 2012 at 06:09:38pm
You will sort it if you have the time? Money and sheer persistence! Give me a shout if you need help
|
||||||
|
696 Posts Member #: 10034 Post Whore Birmingham |
22nd Jul, 2012 at 11:19:43pm
On 22nd Jul, 2012 RidingLow said:
Wow got a few parts and good luck with the 8 week deadline you are brave!! http://turbo-mini.com/62147.html did that in 24 hours :) and loving the number plate is that personal? Cheers. I'm generally not a fan of personalised plates, but this was rock bottom price on DVLA, and I knew it would be appreciated by mini fans. On 22nd Jul, 2012 nala56 said:
If you have the money, I think your dead line can be achieved easy, nice mini.. The budget is what ever the credit-card can take!! I was horrified by the cost the (first time the) diff self-destructed and I had to rebuild the whole engine. I know that this rebuild will not be cheap, but if it needs a lot of engine work, I might as get the turbo in there while I'm at it? On 22nd Jul, 2012 BENROSS said:
You will sort it if you have the time? Money and sheer persistence! Give me a shout if you need help Thanks BENROSS. I'm never the first to ask for help so please jump in if you see me making a complete mess. I've no practical experience with turbos, so all wise words appreciated 
Edited by PhilR on 23rd Jul, 2012. |
||||||
|
696 Posts Member #: 10034 Post Whore Birmingham |
23rd Jul, 2012 at 01:36:31am
Whoops.
Edited by PhilR on 23rd Jul, 2012. |
||||||
|
696 Posts Member #: 10034 Post Whore Birmingham |
12th Aug, 2012 at 09:20:53pm
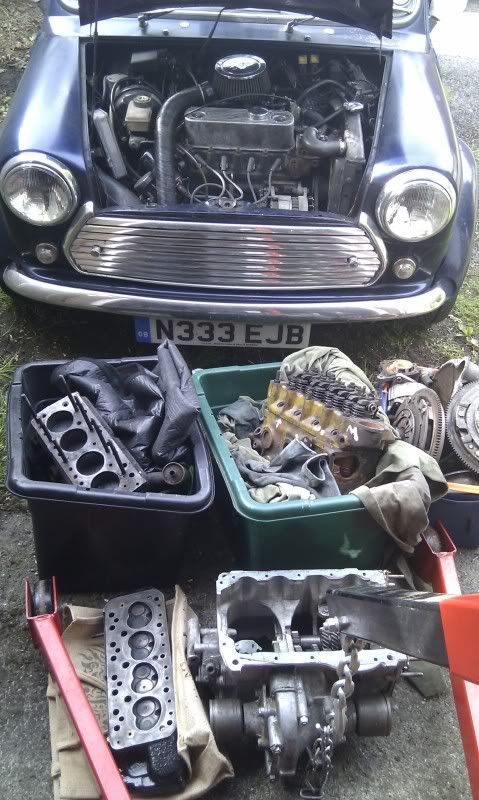
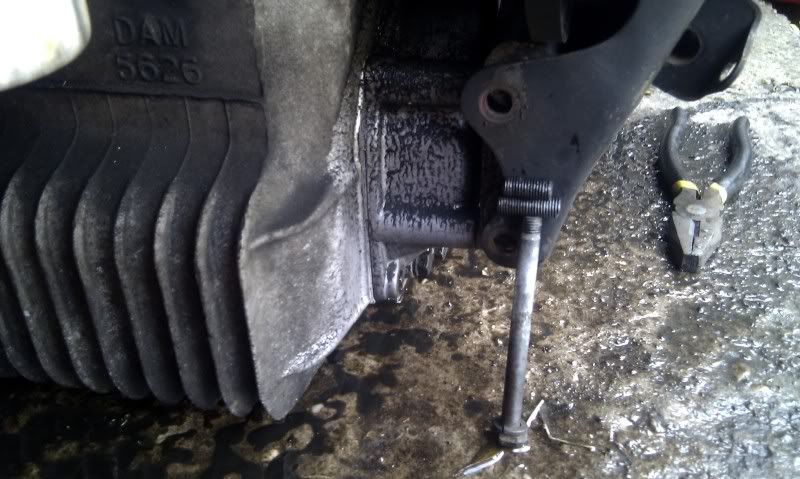
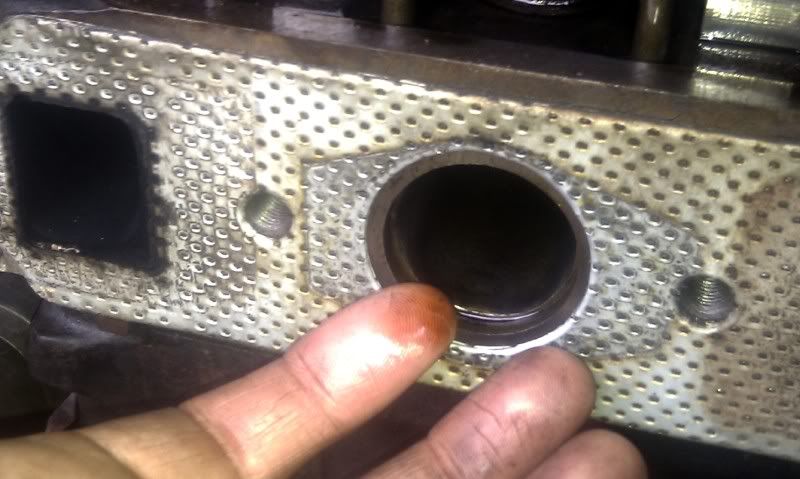
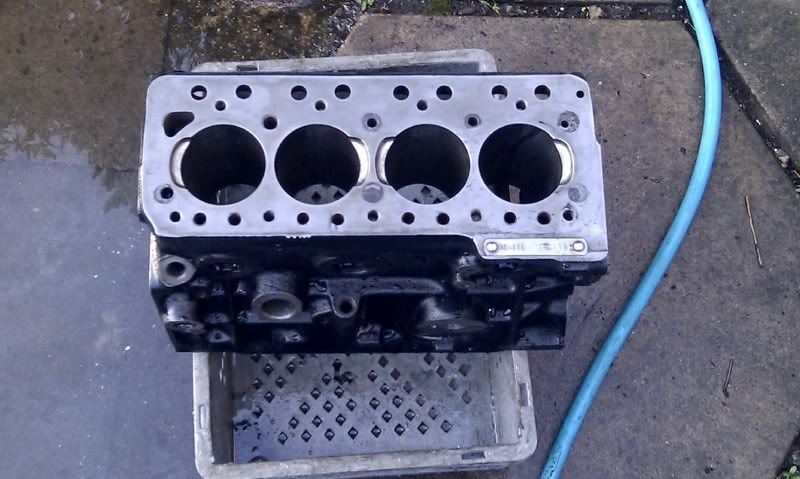
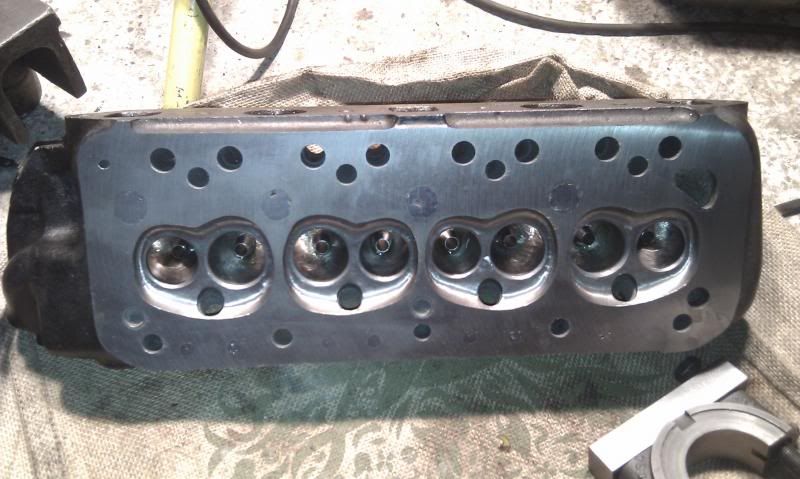
3 weeks in, and some progress!
|
||||||
|
1492 Posts Member #: 9468 Post Whore Wootton Bassett |
12th Aug, 2012 at 09:53:01pm
nice :) On 10th Mar, 2012 theoneeyedlizard said:
Hypothetically speaking, where would you stick your nozzle? On 22nd Jun, 2012 apbellamy said:
my wife doesn't know what.head is never mind compression ratio. |
||||||
|
1909 Posts Member #: 9764 Post Whore Northamptonshire. |
12th Aug, 2012 at 10:12:40pm
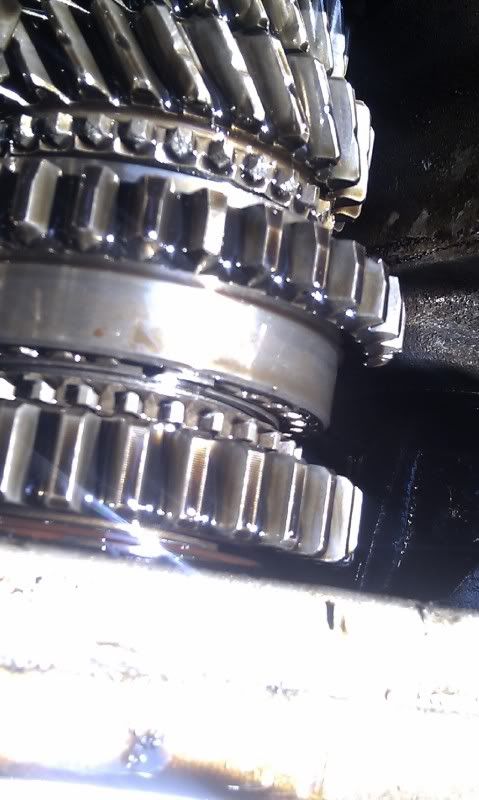
Looking good dude! and the mods to the block look good wonder if they will help or not? let us know :) |
||||||
|
696 Posts Member #: 10034 Post Whore Birmingham |
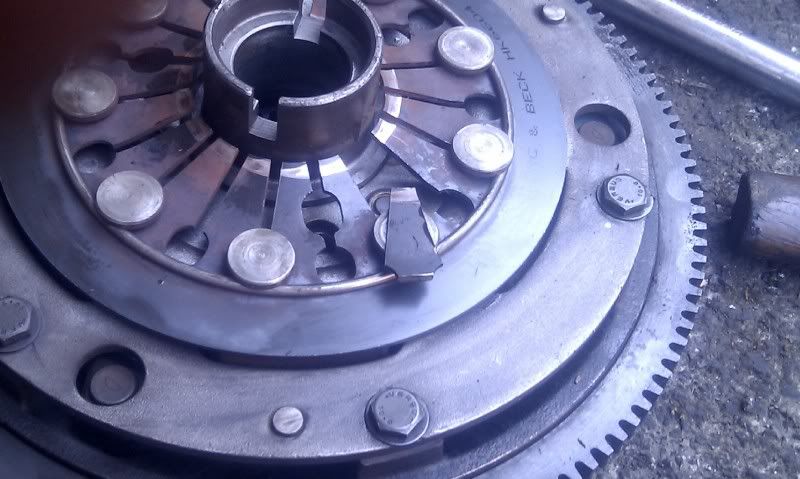
9th Sep, 2013 at 12:59:31am
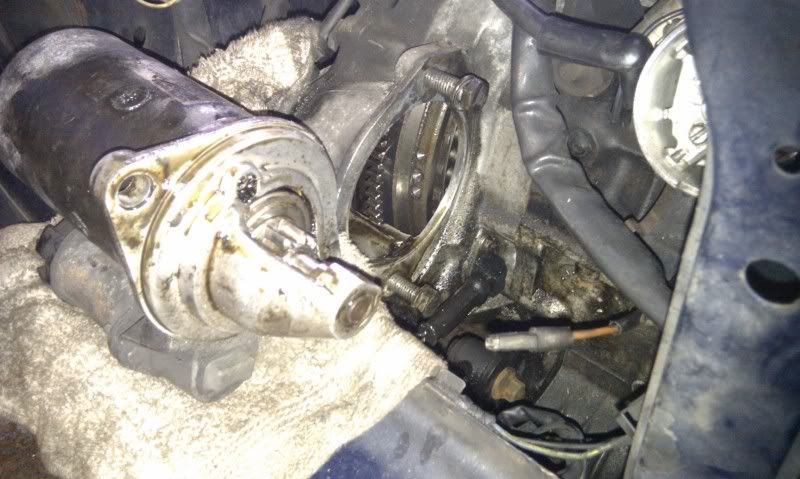
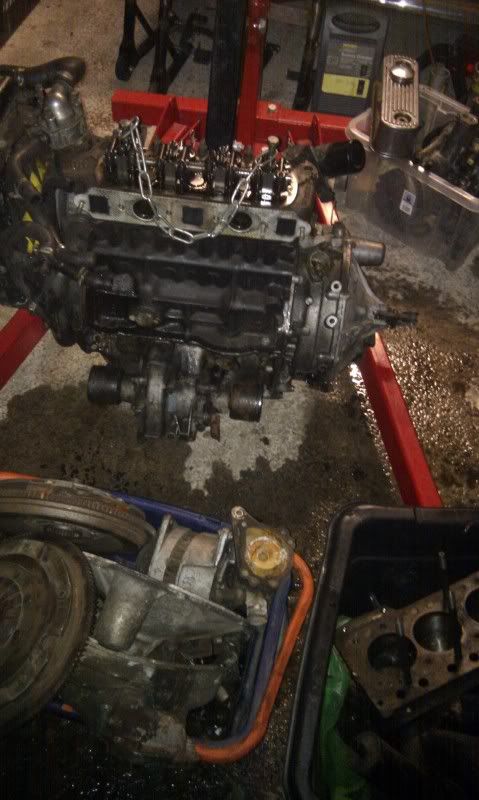
I've spent a long time away from this so an update is long overdue!
|
||||||
|
696 Posts Member #: 10034 Post Whore Birmingham |
9th Sep, 2013 at 01:11:49am
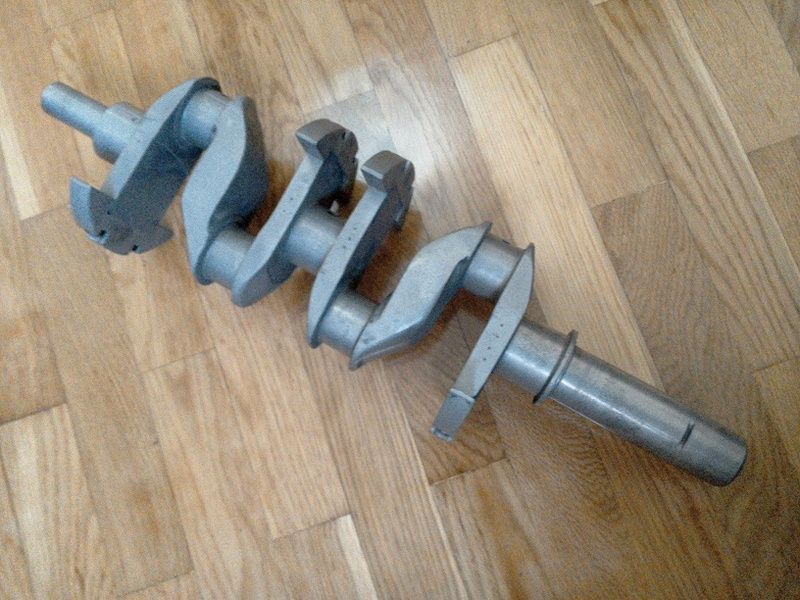
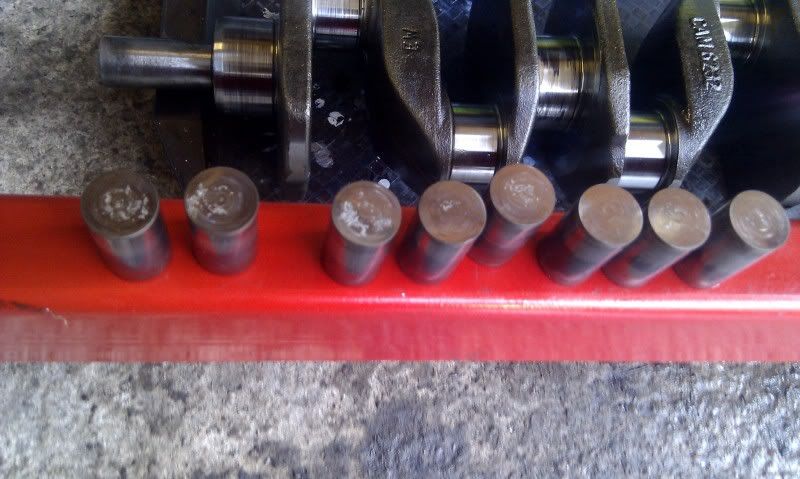
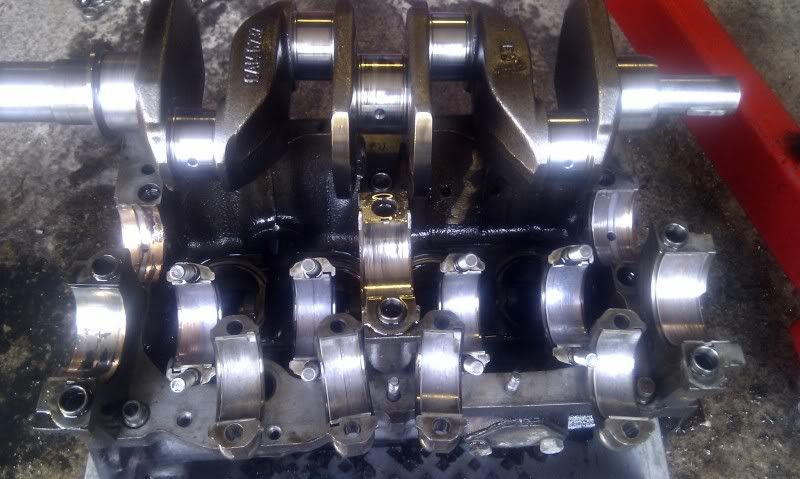
I made a crude setup to balance the rods. I could repeatable measure a difference of up to 10g between the big ends, so corrected them until there was closer to 1g difference
|
||||||
|
696 Posts Member #: 10034 Post Whore Birmingham |
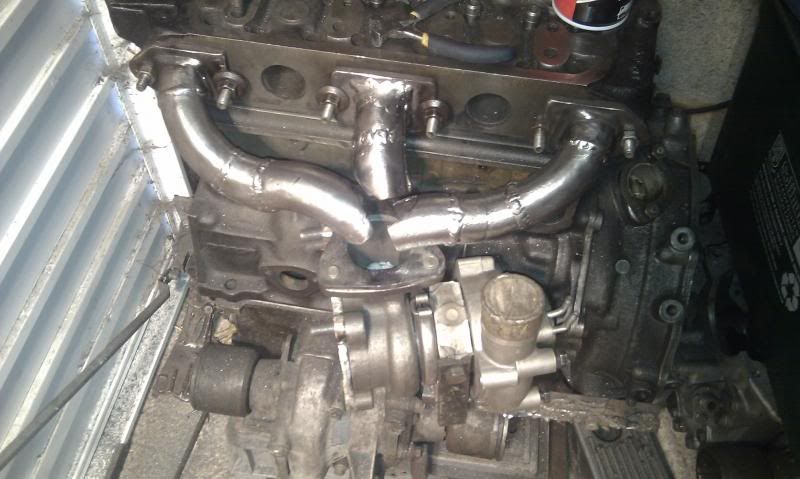
9th Sep, 2013 at 01:30:48am
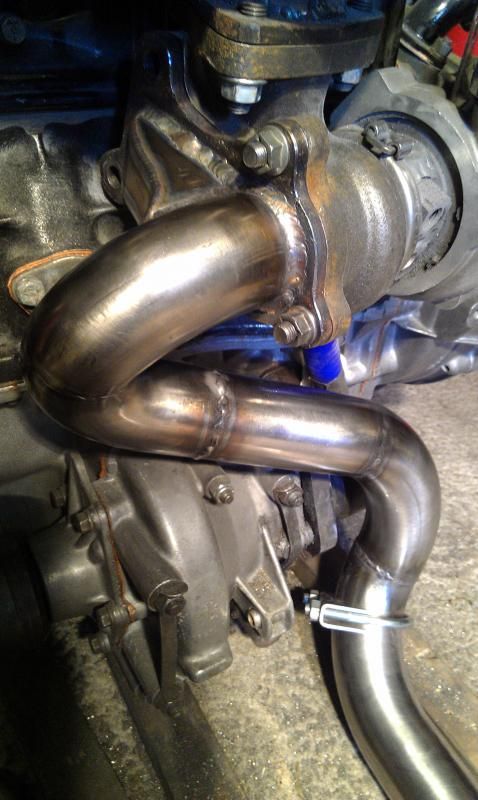
This is the first attempt at fabricating the exhaust manifold. I couldn't find any pre-cut flanges for my turbo so made my own. I made a cardboard template, cut out flange sections from 7mm thick angle iron, them welded them together
Edited by PhilR on 9th Sep, 2013. |
||||||
|
696 Posts Member #: 10034 Post Whore Birmingham |
9th Sep, 2013 at 01:59:28am
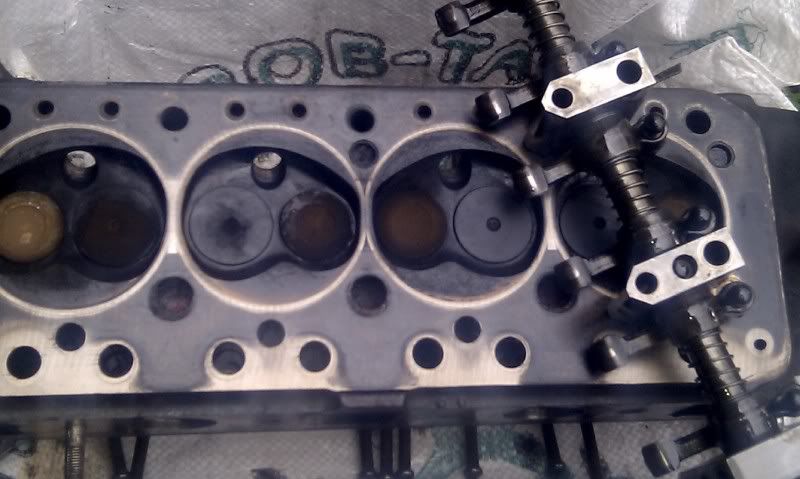
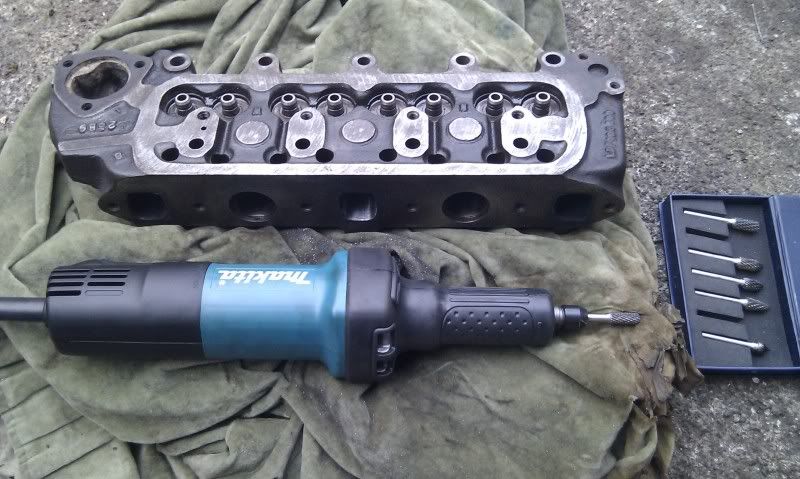
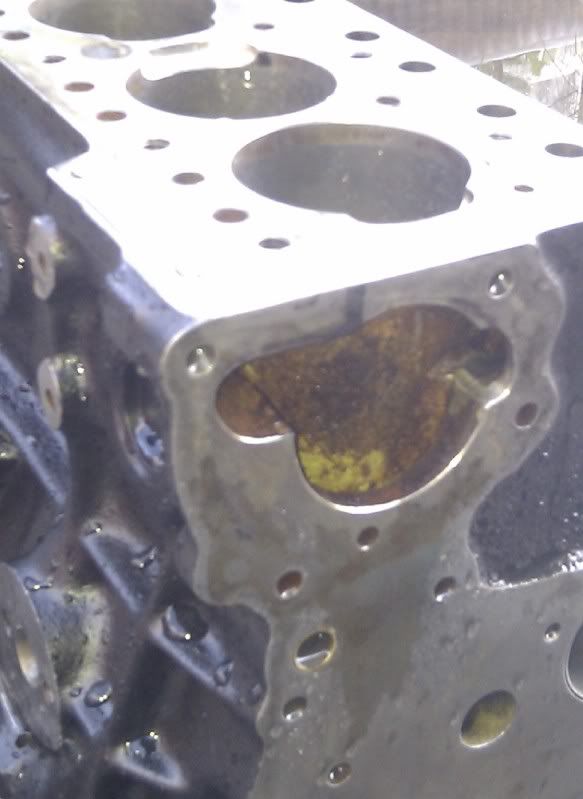
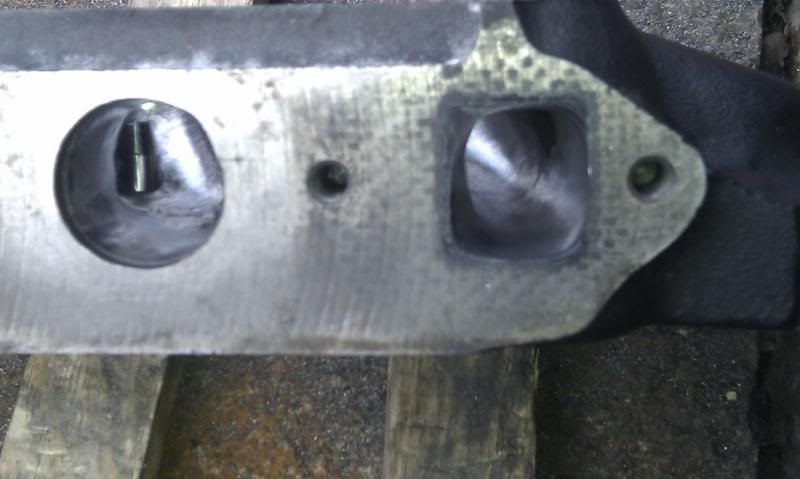
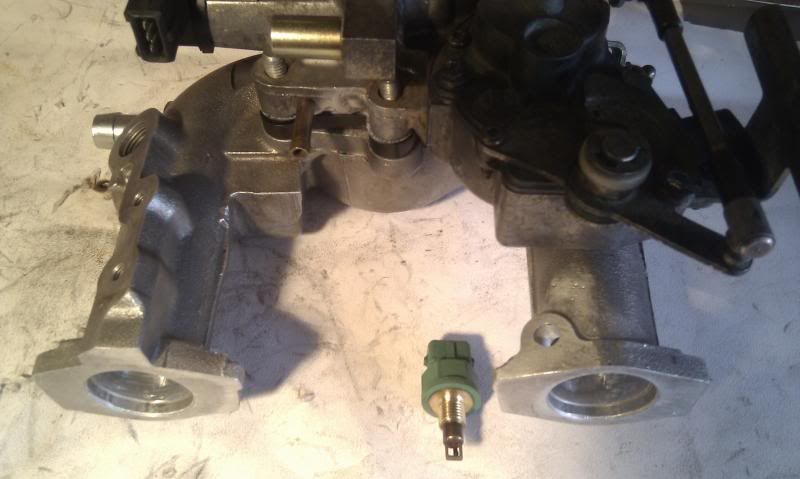
Inlet mods...
|
||||||
|
696 Posts Member #: 10034 Post Whore Birmingham |
9th Sep, 2013 at 02:13:58am
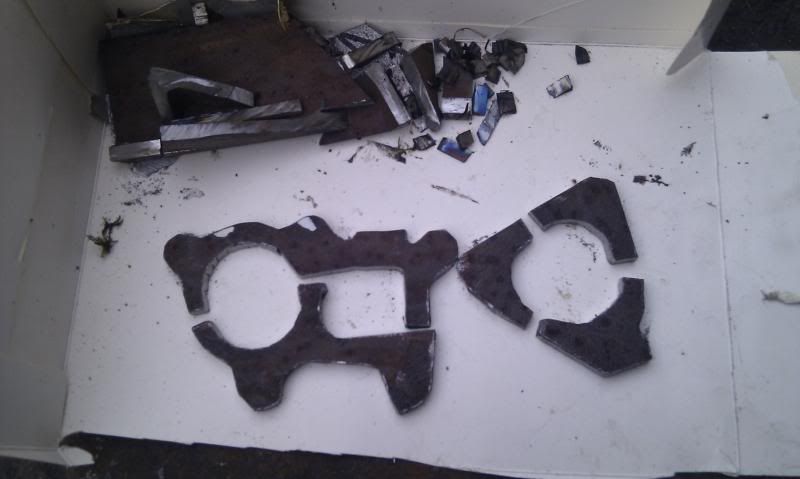
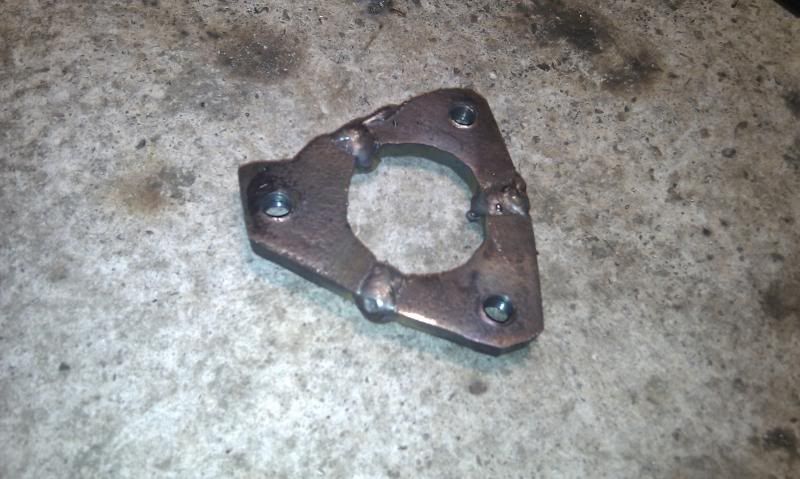
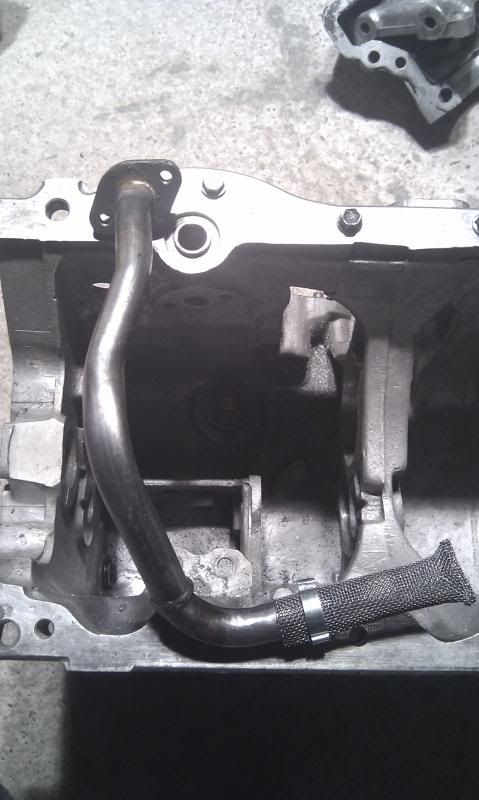
A few more bits welded up. I made the flanges from scrap and the central oil pick up from two normal pickups. I know you can easily buy these parts, but my budget is very tight. If I can make the part for nothing, it's £50 to spend somewhere else ( and it's surprising how quickly the £50 spends add up!)
|
||||||
|
696 Posts Member #: 10034 Post Whore Birmingham |
9th Sep, 2013 at 02:22:10am
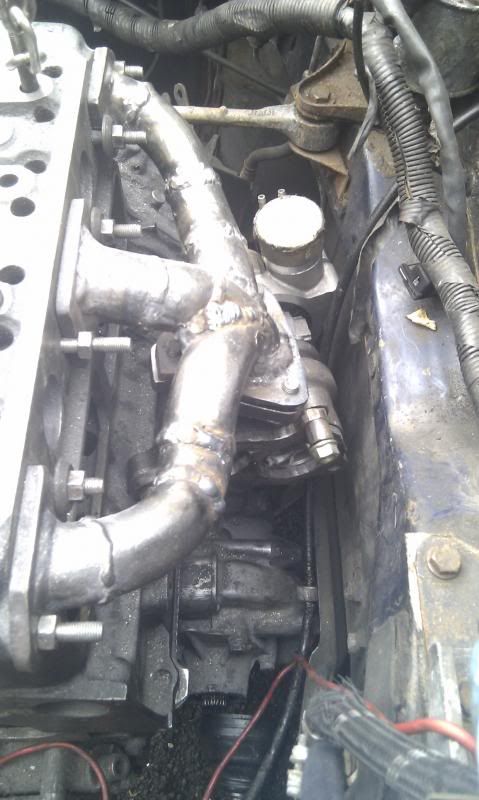
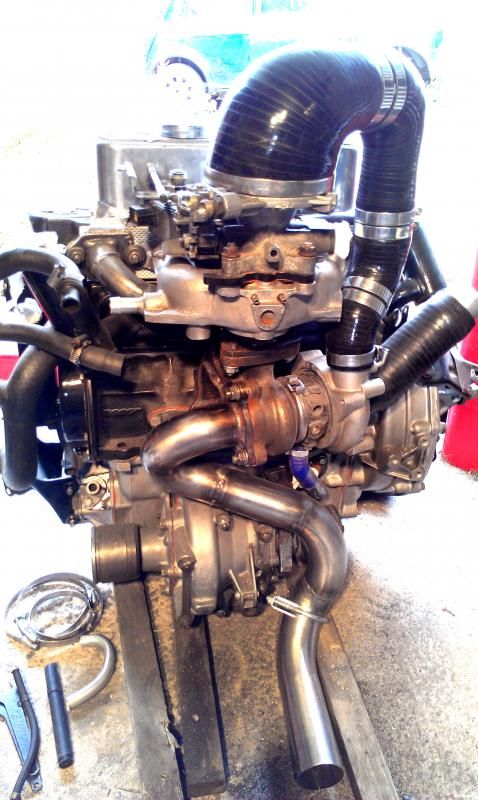
This was a nice way-point to reach; I trial fitted the engine and turbo and it fits perfectly with no bulkhead mods |
||||||
 361 Posts Member #: 114 Senior Member Porto/Portugal |
9th Sep, 2013 at 07:25:10am
Do have any idea how to make the down pipe? Pedro Silva
|
||||||
|
696 Posts Member #: 10034 Post Whore Birmingham |
9th Sep, 2013 at 11:11:30am
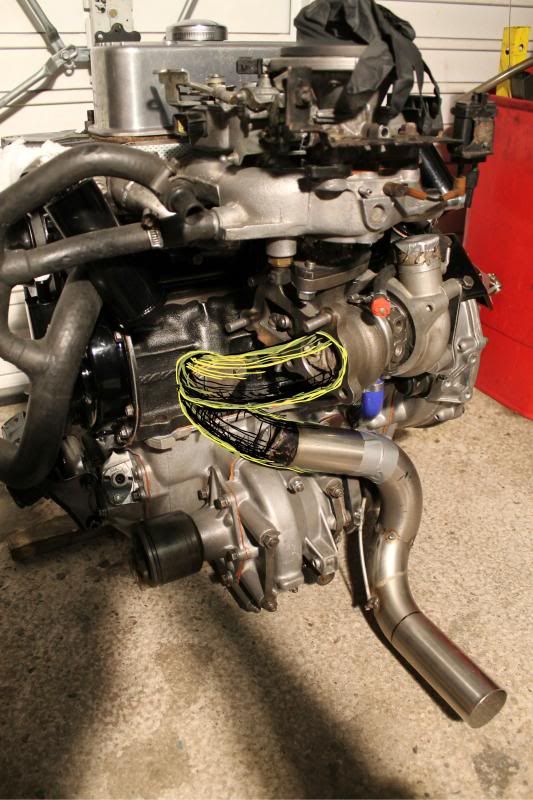
I've used 4 X 2" stainless 90 degree bends -
|
||||||
|
696 Posts Member #: 10034 Post Whore Birmingham |
11th Jul, 2014 at 03:29:35pm
I found some tighter radius bends for the part of the downpipe, so welded them in... I think this is the 1st part I've completed with my new welder, yay Edited by PhilR on 11th Jul, 2014. |
||||||
|
696 Posts Member #: 10034 Post Whore Birmingham |
11th Jul, 2014 at 04:00:38pm
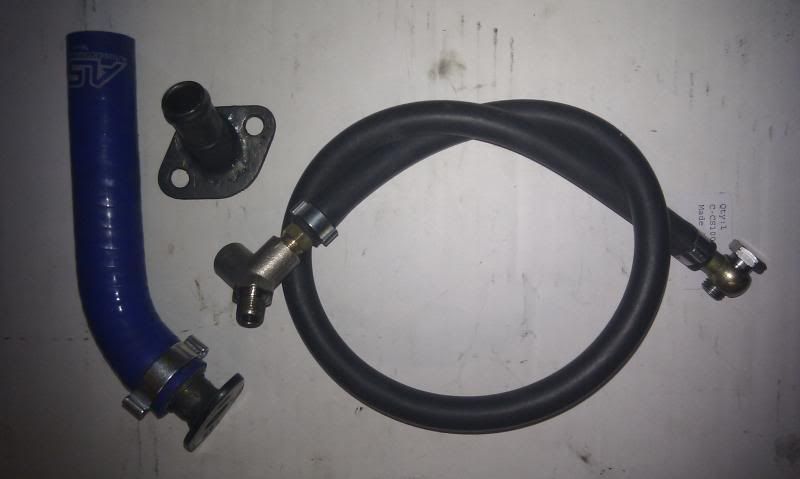
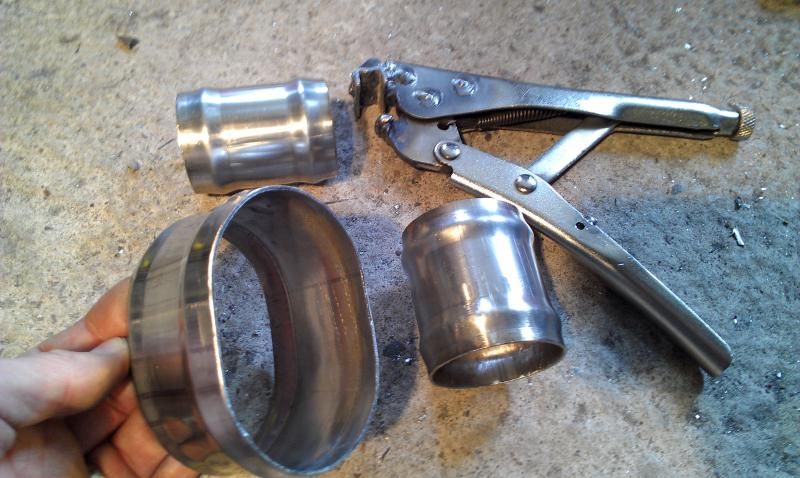
To get from the turbo outlet (44mm) to the inlet manifold (102mm), I went with silicone reducer hoses and swaged joiners.
|
||||||
|
696 Posts Member #: 10034 Post Whore Birmingham |
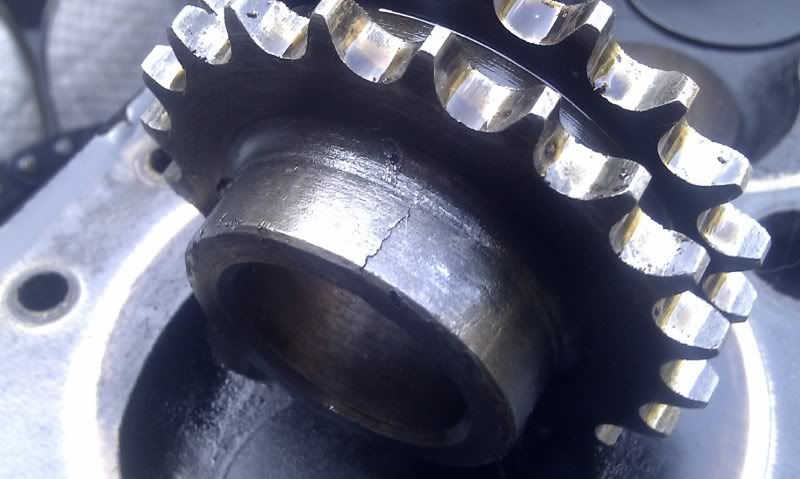
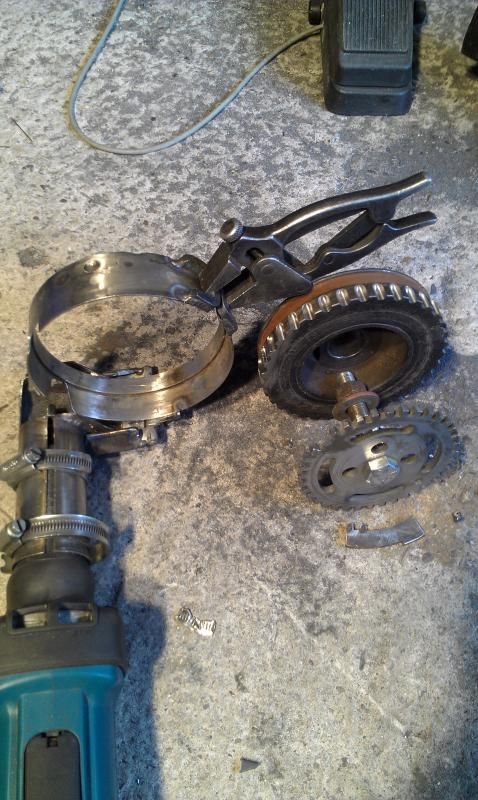
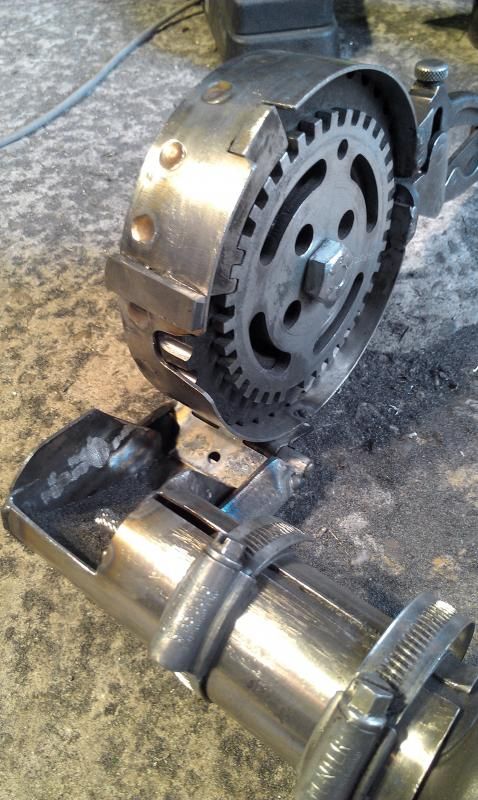
11th Jul, 2014 at 04:42:32pm
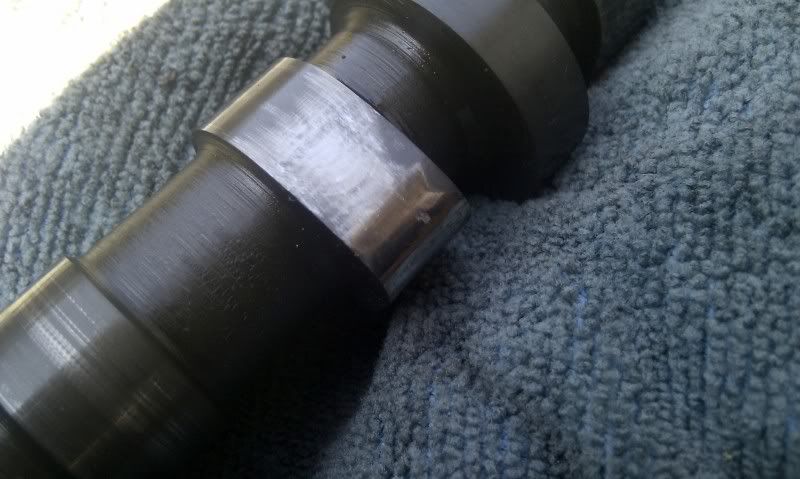
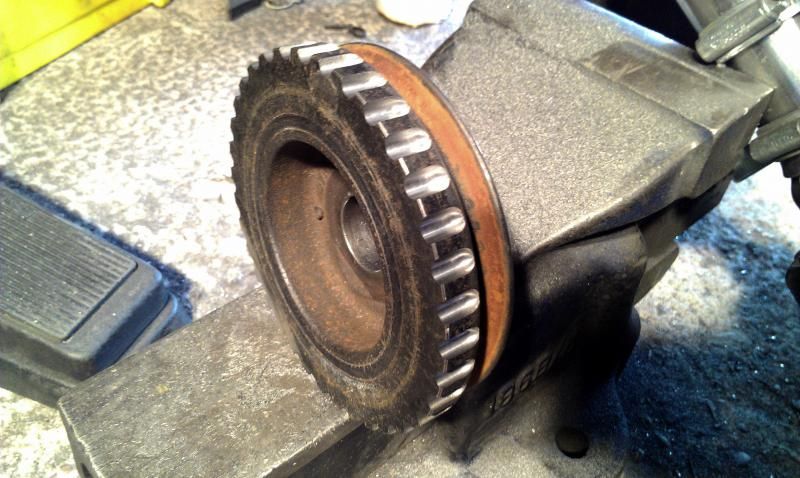
I started making my timing wheel out of a 1275 crank damper pulley. It will be a 36-1 wheel...
|
||||||
 7262 Posts Member #: 1268 The Boom Boom speaker Police! Essex |
11th Jul, 2014 at 04:43:04pm
Love a homemade tool. Very nice. In the 13's at last!.. Just |
||||||
 520 Posts Member #: 189 Post Whore Norway |
11th Jul, 2014 at 05:15:14pm
Long 8 weeks www.shag.no |
||||||
 16540 Posts Member #: 4241 King Gaycharger, butt plug dealer, Sheldon Cooper and a BAC but generally a niceish fella if you dont mind a northerner Rotherham, South Yorkshire |
11th Jul, 2014 at 05:53:15pm
Good skills. On 11th Feb, 2015 robert said:
i tried putting soap on it , and heating it to brown , then slathered my new lube on it 
|
||||||
 359 Posts Member #: 8931 Senior Member Herefordshire |
11th Jul, 2014 at 07:50:07pm
That tool idea is incredible! Amazing skills! |
||||||
 3673 Posts Member #: 9300 Post Whore Quarry Bonk |
11th Jul, 2014 at 08:28:28pm
Some good ideas in here and ingenuity (sp?) but I too have a SIP welder which ive modded, but yet to set it up yet so I wont know how well it works, added a separate PSU for the wire feed motor which adds motor braking, along with the wire feed strap. On 26th Jan, 2012 Tom Fenton said:
ring problems are down to wear or abuse but although annoying it isn't a show stopper On 5th Aug, 2014 madmk1 said:
Shit the bed! I had snapped the end of my shaft off!! 17.213 @ 71mph, 64bhp n/a (Old Engine) |
||||||
| Home > Show Us Yours! > Turbo Cooper - floor repairs | |||||||
|
|||||||


| Page: |