
| Page: |
| Home > Show Us Yours! > K1100 turbo track car build | |||||||
 218 Posts Member #: 9213 Senior Member Scotland |
19th Aug, 2014 at 10:20:14pm
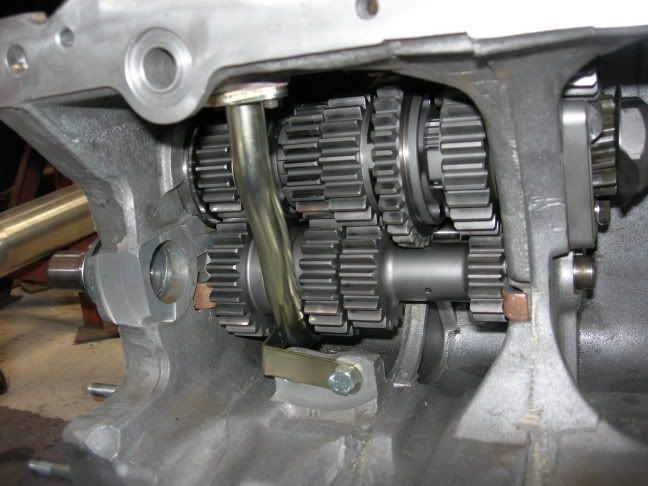
Med dog box, tranx plate type lsd and straight cut 4.5 cwp. Its an amazing setup for the sprints and hillclimbs that I do.
|
||||||
|
218 Posts Member #: 9213 Senior Member Scotland |
19th Aug, 2014 at 10:31:55pm
Double post......... Edited by nky_84 on 19th Aug, 2014. |
||||||
 539 Posts Member #: 6807 Post Whore York |
20th Aug, 2014 at 06:53:38pm
Blimey that is expensive. I had a company quote me £150+vat but i could tell they just didn't want the job to be honest.
On 19th Aug, 2014 nky_84 said:
Med dog box, tranx plate type lsd and straight cut 4.5 cwp. Its an amazing setup for the sprints and hillclimbs that I do. Ive been quoted 170+vat  to do welding and machining. Going to try a few other places I think! to do welding and machining. Going to try a few other places I think!
|
||||||
|
539 Posts Member #: 6807 Post Whore York |
13th Oct, 2014 at 12:51:33pm
Bit of an update.
|
||||||
|
539 Posts Member #: 6807 Post Whore York |
18th Dec, 2014 at 03:04:48pm
Bit of an update at last!
Edited by adcyork on 18th Dec, 2014. |
||||||
 16540 Posts Member #: 4241 King Gaycharger, butt plug dealer, Sheldon Cooper and a BAC but generally a niceish fella if you dont mind a northerner Rotherham, South Yorkshire |
18th Dec, 2014 at 08:19:02pm
Looking good. On 11th Feb, 2015 robert said:
i tried putting soap on it , and heating it to brown , then slathered my new lube on it 
|
||||||
|
450 Posts Member #: 10396 Advanced Member Formerly mk2turbo Stoke-on-Trent |
18th Dec, 2014 at 09:30:06pm
Looking good, how much did they charge for the blasting? |
||||||
 2091 Posts Member #: 9894 Post Whore Dorking |
18th Dec, 2014 at 09:35:40pm
Looks great that! |
||||||
|
539 Posts Member #: 6807 Post Whore York |
18th Dec, 2014 at 09:47:02pm
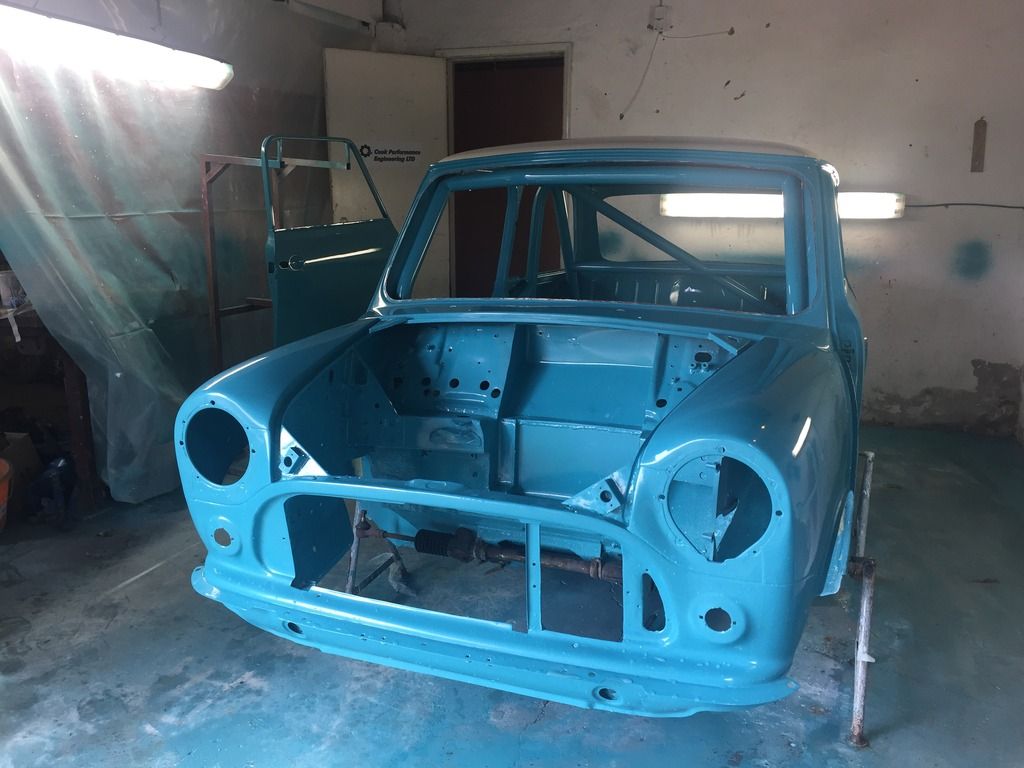
Cheers chaps. The blasting was £500 total, which included blasting and red oxide spraying of the shell, subframes, all of the suspension components and a few other items.
Edited by adcyork on 18th Dec, 2014. |
||||||
|
539 Posts Member #: 6807 Post Whore York |
31st Mar, 2015 at 10:49:31am
Bit of an update.
|
||||||
 8297 Posts Member #: 408 Turbo Love Palace Fool Aylesbury |
31st Mar, 2015 at 11:51:13am
Yep I've got the same flange, and have the same issue. I'm sorting out getting some of my own cut today, as I've got my turbo manifolds all jigged up but no flange to weld it too. https://www.facebook.com/pages/Fusion-Fabri..._homepage_panel
|
||||||
|
539 Posts Member #: 6807 Post Whore York |
1st Jun, 2015 at 09:59:24am
Since the last post a few key bit of progress have been made.
Edited by adcyork on 1st Jun, 2015. |
||||||
 140 Posts Member #: 10115 Advanced Member Sydney, Australia |
1st Jun, 2015 at 11:51:07am
mmmmm that is very tasty indeed! lovely work so far! |
||||||
 428 Posts Member #: 10128 Senior Member Dorset |
1st Jun, 2015 at 04:12:09pm
Looking good, can't wait to see this complete. |
||||||
 359 Posts Member #: 8931 Senior Member Herefordshire |
1st Jun, 2015 at 05:51:45pm
This project is looking seriously good |
||||||
 7260 Posts Member #: 1268 The Boom Boom speaker Police! Essex |
1st Jun, 2015 at 06:47:08pm
Very nice In the 13's at last!.. Just |
||||||
|
37 Posts Member #: 5037 Member |
8th Jun, 2015 at 02:13:40pm
looking good , i see you got the lathe etc there , my dad and i have nearly finished our k1100 conversion my dad made all the parts :
|
||||||
 520 Posts Member #: 189 Post Whore Norway |
10th Jun, 2015 at 03:28:04pm
This look like a really good tought out build. I like it a lot :) www.shag.no |
||||||
|
2091 Posts Member #: 9894 Post Whore Dorking |
11th Jun, 2015 at 02:14:44pm
looks excellent! |
||||||
 2974 Posts Member #: 10749 Post Whore lowestoft suffolk |
11th Jun, 2015 at 03:29:53pm
Does look a nice thought out build...
On 24th Oct, 2015 jonny f said:
Nothing gets past Dave lol NOTHING GETS PAST ME!! 
1/4 mile 14.7 @ 96mph 12psi boost Showdown class A 2nd place 18.6 @ 69mph |
||||||
|
539 Posts Member #: 6807 Post Whore York |
11th Jun, 2015 at 04:00:04pm
Thanks Dave. Yes they're a set of Jon's turrets and they're welded from the outside (wheel arch) as access becomes an issue round the back
On 11th Jun, 2015 D4VE said:
Does look a nice thought out build... Are the coilover turrets jon betts ones? And how do you carry on welding around the back? Or is it welded from the outside at this point??? |
||||||
 12307 Posts Member #: 565 Carlos Fandango Burnham-on-Crouch, Essex |
19th Jul, 2015 at 01:50:37pm
ah, found the thread,
On 28th Aug, 2011 Kean said:
At the risk of being sigged... Joe, do you have a photo of your tool? http://www.turbominis.co.uk/forums/index.p...9064&lastpost=1 https://joe1977.imgbb.com/ |
||||||
|
539 Posts Member #: 6807 Post Whore York |
28th Jul, 2015 at 10:53:43pm
On 19th Jul, 2015 Joe C said:
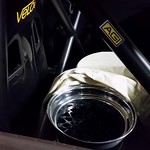
ah, found the thread, just finally got around to checking my SC manifold flange against the head and it fits fine, so they have obviously corrected this at some point. Interesting Joe. I didn't get round to firing mine back at them in time. As some may have seen I was having serious trouble getting the driveshaft angles to work with the engine in a suitable position to clear the bonnet with about 8mm clearance. After much moving about and re drilling of the bolt holes a solution was found. An intermediate position about 5mm higher and 10mm further back was found which solved the driveshaft issue and resulted in a 5mm gap to bonnet, good enough! Onwards and upwards! I've been finalising the intercooler and plenum package which allowed me to get the plenum part finished. First of all I made a form tool to spin a set of trumpets up out of some 38mm Ali tube. Applying heat to the tube with a propane torch as the form tool was crashed into it made forming very easy indeed. 
A little bit of refinement of the speeds and feeds and third time lucky 
X4 after a bit of polishing 
Next up was the plenum body which was designed for a 1.5L capacity on the basis of 1.15 x cylinder capacity for good transient throttle response, which will be key to offset any potential lag from running the GT20. 

IACV flange turned up to suit a pug 306 rallye valve neatly packaged in the centre of the cylinder in the free space below. I need to sort out a spigot on the throttle body next to mate this to. 
Modified Volvo S40 throttle body mocked up at the rough angle to meet the intercooler spigot 
So the next step is to do a proper eng drawing for the intercooler and get it out for quotes. I'll be sending it to pace and concept custom. Does anyone have any other suggestions? Edited by adcyork on 28th Jul, 2015. |
||||||
|
8297 Posts Member #: 408 Turbo Love Palace Fool Aylesbury |
29th Jul, 2015 at 07:43:19am
That's looking good!
https://www.facebook.com/pages/Fusion-Fabri..._homepage_panel
|
||||||
|
539 Posts Member #: 6807 Post Whore York |
31st Jul, 2015 at 06:52:06am
Cheers Matt
|
||||||
| Home > Show Us Yours! > K1100 turbo track car build | |||||||
|
|||||||


 The only way to sort it is to separate each pipe flange.


| Page: |