Donations towards server fund so far this month.

 
£0.00 / £100.00 per month
Page:
Home > Show Us Yours! > '77 Clubman rebuild

Graham T

User Avatar

604 Posts
Member #: 1106
Post Whore

Hungerford, Berks

Time for another project!

The little blue “coupe” is currently all up together after having replaced the valve springs, but is sat waiting in the garage for the opportunity to get out on the road for a few miles at least before I even contemplate another dyno session. I actually got it back together and started up back on the 6th October, but since then there has not been a single day I have been able to get it out for a drive, and the way it is looking at the moment, I have the feeling this in now going to drop into next year.
I still have to complete the variable length runners and CF plenum, but I’m not in that much of a hurry for that, because they will not get fitted until I have some more results with the 1.5:1 rockers fitted, and I’d rather save all the electrickery and Arduino programming until its too cold to go play in the garage.

So rather than sitting doing nothing other than waiting on the winter blues to shake off, I have decided that the time has come to start a long overdue project – rebuilding my ’77 clubman.


A little history on the car:
My parents bought the car for me when I was 15, so we have had it for 30 years now.
During its time with us it has so far had 2 minor low budget rebuilds, both times funded by my parents – once for me and then again several years later for younger sibling.

Here are a few scanned photo’s from when dad and I (Dad mostly) rebuilt it for my first car.


Originally it had a 998cc engine in it, but I acquired a 1275cc unit from a friend who rolled his 1275 GT and wrote it off in snow, only weeks after having the reconditioned 1275 unit installed.
I managed to screw up the engine within a couple of years. We think it suffer piston ring failure due to me hammering the nuts off it too much in second, but that never got investigated, because needing a car to get to work (as an Apprentice at that time), I was forced to buy a run about. So the mini was taken off the road, with every intention of rebuilding the engine – but that never happened.
I think I ran it for around 5 years before it came off the road.


From there it sat in storage for several years before we started rebuilding it for aforementioned younger sibling. I never did find out what happened to the 1275 engine, because it was converted back to 998cc.
Another couple of years down the line and it was on the road again, this time wearing a nasty purple coat. It was run as a daily for many years until 2009, when my younger sibling could no longer stomach driving it, being 7 months pregnant. So rather than see it go off the road again, I swapped it for my car at the time, an old S plate Hyundia Lantra.


This is the only photo I have of it in “ford purple velvet”


It was when I got it back that I started playing with the MS2 and fuel injection, basically at a loss for something to do while waiting to start building the clubman coupe (at least coupe is what the DVLA registered the blue one as).
March 12th 2010 I had the fuel injection installed and the car drivable, then the long slog to get it working properly…


Anyhow, I kept the car on the road for another 2 ½ years, but it had started to get the rot badly by then, and so, as it was only a play thing and we had started building the coupe, it came of the road for a “future” rebuild.
Since then it has sat in various places outside: on the lawn, in the flower bed and on the drive, then finally inside, into a small garage, all the time quietly rotting away and waiting on that promised rebirth.

It even got used as a work bench for a few months while building the new garage for the coupe – perfect height for the chop saw…


This year, I managed a staggering 300 odd miles in the coupe, due to a few technical mishaps, but mainly due to the weather not really being that good for an open top. When the sun was out, the car was apart, only to get back on the road when it started raining.
This is getting just a little frustrating if I’m honest, because although the coupe is fun to drive, it’s just not practical and I really don’t like the torque steer. (also it weighs in at ~870kg).
I guess I could sort the torque steer out, now that I know what is causing a big majority of it, but somehow I just do not want to change the way the little blue beast looks, so the plan is simple:

Rebuild the ‘78 clubman and swap out the engine (maybe the whole front subframe assembly) from the coupe into the ‘78 clubman, then build either an NA or mild turbo motor (and front subframe assembly) for the coupe.

I know what colour it is going to be, I know it will have a FG/ CF removable front (I am thinking 2 piece), I know what engine will be going in it and I know (sort of) what wheels I am going to use, but other than that, I’ve not really planned much else, apart from getting the shell solid...

Edited by Graham T on 9th Dec, 2019.

’77 Clubman build thread
http://www.turbominis.co.uk/forums/index.php?p=vt&tid=618189

Siamese 5 port EFI testing
http://www.turbominis.co.uk/forums/index.php?p=vt&tid=611675


Graham T

User Avatar

604 Posts
Member #: 1106
Post Whore

Hungerford, Berks

So, onto business…

I started stripping out the 78 clubman around mid October, just to see how badly rotted it was before making a decision on rebuilding this shell, or sourcing another shell.


It is fairly bad…


For a fleeting moment I thought: “Let’s take a look at a different shell that I had been offered previously”, but then I thought about the history of the car and decide no, I will keep this one and do a massive rebuild – apparently a lot of work now that I have got into it…


Having been not too sure where to start, I decided that getting the front solid first would be best before tackling the floor and rear.


And a coat of epoxy primer to seal it for now.


Hopefully tomorrow I can get the bonnet hinge bracket cleaned up and then start work on the passenger side.

’77 Clubman build thread
http://www.turbominis.co.uk/forums/index.php?p=vt&tid=618189

Siamese 5 port EFI testing
http://www.turbominis.co.uk/forums/index.php?p=vt&tid=611675


robert

User Avatar

6743 Posts
Member #: 828
Post Whore

uranus

excellent... be done in no time ! *wink*

Medusa + injection = too much torque for the dyno ..https://youtu.be/qg5o0_tJxYM


jonny f

User Avatar

2091 Posts
Member #: 9894
Post Whore

Dorking

Good to see a fresh project thread on here! Good luck with the rebuild Graham


Graham T

User Avatar

604 Posts
Member #: 1106
Post Whore

Hungerford, Berks

On 9th Nov, 2019 robert said:
excellent... be done in no time ! *wink*


hmmm - well that depends on enthusiasm, finances and the other projects...
At the moment enthusiasm is full on, but we will see how that level holds as the winter goes on.


On 10th Nov, 2019 jonny f said:
Good to see a fresh project thread on here! Good luck with the rebuild Graham


Thanks Jonny.

I'm not sure there is going to be anything to exciting involved really - just a basic rebuild of the car, but as I am rubbish at documenting stuff, I thought posting it up on here will force me to keep a diary of types.

’77 Clubman build thread
http://www.turbominis.co.uk/forums/index.php?p=vt&tid=618189

Siamese 5 port EFI testing
http://www.turbominis.co.uk/forums/index.php?p=vt&tid=611675


hazpalmer

User Avatar

1648 Posts
Member #: 9038
Post Whore

Carlisle, Cumbria

Good to see people still posting up projects. I'd post mine, but its boring and progress is very slow


theoneeyedlizard

User Avatar

7261 Posts
Member #: 1268
The Boom Boom speaker Police!

Essex

Excellent work. I’ve been trying to remain motivated on my budget resto. It’s always good to see one in worse shape, coming back together.

In the 13's at last!.. Just


Oli

User Avatar

1733 Posts
Member #: 1910
Post Whore

Wilts

Good start!

Where did you get the brush on epoxy primer?

On 15th Jul, 2009 fastcarl said:
the pissed up clown stood back up, did a twirl and left bollock naked,


Graham T

User Avatar

604 Posts
Member #: 1106
Post Whore

Hungerford, Berks

On 11th Nov, 2019 hazpalmer said:
Good to see people still posting up projects. I'd post mine, but its boring and progress is very slow


Yeah, I think this is going to be boring also - and slow. So I'll only post up progress occasionally and try to keep to the major achievements - Or stupid questions


On 11th Nov, 2019 theoneeyedlizard said:
Excellent work. I’ve been trying to remain motivated on my budget resto. It’s always good to see one in worse shape, coming back together.


My motivation is simple – I want to be able to keep on with the EFI and inlet testing, which I can’t do most of the time because I made a stupid decision to cut the roof off the one I am driving… Fun as it is when the sun is out.

I need a complete new floor assembly and most of the back end as well – so yes, its in pretty bad shape all round – made worse by the “sins” of 2 very low budget rebuilds, as I am now finding out.


On 11th Nov, 2019 Oli said:
Good start!

Where did you get the brush on epoxy primer?


It is HB Body Vehicle 989 - bought it on ebay

I read somewhere it can be brushed on. I also have thinners to spray on if needed.
Once I have all the major panels replaced/ repaired, I'll get it shot bast then start again with the primer if necessary.

Edited by Graham T on 12th Nov, 2019.

’77 Clubman build thread
http://www.turbominis.co.uk/forums/index.php?p=vt&tid=618189

Siamese 5 port EFI testing
http://www.turbominis.co.uk/forums/index.php?p=vt&tid=611675


Graham T

User Avatar

604 Posts
Member #: 1106
Post Whore

Hungerford, Berks

Wow, almost a month since the last update and it feels like not a lot achieved…

I have to admit, this is all turning out to be a lot more challenging than I thought it would be.


So, for the last few weeks I’ve:

Cut out the grot on the passenger inner wing/ wheel well


Made up some new panels to rebuild what I cut out


And installed them along with the new flitch panel.


Removed the bonnet hinge mounts, clean then and reinstalled them.


Cut out the dash top rail and the bottom piece of the A pillar (?) from windscreen to roof. this is a shaped piece that meets the dash rail, inner door post/ windscreen surround.
I did not get photos of the mess these area's were in, basically because there was nothing left to take a snap of.


Made replacement parts


I tried bending them to shape as much as possible, but that really never worked that well, hence I ended up making up smaller sections welded together.


And tried to get it all to fit.


It is almost there, but the flitch panels were not the same shape as the A panels and so nothing matched the shape of the door, so I have modified the flitch panels to allow the top of the A panel inwards. It is still not enough on the drivers side, but I think once the A post and door step repair panel gets installed, that will allow everything to move in just a little more.
So basically now I think that lot is ready for welding in.
I’m going to offer up a windscreen next and make sure that the lower windscreen surround is actually the right shape before going any further.

I’ve cleaned up and shot blast the upper bulkhead outside and in and given it a coat of epoxy primer.


So as long as the windscreen fits OK, I think it is ready to weld up, then I can finish off the top lip of the inner wings.

Then I can move onto replacing the toeboard - which was a last minute decision, rather than trying to repair it where it meets the floor pan.


Complete new floor assembly is bought and currently living on our Spare bed, and considering the cost of carriage on that, I also got rear quarter panels for each side and full new toeboard on the same delivery.


I really have no idea yet how to cut out the whole floor to put the new one in, but I guess its brace up everything and try to jig the shell as solid as possible before attacking with an angle grinder.


Edited by Graham T on 9th Dec, 2019.

’77 Clubman build thread
http://www.turbominis.co.uk/forums/index.php?p=vt&tid=618189

Siamese 5 port EFI testing
http://www.turbominis.co.uk/forums/index.php?p=vt&tid=611675


Graham T

User Avatar

604 Posts
Member #: 1106
Post Whore

Hungerford, Berks

(oh and I have changed the thread title slightly – the logbook says the car is 77, not 78…)

Edited by Graham T on 9th Dec, 2019.

’77 Clubman build thread
http://www.turbominis.co.uk/forums/index.php?p=vt&tid=618189

Siamese 5 port EFI testing
http://www.turbominis.co.uk/forums/index.php?p=vt&tid=611675


D4VE

User Avatar

2974 Posts
Member #: 10749
Post Whore

lowestoft suffolk

Neat panels being made there 👍

On 24th Oct, 2015 jonny f said:
Nothing gets past Dave lol

NOTHING GETS PAST ME!! *tongue*

1/4 mile 14.7 @ 96mph 12psi boost
Showdown class A 2nd place 18.6 @ 69mph


Graham T

User Avatar

604 Posts
Member #: 1106
Post Whore

Hungerford, Berks

Just a little more done now.

Toe board welded to Bulk head, but as yet not welded to the Flitch panels – I’m not happy with how it sits against the old floor, so for now it is held in place with screws and will be finished welded when the new floor is in – just in case is needs any adjustment.

I’ve made a cradle to hold the car upside down and added lots of strengthening before it was turned over.


Now I can see the underside at the back, I have decided to get a load more panels.
Whole boot floor, rear wheel arch assemblies, stiffeners, strengtheners and all the parts to completely replace the floor.


So, now its proper flintstone-esque…


Obviously still a fair amount to chop out before I can try to fit the new floor, but its moving a bit quicker now…

’77 Clubman build thread
http://www.turbominis.co.uk/forums/index.php?p=vt&tid=618189

Siamese 5 port EFI testing
http://www.turbominis.co.uk/forums/index.php?p=vt&tid=611675


Graham T

User Avatar

604 Posts
Member #: 1106
Post Whore

Hungerford, Berks

And a bit of a basic question perhaps:

Do people generally remove the paint that new panels are coated in?


Most of the panels I have bought are Heritage, but some are not.
I am not sure if it is worth stripping all the panels back bare, or just keying the existing paint?

I’m now undecided if I am actually going to send it away for shot blasting.
Originally I was going to, but as about 80% of the shell will be new metal, and I have a small shot blast device to get to the un-replaced parts, I’m thinking not.
So if I can spray over the existing paint of the new panels (after keying), then there is even less point having it blasted.

’77 Clubman build thread
http://www.turbominis.co.uk/forums/index.php?p=vt&tid=618189

Siamese 5 port EFI testing
http://www.turbominis.co.uk/forums/index.php?p=vt&tid=611675


robert

User Avatar

6743 Posts
Member #: 828
Post Whore

uranus

holy moley !!!!

Medusa + injection = too much torque for the dyno ..https://youtu.be/qg5o0_tJxYM


Callum

450 Posts
Member #: 10396
Advanced Member Formerly mk2turbo

Stoke-on-Trent

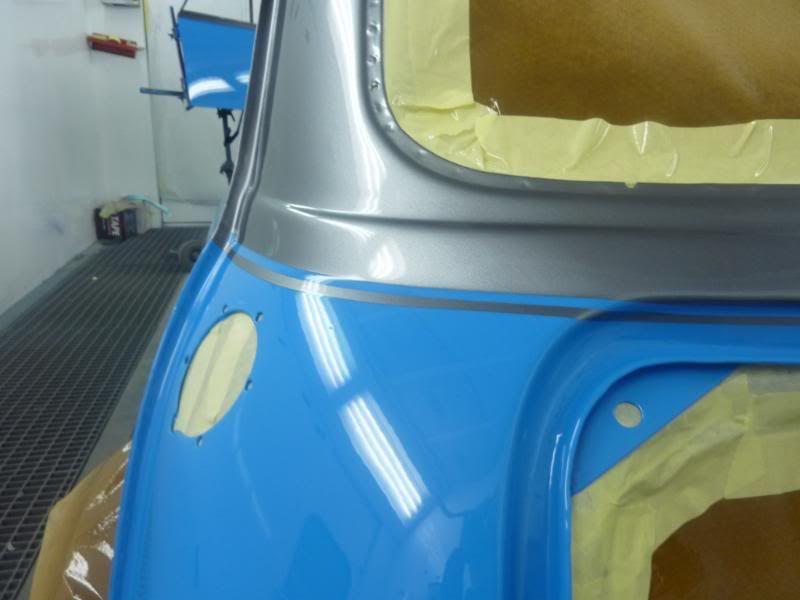
Looking good. I left the coating on the heritage panels, just keyed it before priming, but removed it from the non geniune ones


Steve220

242 Posts
Member #: 11017
Senior Member

Shropshire


On 27th Dec, 2019 Graham T said:
And a bit of a basic question perhaps:

Do people generally remove the paint that new panels are coated in?


Most of the panels I have bought are Heritage, but some are not.
I am not sure if it is worth stripping all the panels back bare, or just keying the existing paint?

I’m now undecided if I am actually going to send it away for shot blasting.
Originally I was going to, but as about 80% of the shell will be new metal, and I have a small shot blast device to get to the un-replaced parts, I’m thinking not.
So if I can spray over the existing paint of the new panels (after keying), then there is even less point having it blasted.


Yes, I removed it all. I found many spider rust lines under the paint that would have spread or bubbled up over time.


Graham T

User Avatar

604 Posts
Member #: 1106
Post Whore

Hungerford, Berks

Thanks for the feedback – I’ll leave it as originally planned for now: to have it completely blasted and then manually remove whatever paint is left after that.


On 27th Dec, 2019 robert said:
holy moley !!!!


Not so “holey” now…

😊


It actually fits.
Though, I was right not to weld the toeboard to the flitch/ inner wings.
We had to release the screws on the flitch panels and let the toeboard up (up in the photo that is) around 3 - 4mm at the floor end to get the heel board in place.
So, nothing welded yet, but the floor is fixed in place with screws and is seems to fit a whole lot better than anticipated.

Once I have received the boot floor and then got the rear subframe lined up with main floor and boot floor, then the floor assembly needs to come back out to clean off the paint prior to welding.

If the parts arrive on time, I reckon by the end of next weekend I can have the whole underside welded in place.
I was looking at around march to be at this point…

’77 Clubman build thread
http://www.turbominis.co.uk/forums/index.php?p=vt&tid=618189

Siamese 5 port EFI testing
http://www.turbominis.co.uk/forums/index.php?p=vt&tid=611675


robert

User Avatar

6743 Posts
Member #: 828
Post Whore

uranus

EXCELLENT .

Medusa + injection = too much torque for the dyno ..https://youtu.be/qg5o0_tJxYM


gr4h4m

User Avatar

4890 Posts
Member #: 1775
Post Whore

Chester

Looking sweet

I run a supercharger and I don't care the TB is on the wrong side.
VEMS + 12 PSI + Liquid Intercooler = Small Bore FUN!


cossierick

User Avatar

3074 Posts
Member #: 1348
Post Whore

wakefield West Yorks

Looking good , the full floors make such a better overall job .
Yes I’d leave the coating on the gen stuff but definitely needs to come of the non gen stuff .


theoneeyedlizard

User Avatar

7261 Posts
Member #: 1268
The Boom Boom speaker Police!

Essex

That’s coming together really well!

In the 13's at last!.. Just


robert

User Avatar

6743 Posts
Member #: 828
Post Whore

uranus

cost so far ?

Medusa + injection = too much torque for the dyno ..https://youtu.be/qg5o0_tJxYM


Graham T

User Avatar

604 Posts
Member #: 1106
Post Whore

Hungerford, Berks

On 30th Dec, 2019 cossierick said:
Looking good , the full floors make such a better overall job …
.


Yes, that was the conclusion I came to, get rid of all the patched up area’s, all the seams where rust would continue to lurk and get the shell back to its original shape – area’s like the door insteps had become straight over all the rebuilds.

And at least I Know that it will be solid for a fair while to come.


On 31st Dec, 2019 theoneeyedlizard said:
That’s coming together really well!


It was, but I have hit a set back…
When I stripped out the rear subframe, I decided it would be all new, so threw away the mounting components apart from the trunnions.
When I ordered the boot floor on Monday, I had the foresight to order new poly bushes for the rear subframe, but neglected to think about the Trunnion pins.
I did order new pins and a ST/ST rear subframe bolt kit yesterday lunch time, but I think little chance of getting it today.


Dad rescued the old subframe out of the metal skip over the weekend after we decided to replace the boot floor. Apparently he is currently digging through the skip again as I type, trying to find the old pins.
If he can’t find them, then that will slow me down a bit.


On 31st Dec, 2019 robert said:
cost so far ?


So far its at:
Panels £2,370
Subframe mounts (front and rear) £120
Welding gas £190 (but only about 25% used)
Steel sheet £60
Paint £80

Frame to mount the shell on with wheels - £165

So far total is £2,985 – which is a bit of a shock now I have added it all up.


For metal panels I still have to get:
door skins
boot surround (back panel)
companion box repair sections
waist rails

So that’s going to end up around £500 more with carriage.

Then I have to decide on the front end – carbon fibre/ Fibre glass
and whether to use the metal bonnet or buy a composite bonnet.

Ooohh crap! I’ll stop there – I don’t even want to think about the subframes and steering/ brakes/ suspension, wheels and interior.


Edited by Graham T on 31st Dec, 2019.

’77 Clubman build thread
http://www.turbominis.co.uk/forums/index.php?p=vt&tid=618189

Siamese 5 port EFI testing
http://www.turbominis.co.uk/forums/index.php?p=vt&tid=611675


hazpalmer

User Avatar

1648 Posts
Member #: 9038
Post Whore

Carlisle, Cumbria

I think turbo nick on his rebuild tried a carbon fibre front end and didn't get on with so switched back to a metal one.

Home > Show Us Yours! > '77 Clubman rebuild
Users viewing this thread: none. (+ 1 Guests)   Next ->
To post messages you must be logged in!
Username: Password:
Page: