|
Home > Show Us Yours! > Supercharged imp
|
blown_imp

223 Posts
Member #: 598
Senior Member
Gaol
|
|
Hi chaps,
I have posted this project before, but there have been a few updates, so here is the progress for summer -
So anyway, I have some updates as I have been playing with carbon again, and as it is nearing the summer, time to get it driving again!
First of all the plenum -
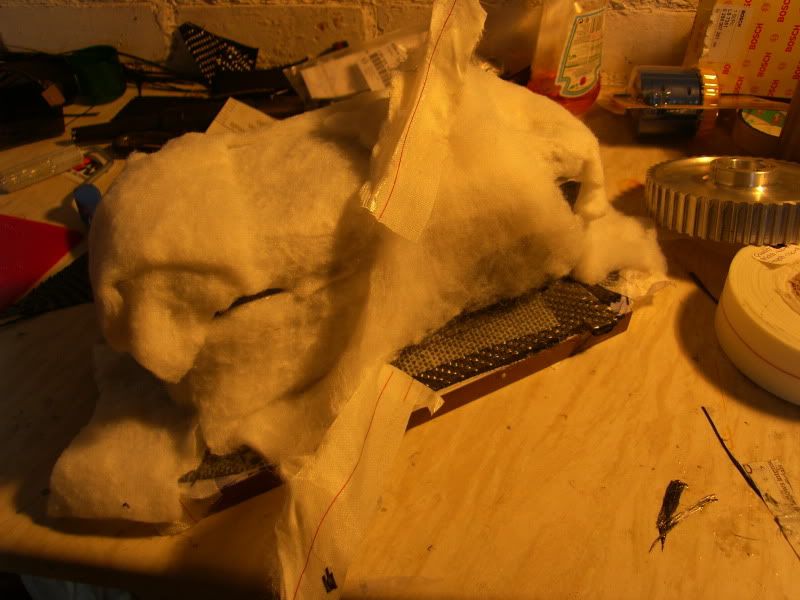
I could not wait any longer to post this, as some of you know my old plenum was leaking lots, so with some common household materials and some not so common, I made this -
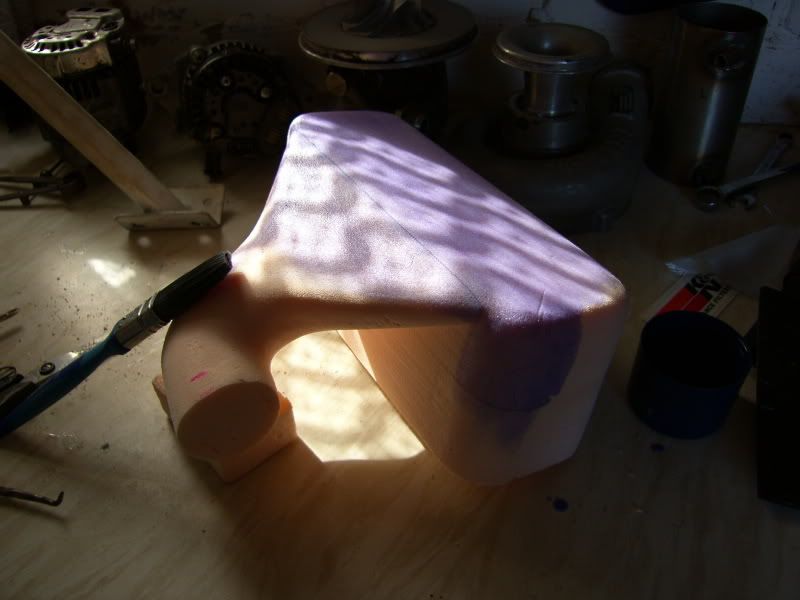
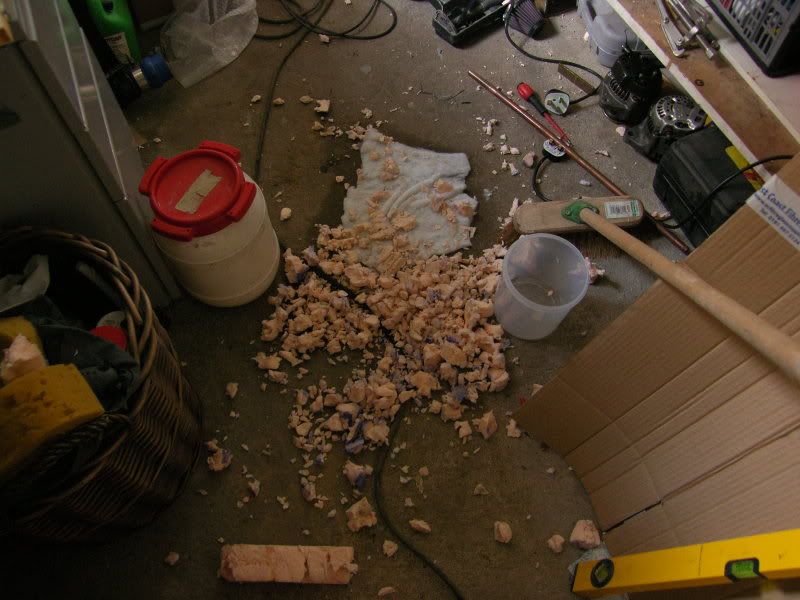
A foam mould from roofing insulation!, the blue stuff is PVA release agent.
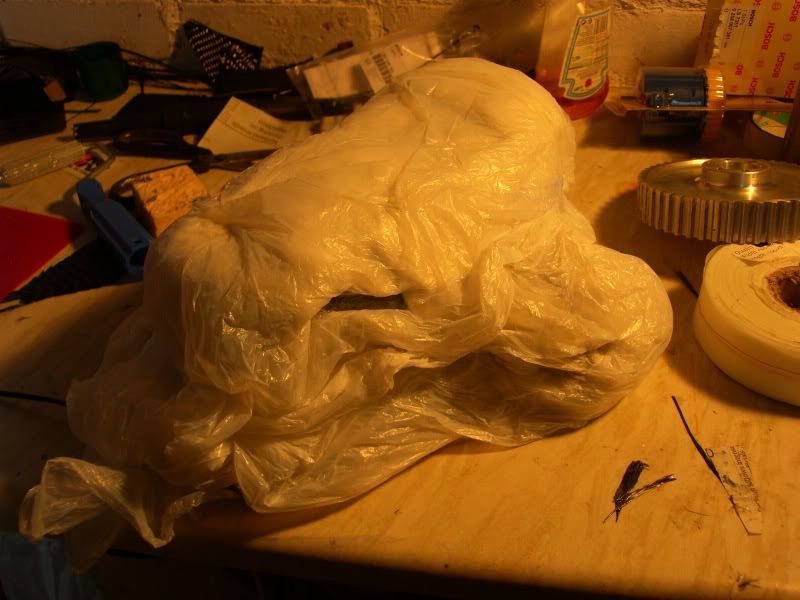
Bag of rubbish no?
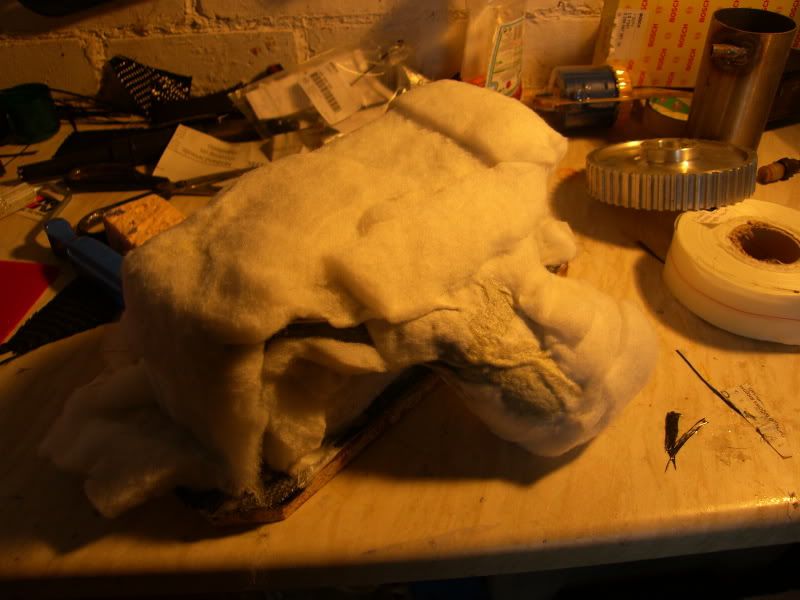
Fluffy?
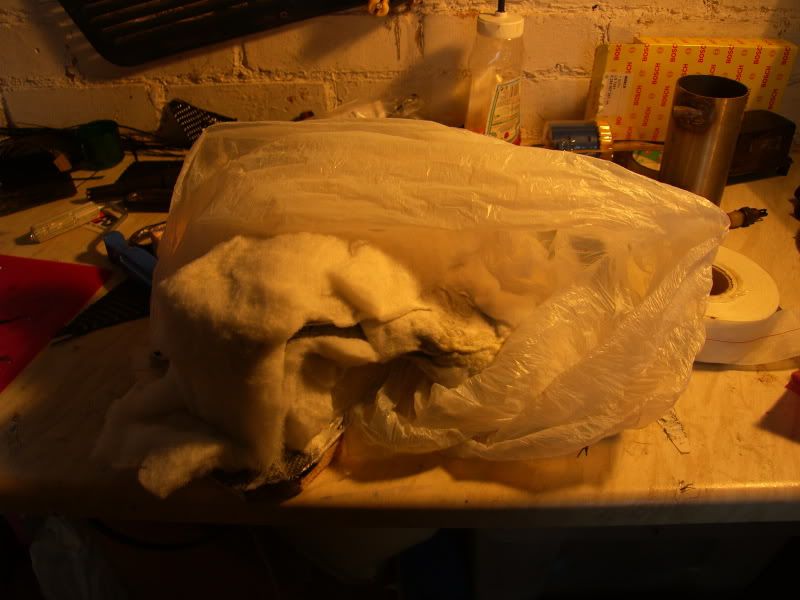
Whats this?
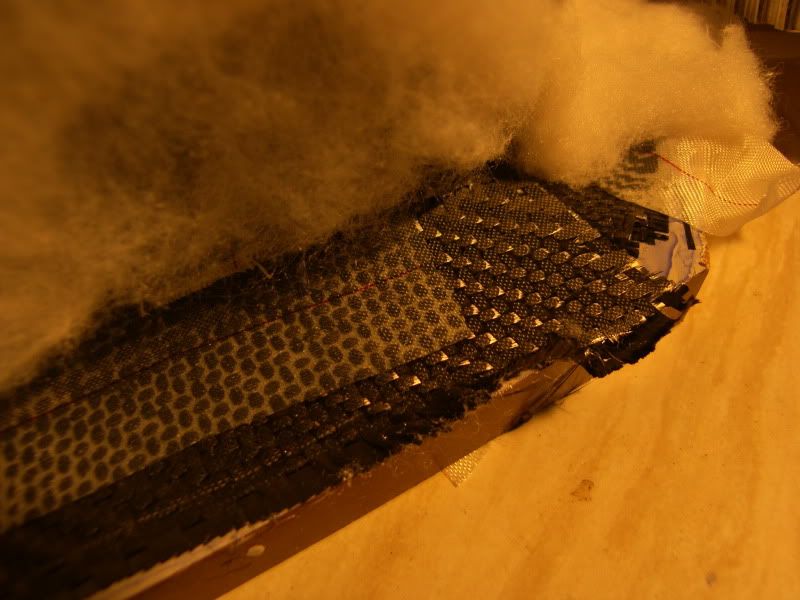
Yay! Carbon!
I used, a shelf, some foam roof insulation and some glue to make the mould. Covered in PVA for a release agent, although the compound shape means the mould will have to be forcibly dismantled ;D
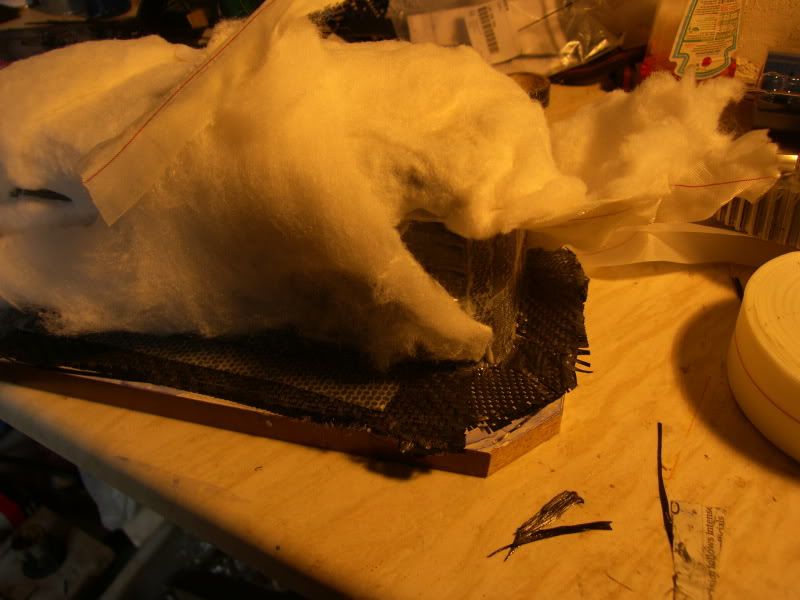
The less common materials were 650gsm 2x2 carbon twill, epoxy resin, and peel ply, layed up in various different pieces so that it would lay as flat as possible around the crazy curves.
Then back to the household materials with an old duvet, bin bag, and workshop hoover.
The peel ply is porous but not adhesive to the epoxy, so it flows through it, over the peel ply the filling from the duvet was placed allowing the epoxy to soak into something.
This was bagged up into the binbag and the shop vac attached using a 8mm bore hose pushed up against the duvet filling. I had to keep my eye on the vacuum as it was in stall so the motor was getting pretty toasty :o 
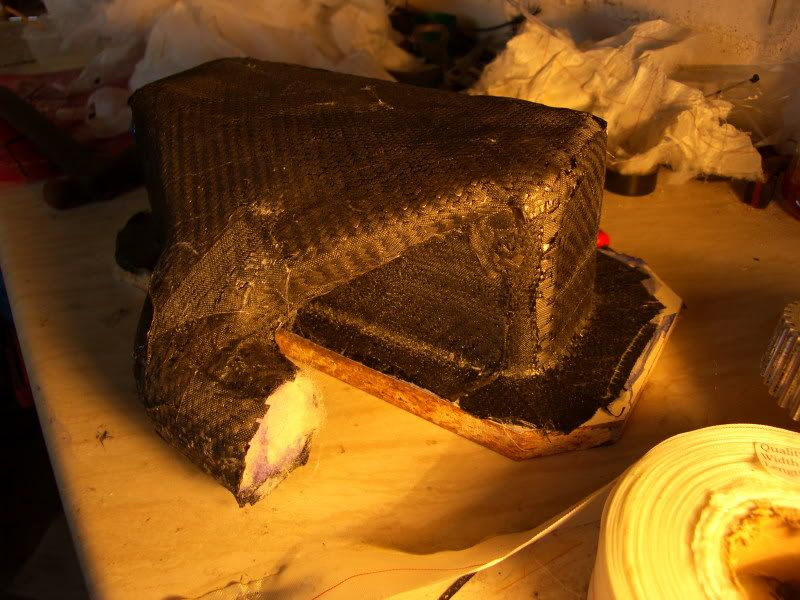
Now it is totally unfinished fresh out of the mould here, needs rubbing back in places and the cosmetic coat putting on, got some super rare weave for that! I will update over the next few days as I make progress.
Lot's of love, J
And
Well I have finished the final layer of carbon and pulled the mould out, it all appears to have worked a treat! -
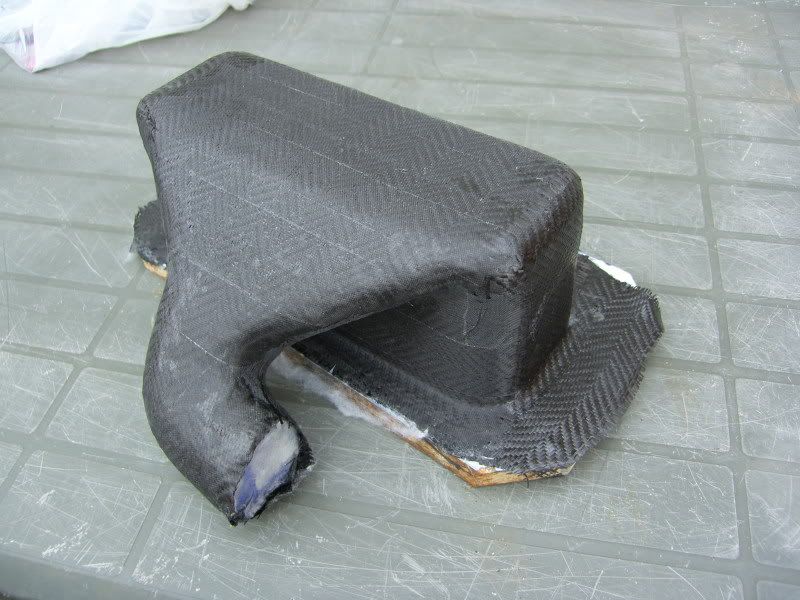
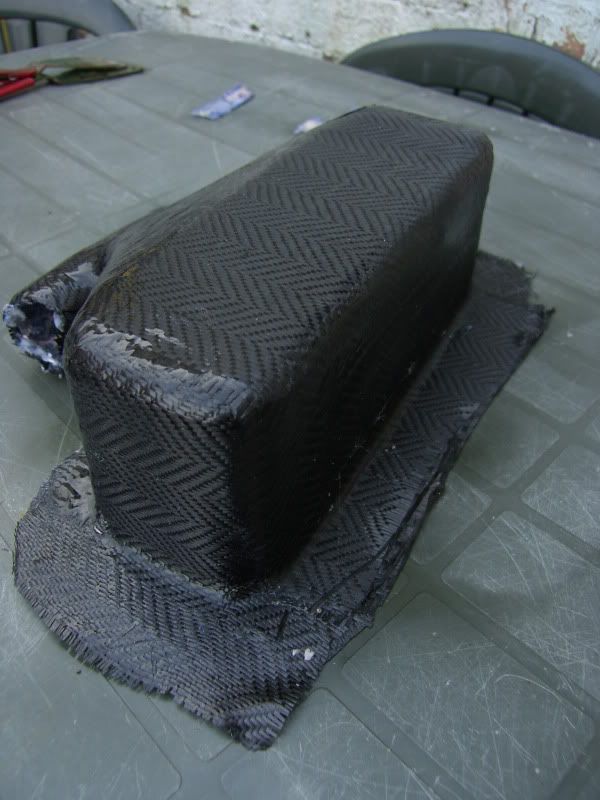
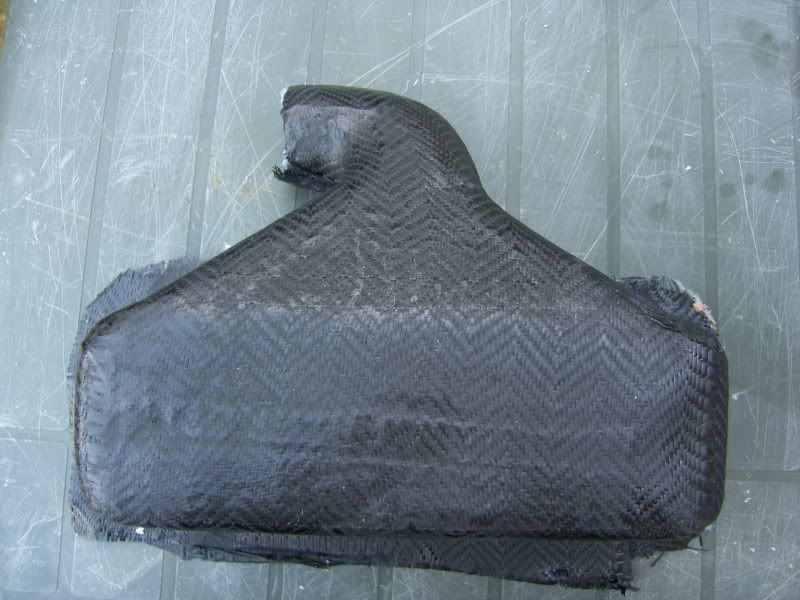
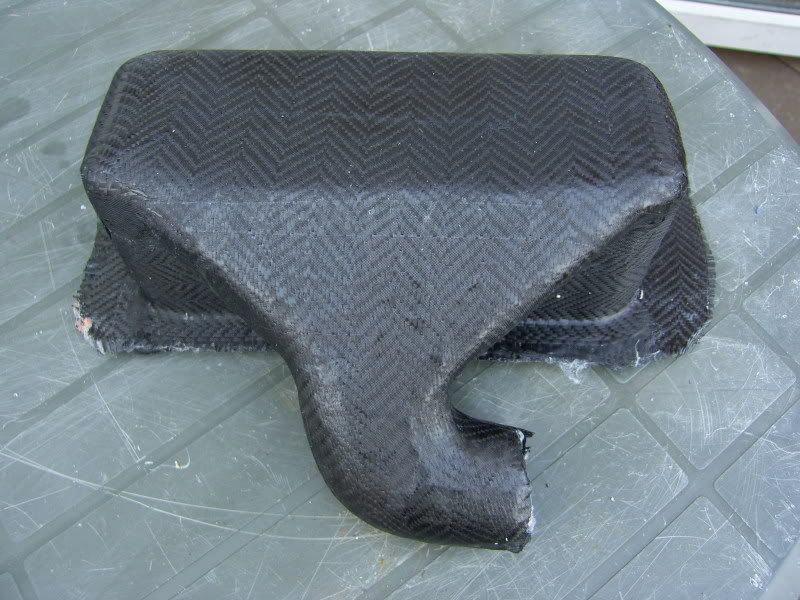
It is very light weight, excellent carbon to resin ratio, and well consolidated too.
On 5th of Sep, 2006 at 05:47pm mini13 said:
I reckon if his brains were gunpowder he couldn't blow his own hat off...
|
blown_imp
223 Posts
Member #: 598
Senior Member
Gaol
|
|
Right this is todays progress, the plan of action is to get the car up and running again with a reasonable tune for PPC in the park, perfect place for a test and tune due to being 3 miles down the road!
Here is where I started for the evening -
The old plenum would have to come out with the throttle bodies attached -

Now due to my brain only rarely being attached to the rest of my body, I did not measure anything before making the new plenum, just a bit of eyeing up and some numbers that were hanging around in a corner of my head from last time. So this would be the first time the new plenum has been anywhere near the base plate / trumpets! :o :o
Well the plenum fitted the base plate, although I will need to replace a couple of bolts with counter sunk items. The real issue came with the fitting of the bolt rings round the outside, the mould for the new plenum was actually the perfect size, but due to the fact that I put all of the materials onto the outside of it, it grew quite a bit!
The result was this -
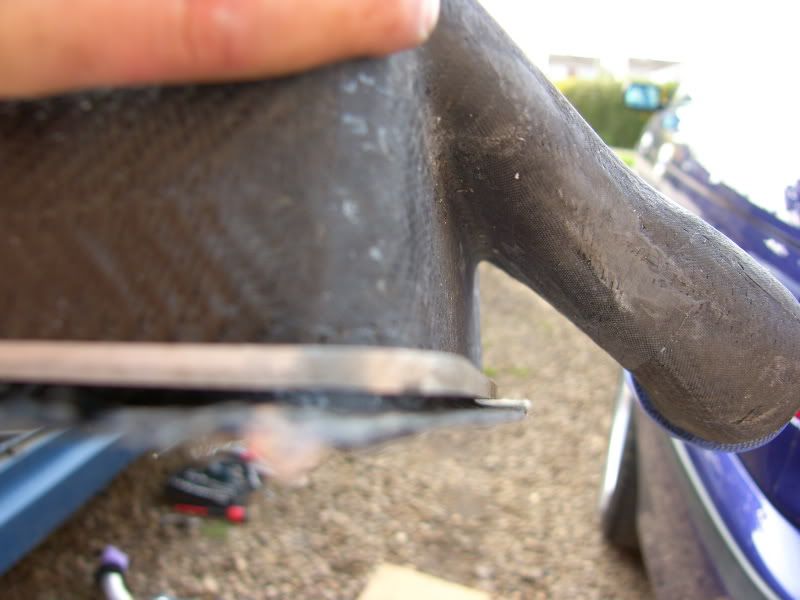
The radius between the sides and the base interferes with the bolt rings :-X the thought process was something like this -
Ok
Now what?
Balls!
Right, well the radius is not so big that it passes outside the edge of the bolt rings. So match the radius of the plenum to the bolts rings -
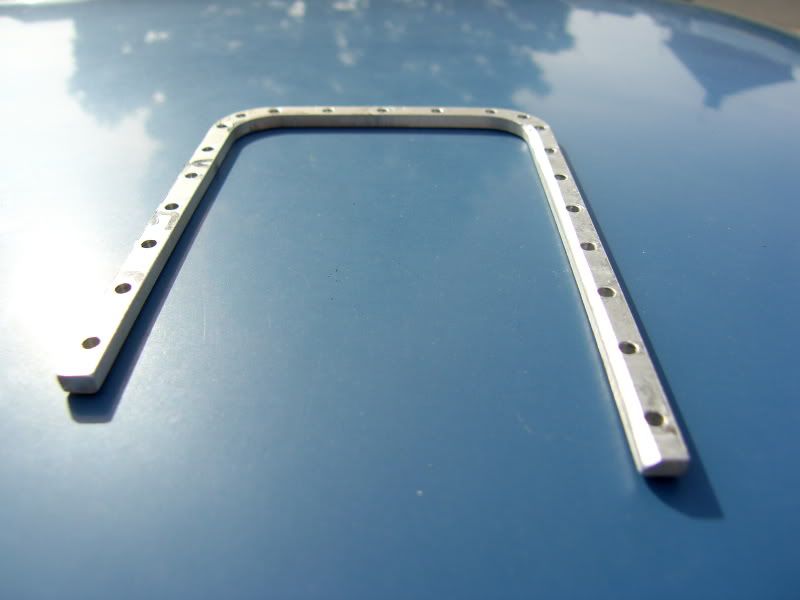
Fortunately for me, it worked, I was fit to explode! ::)
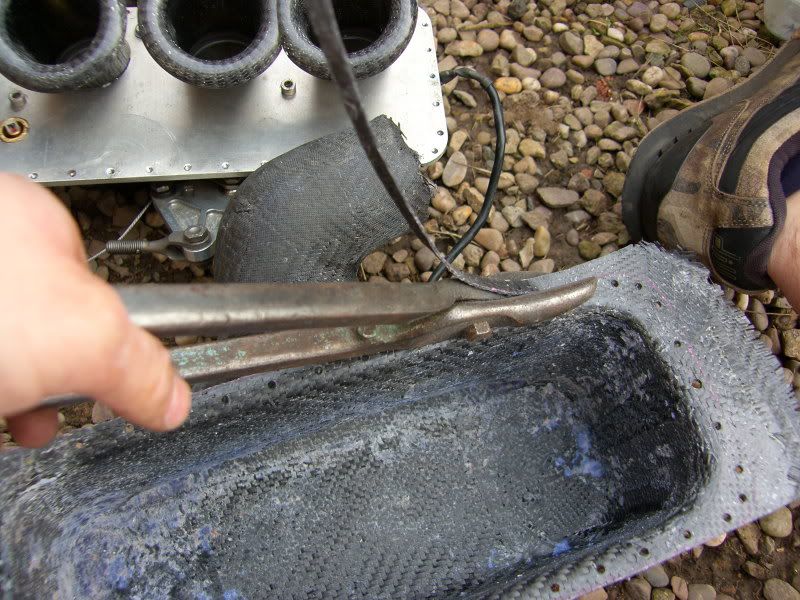
All of the bolt holes had to be marked and drilled out so that it could be pulled down evenly and seal properly, took a while with all the measureing but I like the overall effect (think RR merlin!).
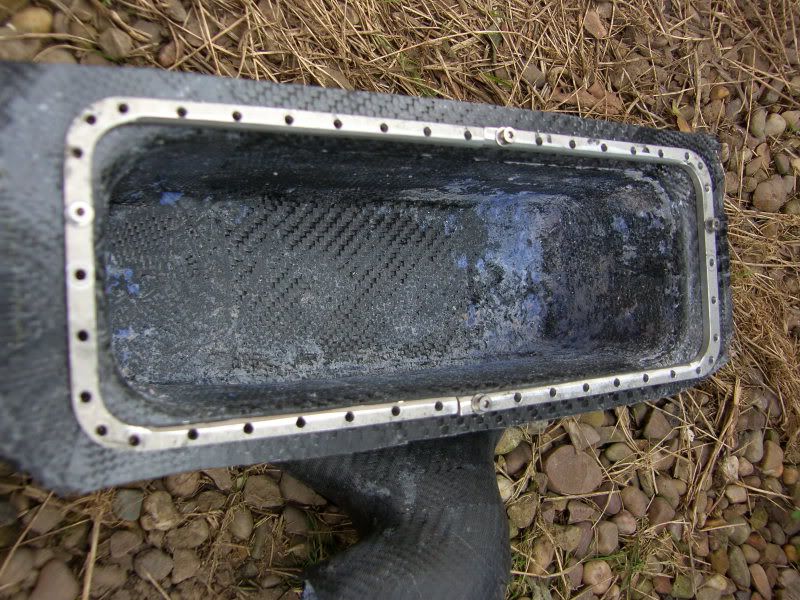
Then the edges were trimmed close to the final shape, so that it can be easily sanded back.
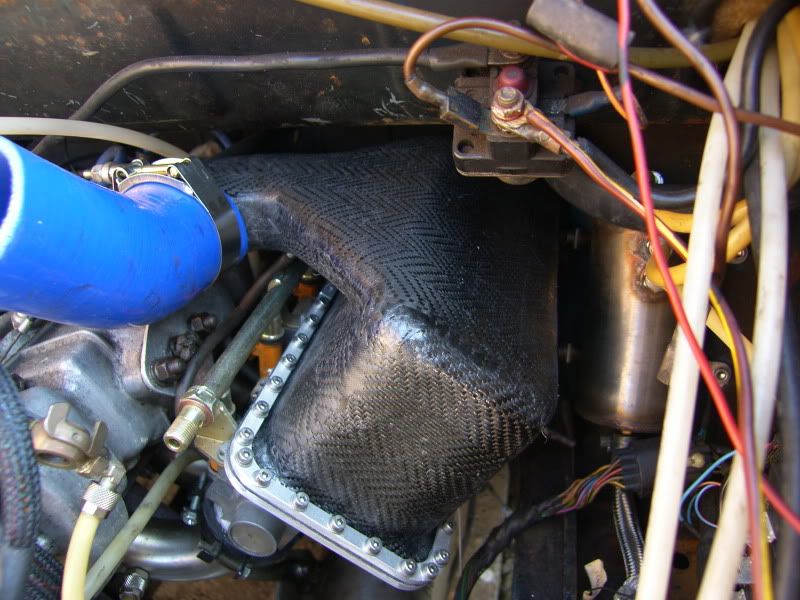
The next moment of truth was the trial fitting in the engine bay, would it fit in? Had my general eyeing up of the engine bay and local space been enough to stop me pulling all of my hair out?
Get in!!! 8-)
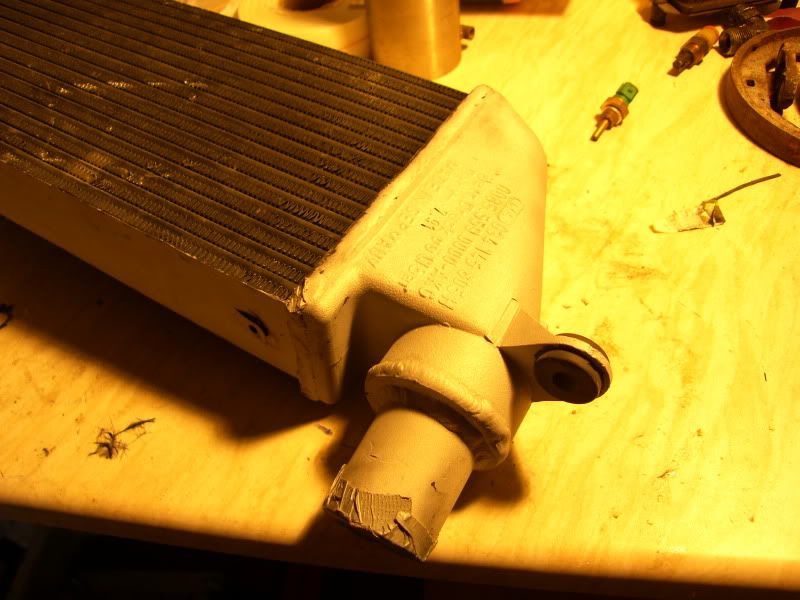
Before removing the original plenum, I had decided to move and re-mount the intercooler, currently this is the only item on the whole blower system that is mounted to the body not the engine. This means there is relative movement that puts stress and fatigues the joints.
To overcome this I have decided to mount the intercooler on the engine too, the bonus is that it will centralise it and reduce the number of joins (if you have read the thread before, you will know my beef with joins  ). ).
So this is the mock up and where we end the day with a BBQ -
So tomorrow, I will be finishing up the plenum and re-fitting it, then thinking about the intercooler mounting, then if time and weather permits, the pipe between the blower and intercooler can be mocked up. This will be more complicated than it first appears due to the inclusion of my boost control wastegate and the bypass valve all in a very small space!
Big hugs,
J
On 5th of Sep, 2006 at 05:47pm mini13 said:
I reckon if his brains were gunpowder he couldn't blow his own hat off...
|
blown_imp
223 Posts
Member #: 598
Senior Member
Gaol
|
|
Good afternoon chaps!
Time for another update, although what I said about finishing the plenum and fitting the intercooler at the end of the last update may have been slightly optimistic!
I started on sat with beautiful weather and a nice continetal breakfast of croissants and jam on the patio 8-) this put me in a fantastic mood to work on the car, so I had a think about what I was to attempt next.
Upon looking at the engine bay I realised that a number of things were going to hold me back, to fit the plenum I would need two M5 countersunk fixings as these reside inside it and are inaccessable from the outside, so I could not finish that bit. Ok, so it can be positioned in the correct place so that the intercooler can be fitted, right? NOPE! The intercooler needs a new 45 degree silione hose to connect to the plenum, so I don't know the exact position of that either! >:(
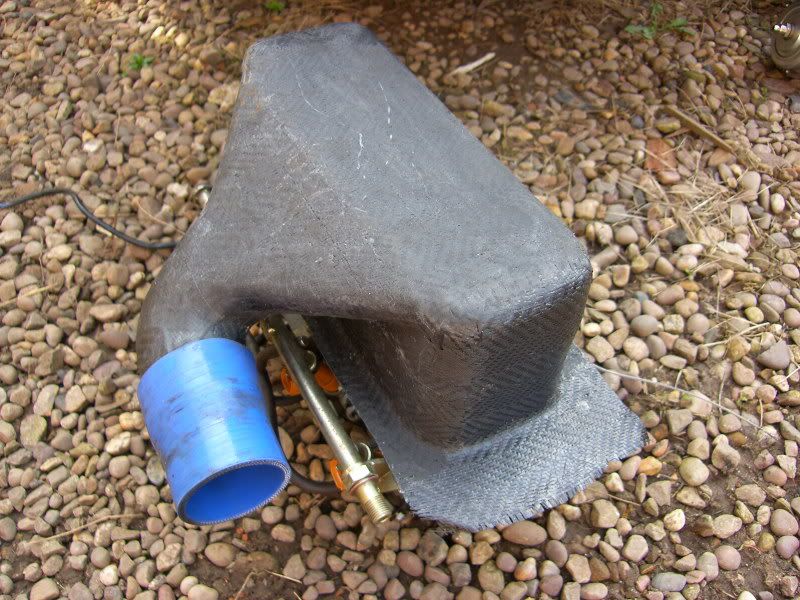
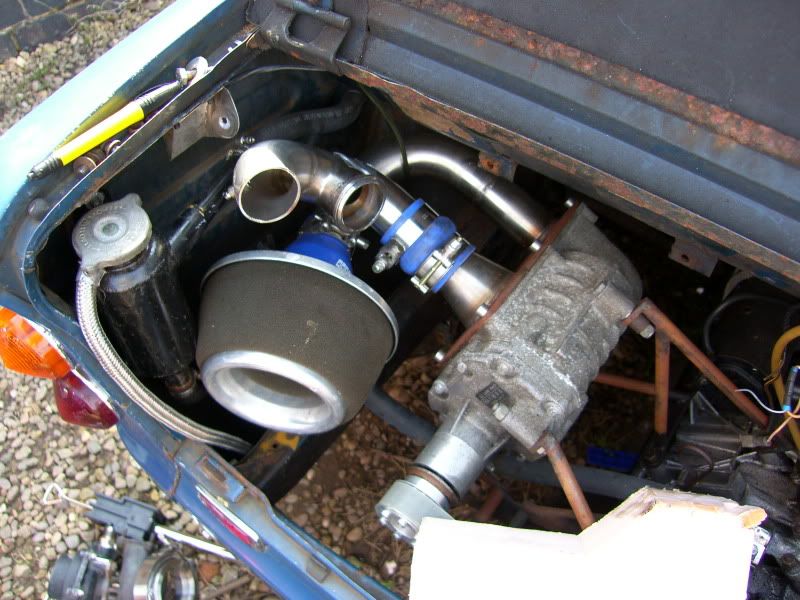
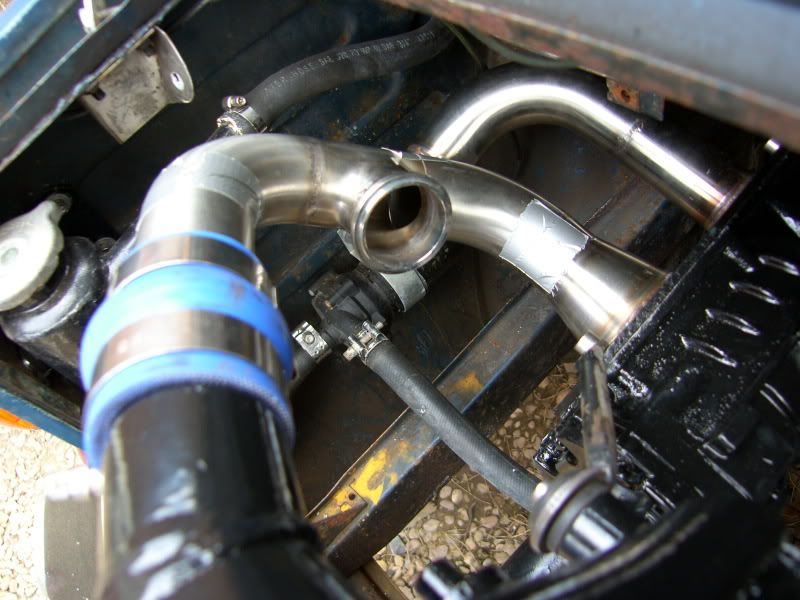
In the end the intercooler was positioned in around the right place and the pipe from the blower to intercooler could be mocked up. After fretting about the amount of space to fit both the wastegate and bypass valves, the actual amount of space available is easily sufficient. The only real issue is that the wastegate is going to have to poke out of the back of the car! ;D
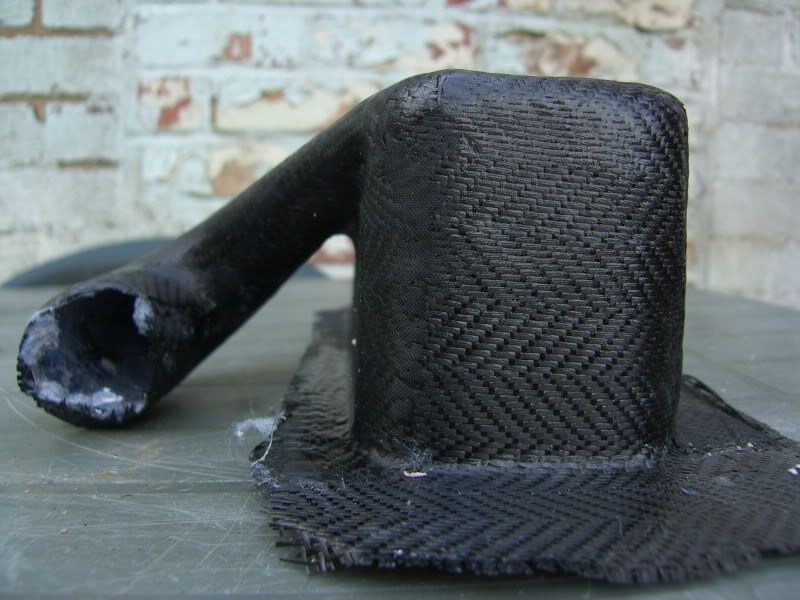
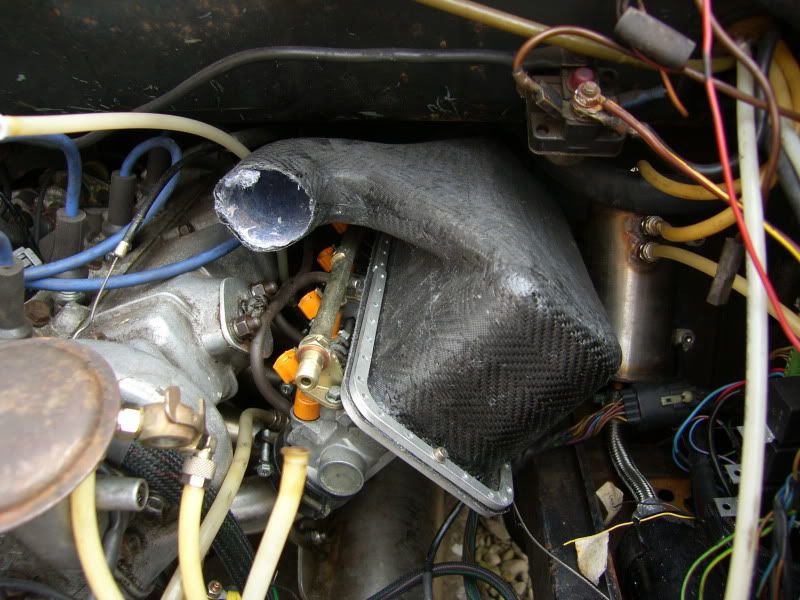
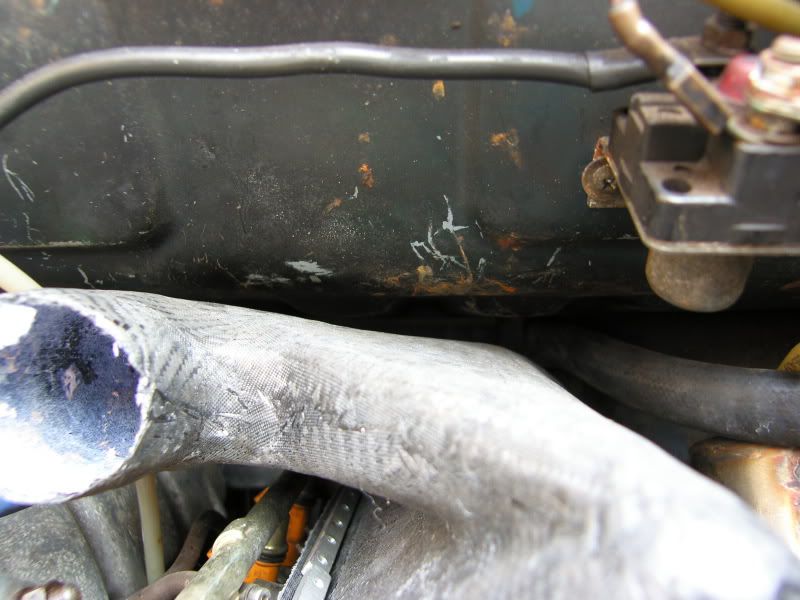
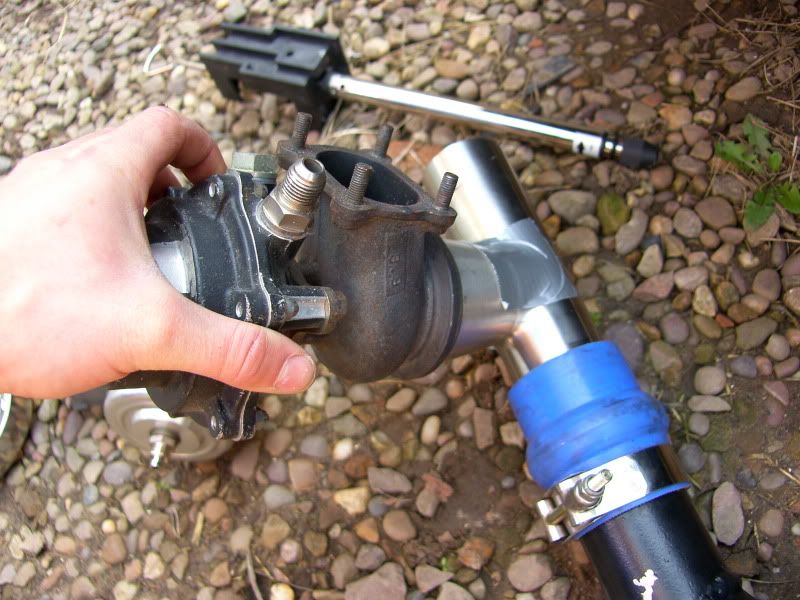
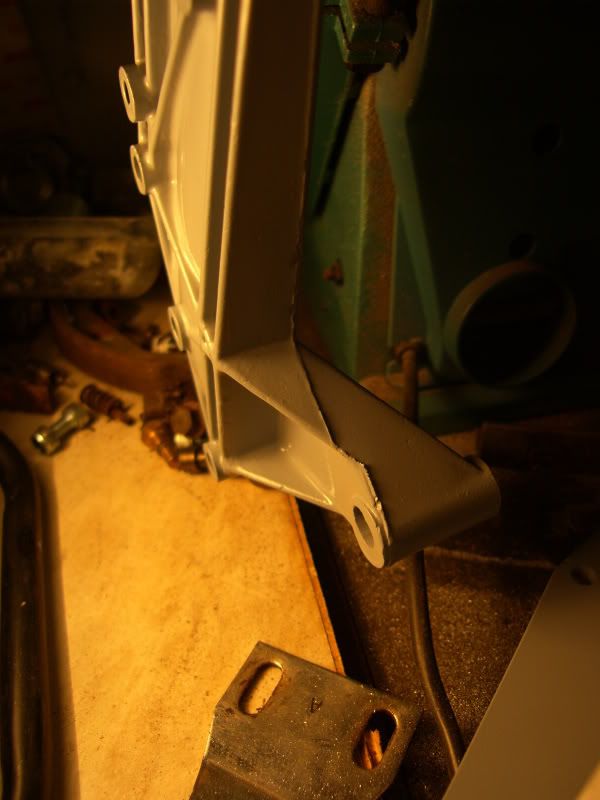
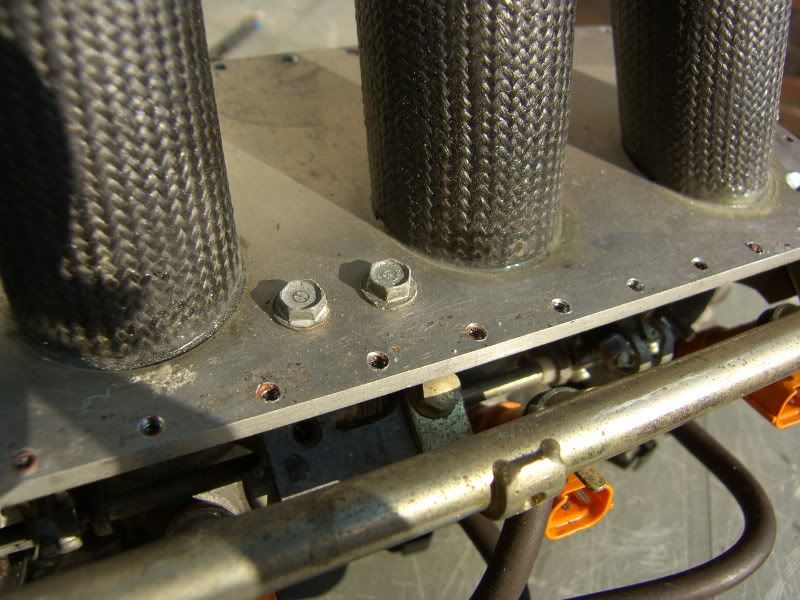
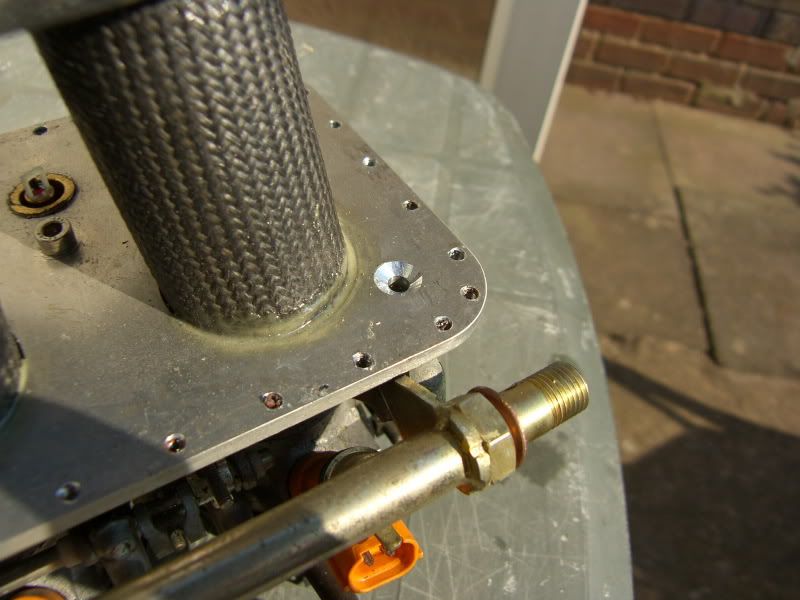
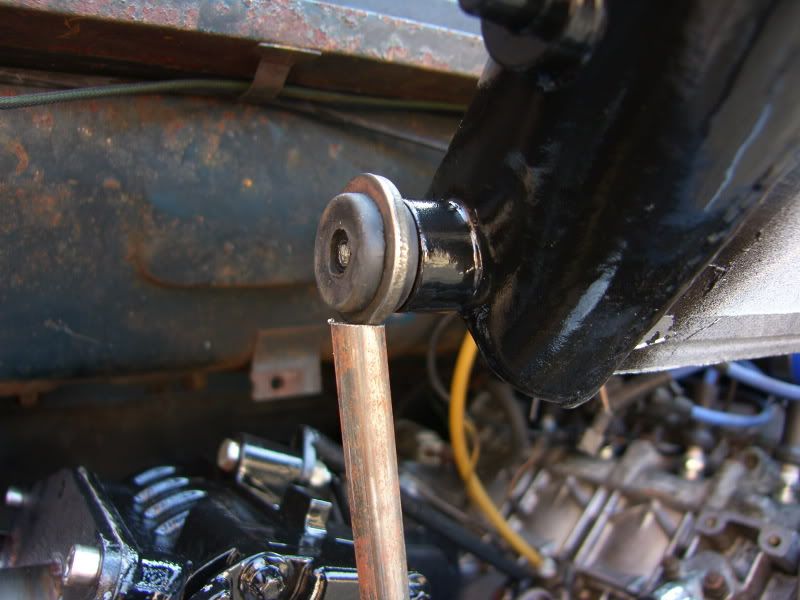
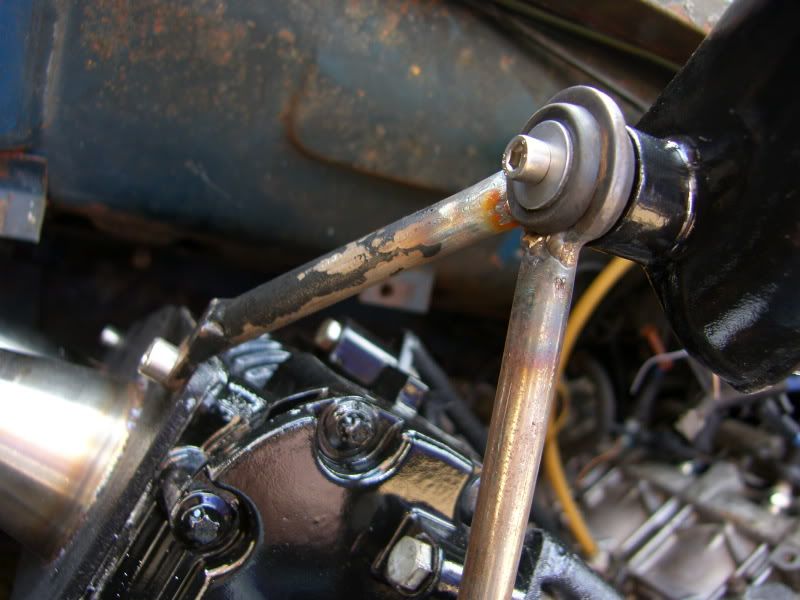
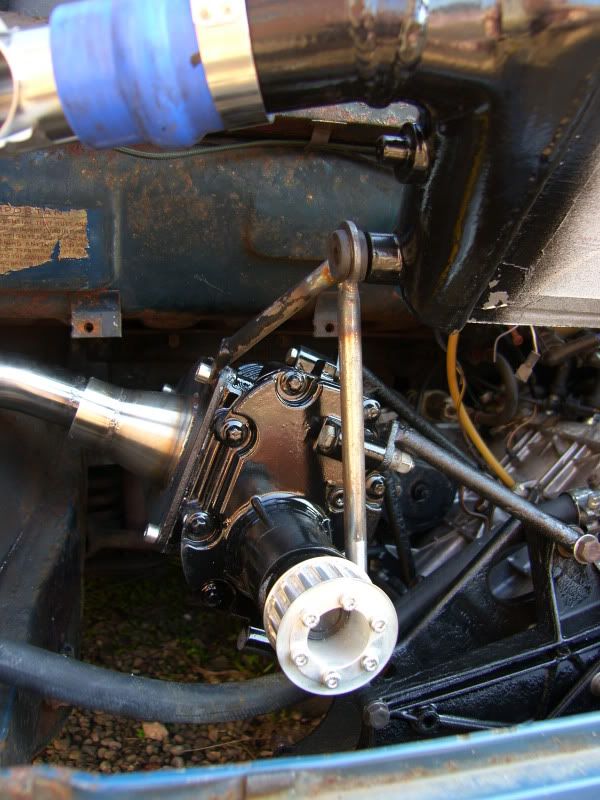
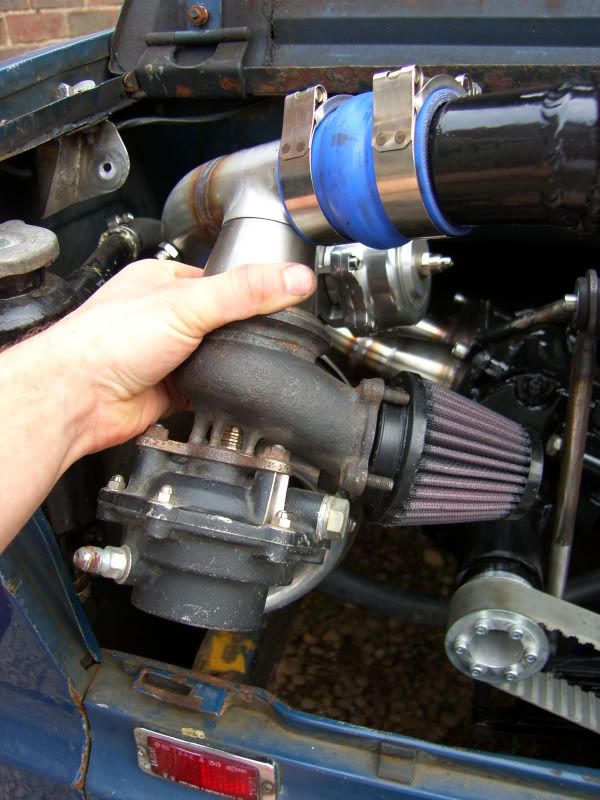
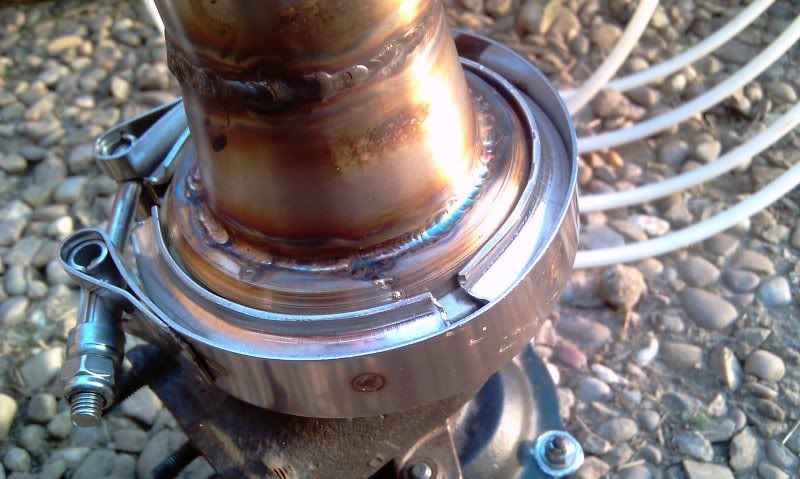
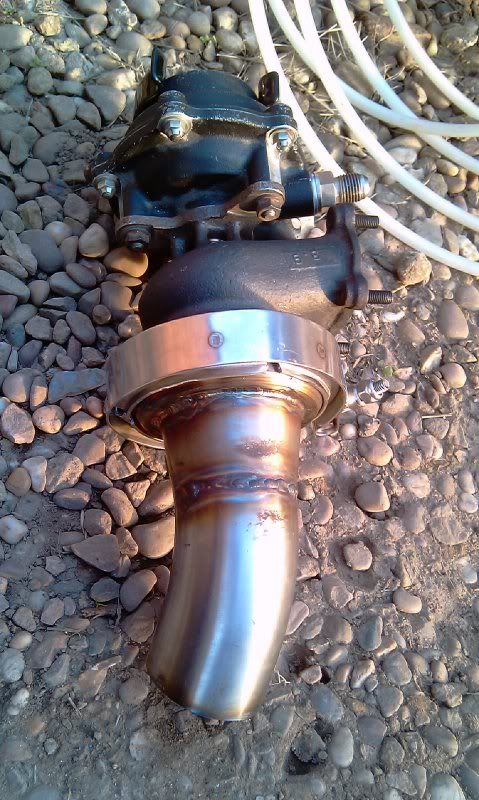
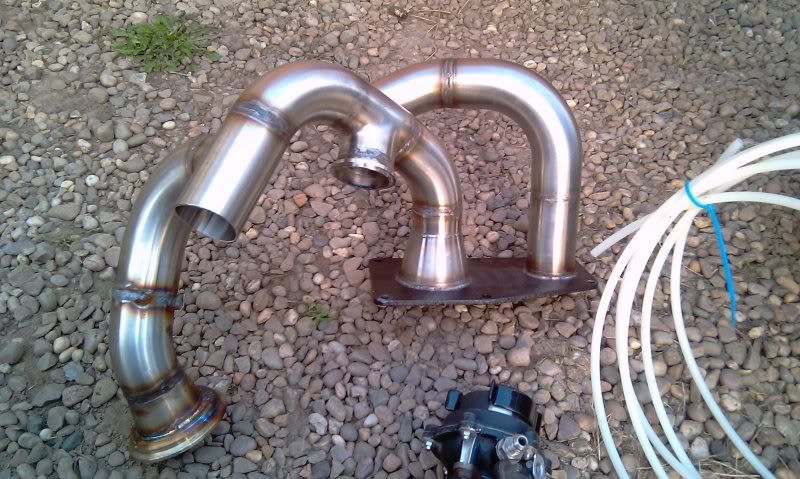
You can see here the outlet from the supercharger, the flange for the wastegate, and just after this the wastegate will be fitted -
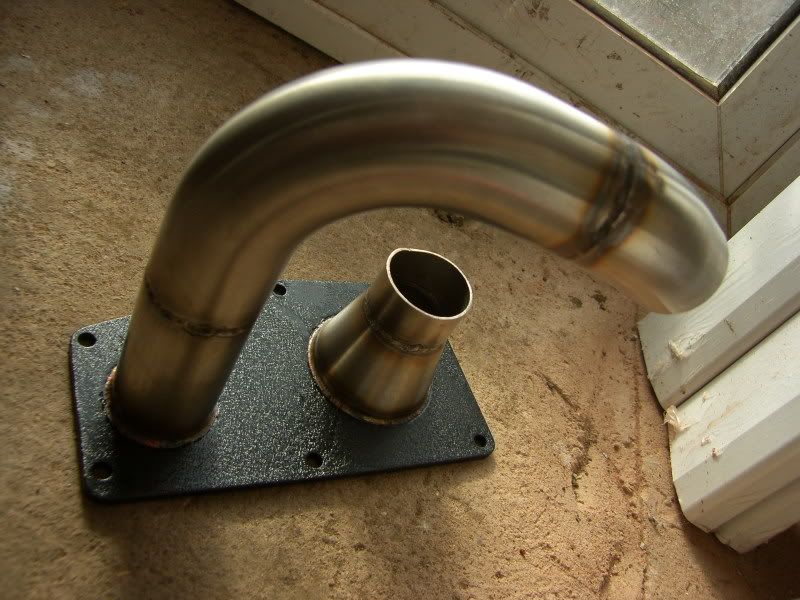
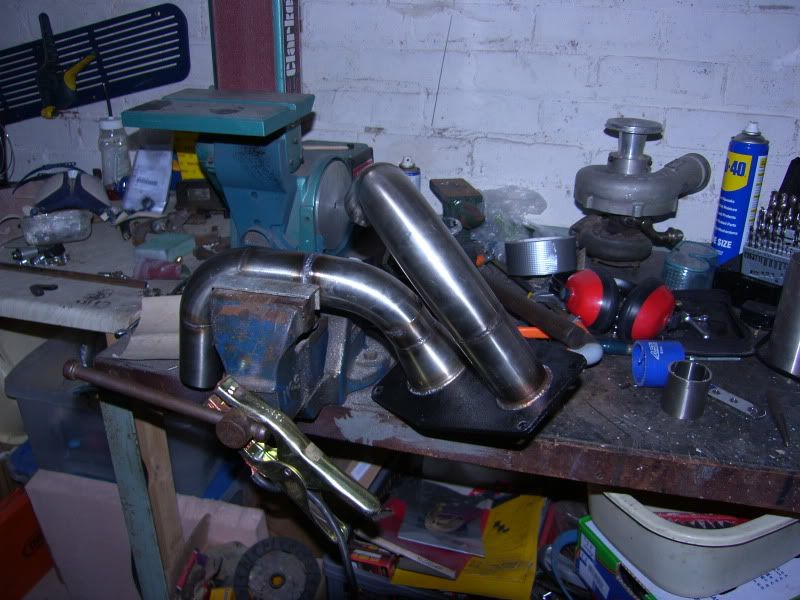
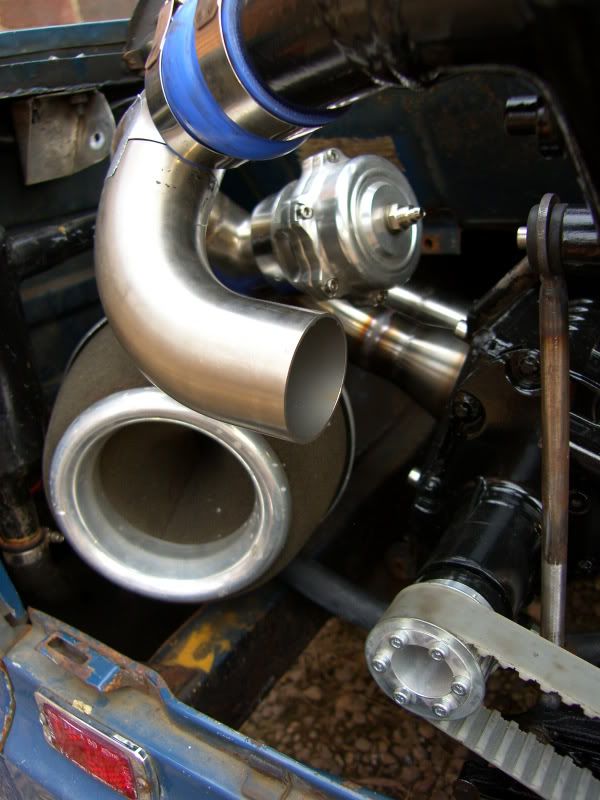
This is the pulled T that the wastegate will be fitted to -
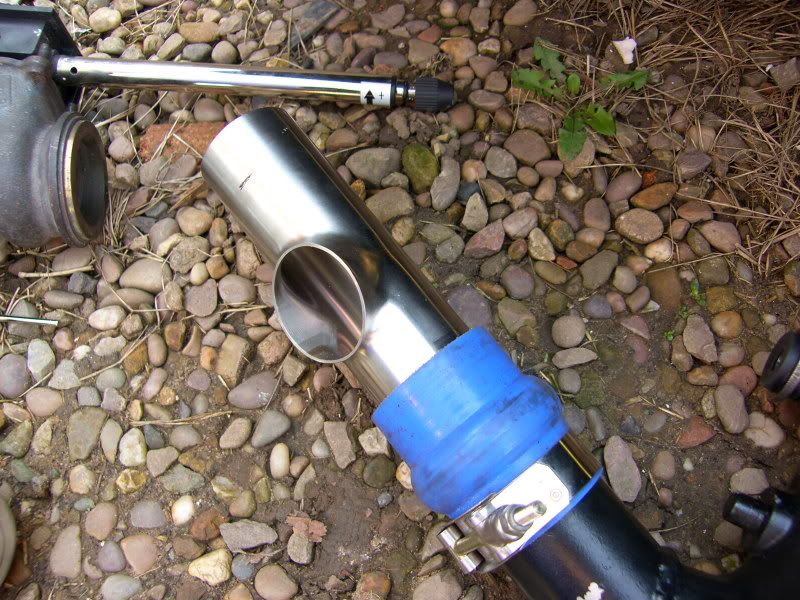
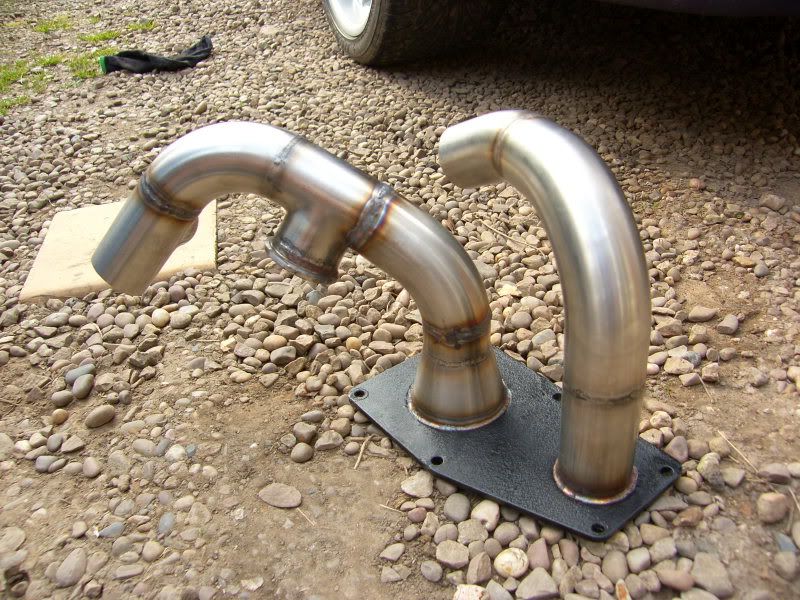
And what it should look like once put together -
At this point work came to a grinding halt due to all the things holding me up, after lots of stareing at the engine bay the oracle was consulted (Michelle), she asked why the brackets were rusty and the engine all oily.
My reply? "Because I have never removed the supercharger"
More why's from the oracle
"Because, because I am scared that it will never go back together properly and actually ever work again!"
Fortunately she convinced me that it would be fine, and would look a whole lot better actually painted and clean!
I have a look around the cupboards for something that would clean oil and grease, oven cleaner? Looks harmfull enough
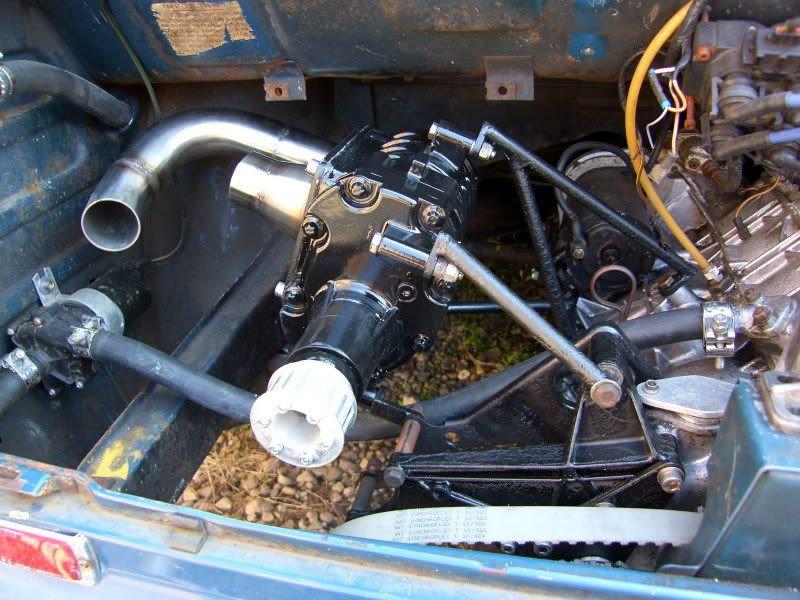
So the blower flange/intake/outlet was removed, then the blower and all associated mounting brackets.
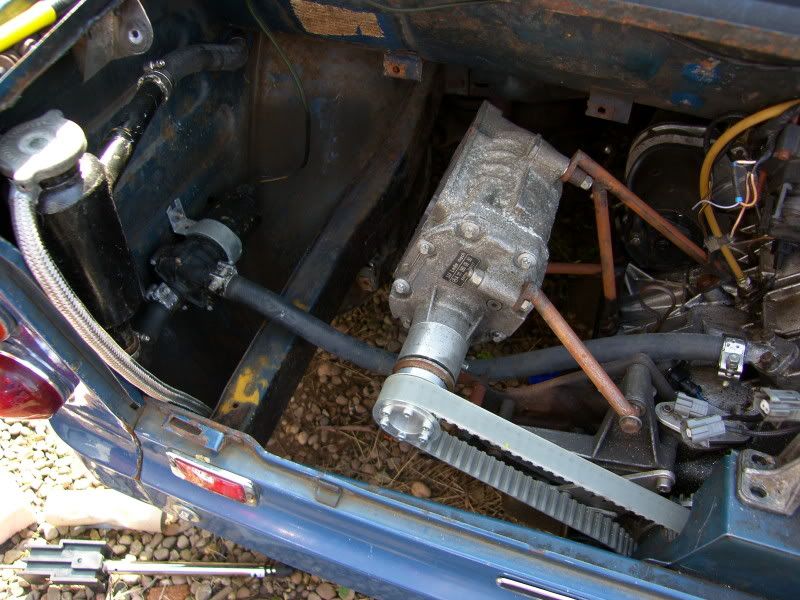
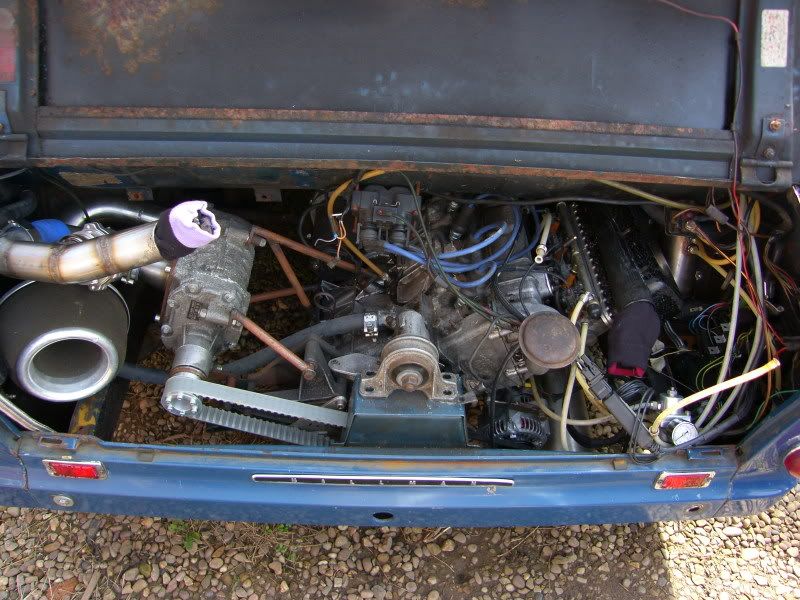
Leaves a big hole in the engine bay -
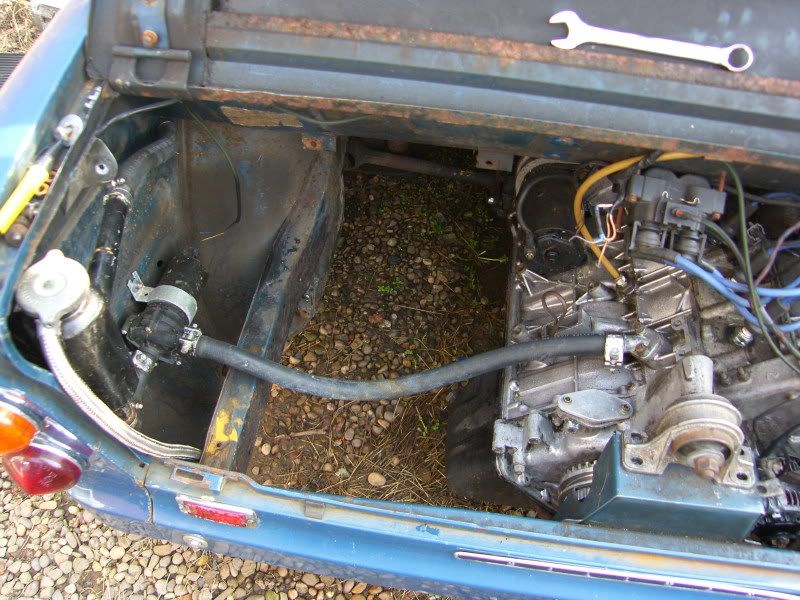
The engine and anything greasy was sprayed with MrMuscle and left for 10 mins to really remove those stubborn stains
As you can see it worked a treat!

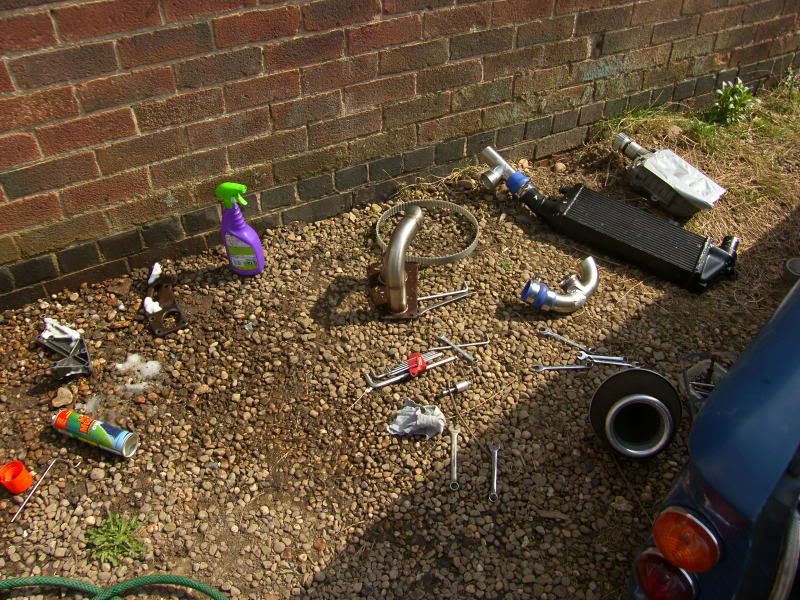
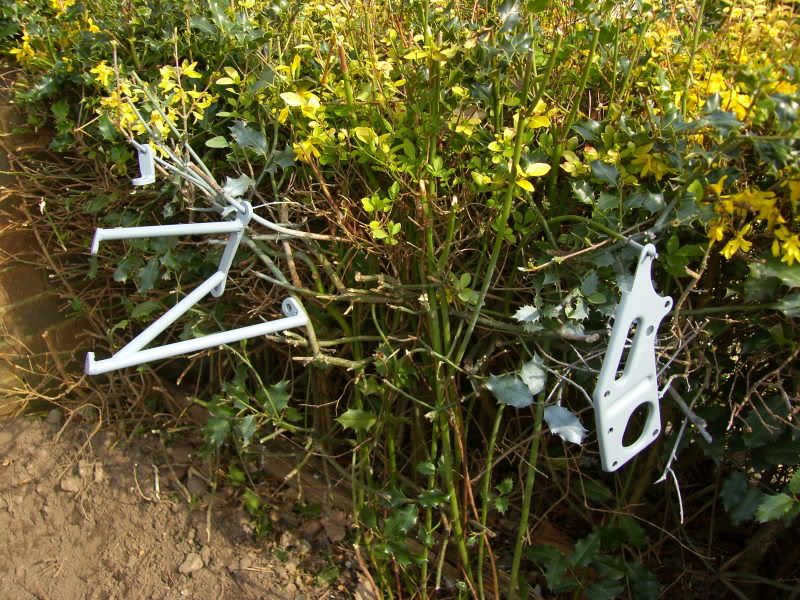
The brackets were then rubbed down, cleaned and rust proofed (which much to my amusment left my fingers all very purple!), and finally hung in the hedge and given sevral coats of etch primer -
Next the paint finished was selected, now I have always like the wrinkle finish that is applied to BDA cam covers. Some time ago a tin was procured and added to the supplies in the garage, however the previous times it was used, the finish was far from wrinkled, rather more rubbish!
This time I was prepared with a new technique and process, which, still didn't work >:( :'(
So at this point I cleared up and left it all untill sunday.
Sunday morning I decided to try another coat, this time warming up the paint and items to be painted to see if it would help. Well I put the brackets next to a 300w halogen lamp while I had breakfast, when I arrived back they looked like this -
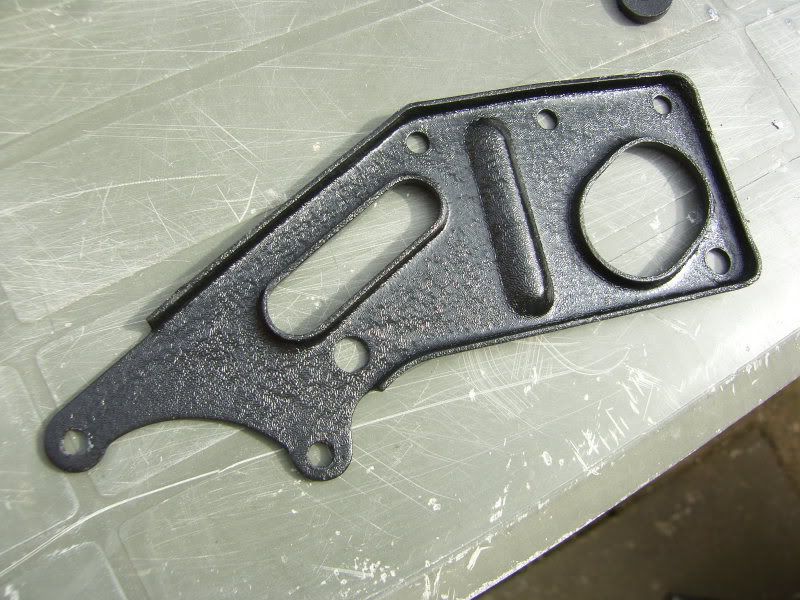
Yay!!! ;D ;D 8-)
I obviously had not let them heat up enough! So the finish is exactly as I would have hoped.
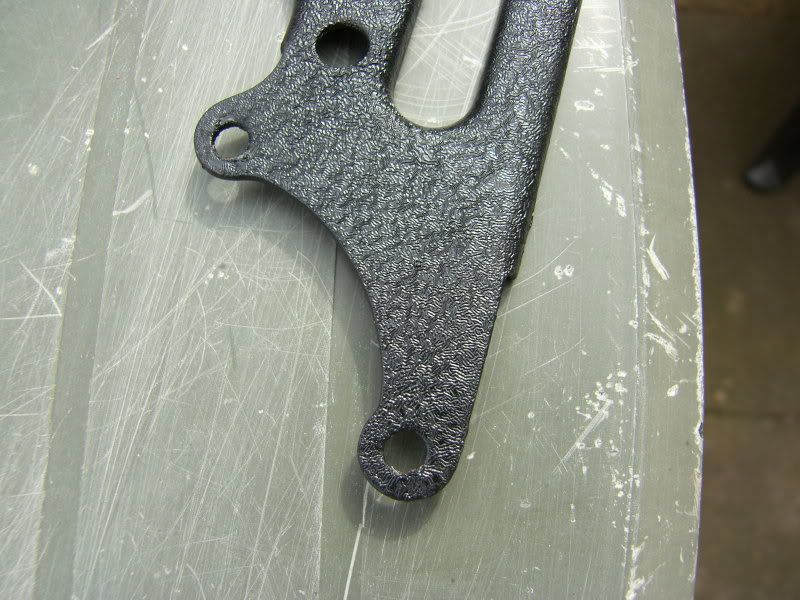
Fired up renewed vigour, the complex cast aluminium bracket and the blower flange were prepared. After prepping them and three coats of etch prime, some flash on the aluminium bracket came to light, so the dremel was cracked out and it was fettled back, three more coast of etch prime and they were ready.
Flash -
Unfortunately the paint ran out after the blower flange, so the ally bracket will have to wait.
So this was the end of work for today -
Paint, silicone hose, and various other bits and bobs are on their way to allow work to recommence.
Hope everyone has had a great weekend,
Laterz
J
On 5th of Sep, 2006 at 05:47pm mini13 said:
I reckon if his brains were gunpowder he couldn't blow his own hat off...
|
blown_imp
223 Posts
Member #: 598
Senior Member
Gaol
|
|
Just a small update today, I spoke to a chap at work which resulted in one of the messiest jobs I have ever undertaken.
In his garage he has a sand blasting setup, no cabinet, just sand, everywhere, even in my pants.
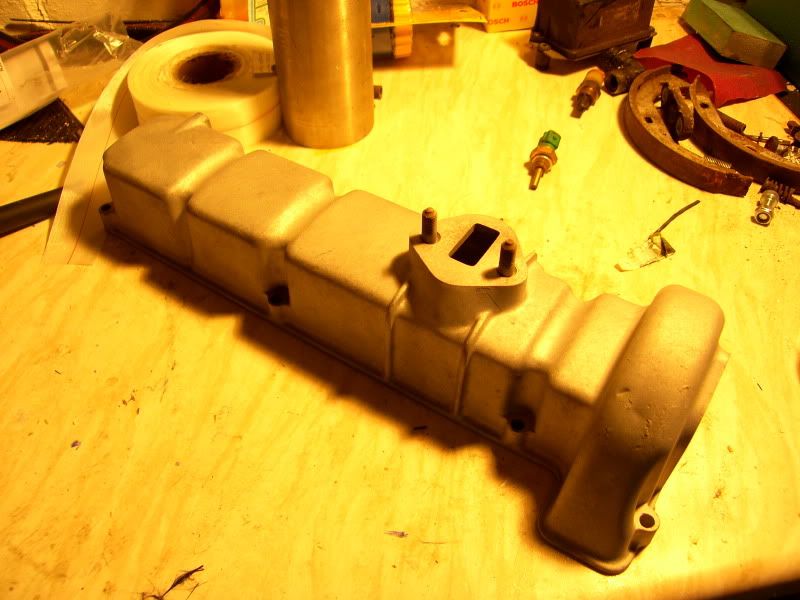
The supercharger, intercooler and cam cover will be getting the same wrinkle finish black that the previous parts have got, but cleaning them was going to be significantly more of a chore. The aluminium has corroded on the surface leaving white 'fluff' everywhere, and the complex shapes of the parts would have meant hours of laborious sanding.
So over I popped to Jon's house, and spent an hour using his blasting setup. It also took me an hour to get clean once I was home!
Anyway, enough dilly dallying, here are the results -

You can see here where I masked the pulley and bearings using gaffer tape -
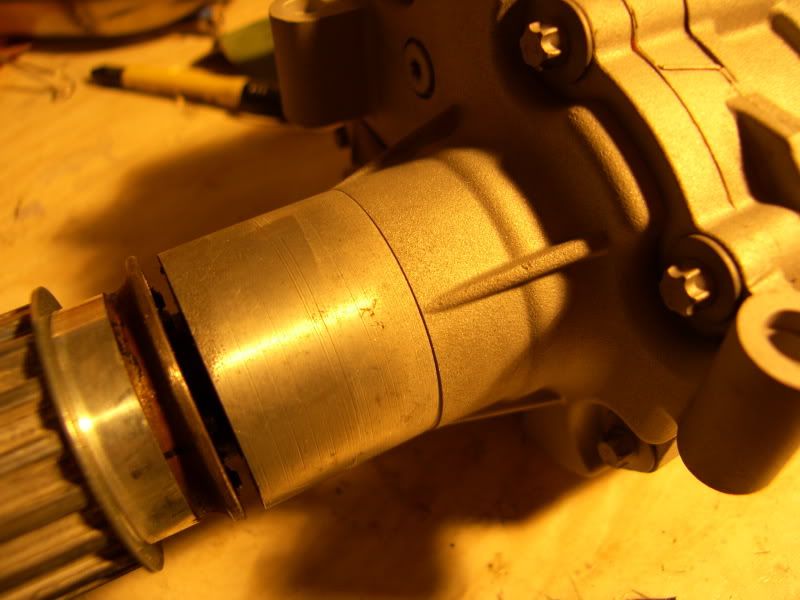
And this also arrived in the post today -
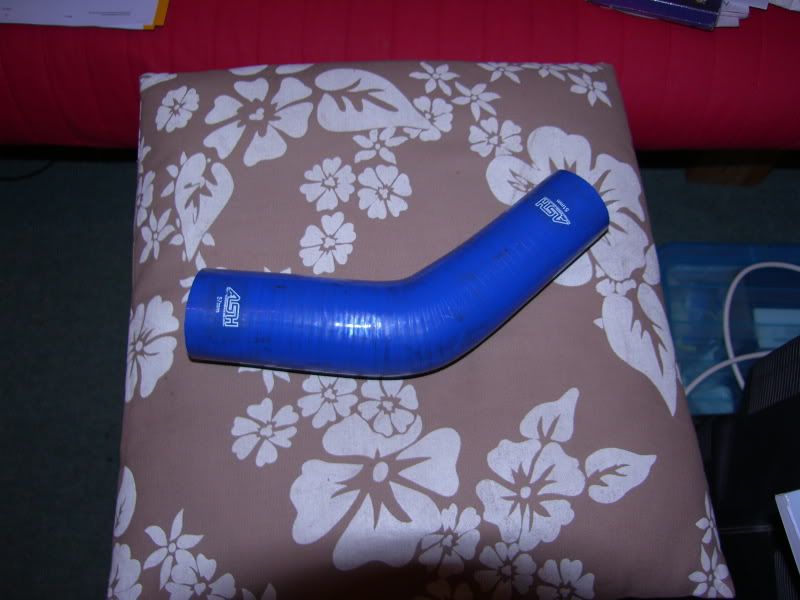
So work can carry on with the intercooler mounting etc
Right, dinner is ready, so im off for meatballs!
Big hugs,
J
On 5th of Sep, 2006 at 05:47pm mini13 said:
I reckon if his brains were gunpowder he couldn't blow his own hat off...
|
blown_imp
223 Posts
Member #: 598
Senior Member
Gaol
|
|
Time for another update!
Good weekend out in the sunshine, so nice to be working in good conditions
Unfortunately I have been battling with tonsillitis all week, and generally feeling pretty crappy, but work on the imp cannot be halted, we're on a tight schedule here :o
The various bolts needed to attach the carbon plenum had arrived, and some petrol proof laquer aquired, this meant that the plenum could be trimmed, and the fitting finalised.
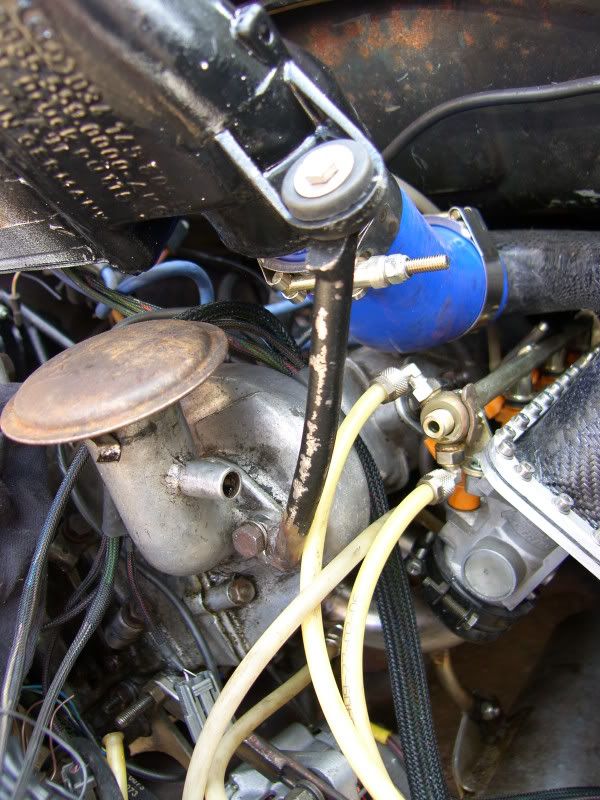
Protruding bolts that stop the plenum sitting flat -
Countersunk so that the bolts sit flush and no longer interfere -
The plenum was treated to a single coat of laquer with no sanding, as I decided that I don't want to destroy and of the fibers and risk the structural integrity. The whole unit was then installed -
Various components have been painted with wrinkle finish paint, including the intercooler and supercharger, once this was complete and having the correct joining hose, the intercooler needed mounting.
Painted items bolted on -
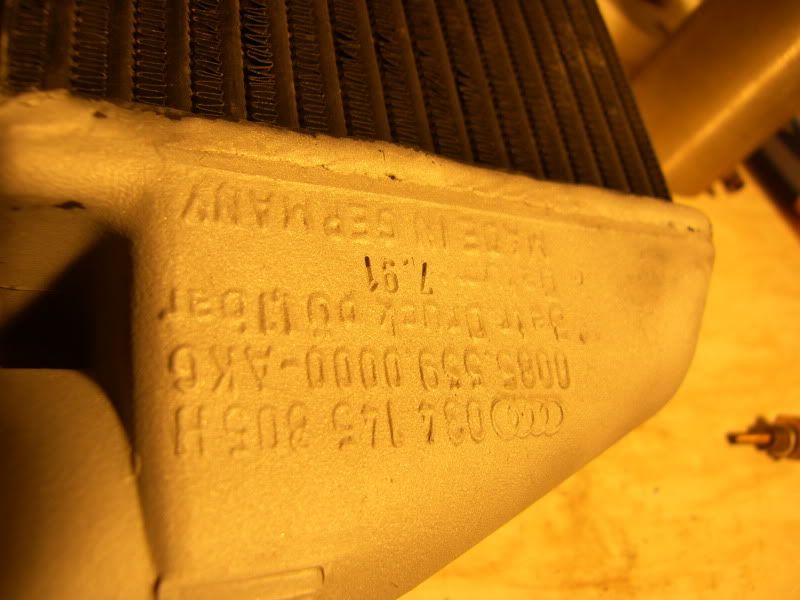
When mounting a component like this that is fragile having cast ally end tanks, and also not too position critical, rubber mounting points are best. Fortunately Audi very kindly put mounting points on either end ready for insertion of rubber grommets, thanks Audi!
Intercooler suspended using the 45 degree silicone hose -
The first mounting point was at the inlet end of the intercooler, there was a small length of tube ready to accept a support -
This went straight up to a large 3mm thick washer that carries the rubber grommet -
These were then welded and another support added linking the intercooler to the supercharger, this will make the whole assembly nice and rigid -
The finished mount on that side -
At the plenum end of the intercooler another rubber mount was needed to support the weight of the intercooler, a couple of 5mm steel mounting points were cut by hand (hacksaw!) and cleaned up. Everything was sized up and then TIG'ed together -
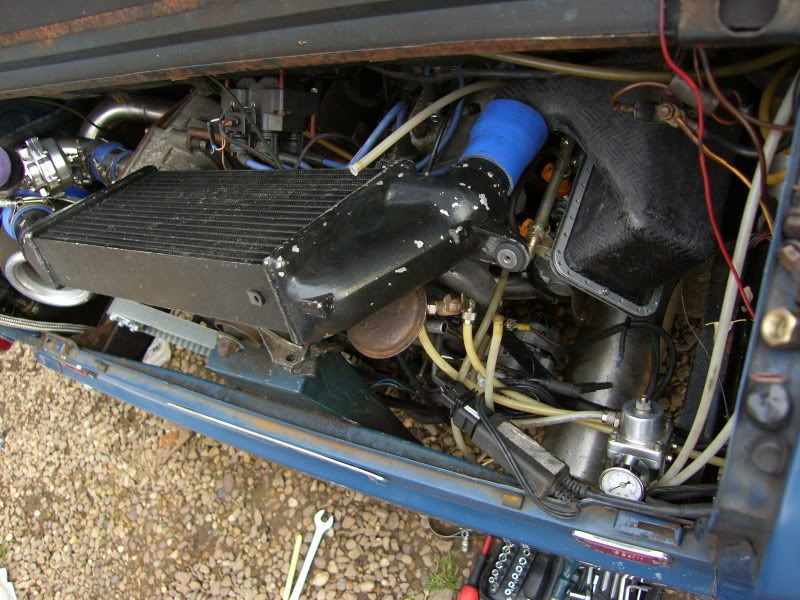
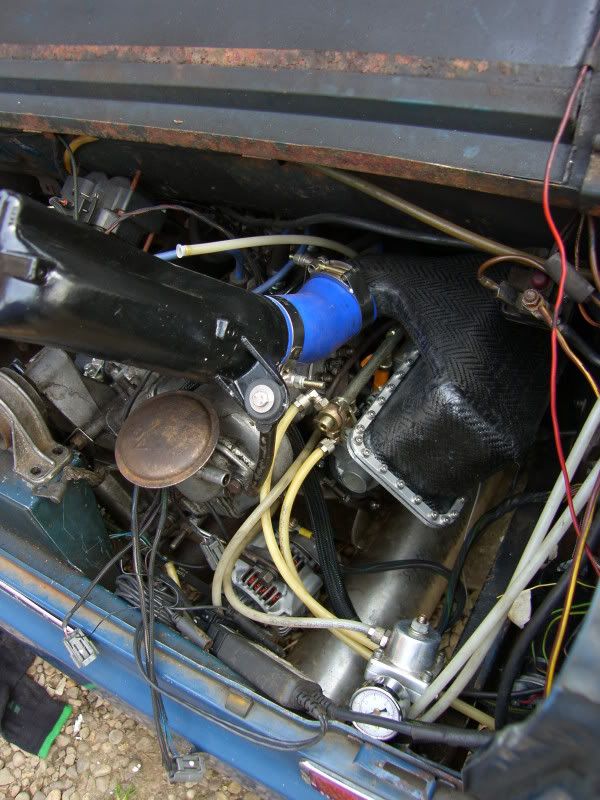
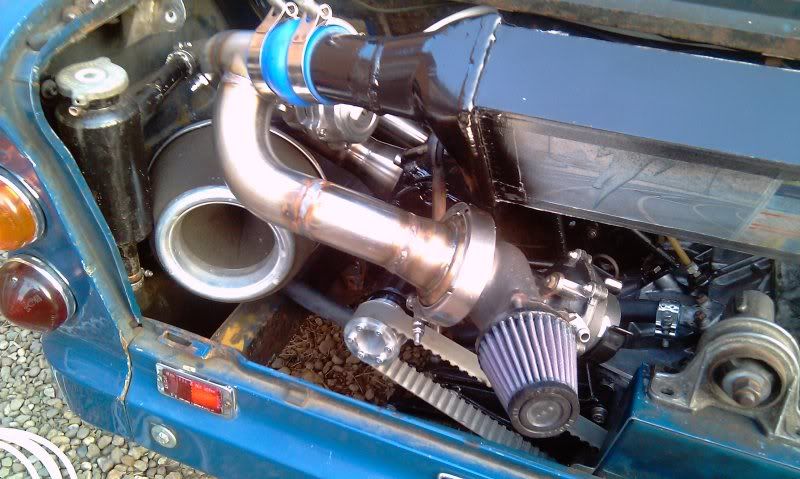
At this point everything was looking good, the intercooler was in and rigidly mounted, the plenum was in and looking mighty fine! -
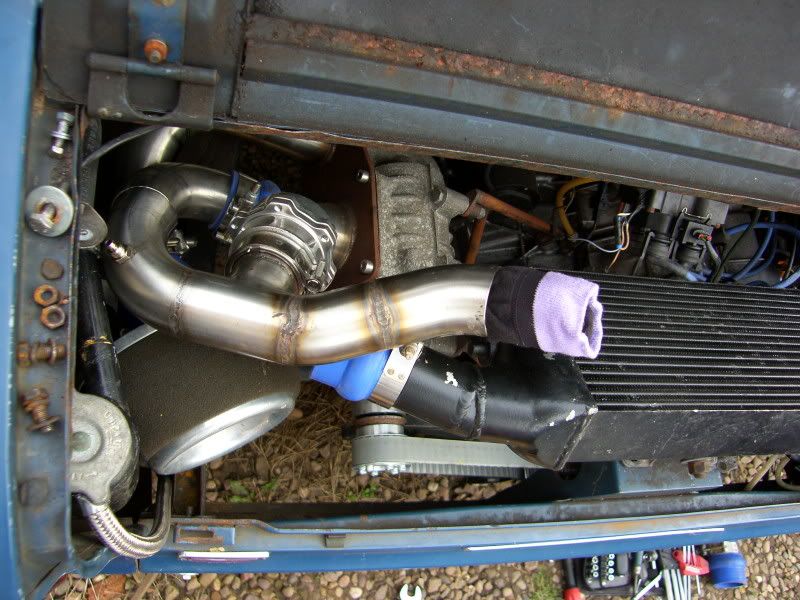
With all that in it's final position, the pipework between the blower and intercooler could be finalised, there were two options, number one was two joins one at the intercooler and one at the supercharger -
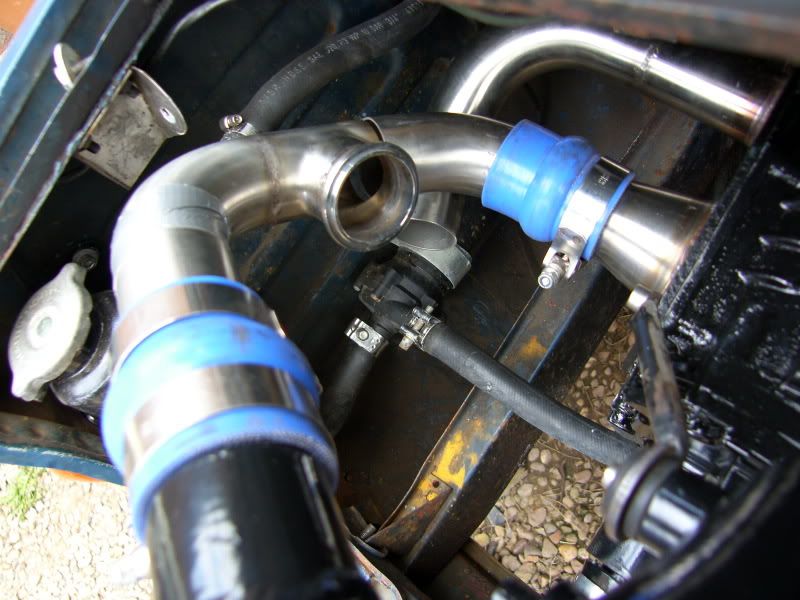
The second option being a single join at the intercooler end and rigid at the supercharger -
After all the time getting rid of joins and desipite the extra time to fabricate, the decision was made to use option two. So all the ends were tidied up and made gapless, and the welding could commence
The finished article ended up so -
It is a tight fit, but so much better for the lack of joining pieces -

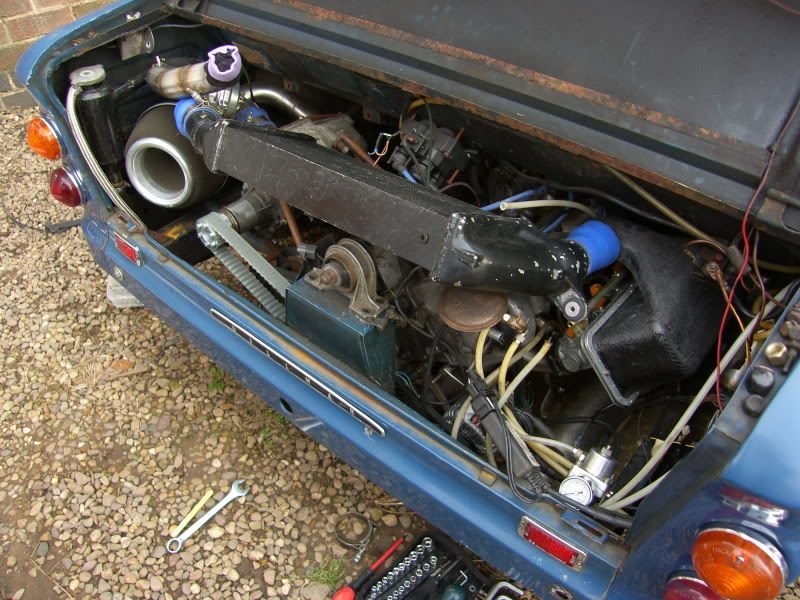
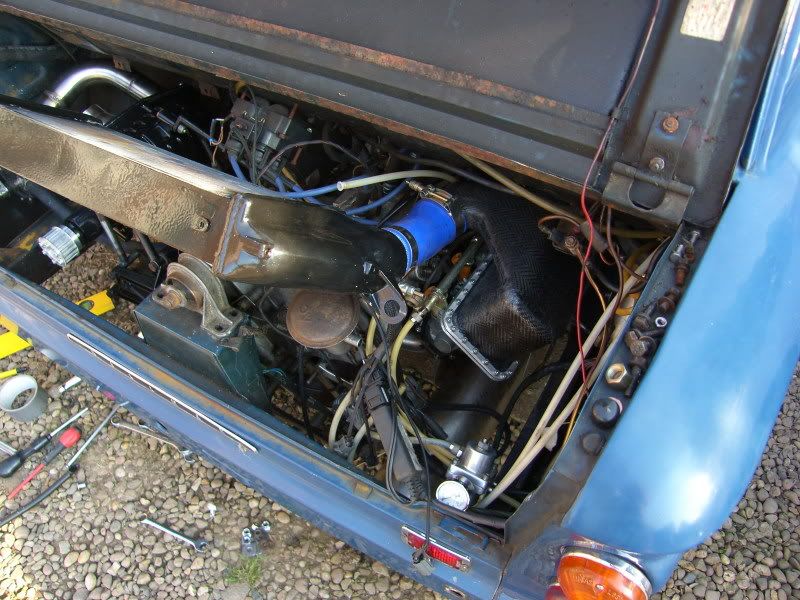
So this is where we end up for the day -
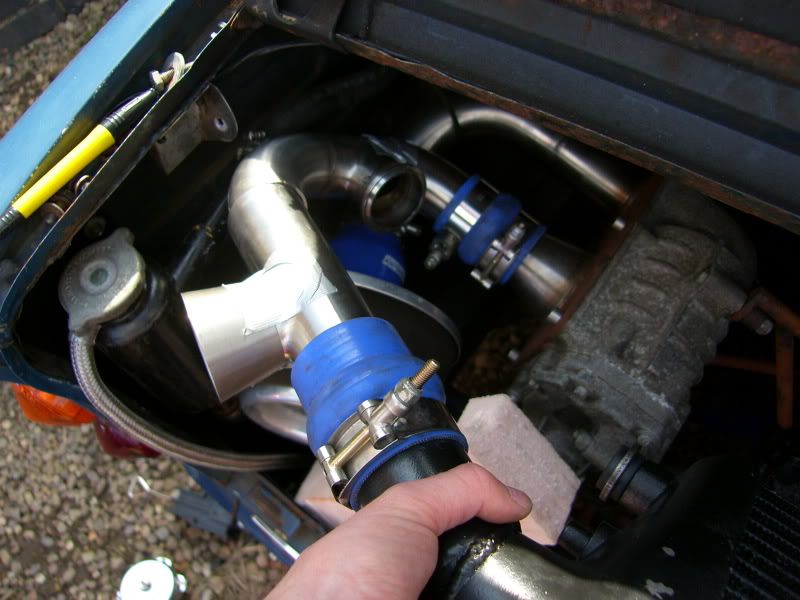
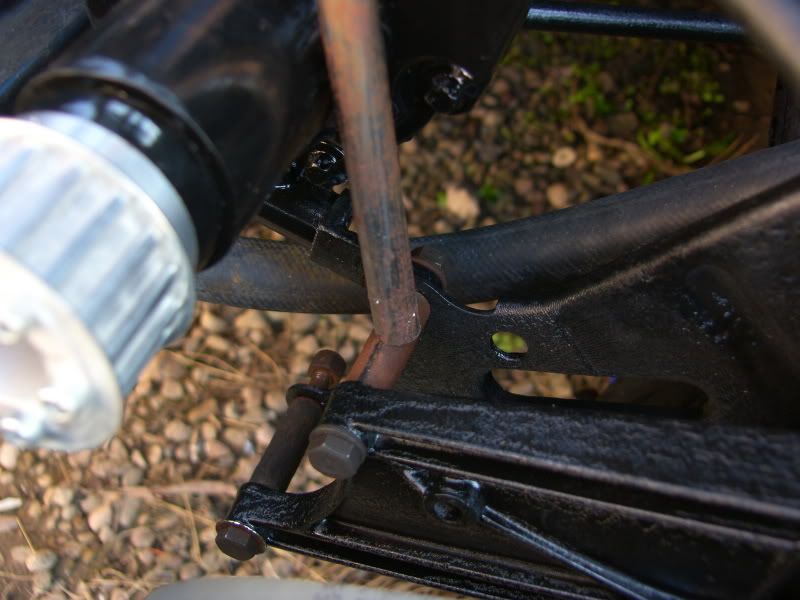
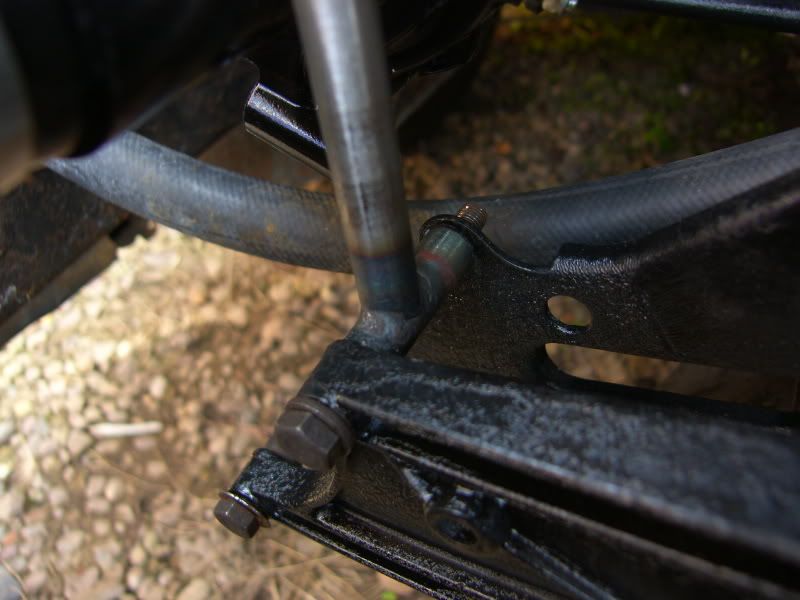
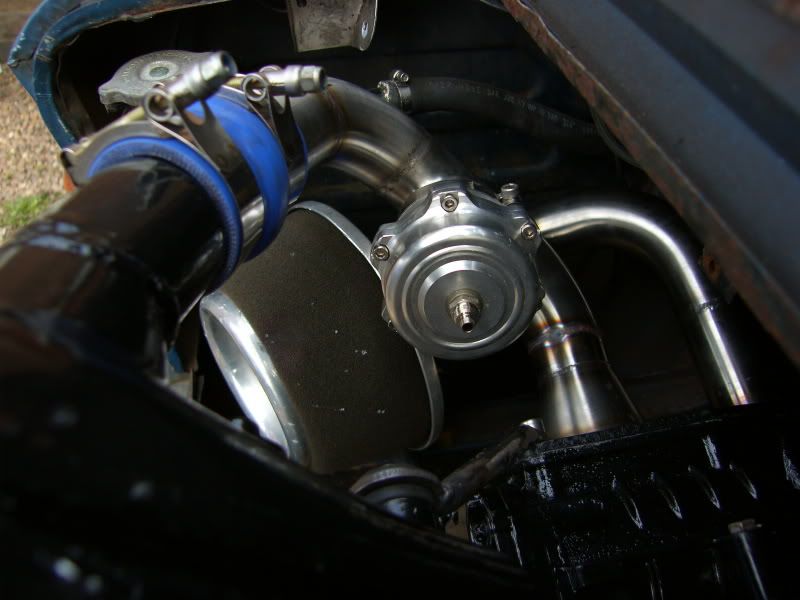
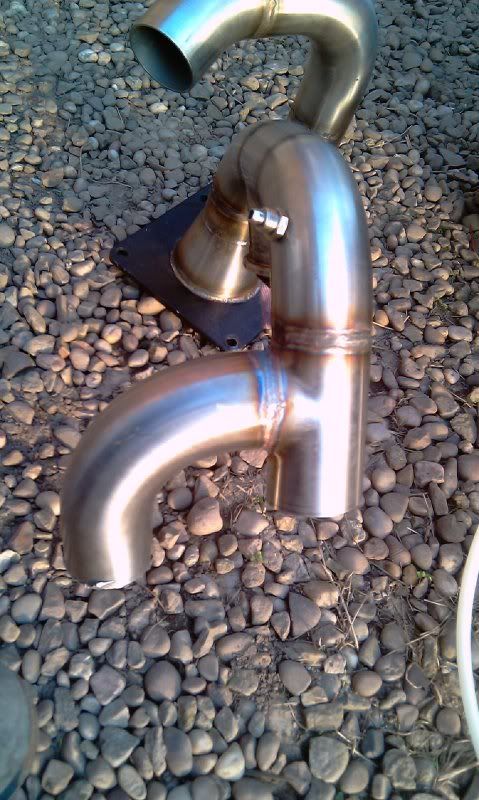
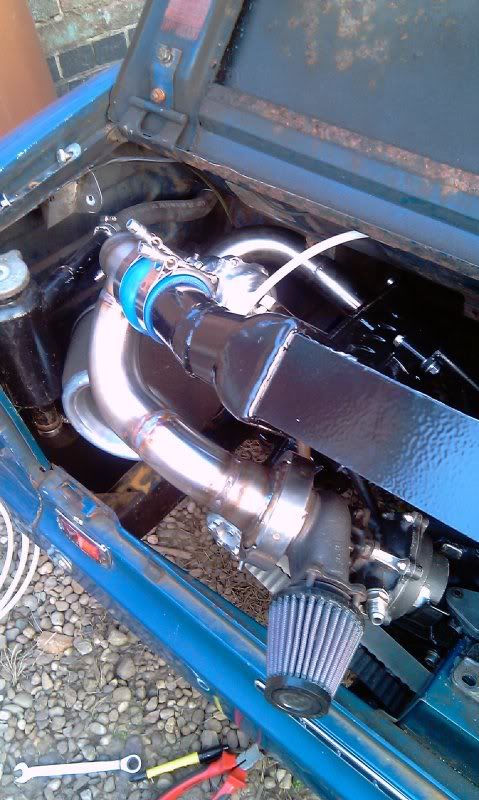
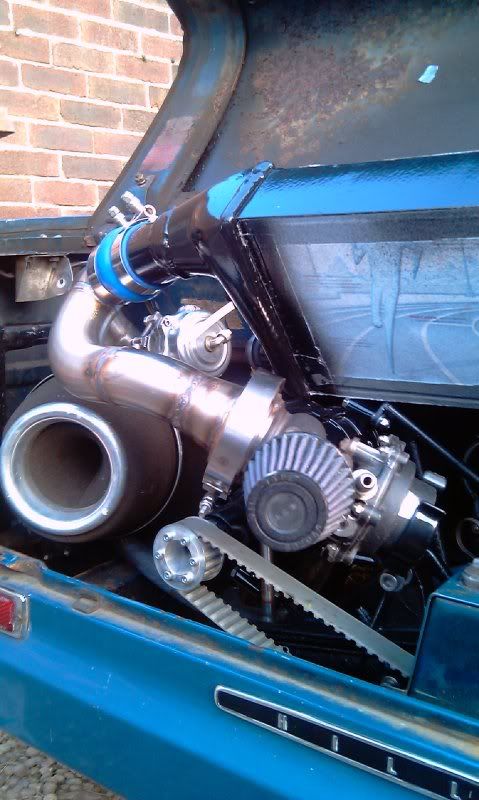
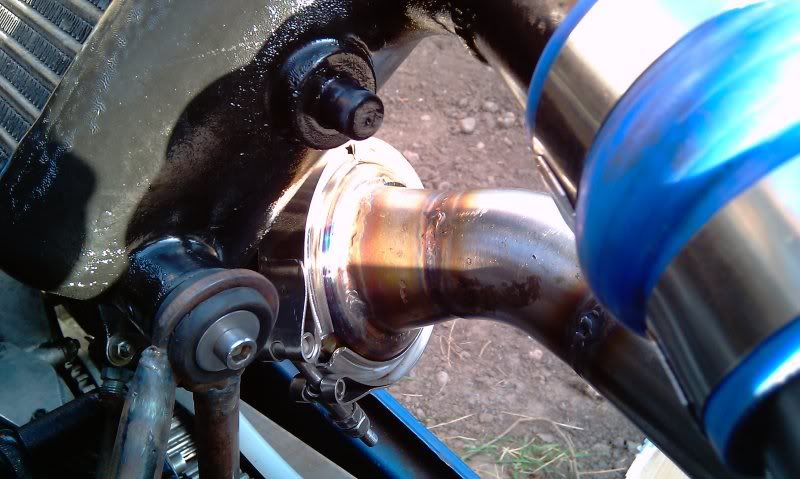
The next thing to do is going to be mounting the wastegate for boost control, now things are getting a little tight so I have to decide where to fit is, option 1 is tight up against the T-piece like so -
Option 2 will use a 90 degree fitting and a length of pipe to move the wastegate towards the middle of the car and into one of the final remaining areas free from stuff! -
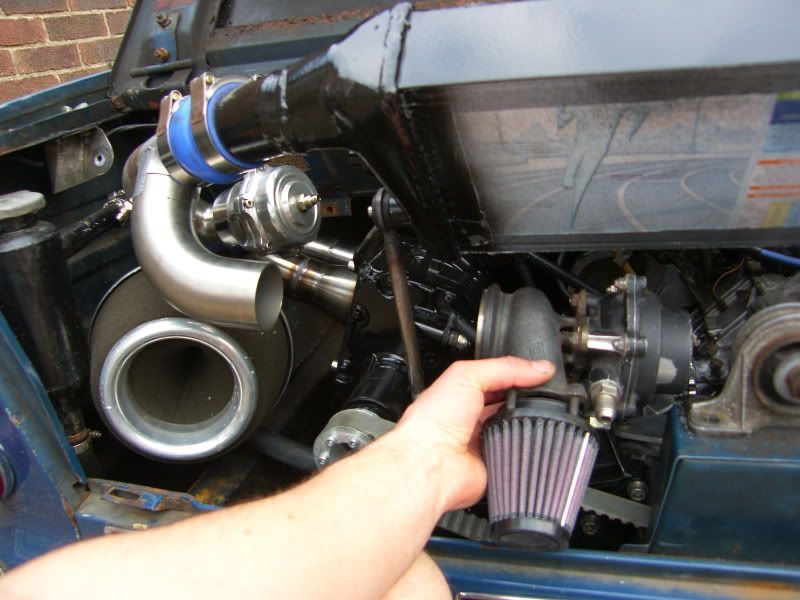
So what do you think? I leaning towards option 2 as I will be able to make a support for the wastegate, taking the load off the boost pipes?
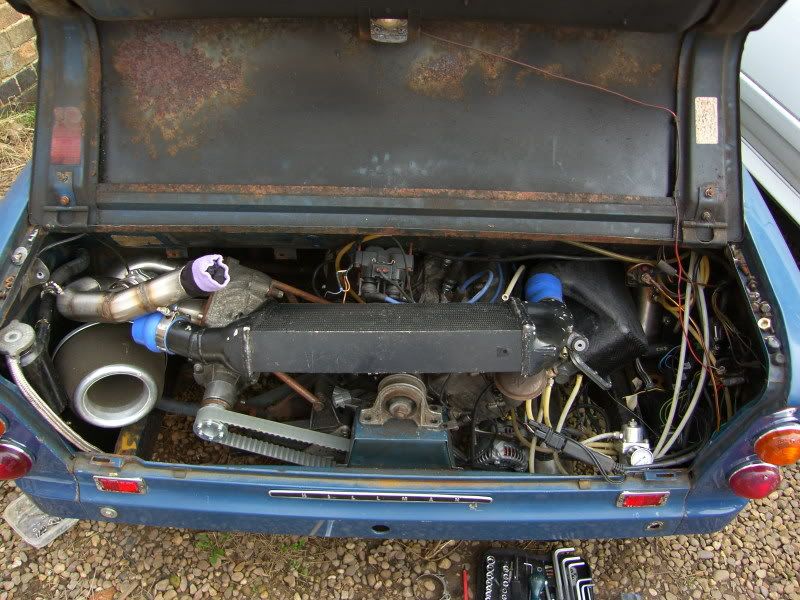
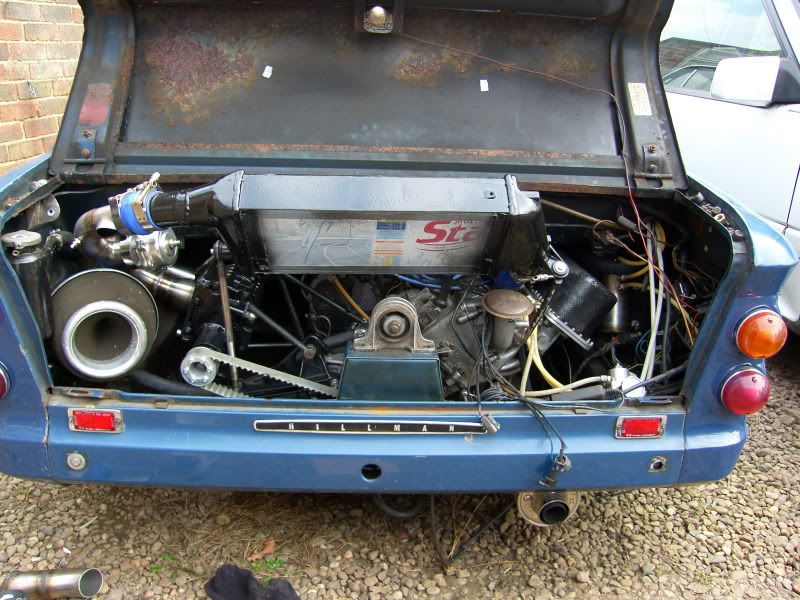
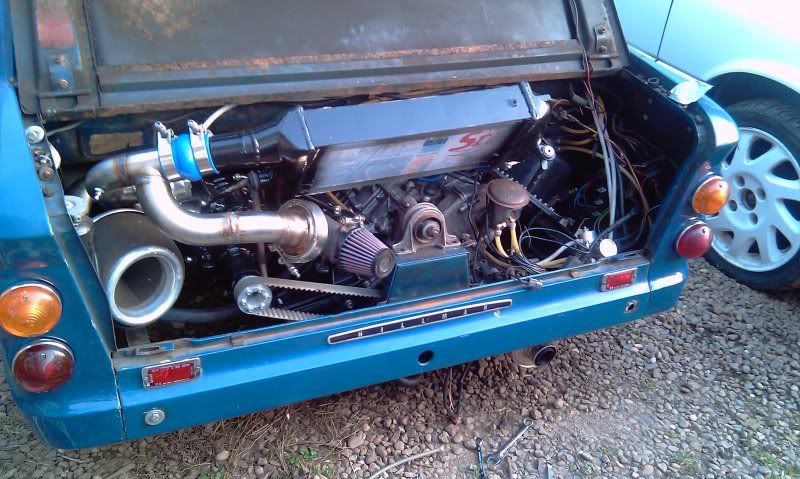
And finally a parting shot of what this car is all about -
Lot's of love,
J
On 5th of Sep, 2006 at 05:47pm mini13 said:
I reckon if his brains were gunpowder he couldn't blow his own hat off...
|
blown_imp
223 Posts
Member #: 598
Senior Member
Gaol
|
|
Hello!
The dead line is fast approaching (1st of May), so evenings have been deployed as well as the usual weekends, and I am pleased to say that the blown imp is back on the road and driving again! ;D
Here is how the car was last -
It needed the wastegate fitting and plumbing in, the throttle cable attaching and a new return spring adding, and a new manifold air pressure signal to be plumbed in from the original Honda take off point.
Now due to working at quite a pace, not everything was photographed, sorry chaps, but it did make way for rapid progress.
The wastegate had to be detachable for servicing etc, so a stainless V-band clamp was employed to seal and retain, this was pared back as much as possible due to it being heavily over engineered for exhaust use. This was machined to fit both the wastegate and a stainless reducer down to 2".
Some of my best welding so far -
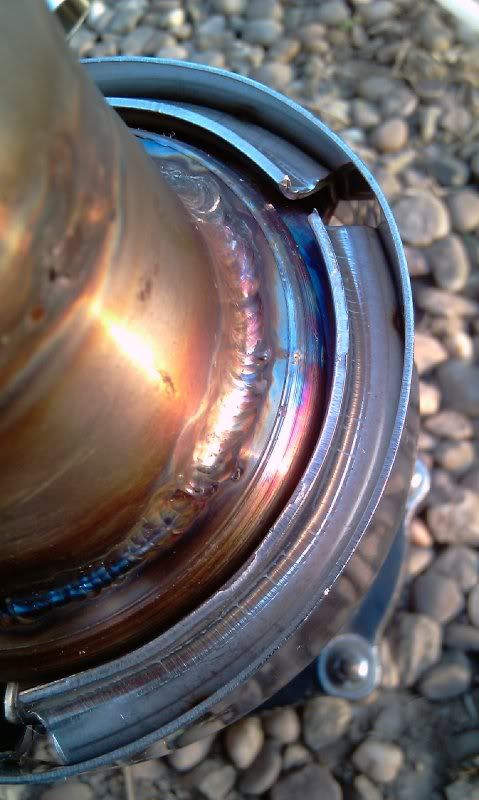
After a bit of fiddling around it was discovered that cleaning the stainless with acetone before welding helps with a clean weld pool, so some of the girlfriends nail polish remover was used (just don't tell her!) ;D
After working out where everything should go and welding each section, the final piece is possibly a step too far :-[ -
This was all bolted up and set ready to go, the intercooler was fitted and all the bolts checked ready for the first start, after a bit of churning (the fuel rail had to fill) it screamed into life :o :o
The wastegate and bypass valve are both doing exactly as they should, infact the wastegate is a little too good and is bleeding off most of the pressure at the moment. This can be solved using a bleed and pressurising both side of the wastegate diaphragm.
A return spring was cobbled together using some stainless sheet and a grotty old spring from the bottom of the tool box, although the position needs fine tuning as it is still not curing the fluctuating high idle speed.
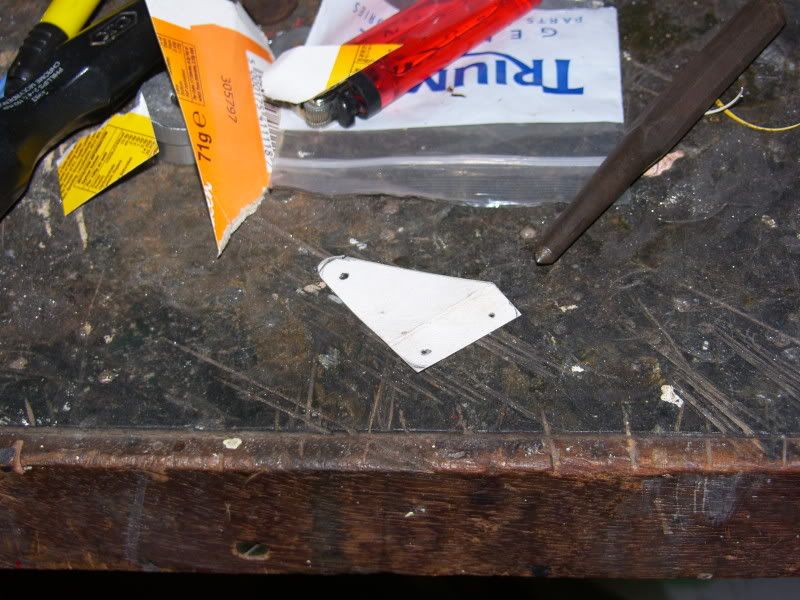
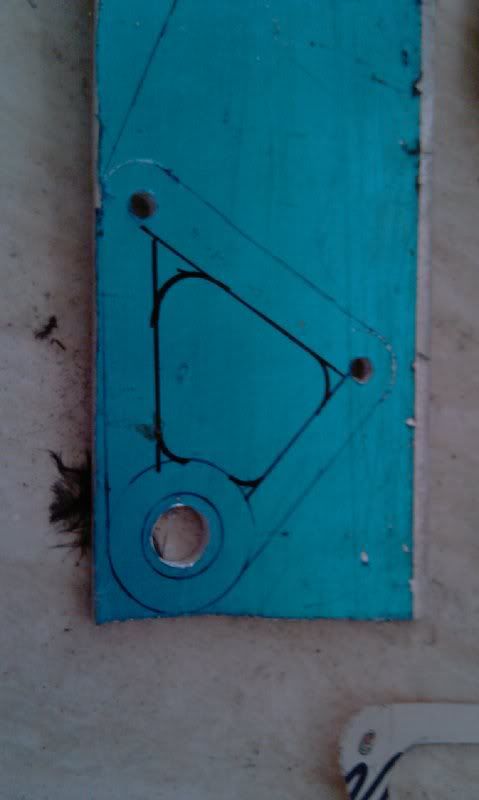
I used CAD for this bracket (Cardboard aided design ::) ) -
Stainless hacksawed out and drilled -
It was shaped and then bent 90 degrees ready for fitting -

The only bits left to sort out are a mount for the wastegate to support it, and an adaptor to fit a filter to the wastegate outlet.
Oh and I can't run a boot lid until I have sorted out some ventage
I will get a film of it once the fuelling is a little more sorted, but all in all im jolly happy
Hope everyone is well and enjoying the sunshine,
Hugs
J
On 5th of Sep, 2006 at 05:47pm mini13 said:
I reckon if his brains were gunpowder he couldn't blow his own hat off...
|
blown_imp
223 Posts
Member #: 598
Senior Member
Gaol
|
|
Hi guys,
Just a quick update to show the fitting of a bracket to stop the wastegate wan*ing it's self to death and a short video of the engine running.
As you can see the wastegate sits at the end of a really long length of stainless pipe without much support, and with the vibrations present would end up fatiguing a join somewhere resulting in nasty cracks.
I started out by working out the best options for mounting points, the intercooler mount and intercooler it's self were both good candidates, and the actual pipe leading to the wastegate was selected as it is right in the line of fire from the other mounts.
A tab was added to the intercooler mount and another stainless one added to the wastegate pipe.
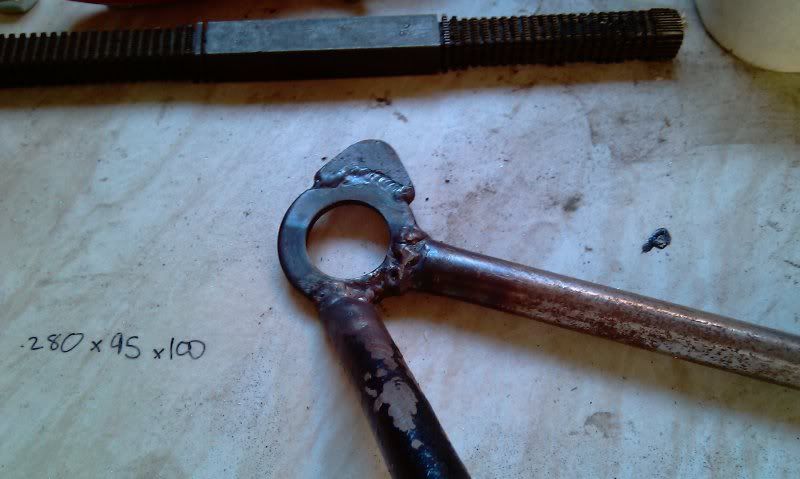
Some more CAD for the template led to this -
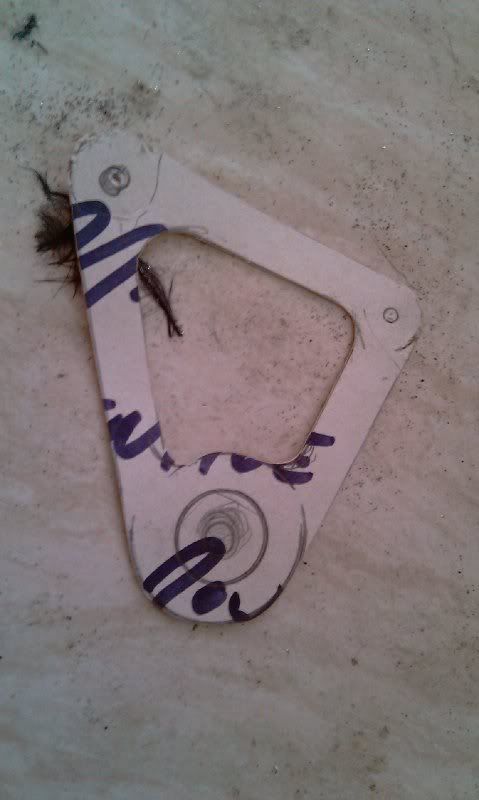
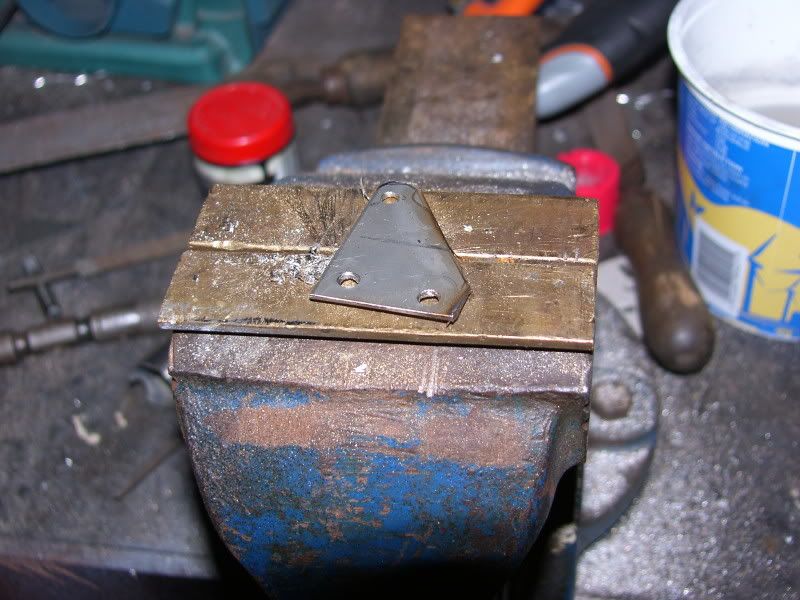
The bracket was marked out on some 3mm ally plate and hand cut and filed into shape.
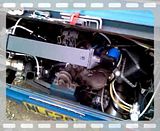
And finally a video of the finished bracket and the engine running again, fun!
Hope you are all well,
J
On 5th of Sep, 2006 at 05:47pm mini13 said:
I reckon if his brains were gunpowder he couldn't blow his own hat off...
|
Joe C

12307 Posts
Member #: 565
Carlos Fandango
Burnham-on-Crouch, Essex
|
|
Well fuck me!
here's a welcome suprise!
On 28th Aug, 2011 Kean said:
At the risk of being sigged...
Joe, do you have a photo of your tool?
http://www.turbominis.co.uk/forums/index.p...9064&lastpost=1
https://joe1977.imgbb.com/
|
Brett
9502 Posts
Member #: 1023
Post Whore
Doncaster, South Yorkshire
|
|
what a read!!! top work
Yes i moved to the darkside
Instagram @jdm_brett
|
Fortecphil
497 Posts
Member #: 7641
Senior Member
Jersey, CI
|
|
I love it. Top work pal, superb. 
|
lockfast
559 Posts
Member #: 2775
Post Whore
Aberdeen
|
|
Fantastic .........keep it up
|
Turbo Phil
4642 Posts
Member #: 20
My sister is so fit I won't show anyone her picture
Lake District
|
|
Very very nice !
WWW.TURBO-MINI.COM
|
matty
8297 Posts
Member #: 408
Turbo Love Palace Fool
Aylesbury
|
|
Welcome back!
Nice work, that shoudl go well. :)
https://www.facebook.com/pages/Fusion-Fabri..._homepage_panel
www.fusionfabs.co.uk

1/4mile in 13.2sec @ 111 terminal on 15psi
|
Johnny
1183 Posts
Member #: 6926
Post Whore
Accrington
|
|
very nice! do you do the welding yourself? if so which tig welder do you have? im thinking of buying one but was going to go for the cheapest one in machinemart
|
Joe C
12307 Posts
Member #: 565
Carlos Fandango
Burnham-on-Crouch, Essex
|
|
he's got a cheapish tig,
if you get one go for one with an HF start rather than a scratch start.
theres a pic of it on the first page of this thread, also theres a load more stuff for people that haven't seen the build before.
http://www.turbominis.co.uk/forums/index.php?p=vt&tid=121495
Edited by Joe C on 1st May, 2010.
On 28th Aug, 2011 Kean said:
At the risk of being sigged...
Joe, do you have a photo of your tool?
http://www.turbominis.co.uk/forums/index.p...9064&lastpost=1
https://joe1977.imgbb.com/
|
Rob H
4314 Posts
Member #: 700
Formerly British Open Classic
The West Country
|
|
Welcome back, looking good as ever, however I'd be a bit worried about how well the IC will work with a gurt big piece of card stuck across it:
Isambard Kingdom Brunel said:
Nothing is impossible if you are an Engineer
|
blown_imp
223 Posts
Member #: 598
Senior Member
Gaol
|
|
heheh, it's not actually an intercooler, if you look closely it is a cereal box that looks like an intercooler!
Thanks for all the kind word guys, i'm quite happy with the project now, and the engine is running well, I am up to my neck in tunes and logs
Next up will be some more boost controlled by the megasquirt.
The TIG welder is just a scratch start DC unit from machine mart, and I agree with mini13, get one with a hf or lift start, will make the world of difference.
cheers
J
On 5th of Sep, 2006 at 05:47pm mini13 said:
I reckon if his brains were gunpowder he couldn't blow his own hat off...
|
jamz
1342 Posts
Member #: 2292
Tool
Herne Bay, kent
|
|
amazing
On 27th Apr, 2010 Rick.SPI said:
cant beat a good blowout.
|
Paul S
8604 Posts
Member #: 573
Formerly Axel
Podland
|
|
Great work as usual. Good to see you back.
On 2nd May, 2010 blown_imp said:
Next up will be some more boost controlled by the megasquirt.
That will be interesting with the supercharger. It also may explain why you have that exhasut gas wastegate on the inlet side.
Saul Bellow - "A great deal of intelligence can be invested in ignorance when the need for illusion is deep."
Stephen Hawking - "The greatest enemy of knowledge is not ignorance, it is the illusion of knowledge."
|
apbellamy

16540 Posts
Member #: 4241
King Gaycharger, butt plug dealer, Sheldon Cooper and a BAC but generally a niceish fella if you dont mind a northerner
Rotherham, South Yorkshire
|
|
I've been reading about this on retro rides. good skills
On 11th Feb, 2015 robert said:
i tried putting soap on it , and heating it to brown , then slathered my new lube on it

|
robert

6754 Posts
Member #: 828
Post Whore
uranus
|
|
hurrah .
Medusa + injection = too much torque for the dyno ..https://youtu.be/qg5o0_tJxYM
|
blown_imp
223 Posts
Member #: 598
Senior Member
Gaol
|
|
Sure does! The supercharger is geared for around 24psi of boost, but is currently running 3! So it def works
so a bit more plumbing and a solenoid and I should be able to get it boosting to an RPM based map.
On 5th of Sep, 2006 at 05:47pm mini13 said:
I reckon if his brains were gunpowder he couldn't blow his own hat off...
|
apbellamy
16540 Posts
Member #: 4241
King Gaycharger, butt plug dealer, Sheldon Cooper and a BAC but generally a niceish fella if you dont mind a northerner
Rotherham, South Yorkshire
|
|
what charger is it?
On 11th Feb, 2015 robert said:
i tried putting soap on it , and heating it to brown , then slathered my new lube on it
|
theoneeyedlizard
7265 Posts
Member #: 1268
The Boom Boom speaker Police!
Essex
|
|
Great to have you back!
In the 13's at last!.. Just
|
Brett
9502 Posts
Member #: 1023
Post Whore
Doncaster, South Yorkshire
|
|
howcome the charger is geared so high, does it not use a stupid amount of power to drive it at high rpm?
edit, hang on, is it so you get alot of boost from the charger right off idle?
Edited by Brett on 2nd May, 2010.
Yes i moved to the darkside
Instagram @jdm_brett
|
|
Home > Show Us Yours! > Supercharged imp
|
|
Users viewing this thread:
none. (+ 1 Guests)
|
Next ->
|
|

