|
Home > Show Us Yours! > Dan's 998 build
|
dan_w
64 Posts
Member #: 4837
Advanced Member
Tonbridge Kent
|
|
Well I finally thought it was about time I created a project thread on here, I have been lingering on here for quite a while now researching and getting ideas from other peoples builds.
I brought my mini about a year and half ago as a quick tidy up car to get my wife learning to drive in. Well to cut a long story short she still gets the bus lol. There was far more work to be done than I ever thought and now I have got more than a little carried away with things
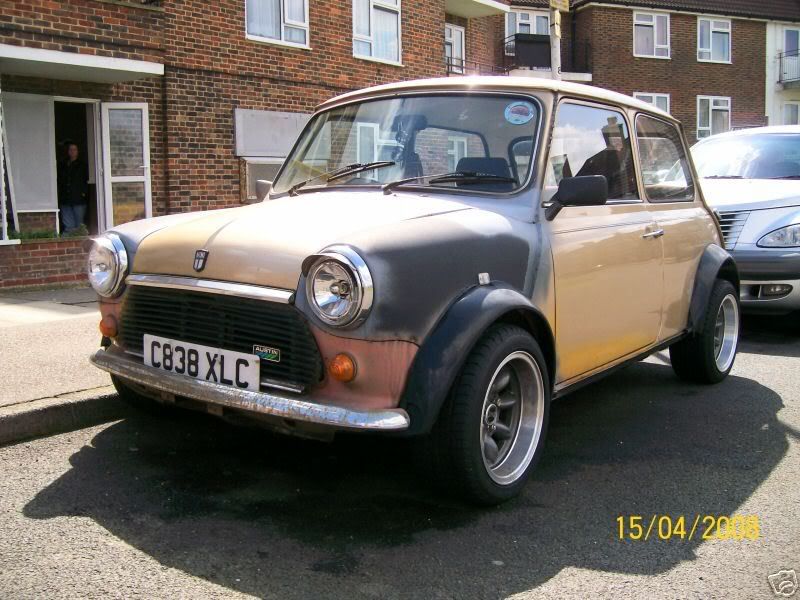
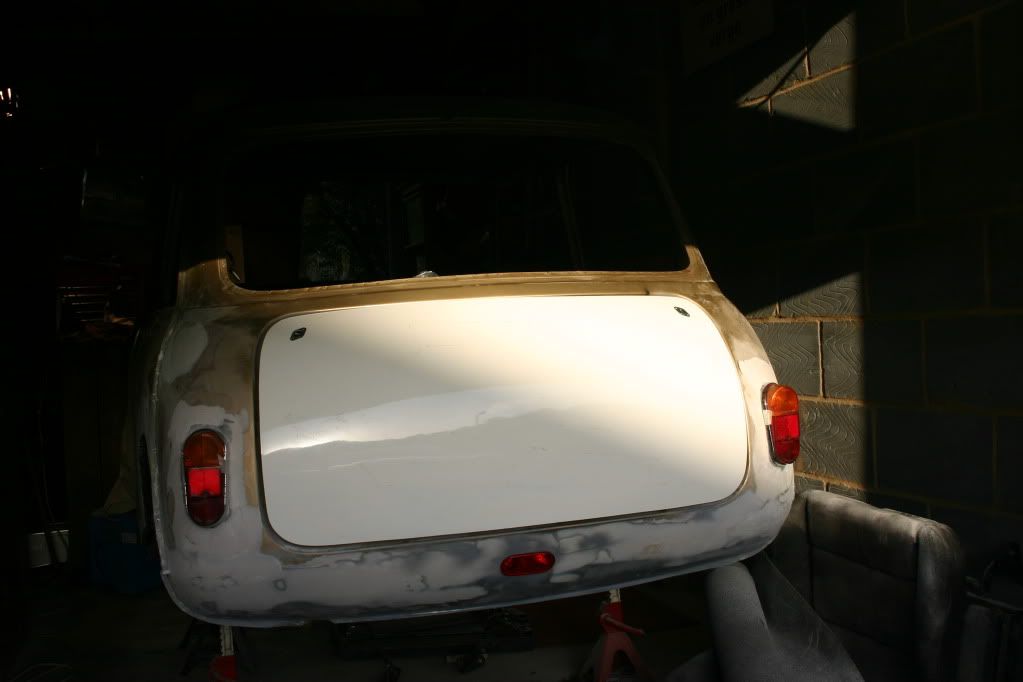
This is how it started life when I brought it.
The plan is now to have a weekend toy for those few sunny days we have and hopefully for the odd track day (If I can build up the courage)
The final spec I am aiming for will be:
998 +20 thou – Already brought (I have no idea what cc that makes it if anyone can tell be that would be great)
Various engine mods (balanced crank, lightened conrods etc)
T2 turbo on Mirage manifolds– Already brought (still needs a rebuild)
12G940 head – block has been pocked already – still need the head though
Gmax lowered shocks – ready to be fitted with subframes
Deep dish superlights 13x7
Miglia arches
6 point cage – Harnesses – fibreglass seats – fully stripped out interior
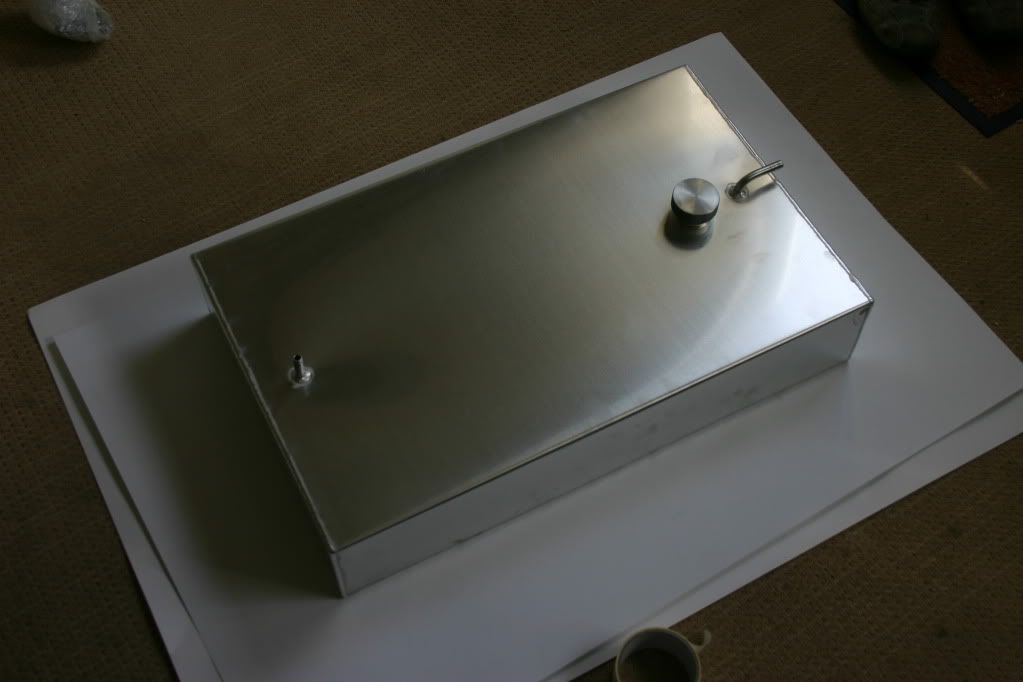
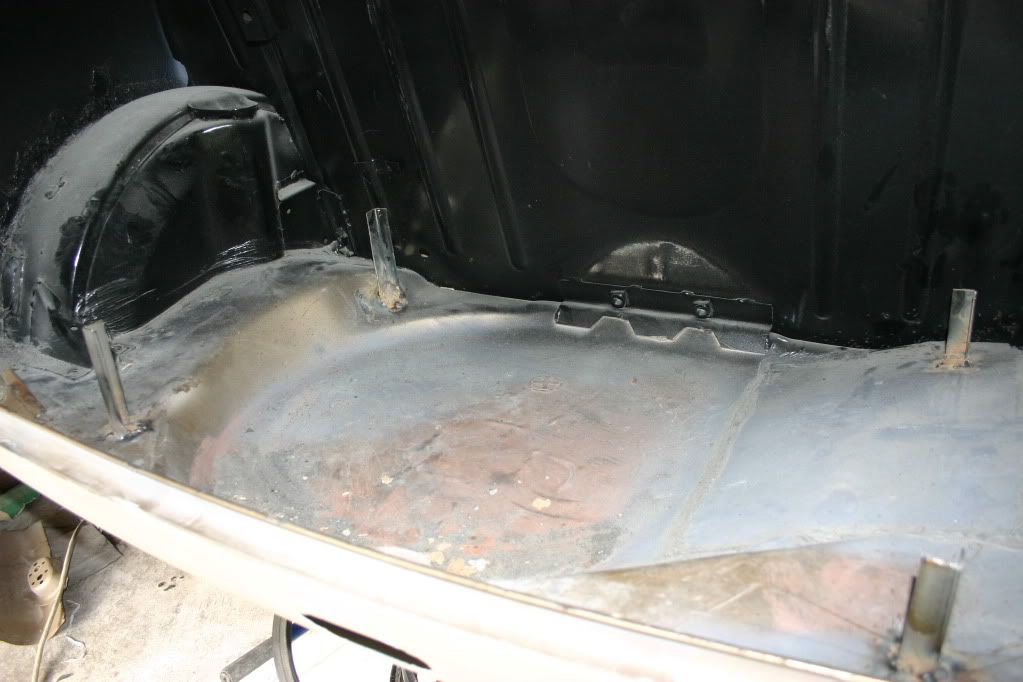
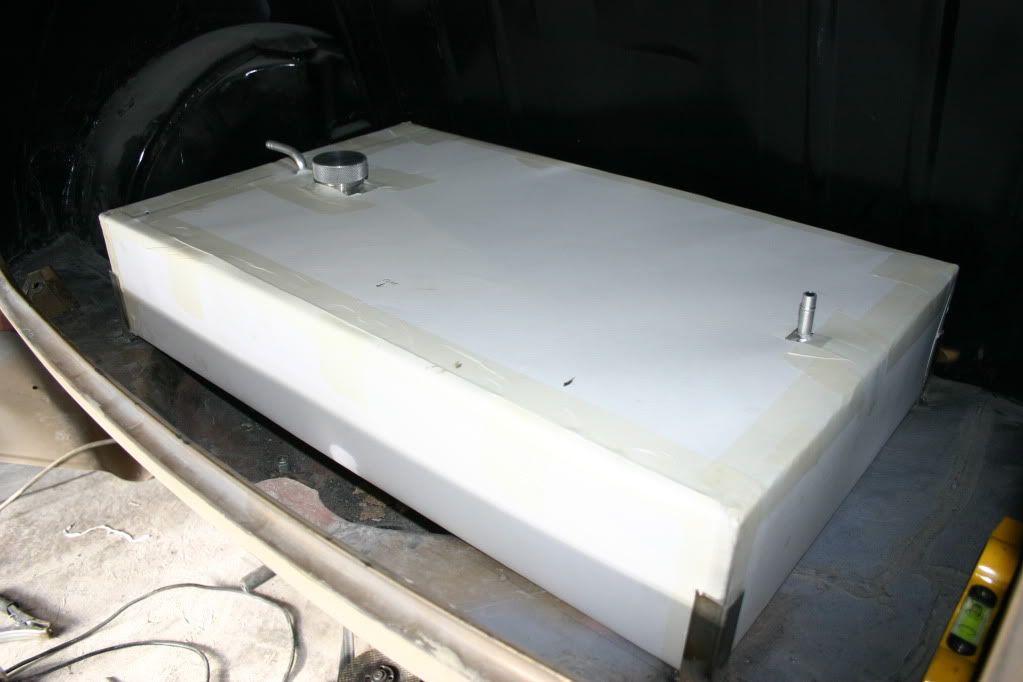
Alloy fuel tank located in boot.
Polycarbonate sliding windows
I will be paining it Orange (hopefully metallic) with black arches and roof.
Anyway enough talking here are a few progress pics, really sorry about the picture overload I have tried to catch the main progress in as few a shots as I can.
All pics are in my photobucket account so feel free to have a look.
http://s312.photobucket.com/albums/ll358/dan_mini/
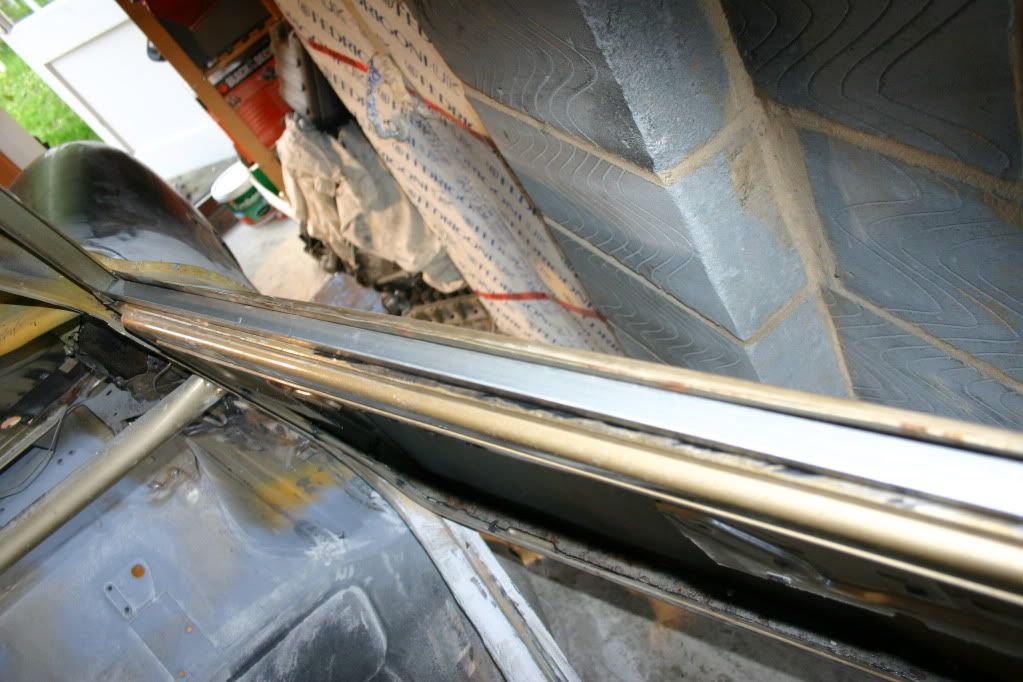
Loads of welding done (taught myself to weld in the process and lots of scrap panels)
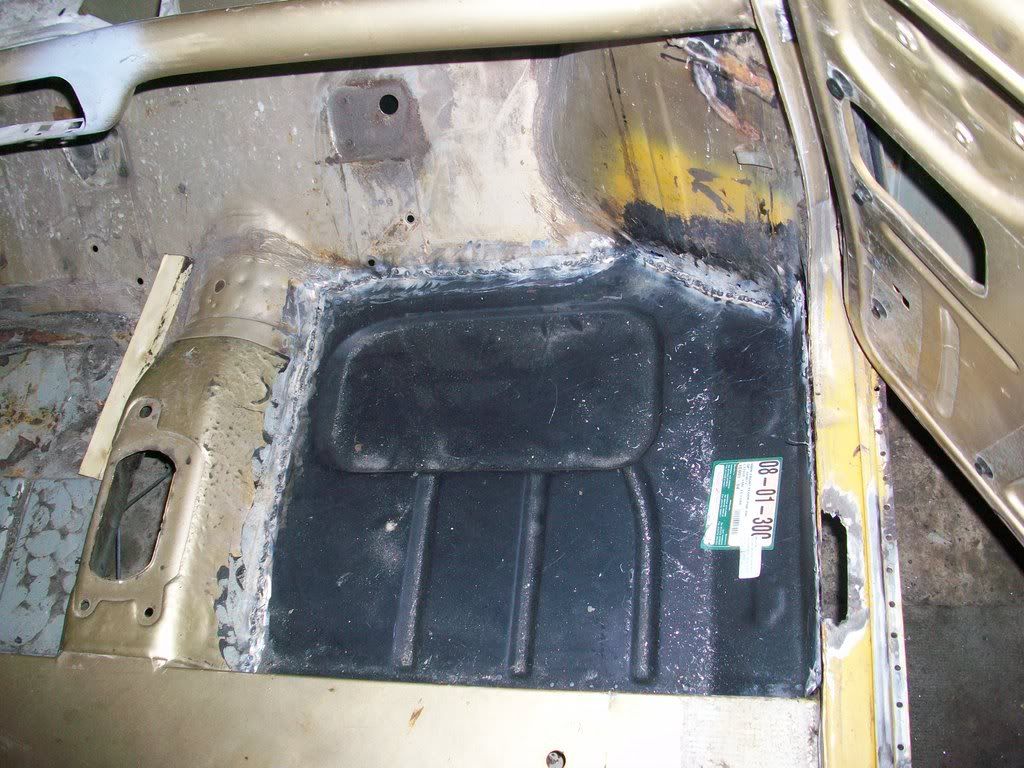
Arches tubbed
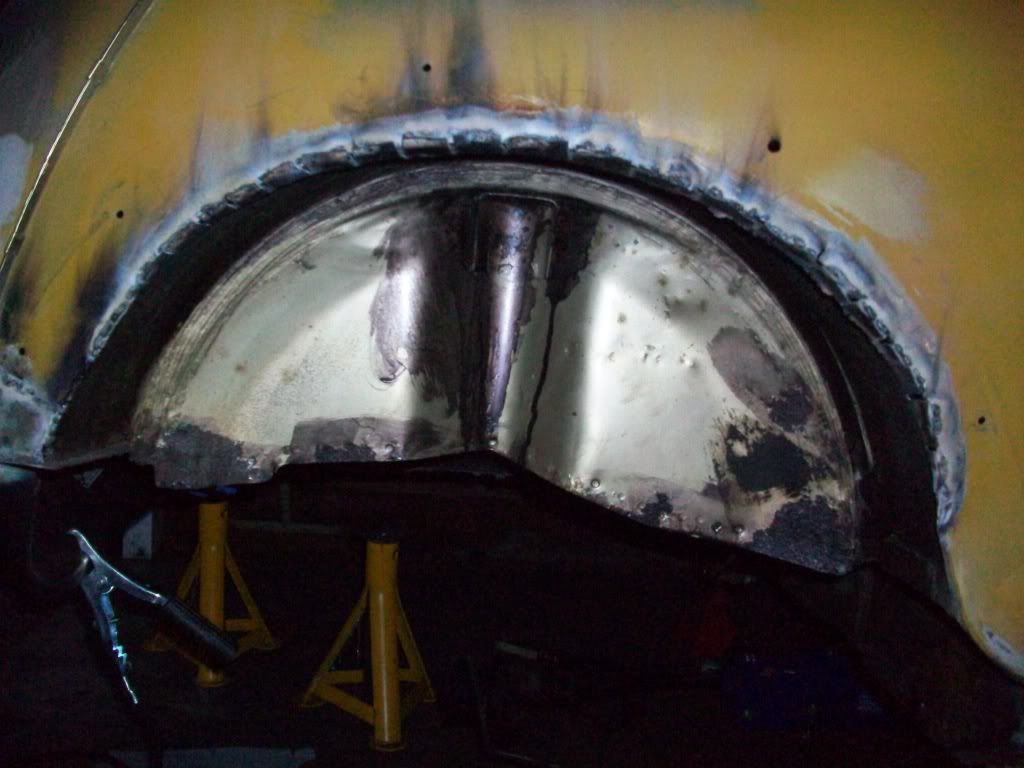
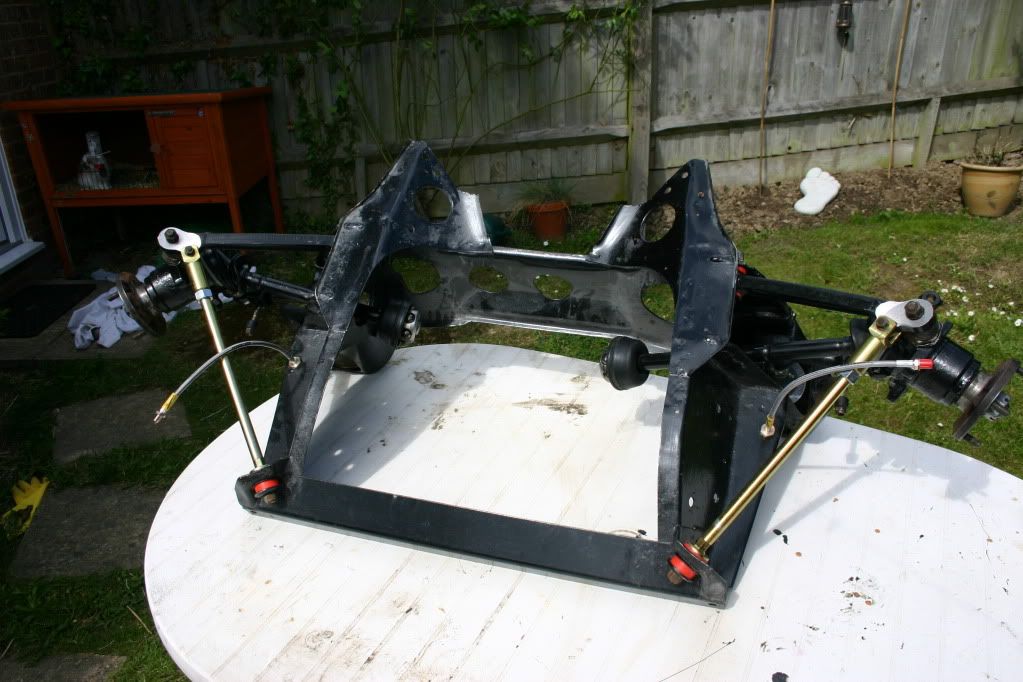
Front subframe fully assembled – negative camber kit , polly bushes etc
Rear is also assembled but I have no pics at the moment
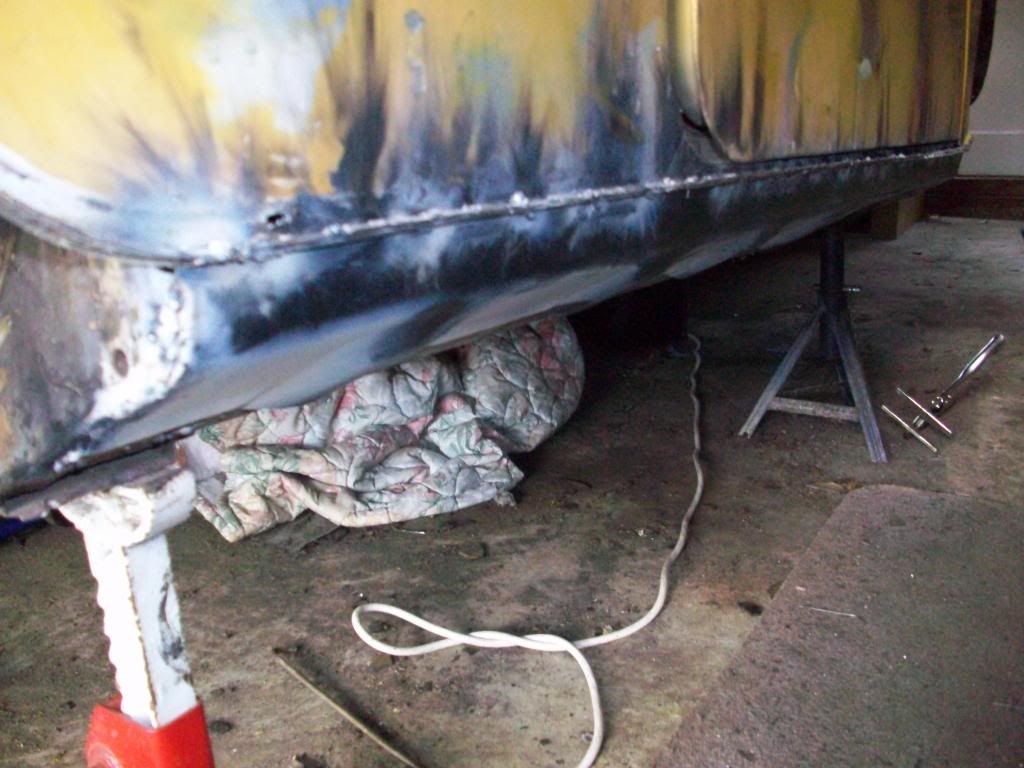
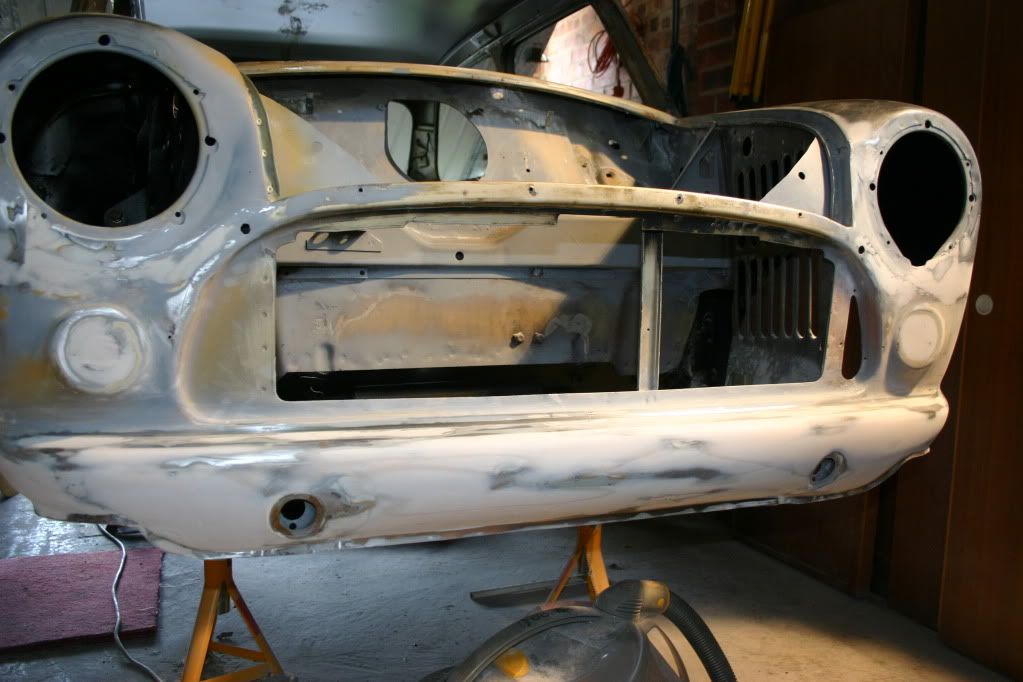
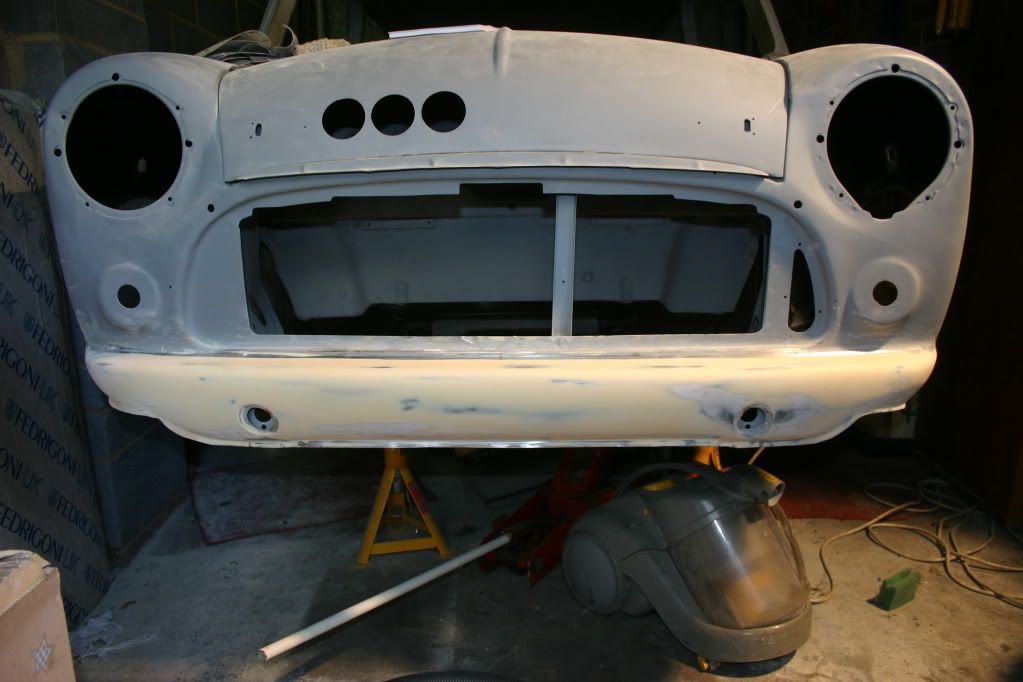
I am aiming for a nice smooth look to the car so the front and rear bumpers have been removed all lips and joins have been removed and will be using some small side repeaters as front indicators.
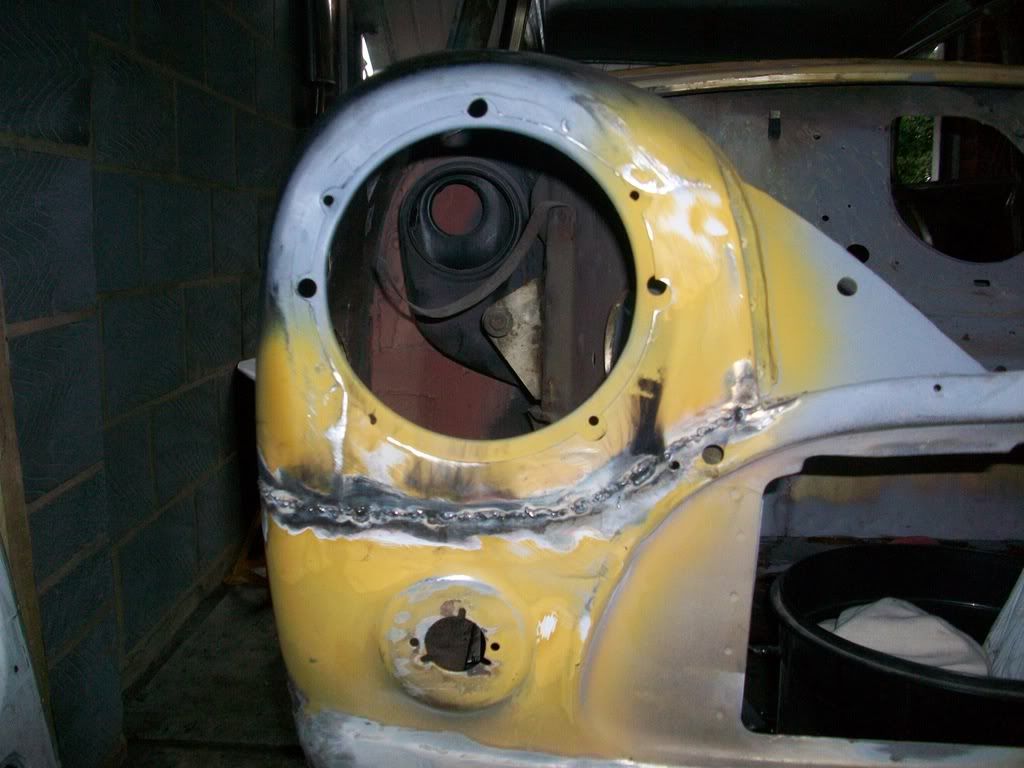
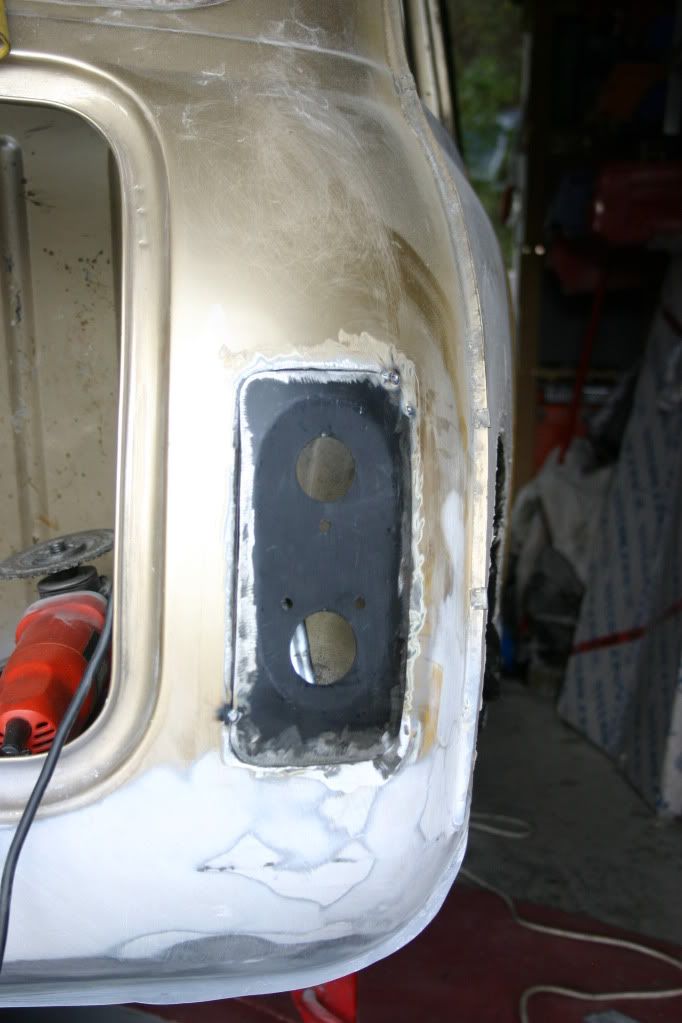
Mk1 light plates welded in. and hole cut to hold the fog light from a new mini cooper
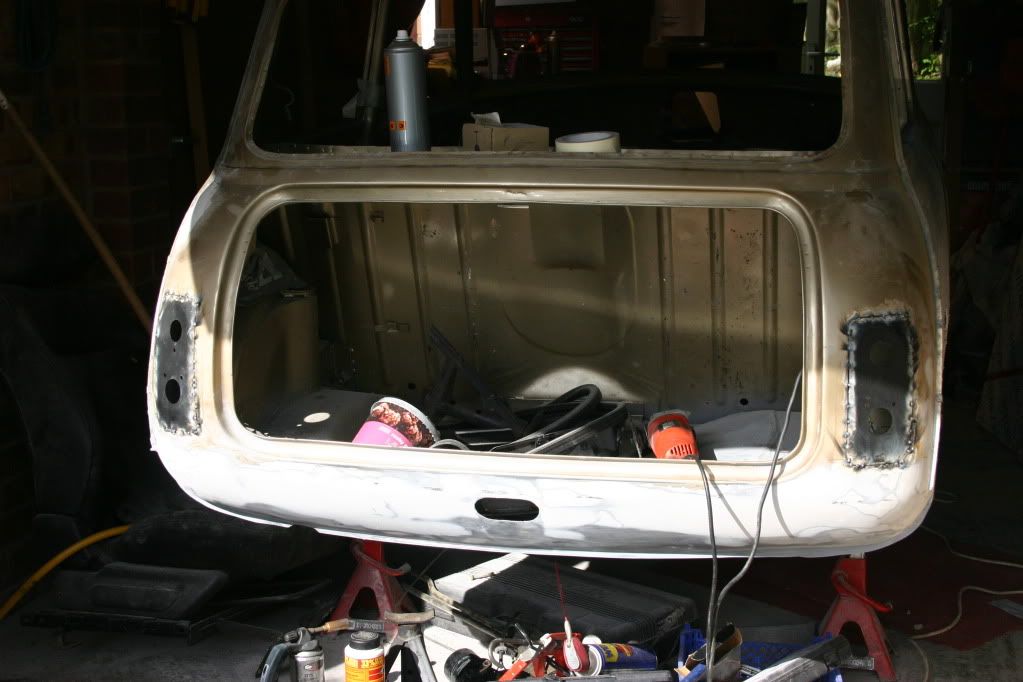
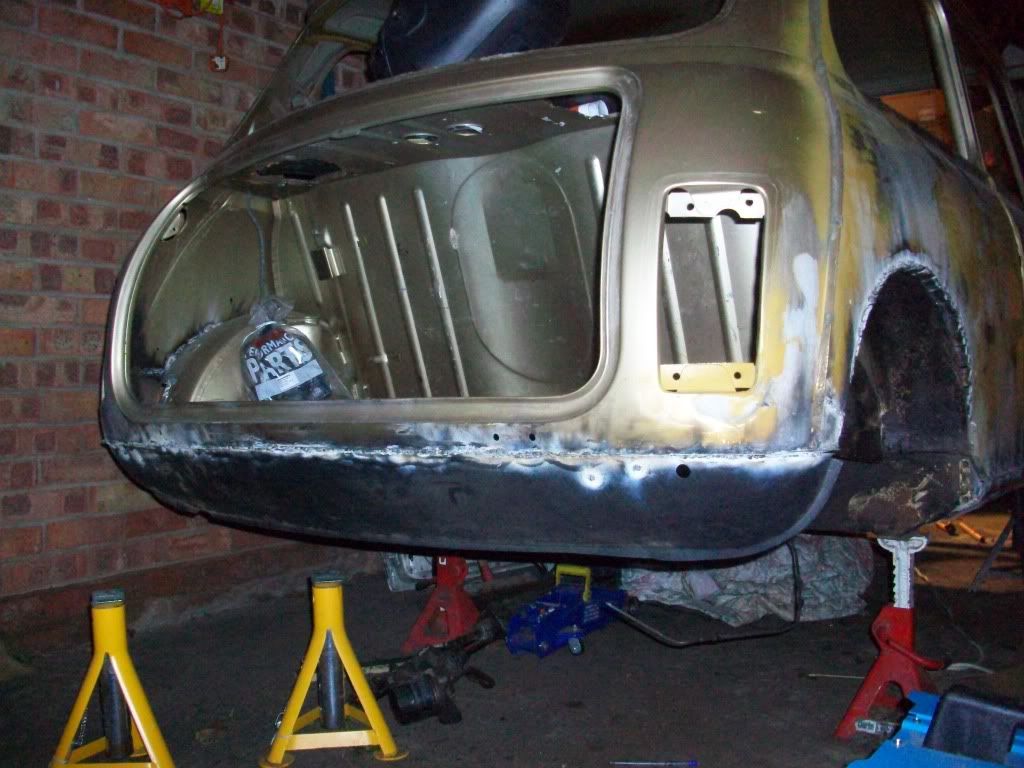
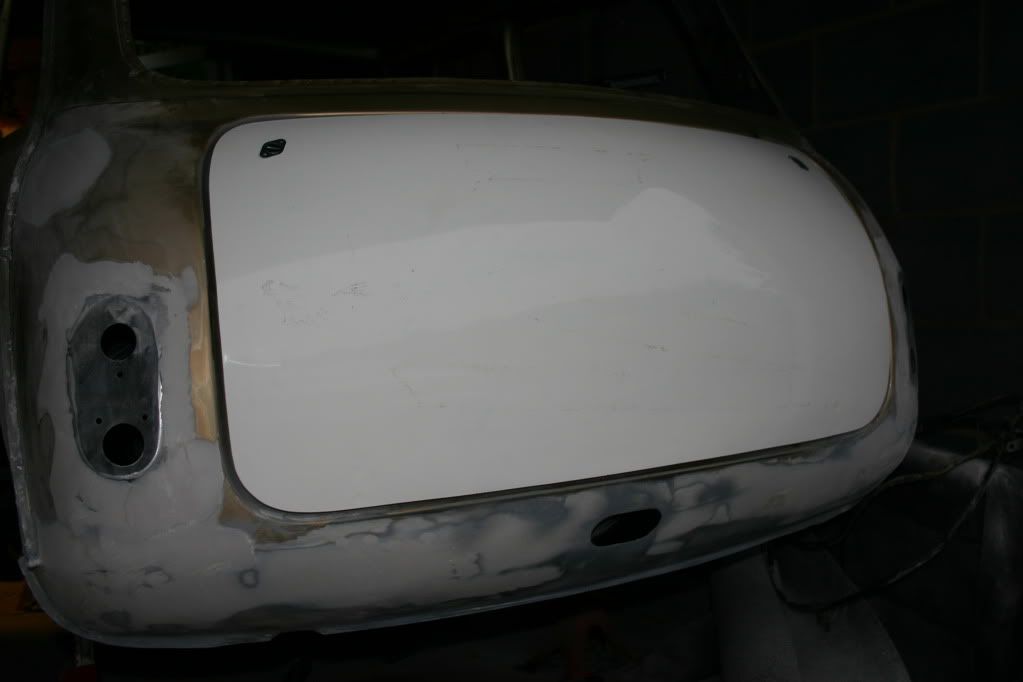
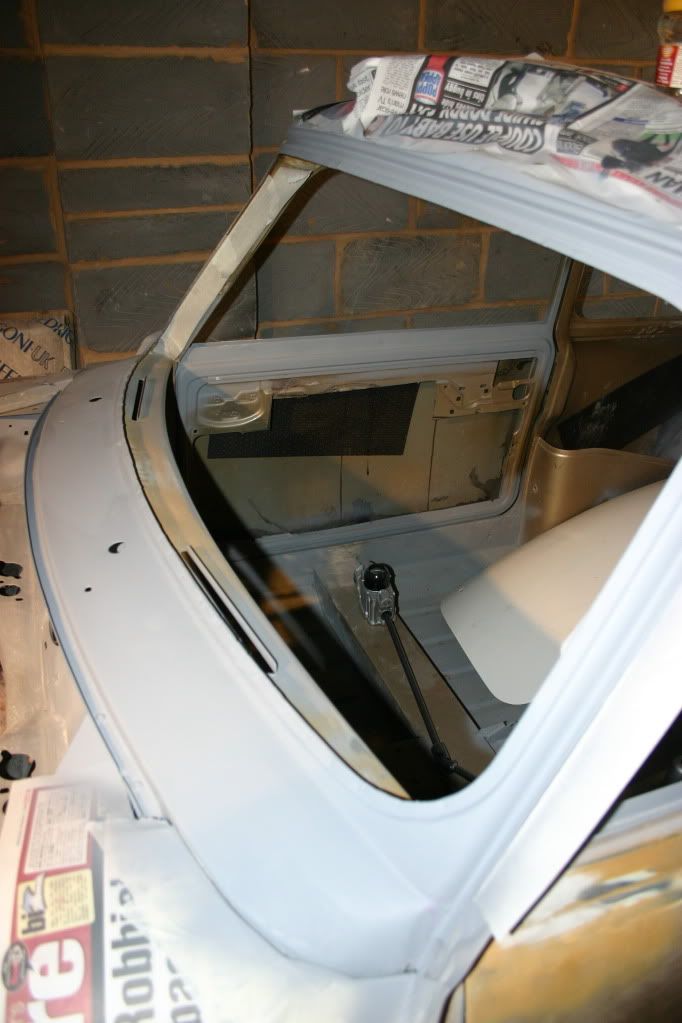
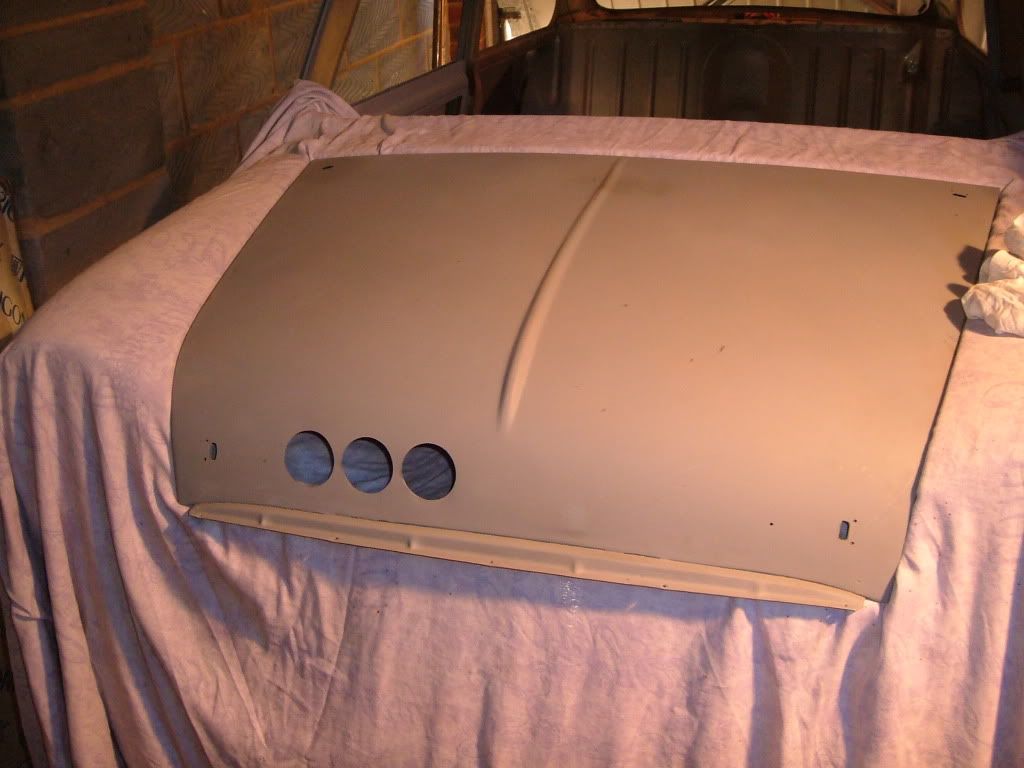
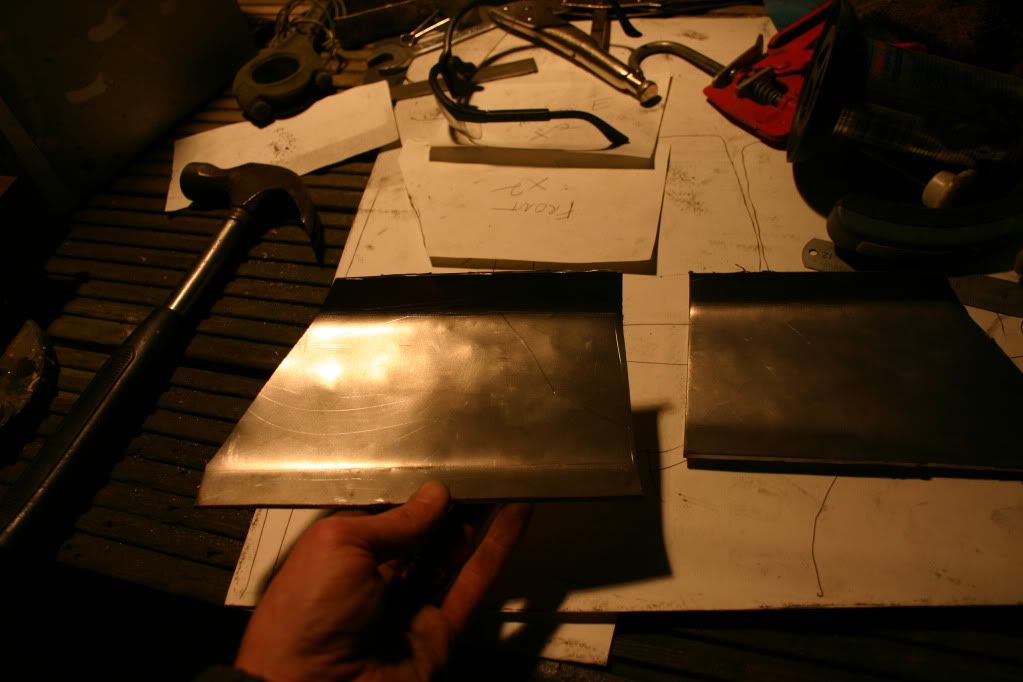
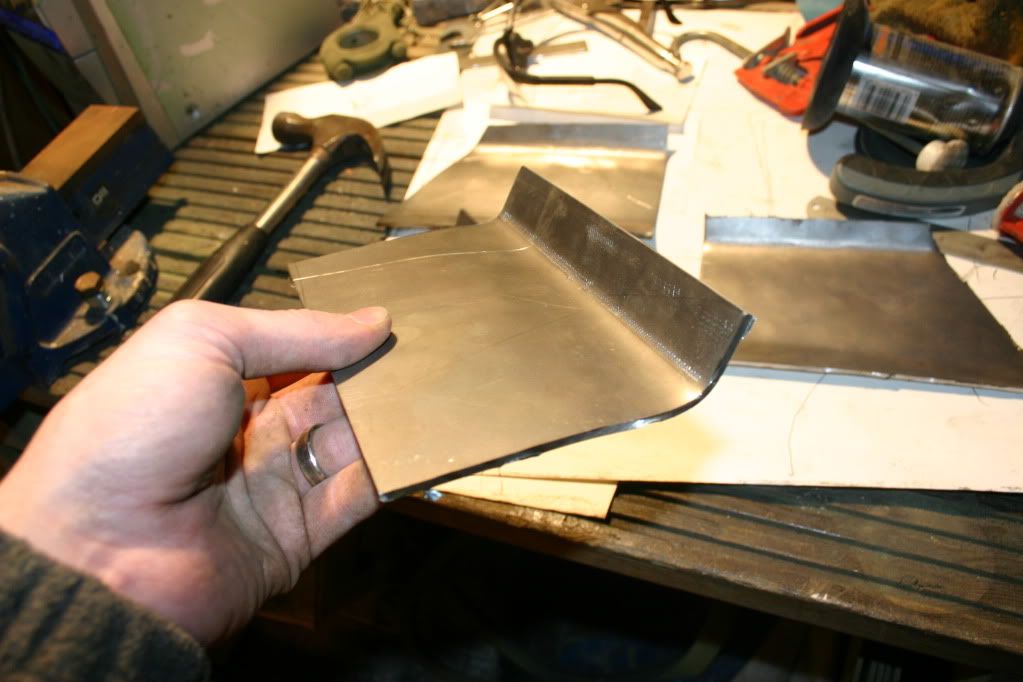
Single skin smooth boot mocked up with Dzus fasteners and home made latch’s at the bottom.
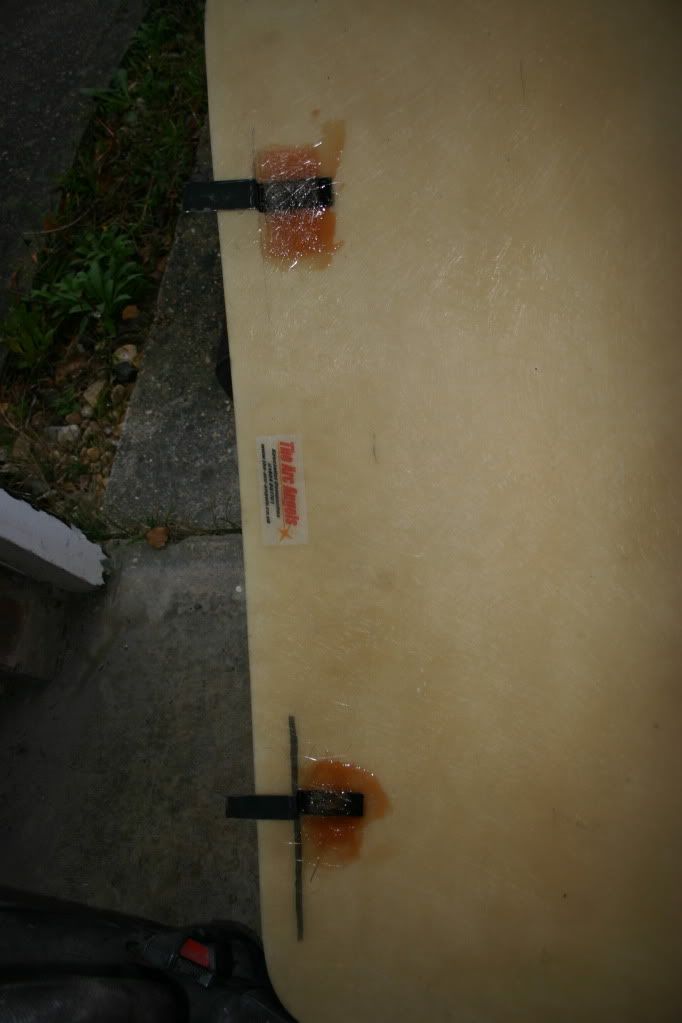
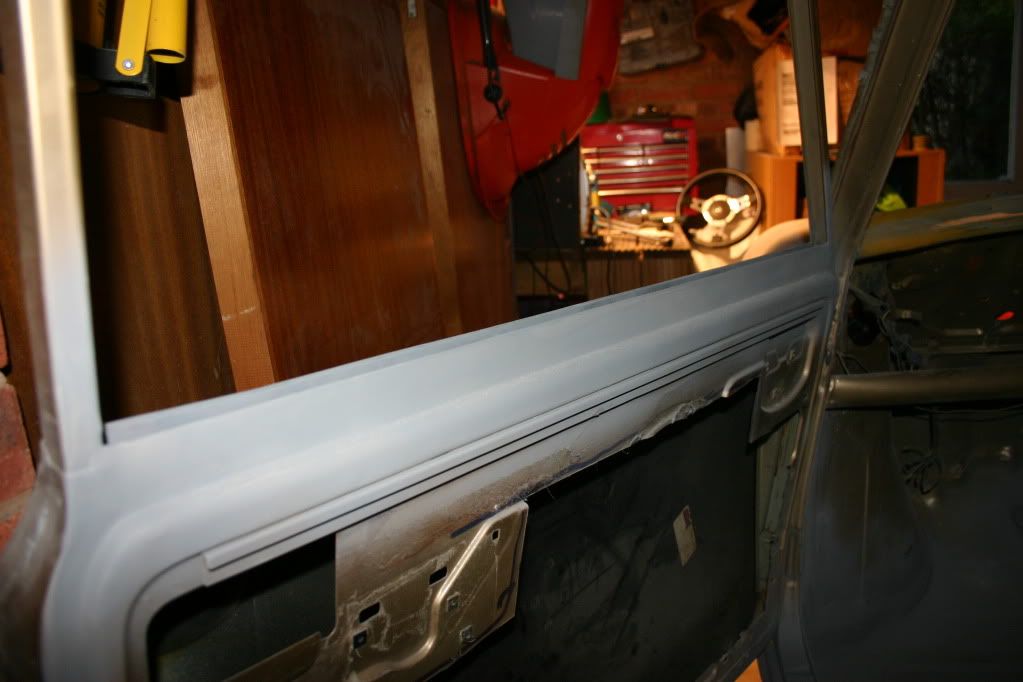
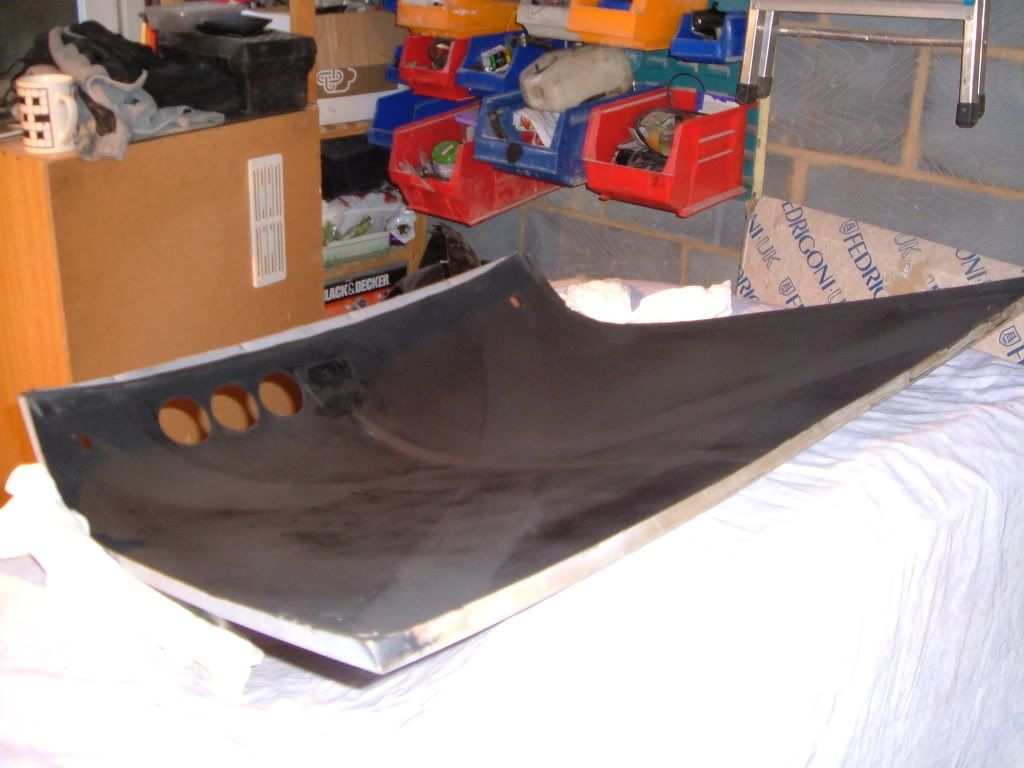
Wanting to save on weight I will be fitting polly carb windows but I am not keep on only having a small cat flap to open. Hence the Mk1 style sliding windows.
I have welded in a L shaped trim on the inside edge and will be fitting standard rubbers (the type that normally goes around the top of the window frame) all round. This will then give me runners for both panes. The only issue I can see is potential water leeks. But the car will be kept in the garage and will only be out in nice weather so no real issue.
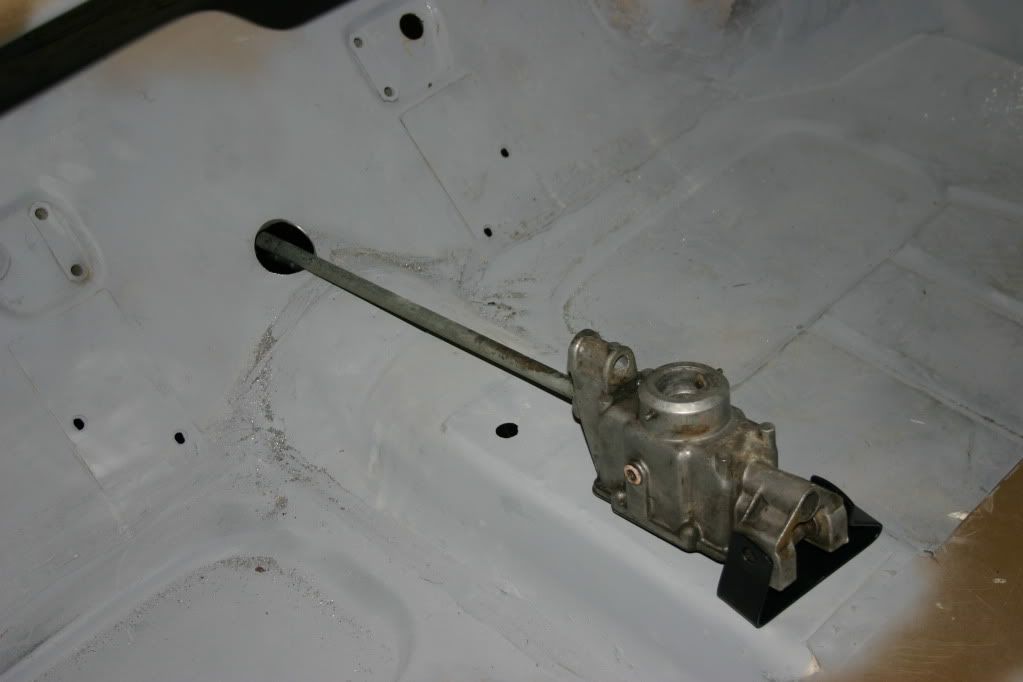
Internal shifter prepared and ready to mock-up in the car once I have the a better idea of where seats will be fitted etc.
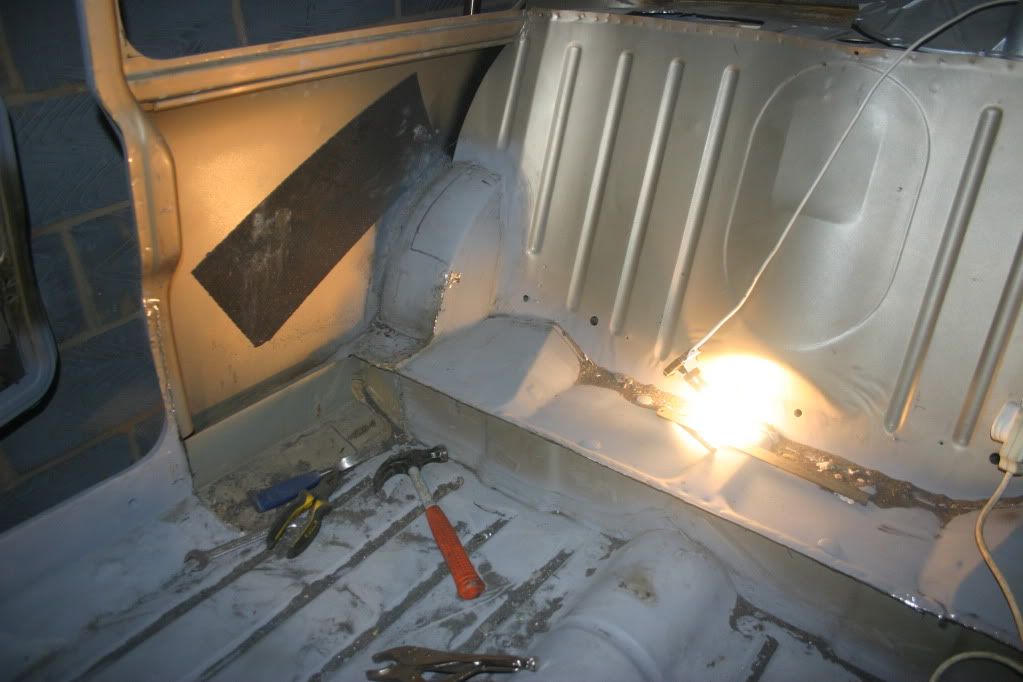
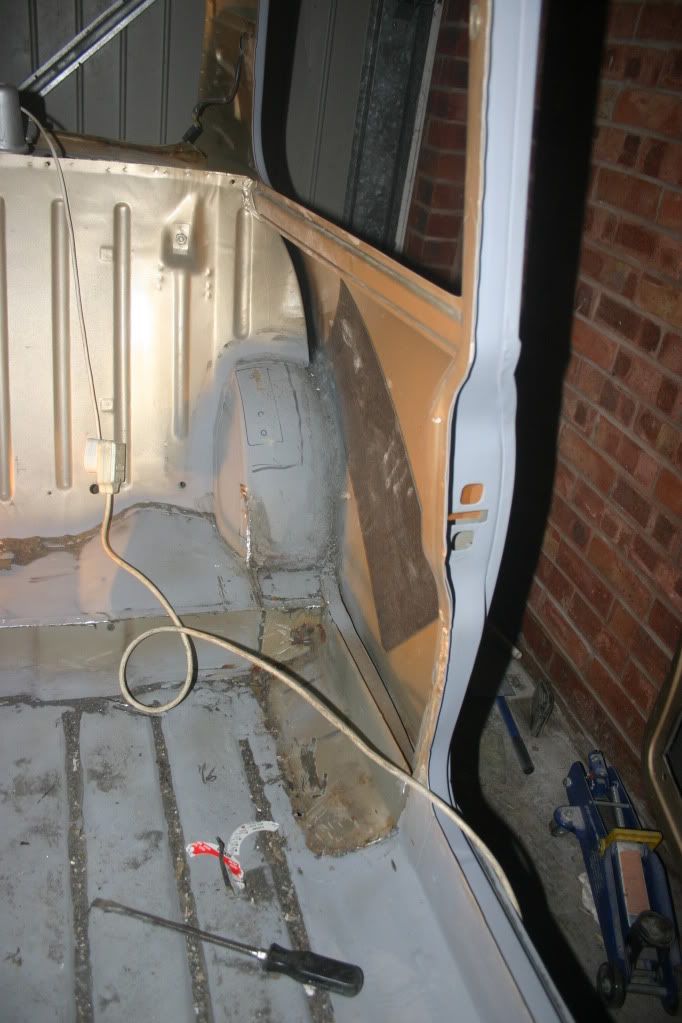
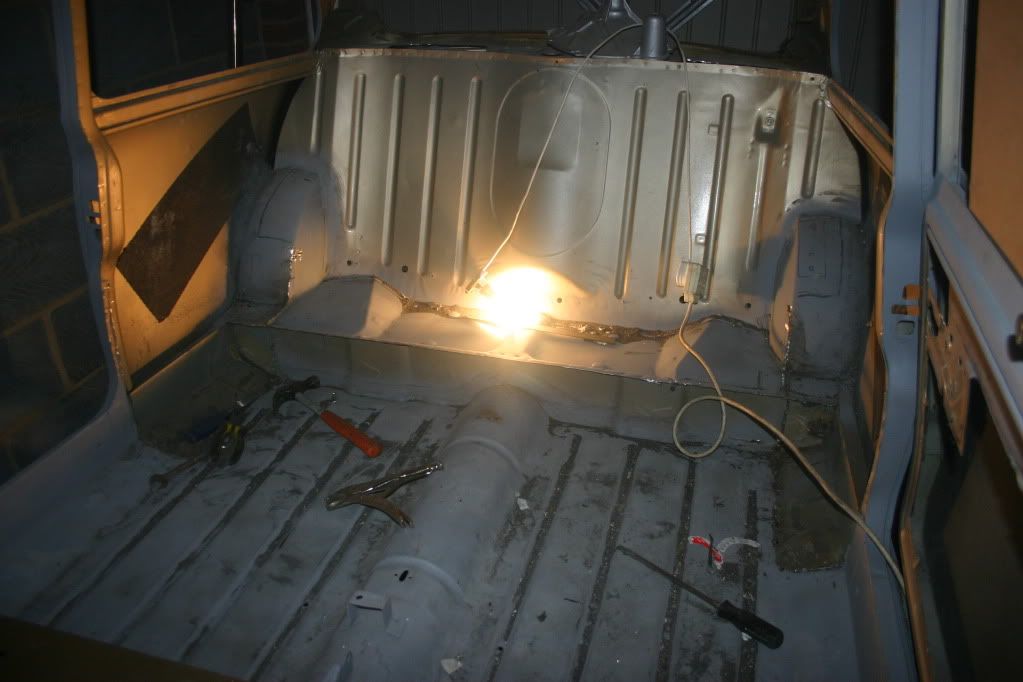
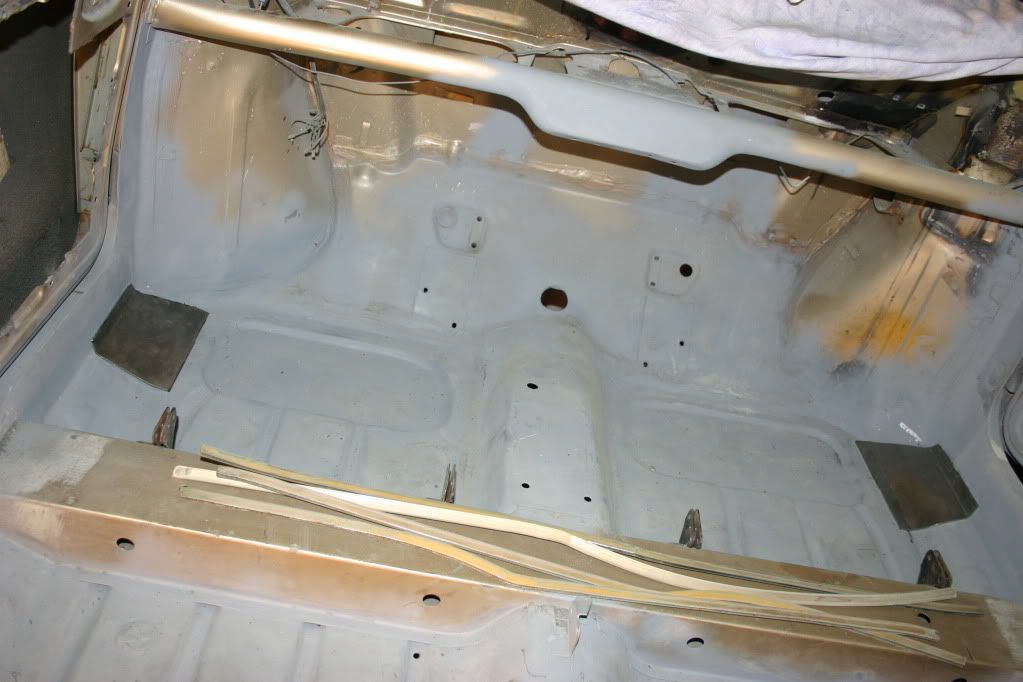
Recently I have been cracking on with getting as much of the car primed as possible. Most of the interior is now in primer and so is the engine bay. Just need to get around to buying a cage and seats so I can mock these up and then the interior is ready for paint.
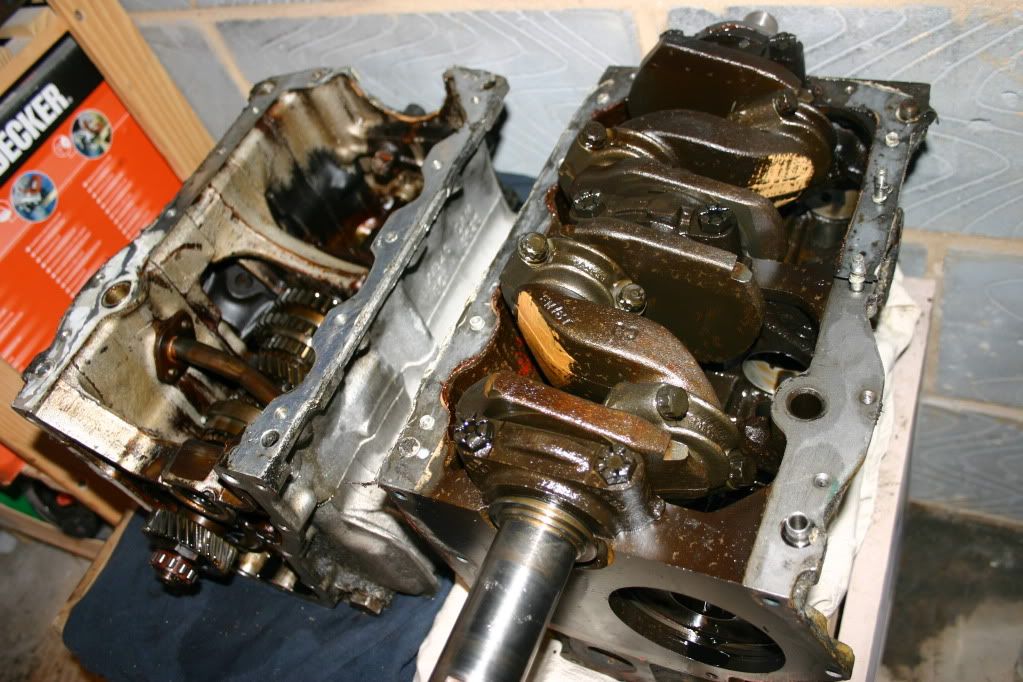
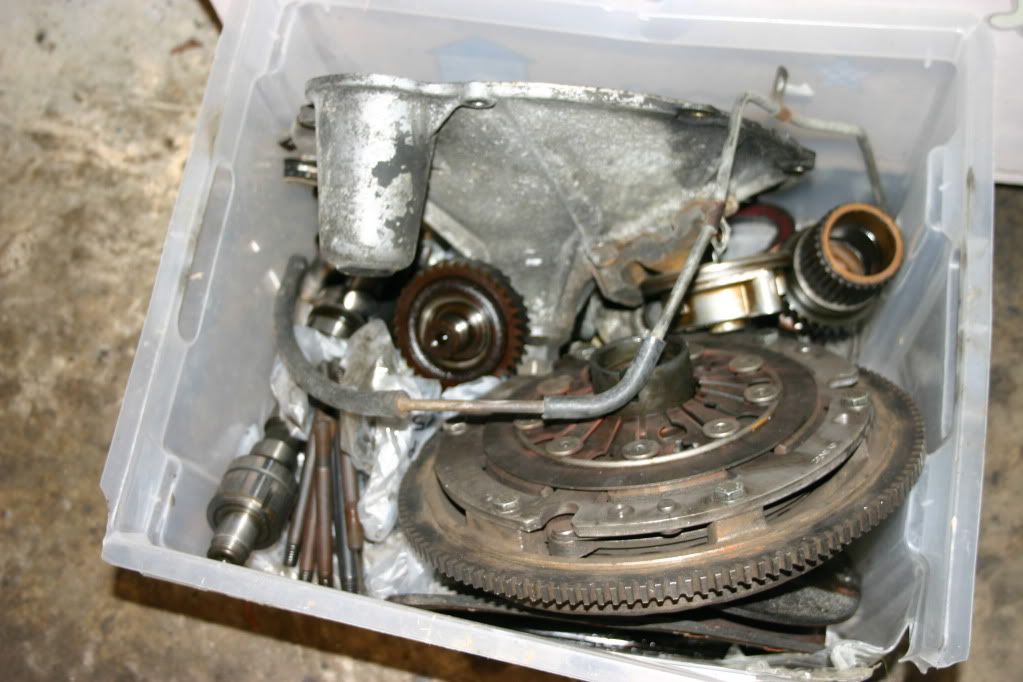
There is still loads more body work to complete on the outside. This seems to be taking ages and I get bored easily hence why I have started to strip down the engine that came with the car. I will be reusing what I can from this with the new block and up rating what’s needed when I begin building the new engine.
Anyway here is one last pic of my favourite part of the car, cant wait until it is all painted up and on wheels.
Sorry for the essay just though I should get up to scratch before I post regularly. Hopefully the next update will be soon and will not be as long.
Will be good to see what people think so far.
Cheers
Dan
:)

|
Radleigh
367 Posts
Member #: 1643
Senior Member
West London
|
|
Cool mini, But sorry not a fan of the smooth boot :(
Keep up the good work :)
Lightweight racer coming soon.
|
apbellamy

16540 Posts
Member #: 4241
King Gaycharger, butt plug dealer, Sheldon Cooper and a BAC but generally a niceish fella if you dont mind a northerner
Rotherham, South Yorkshire
|
|
Looking good. Your, welding is pretty good if you've just learnt by doing it on the car...
On 11th Feb, 2015 robert said:
i tried putting soap on it , and heating it to brown , then slathered my new lube on it

|
1380rich
484 Posts
Member #: 4755
Senior Member
warwickshire
|
|
looking good. liking the mk1 rear light conersion and sliding poly carbs.
rich
2012 Avon class c 2nd place 13.8 @98mph
|
Ben.
628 Posts
Member #: 1064
Formally Whyte_ben
Horndean, Hampshire
|
|
Looks cool mate. I quite like the smooth rear.

Build Thread Click Here
|
Brett
9502 Posts
Member #: 1023
Post Whore
Doncaster, South Yorkshire
|
|
i like to see builds progress from the beginning, yours is starting to look well, im liking it :)
Yes i moved to the darkside 
Instagram @jdm_brett
|
El Potter

514 Posts
Member #: 2169
Post Whore
Malta (Ex. Scotland)
|
|
Looking good mate.
Good on you for not hangin about,smokin and dreaming like I do. 
Warning:Stig in Training
|
miniallsort
230 Posts
Member #: 1131
Senior Member
|
|
good progresss mate
|
dan_w
64 Posts
Member #: 4837
Advanced Member
Tonbridge Kent
|
|
Thanks for all the comments guys,
On 28th Oct, 2009 Radleigh said:
Cool mini, But sorry not a fan of the smooth boot :(
Keep up the good work :)
On 28th Oct, 2009 Ben. said:
Looks cool mate. I quite like the smooth rear.
Cheers Ben and no worries Radleigh I know its not everyone’s cap of tea, that is the great thing about the mini scene everyone has a different idea of what makes a good mini and no matter how many you have seen they are all different.
On 28th Oct, 2009 apbellamy said:
Looking good. Your, welding is pretty good if you've just learnt by doing it on the car...
Thanks, it’s still not great and ends up needing a fair bit of tidying up after but the joins are always strong that’s the main thing. I was able to grab a couple of panels of a mates van that he was breaking and practiced on these first. The only problem I did have with the welding was when fitting the Mk1 light plates I ended up distorting one of them. Just too much heat I think. No real big deal I have had a look and with a bit of trimming of the trim the light will fit fine. You live and learn hey. The welder I have is gasless but can be converted so will be looking to convert soon, hopefully this will help perfect my welding in future.
On 28th Oct, 2009 El Potter said:
Looking good mate.
Good on you for not hangin about,smokin and dreaming like I do.
Believe me there has been plenty of hanging around, lots or head scratching and dreaming. I have also only just got married so this has taken up a huge amount of time and money. That is all out of the way now so I am trying to crack on as and when I can.
|
dan_w
64 Posts
Member #: 4837
Advanced Member
Tonbridge Kent
|
|
A little bit of an update.
Headed down the scrappy on Saturday and picked up a few parts. (Also stumbled across a Sprite hidden away done there, hoping to go back and get the head off it. Have posted in the help needed section about this)
Side repeaters from a Punto to use as front indicators.
A pair of catches from a mini bus to use with my sliding windows. Not the prettiest of catches but they will do the job I need them to.
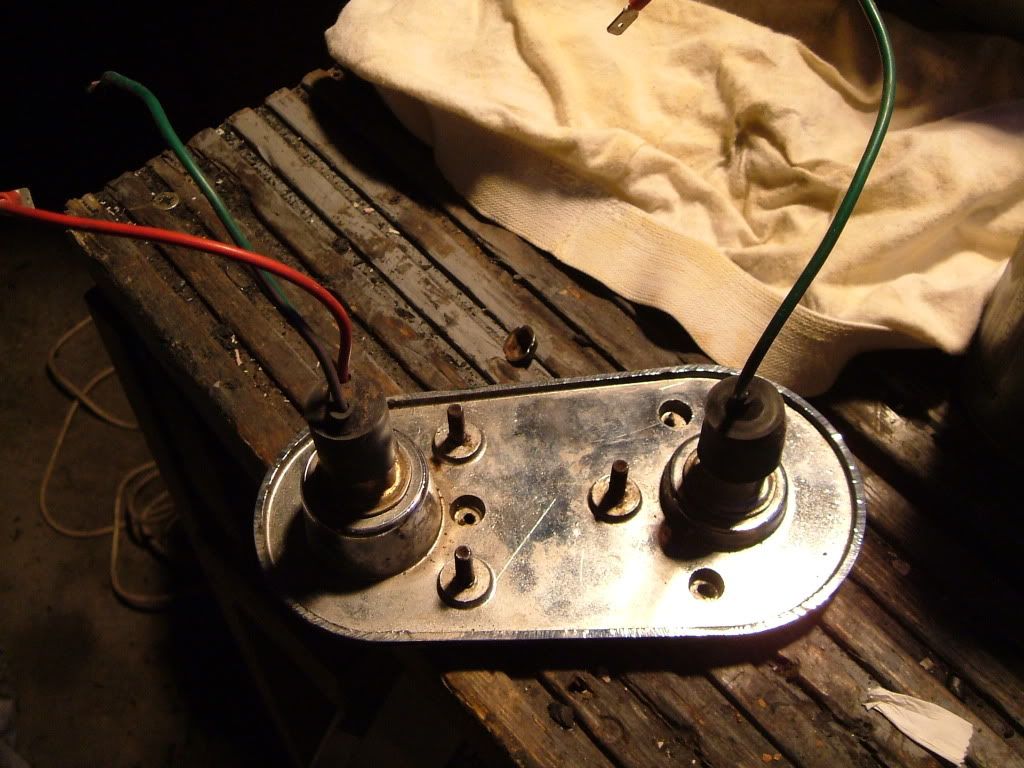
I also got myself an inertia switch from a rover to use when plumbing in the fuel pump. (I know it a long way off yet)
Managed to fully strip the engine down now apart from the pistons crank etc, seeing as I have new parts for this I see no point.
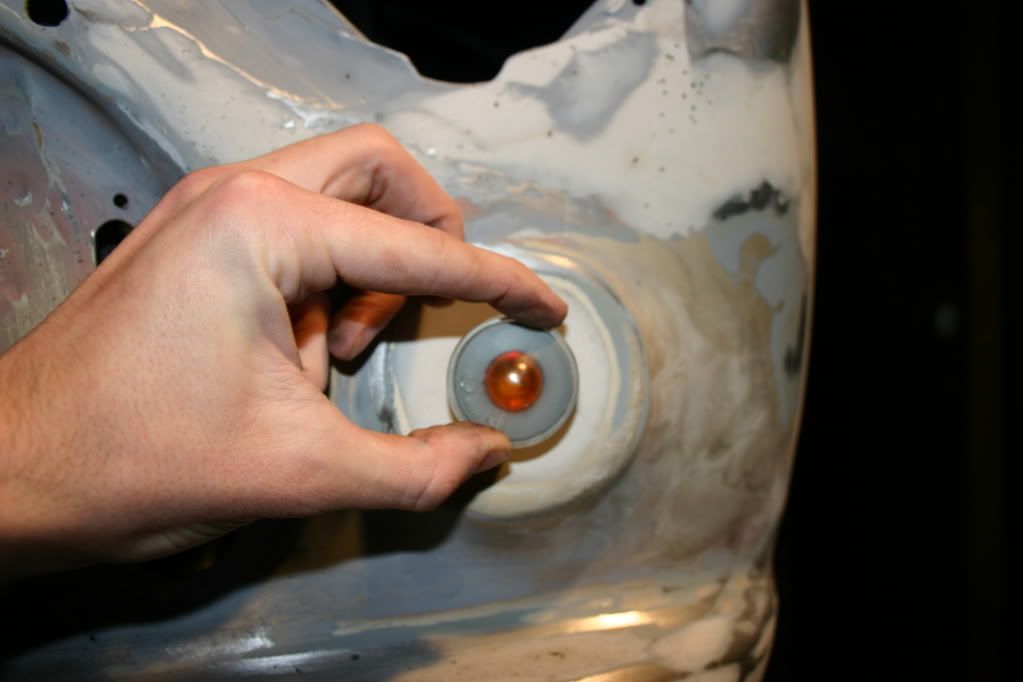
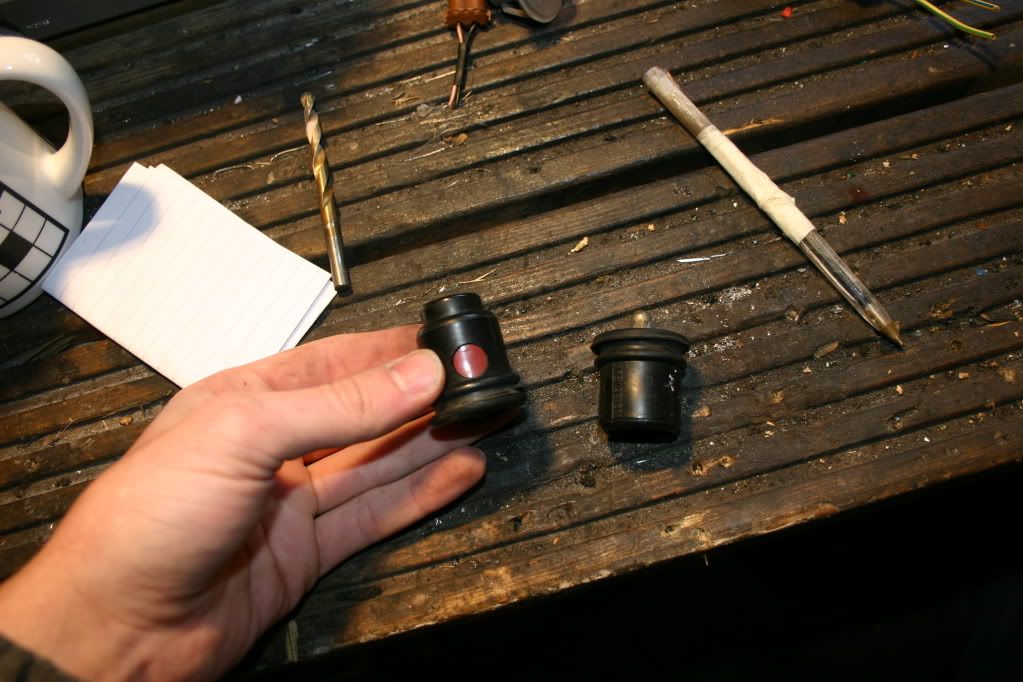
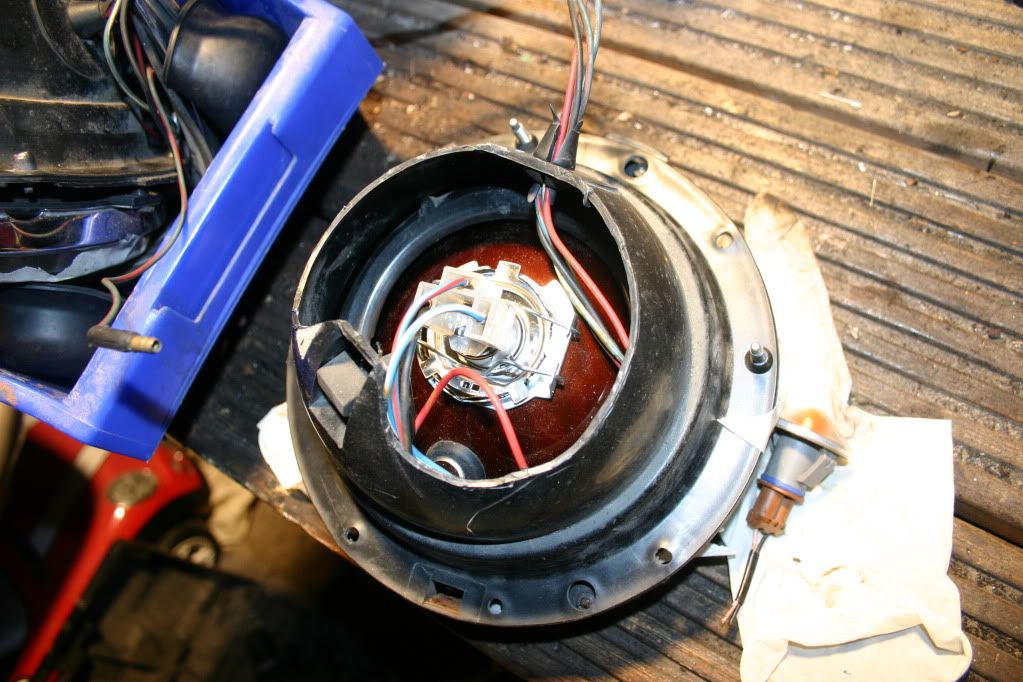
Had a little tinker with the new headlights I picked up from a show during the summer. The car came with some nice tacky angel eye lights so I had to use the plastic innards from these to house the new units. Well lets just say it wasn’t the best fit, lots of cutting later and they do fit but I am a little concerned about water getting in so may end up replacing or making some form of cover.
Hoping to get the full front end in primer over the weekend and possible a little more. Will have to see how things progress.
|
dan_w
64 Posts
Member #: 4837
Advanced Member
Tonbridge Kent
|
|
A little bit of an update today as I had a couple of days off last week I managed to get a good full day with on interruptions.
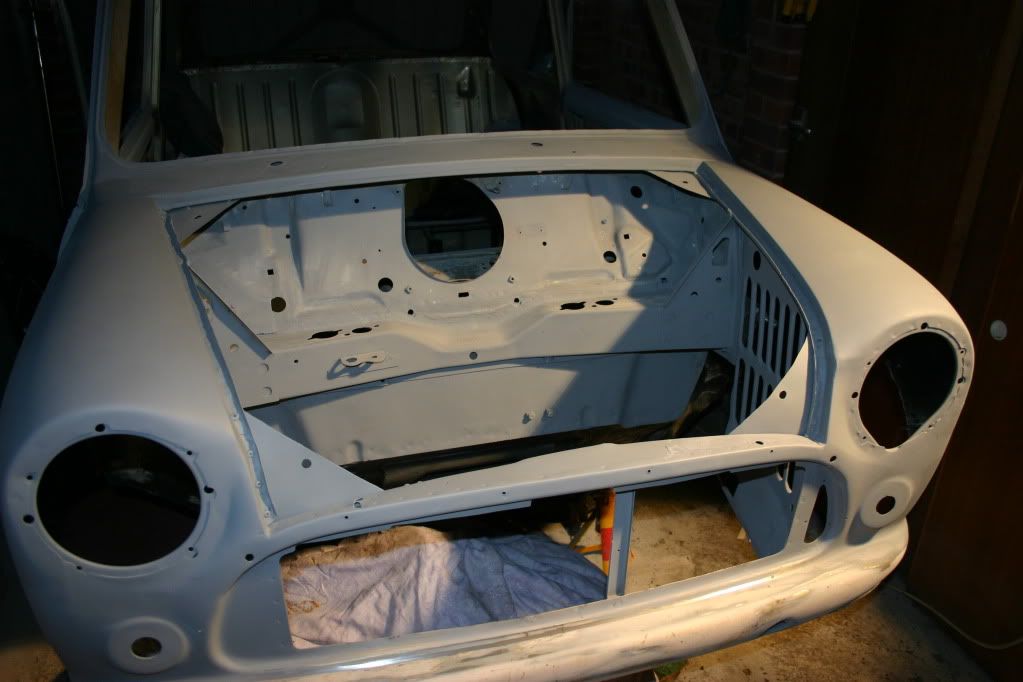
The front is now all premiered up with the exception of the bumper. I have held off on this as this still needs a lot of filling / sanding and my mate who works in a body shop is more than willing to give me a hand. He will get a lot better finish than I ever would.
Holes have also been drilled for the new indicators and they have been test fitted.
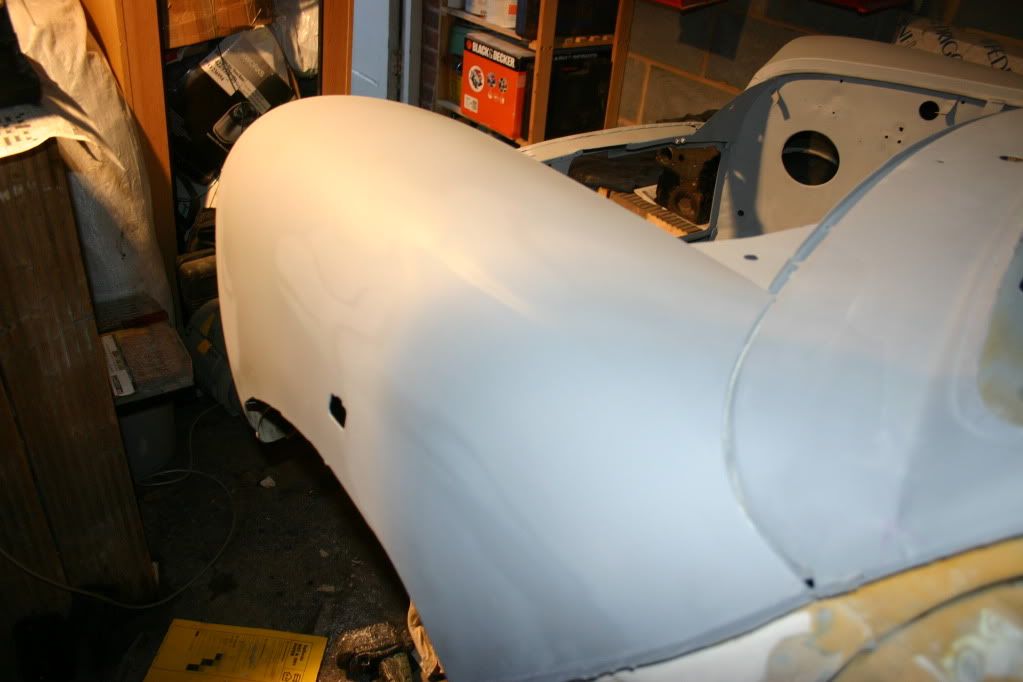
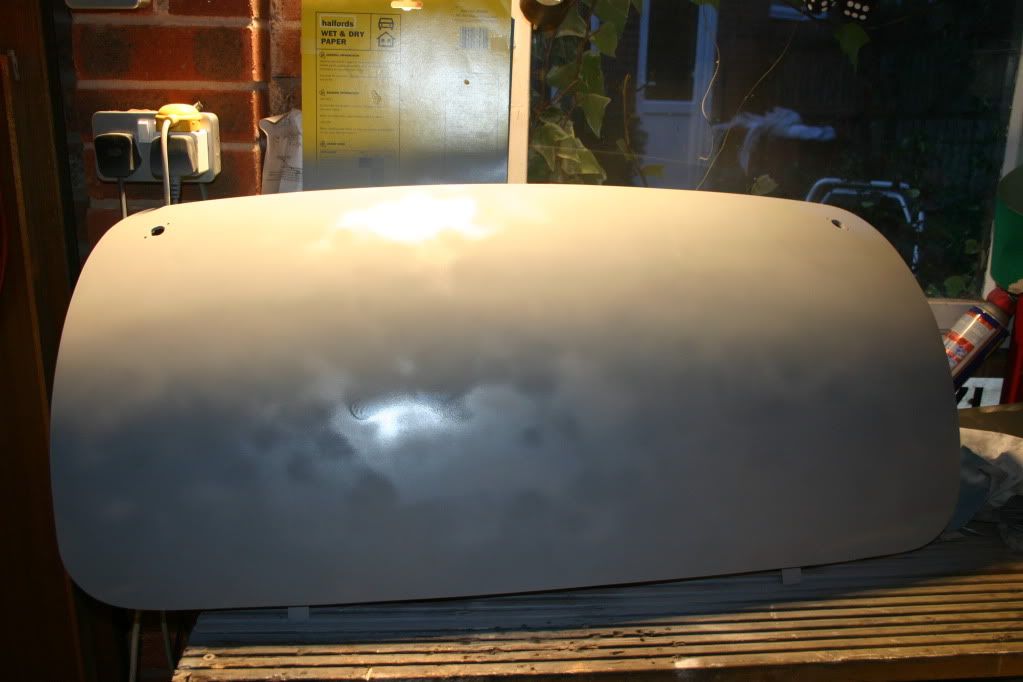
Boot now premiered, too trigger happy with the camera before it all dried hence the sketchy finish.
Just engine parts painted from then on.
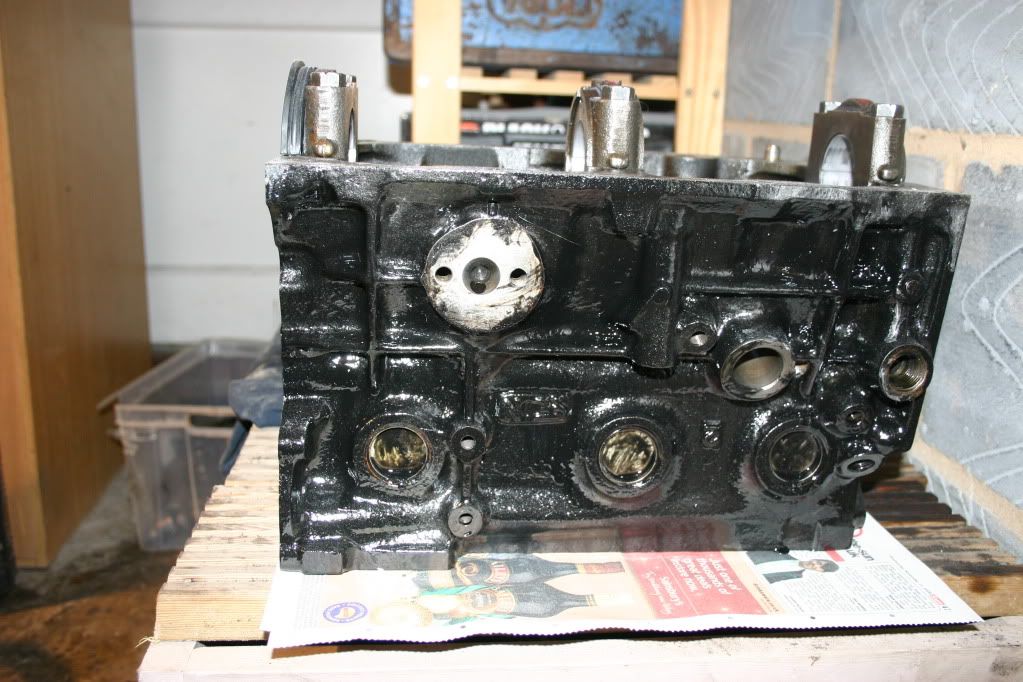
New block painted, could still do with another coat in places when i have a chance.
Wok, timing cover and other general bits all done.
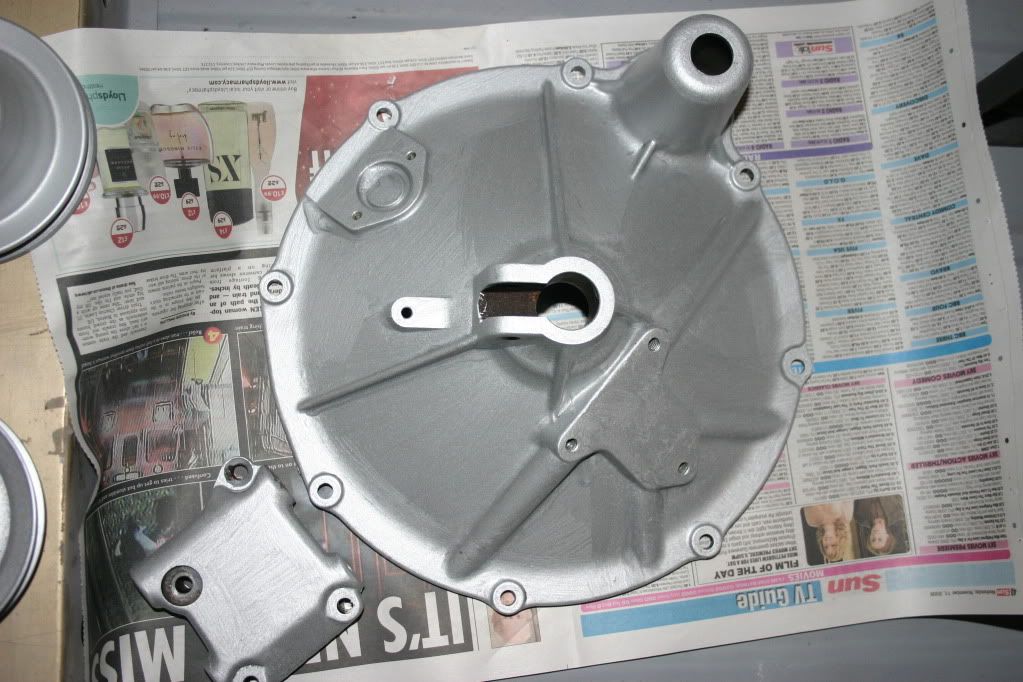

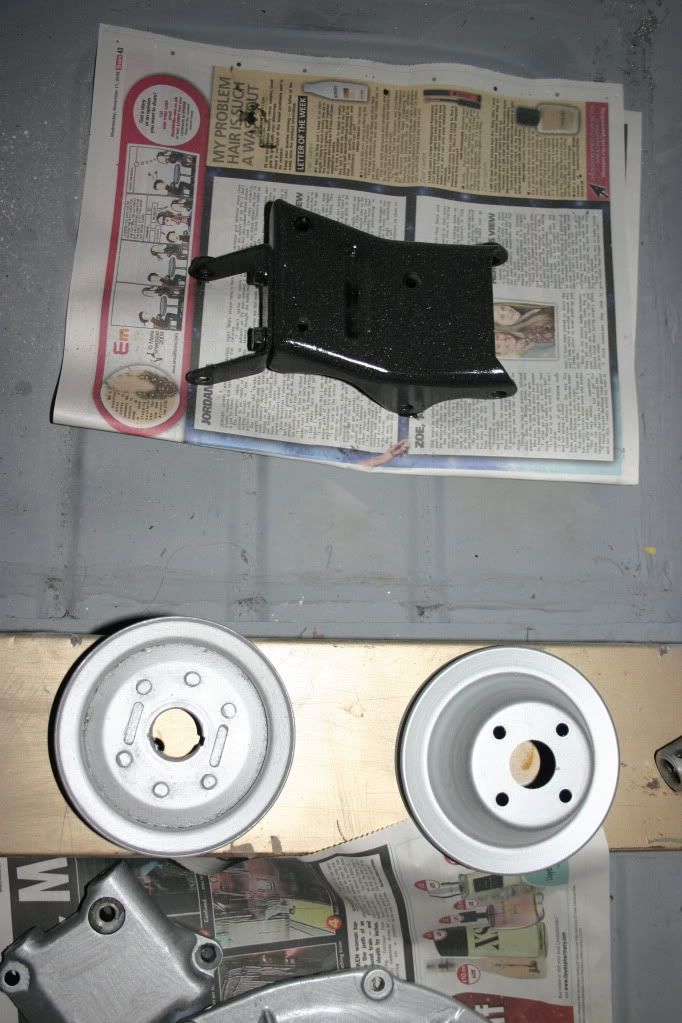
Just stupid me totally forgot about the transfer housing lurking under the car so will have to get the silver paint out again during the week.
Edited by dan_w on 23rd Nov, 2009.
|
madcatminis

549 Posts
Member #: 5327
Post Whore
Dudley, West mids
|
|
You don't hang around son!!! I like it. 
|
dan_w
64 Posts
Member #: 4837
Advanced Member
Tonbridge Kent
|
|
On 23rd Nov, 2009 madcatminis said:
You don't hang around son!!! I like it.
Well I wouldn't really say that. I dont have half the time to spend on it as i would like. Especially working nights and looking after my 3 year old son during the day. Can wait till he starts play school in Jan it will give me some free time in the afternoon's in the week once im up and about.:)
|
dan_w
64 Posts
Member #: 4837
Advanced Member
Tonbridge Kent
|
|
A little more progress to report I am pleased to say. :)
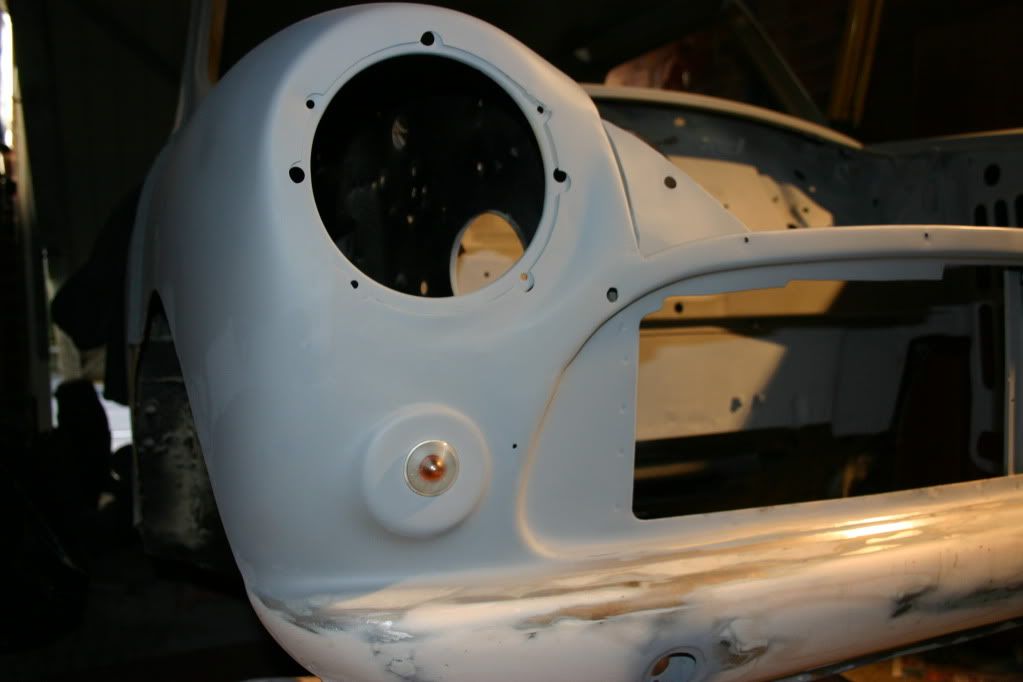
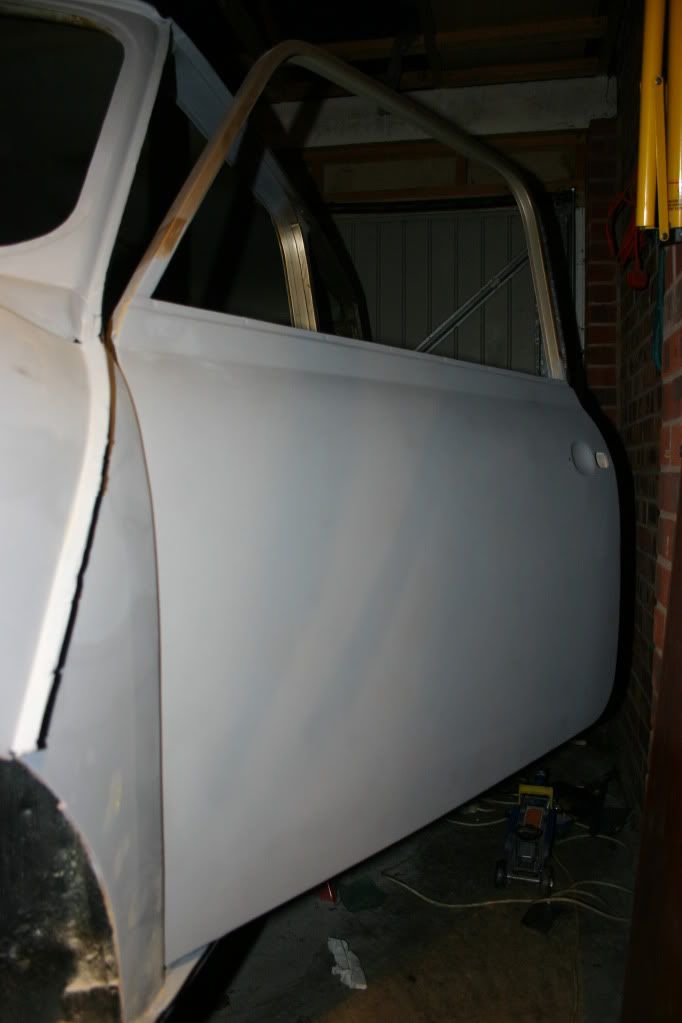
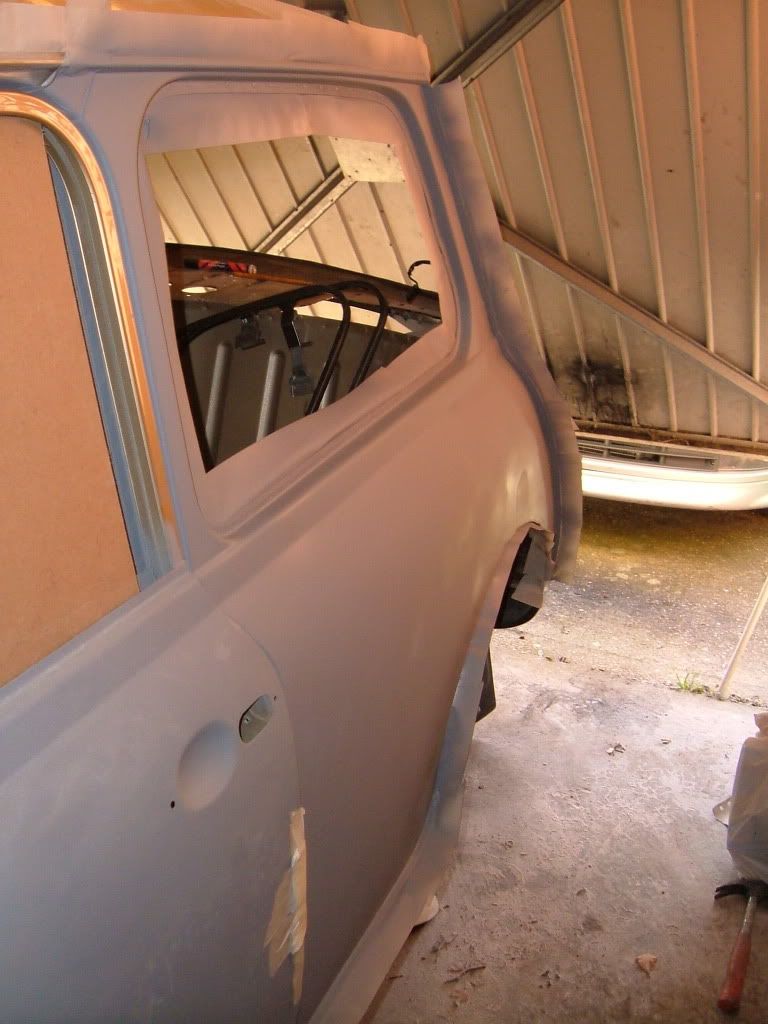
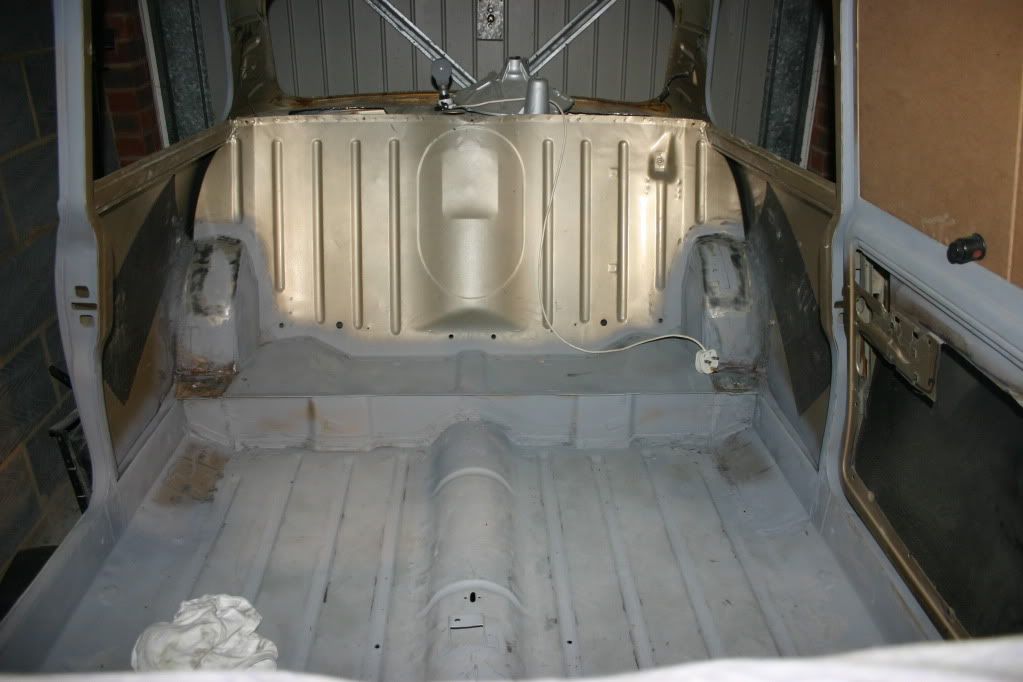
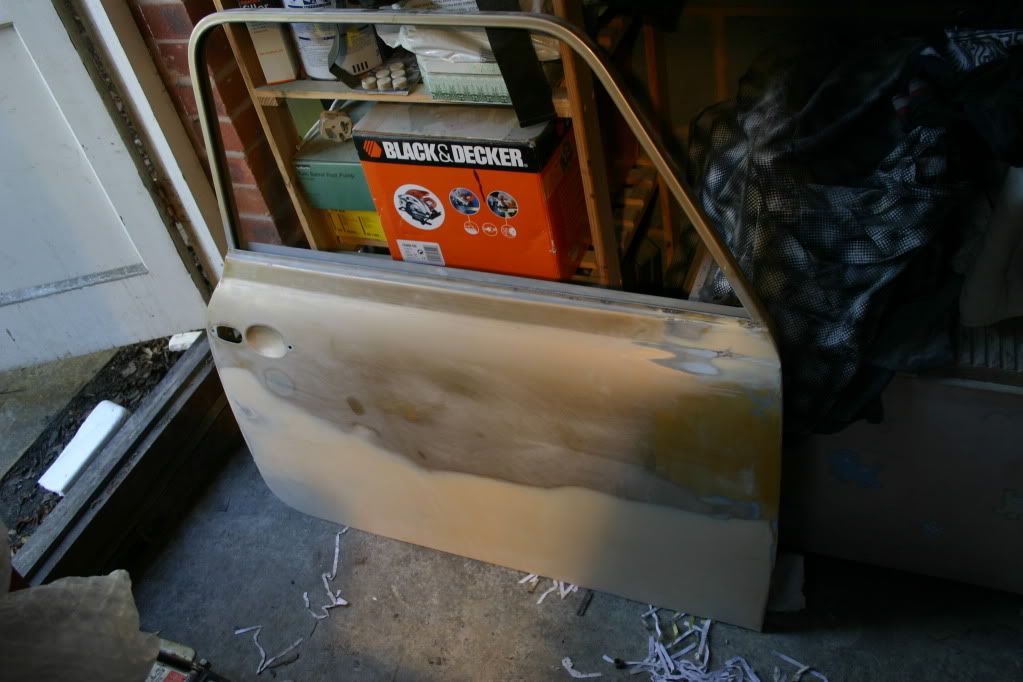
Both A panels are nice smooth and premiered up. As well as the passenger door.
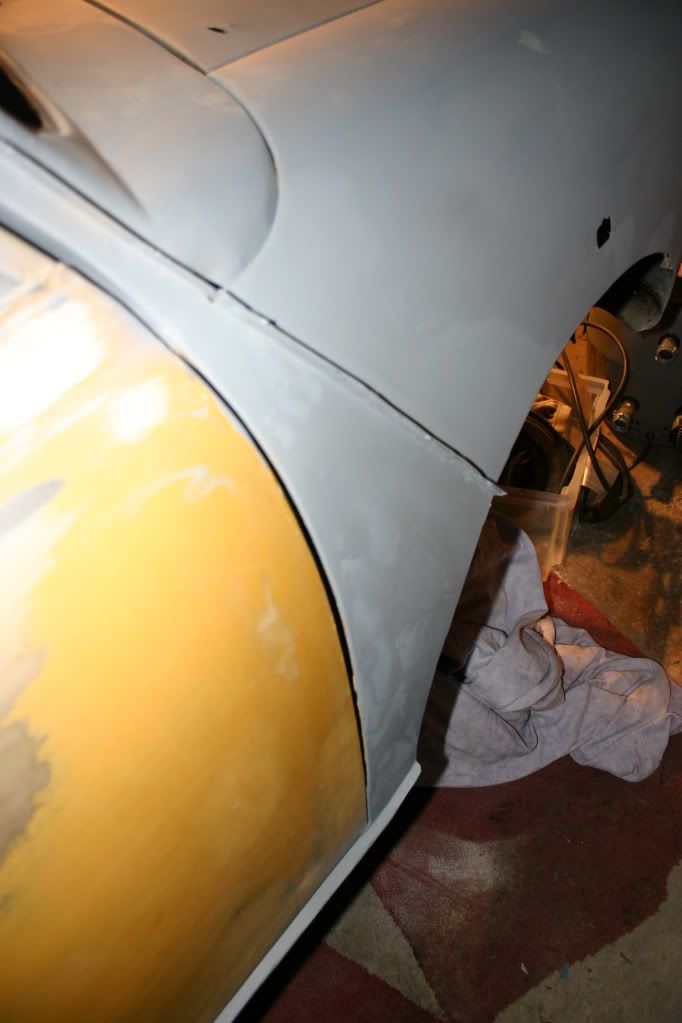
Picture of the passenger side A panel doesn’t look great but I think this is just dust sitting on the panel.
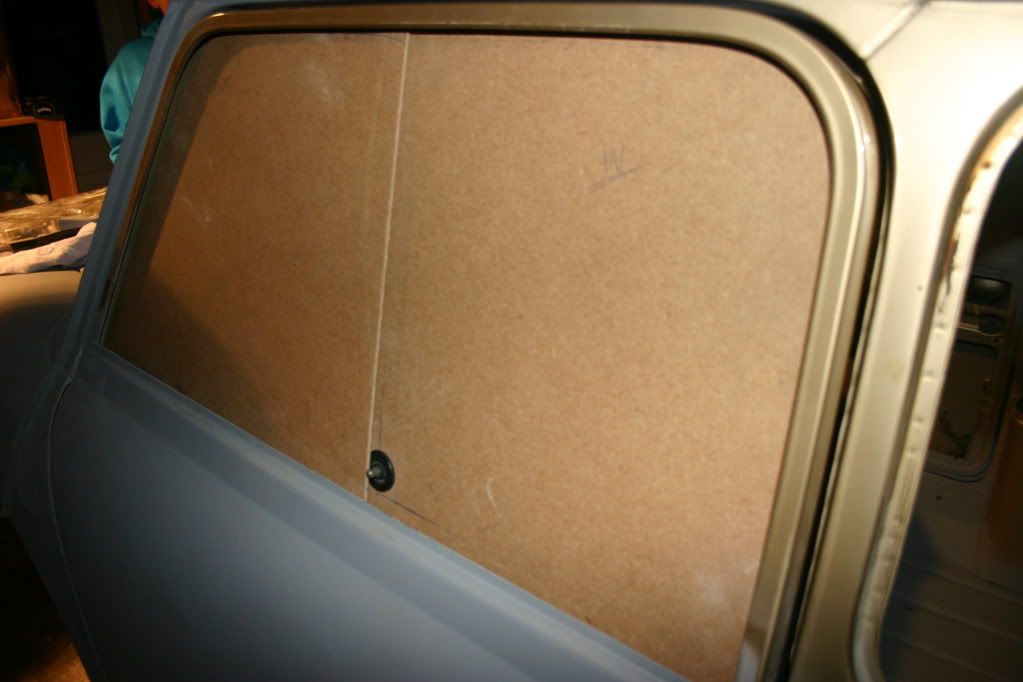
I have also made myself up some templates for the polycarb sliding windows. The rear part of the window will be masticked in place and will not move. The front section will then slide providing more than enough ventilation. I just need to find something descent to use to open the window. Some sort of small handle or finger grip should work a treat. The mechanism you can see if from a minibus and will just be used to hold the front section closed.
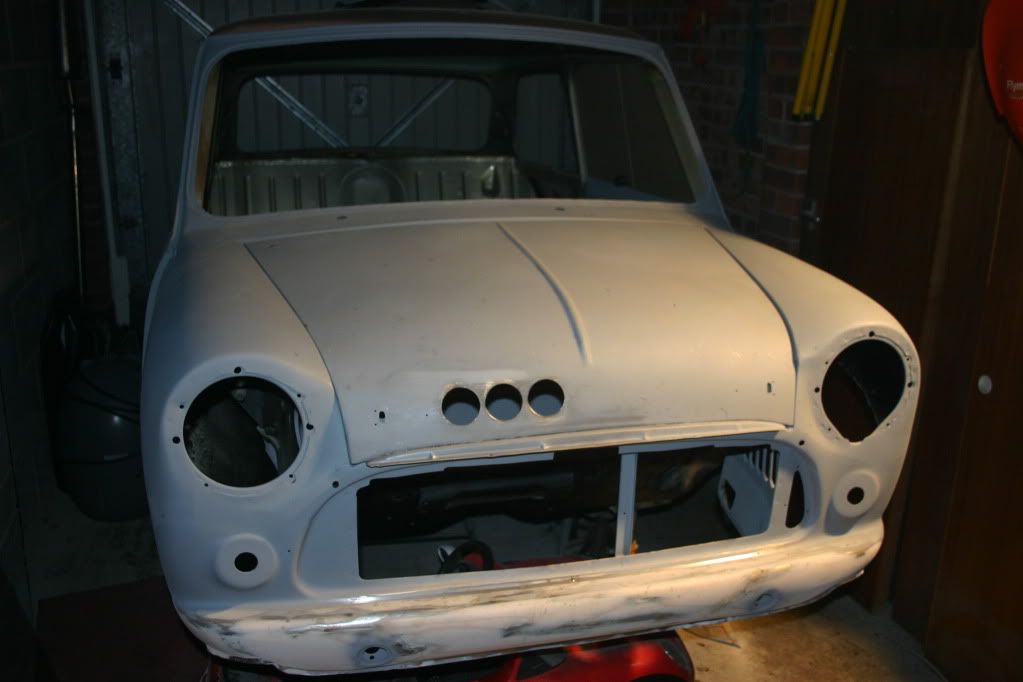
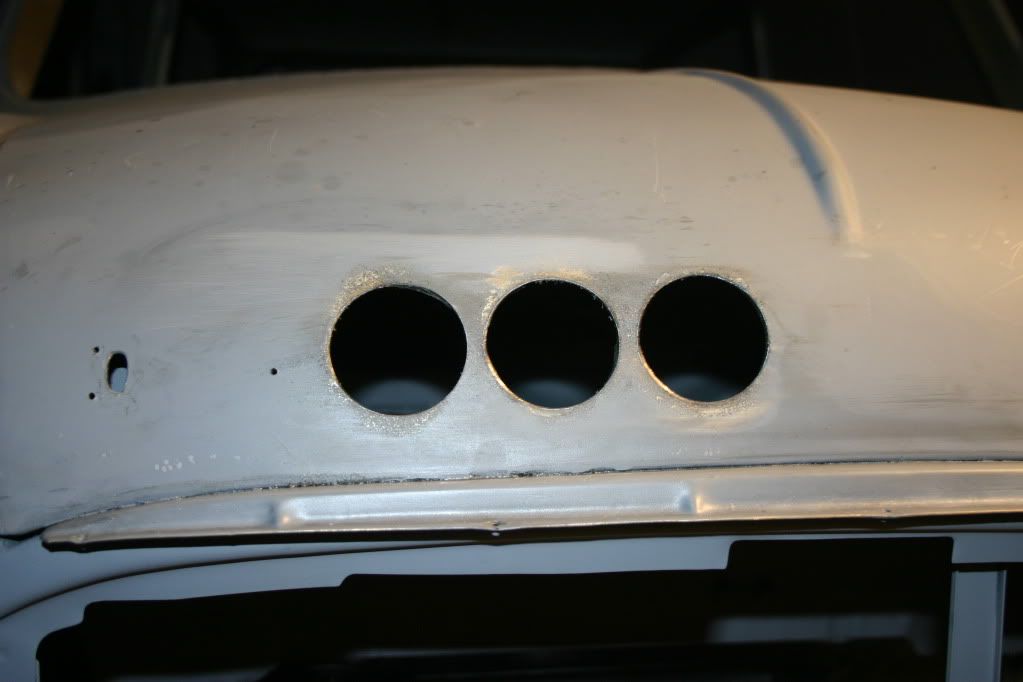
Finally I made a decision, bit the bullet and drilled ventilation holes in the bonnet for the intercooler. I really could not make my mind up about these. Ideally I would have waited to get the engine in and the final positioning of an intercooler before drilling the holes but this needed to be done before paint so this is how it will be. I’m pleased with how they look and just need a bit of a tidy up with a file, some sandpaper and a lick of primer should see it right.
Next thing on the list is more sanding and templates for the rear windows hopefully retaining the original opening frames I have at present. Hopefully I will be buying the paint very soon this will at least mean I can get the engine bay painted, get the subframes fitted and the car on wheels. :)
After Xmas I will need to start collecting a few parts, rollcage, alloy fuel tank and fibreglass seats. All need mocking up and possible brackets / fitting plates fabricating before the interior can be painted.
|
dan_w
64 Posts
Member #: 4837
Advanced Member
Tonbridge Kent
|
|
I though it was about time I got back on here and updated my progress of lack of it really.
Had some good and bad luck recently.
Starting with the good, had my feature in Mini Mag this month. Nothing special I am afraid just me looking like a bit of a prat in the On The Job feature, I am pleased with it all and will be something to keep hold of and to give me a bit of motivation.
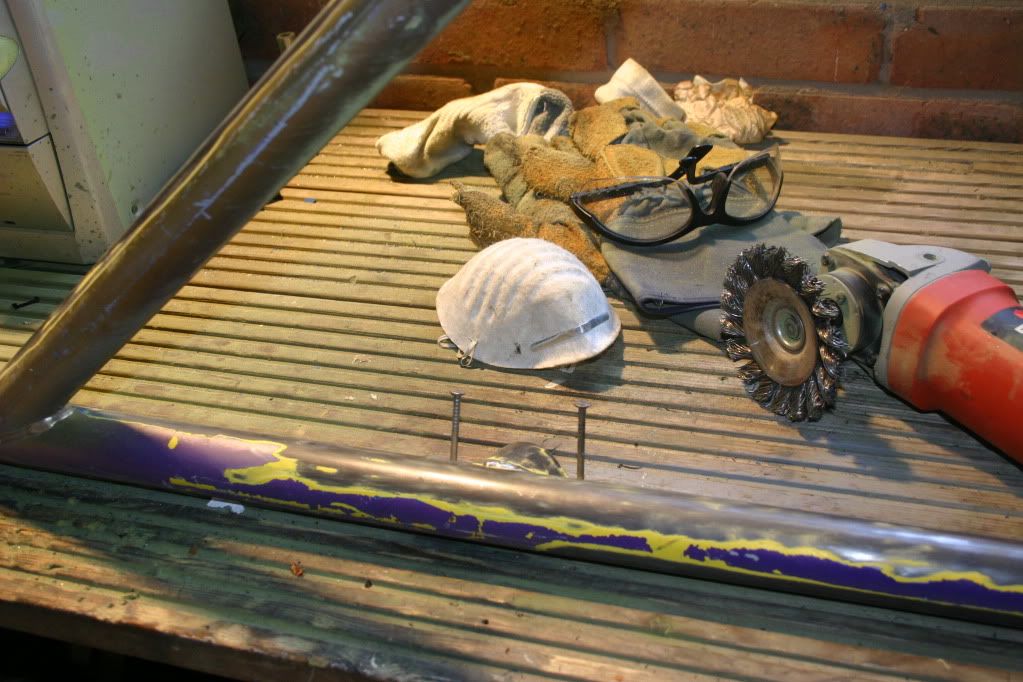
I have not had a lot of time to work on the car recently, especially with Christmas, New Year, my Son's 3rd birthday and a recent accident when working on the mini. I have been out of action for nearly 2 weeks now due to having a piece of metal stuck in my eye, well pupil to be exact. :(
I still can’t work out how it happened as I had a good day working on the mini on the Sunday, I only did a small amount of grinding and always wear protective glasses. Didn’t notice anything at the time, then Tuesday by eye was a little uncomfortable and slowly got worse at work. (I work in an office so could not have happened at work) By Wednesday when I woke up I could not open my eye without being in real pain. After a trip to A&E turns out I had a small piece of metal stuck in my pupil that they could not remove and sent me home with some drops / cream to help remove it.
Well it’s all out now but I am left with a rust ring that has been causing real problems seeing, Driving and using a PC in particular. It’s getting better now and I just need to wait a few days to see if it gets better and see what the optician says. It doesn’t look like there is any long term damage luckily.
Back to the Mini, progress is not to bad, almost finished with the sanding and priming, both rear quarter panels are all premiered ready to go so is the passenger door, just need to get the drivers door, the whole rear and the front bumper/ lip in primer then I will be ready for paint finally. Oh plus I still need to get my hands on a roll cage and some seats before I can think about painting the inside.
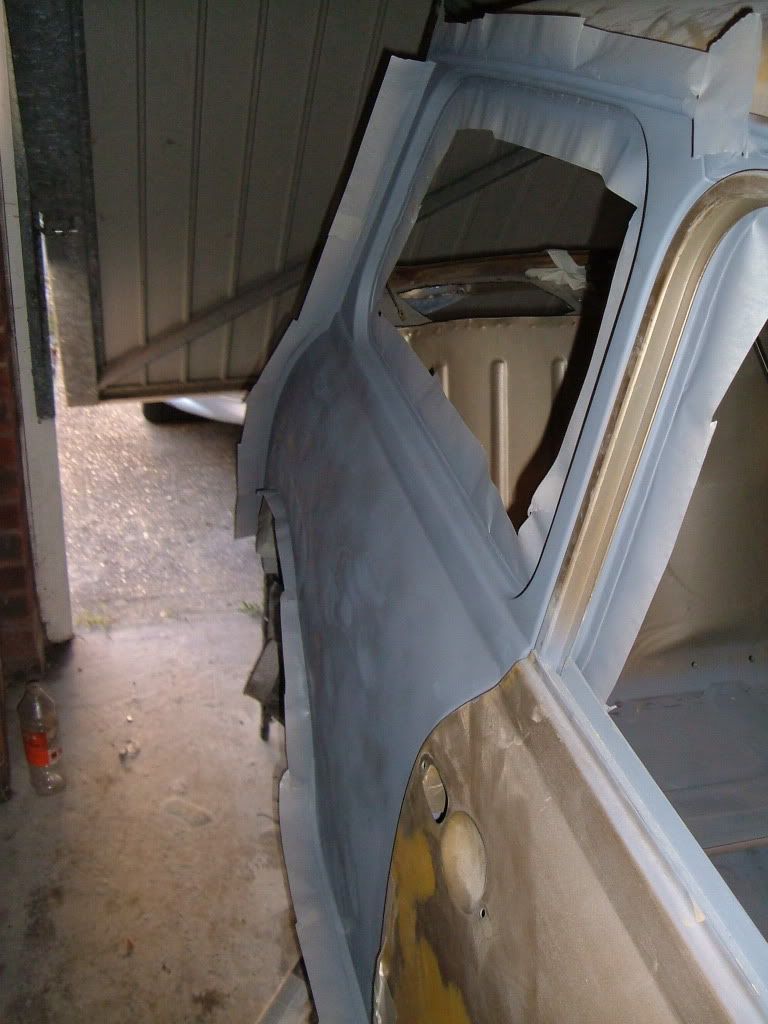
I also removed the glass from the rear opening window surrounds ready to be cleaned up and have polycarbonate fitted into.
The holes I cut in the bonnet have also had a tidy up and the underside of the bonnet sprayed in mat black.

I have also tweaked the Mk1 lights I have to fit flush with the poorly fitting plates I have welded (think this is a mix of poor quality parts and my inexperience of welding causing them to warp a bit also) The locating treads have been removed along with the raised area around them and a little heat / pressure in the right places has bent then enough to sit flush and hold the lenses ok still. Just needs some new locating nuts fitting and they will be ready for a clean up.
I just hope I get to spend some more time on it in the near future. A little advice for anyone with a young family and works nights full time, don’t ever consider having a hobby you just don’t have the time!!!!
Edited by dan_w on 29th Jan, 2010.
|
giallofly

4436 Posts
Member #: 164
The Stig..
Newport Pagnell
|
|
Nice work, I like it alot..
Would be nice to see some external door hinges... It would realy finnish the look off IMO.
JF
On 21st Jan, 2011 fastcarl said:
therefore acheiving two things , a sore knob and a beer bellyl
|
dan_w
64 Posts
Member #: 4837
Advanced Member
Tonbridge Kent
|
|
Thanks JF, not really going for the MK1 replica just really like the smaller Mk1 lights and decided the sliding windows would be a better way of getting more ventilation when fitting pollycarb windows.
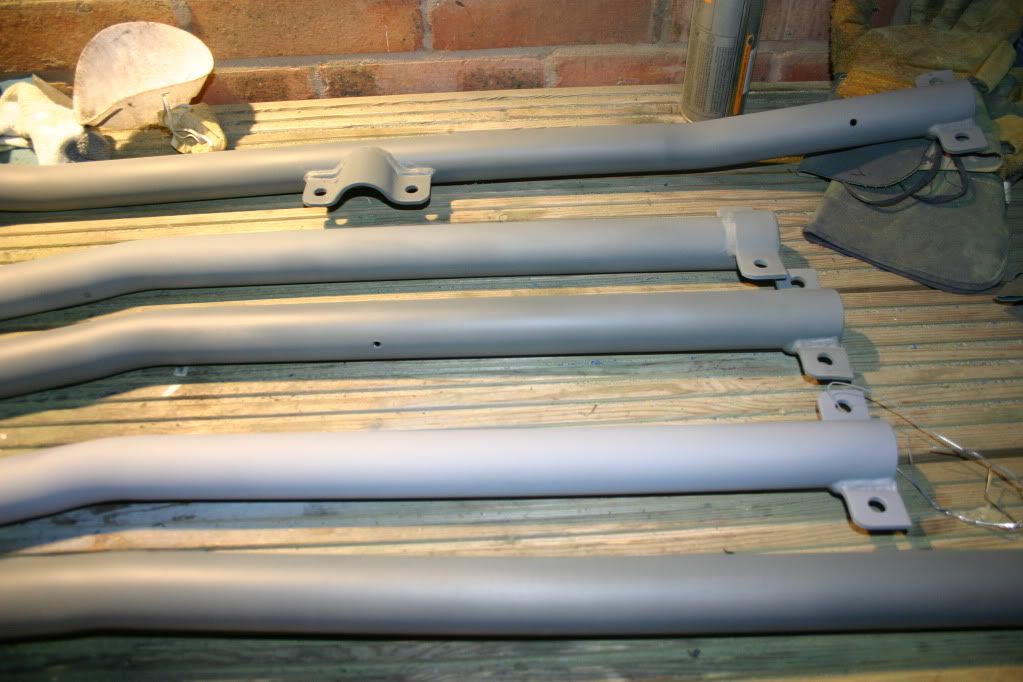
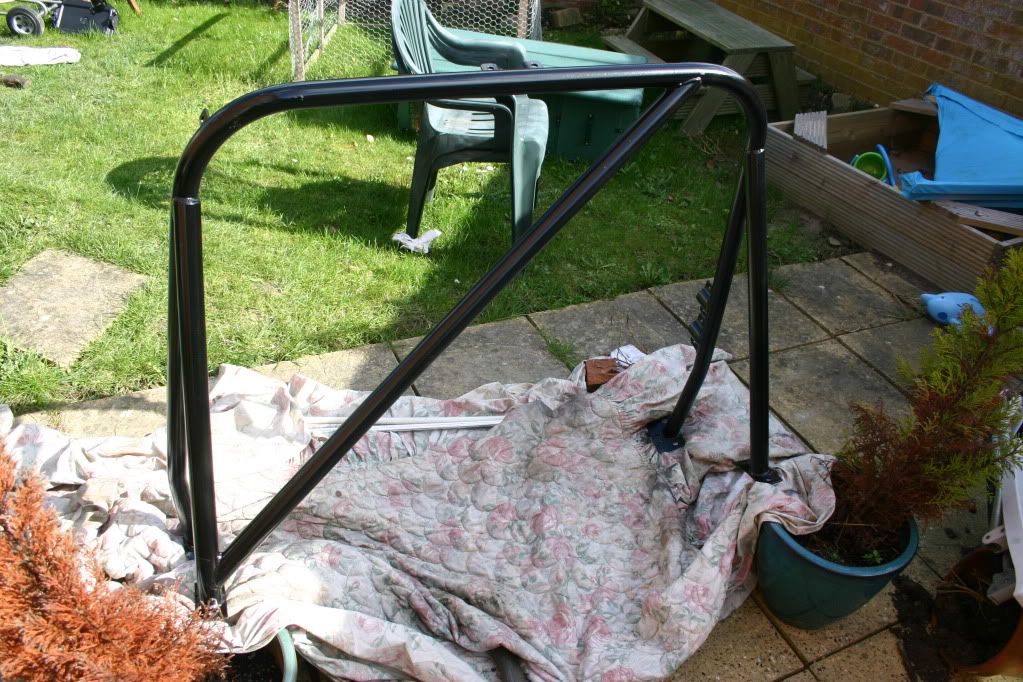
Finally brought a roll cage!!!! it has been bugging me for so long now as I needed to get one before making any real progress inside (mock up seat brackets without the cage - cant start painting inside without seat brackets mocked up etc)
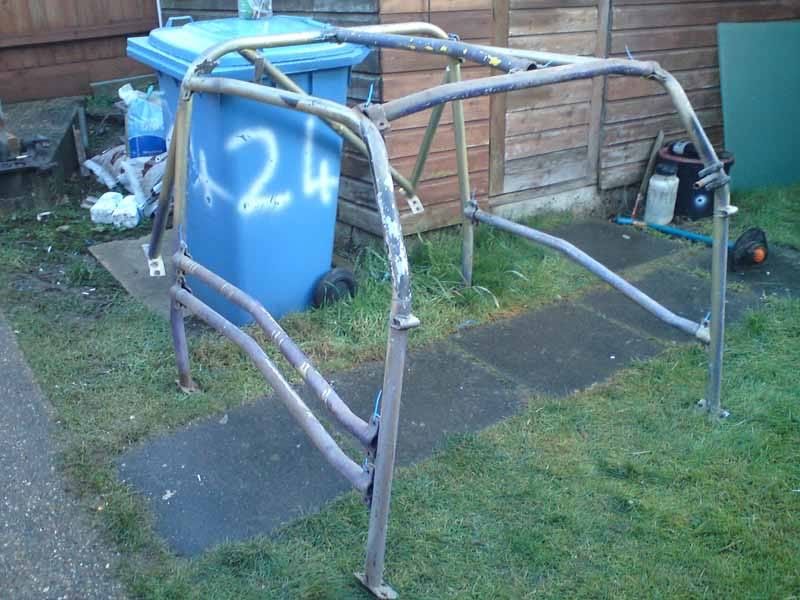
Anyway collected the cage sat and trial fitted it on Sunday and stripped the multiple layers of paint off a few of the bars. I have a few issues with the fit (questions posted in need help section) but it’s looking good. Hopefully will get out during the week and get some holes drilled and some plates welded on.
|
haimesyboi

392 Posts
Member #: 5702
Senior Member
Cornwall
|
|
lookin good.
I like the idea of the sliding windows, i had a similar problem with my eye we eventually decided i must of rubbed it in there accidently 
|
dan_w
64 Posts
Member #: 4837
Advanced Member
Tonbridge Kent
|
|
Cheers haimesyboi. I didnt really fancy having just a cat flap size window for ventilation hence the sliding windows.
Also think I must have rubbed it in my eye also seeing i always wear glasses when cutting and grinding.
|
dan_w
64 Posts
Member #: 4837
Advanced Member
Tonbridge Kent
|
|
I have had a real burst of enthusiasm recently and have really pushed to find the time to get out in the garage much to the annoyance of my wife. :-
Any way managed to get a fair way towards getting the cage in.
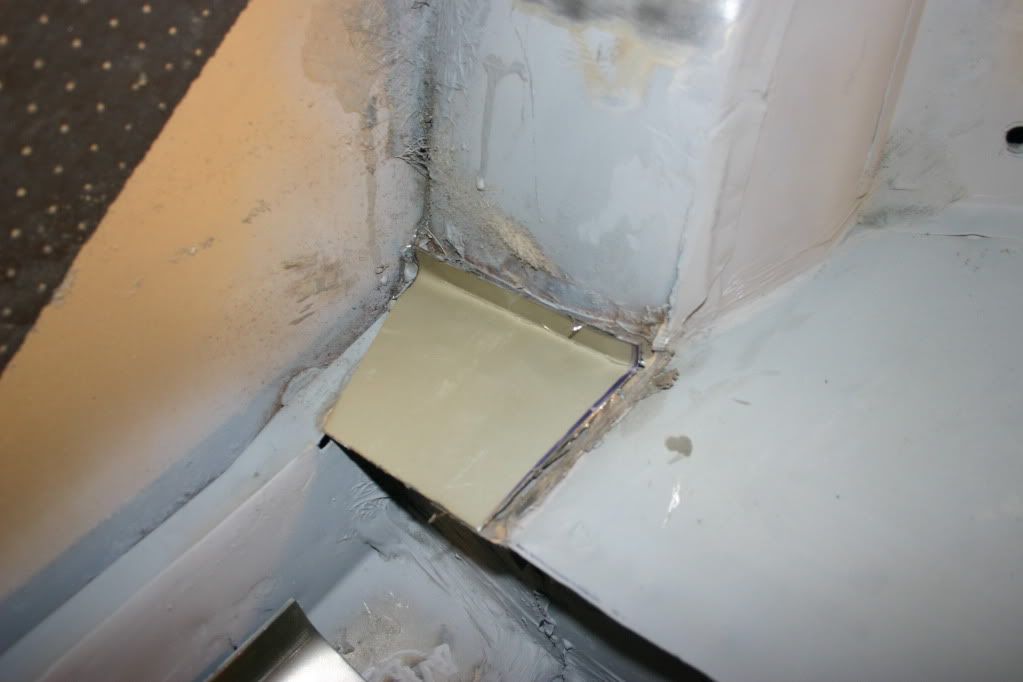
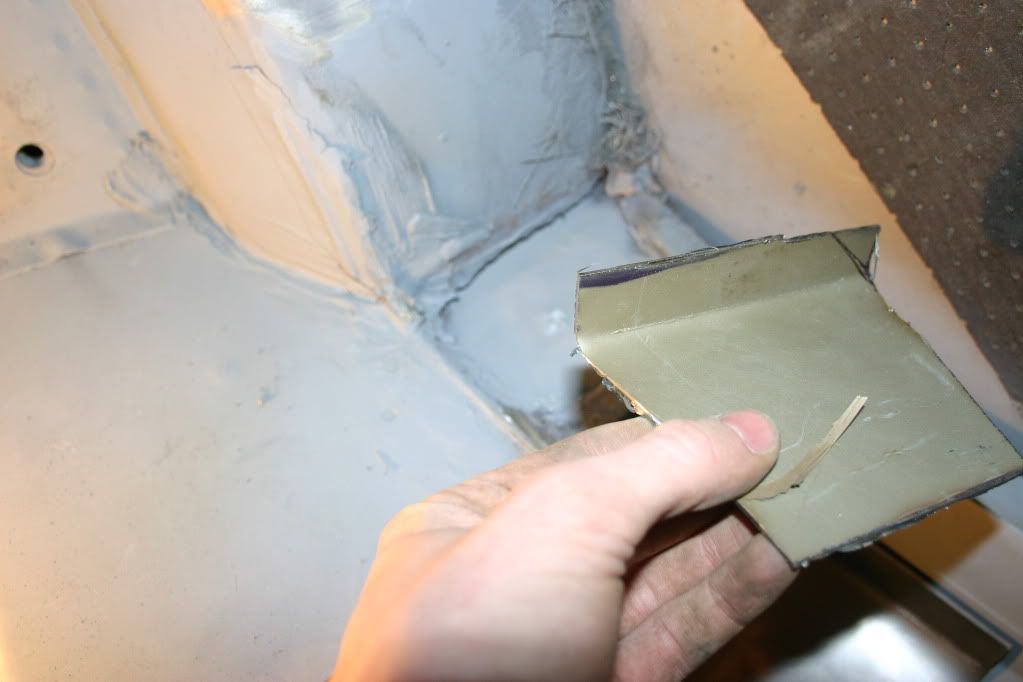
Decided it would be a good idea to remove the rear bins and the front section of the seat, and lucky I did as I found a section of rust I had not noticed previously.
I have tidied up areas where the bins have been removed and now have some mounting plates cut and bent ready to be welded in either over the weekend or during the week.
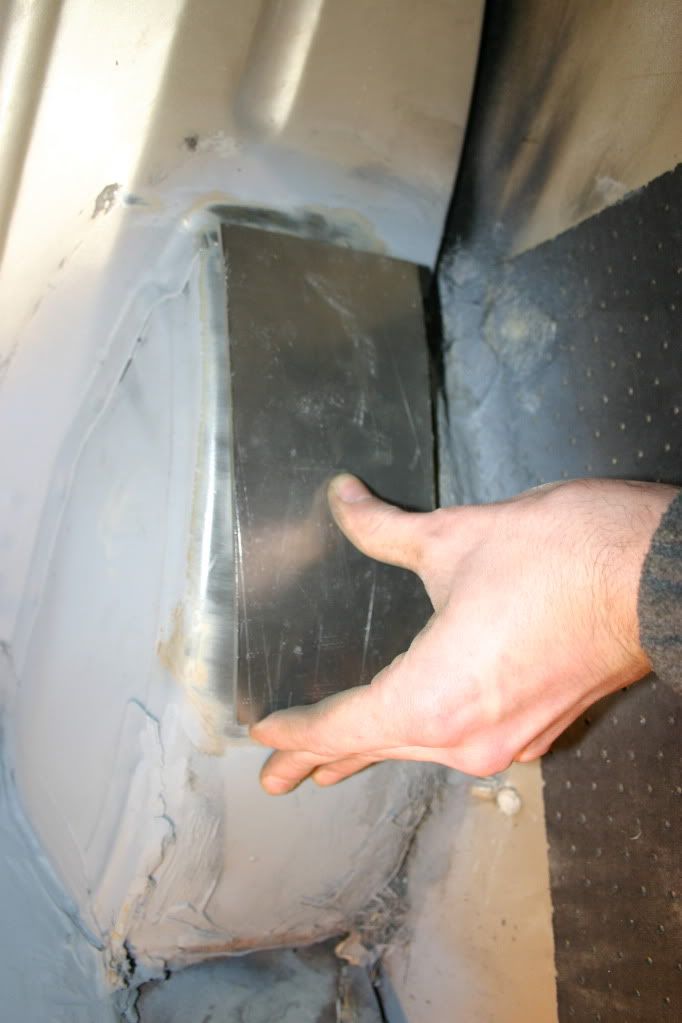
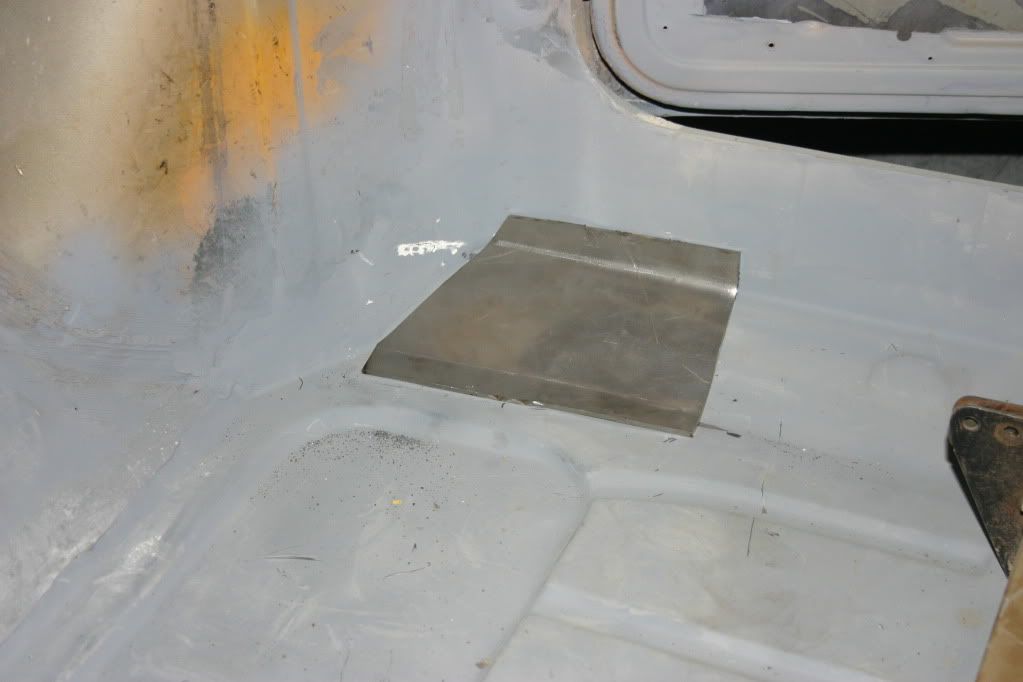
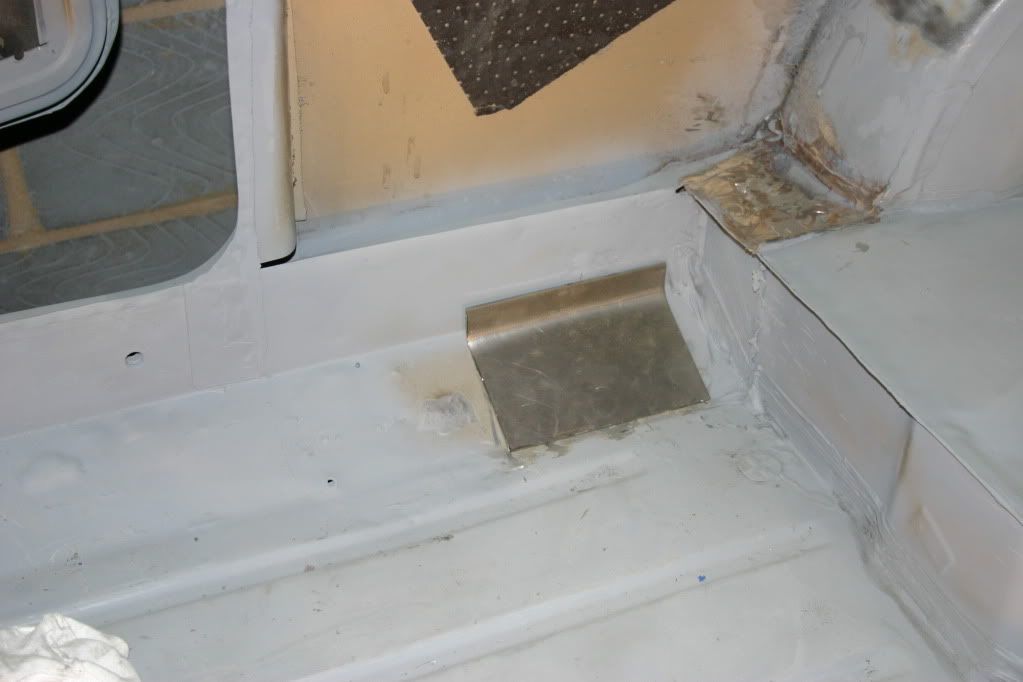
Also noticed where someone had previously covered a load of rust with silicon of all things. I knew the silicon had been there but assumed it had been used to stick the card from the bin in place not to cover rust. I’m just glad I decided to remove the bins as I would have left this area well alone.. :crazy: Anyway the rust has all been removed and a replacement panel ready to be fitted on both sides.
All sections of the cage are now fully stripped of the layers and layers of paint previously painted in and most are in primer.

The rear hoop has its first light coat of hammerite unfortunately I cocked up managed to get a few runs on it. Just means I need to wait for it to dry rock hard before sanding back the runs and applying the other coats, not a huge problem as I need to test fit it again soon anyway at least this was I don’t need to worry about the paint getting scratched as much.
Edited by dan_w on 27th Feb, 2010.
|
dan_w
64 Posts
Member #: 4837
Advanced Member
Tonbridge Kent
|
|
No pictures to update today I am afraid as i took the camera out to the garage took loads of pics an normal only to get inside and realise i had no memory card in 
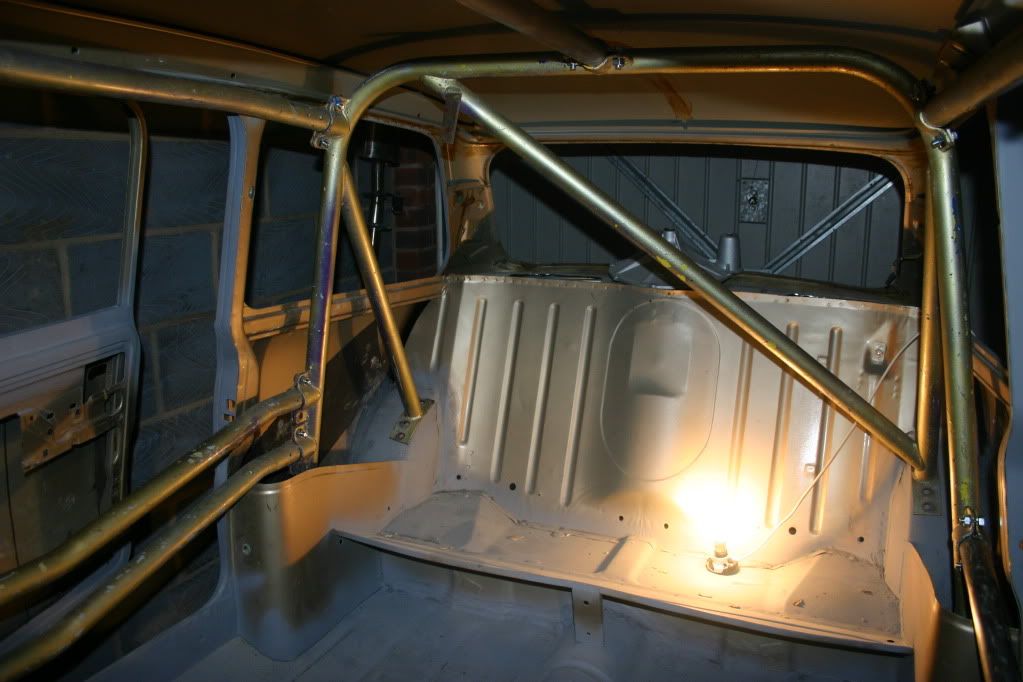
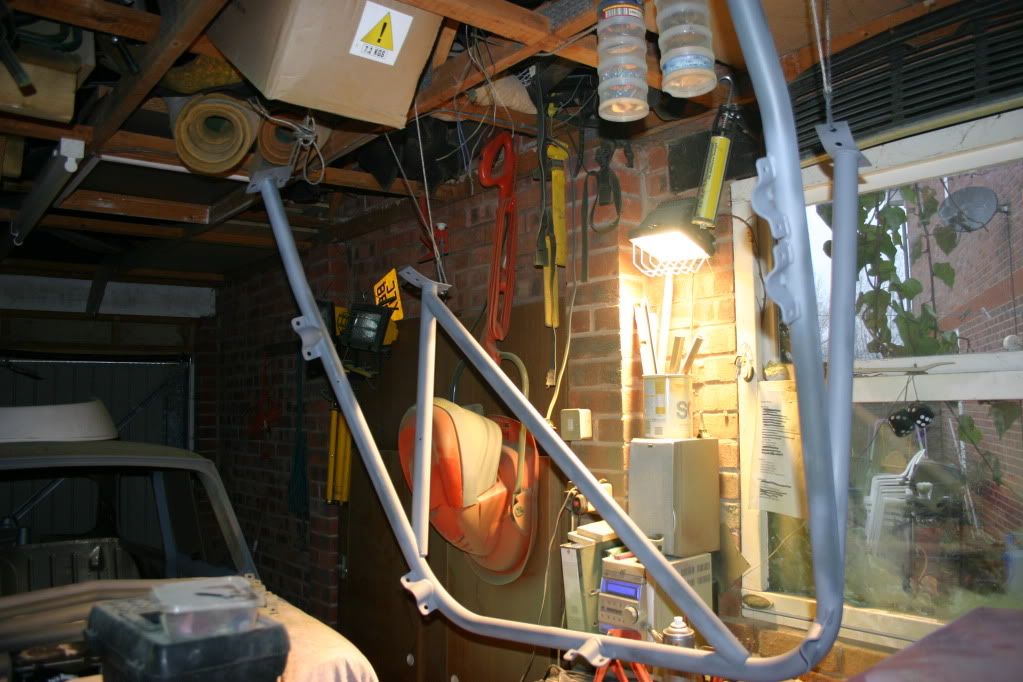
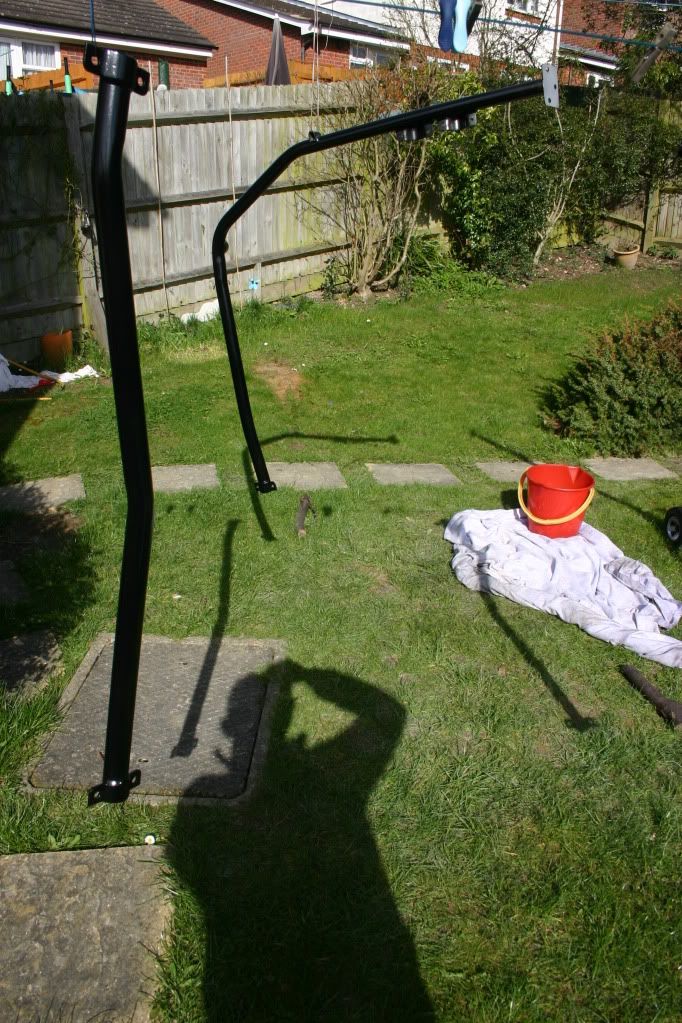
Final test fit of the roll cage all done now I have the mounting plates all welded in Really pleased will it all. It did take a bit or brut force to get some of the holes to line up ok and to get the legs where i wanted them but got there in the end.
Think im gona have to wrap everything up really well once i have the cage and inside all painted up, don’t want to go scratching anything when fitting it.
I should be ordering my seats at the end on the month, only thing is they need 4 weeks to make them so won’t have them ready to make mounting brackets and test fit for a while.
Hoping to get the new welds on the mounting plates all cleaned up and in primer during the week. Get my mate round at the weekend to help with the outside bodywork and then its ready for paint!!!!
8-)
Edited by dan_w on 8th Mar, 2010.
|
dan_w
64 Posts
Member #: 4837
Advanced Member
Tonbridge Kent
|
|
Seeing as I have been relatively busy with the mini recently I though it was about time I got on here and updated you all with my progress. My Son has finally started nursery this week so instead of waking up and looking after him when the wife goes to work (The trouble with working nights) I will now have around 8 extra hours a week to work on the mini The updated should be coming thick and fast now.
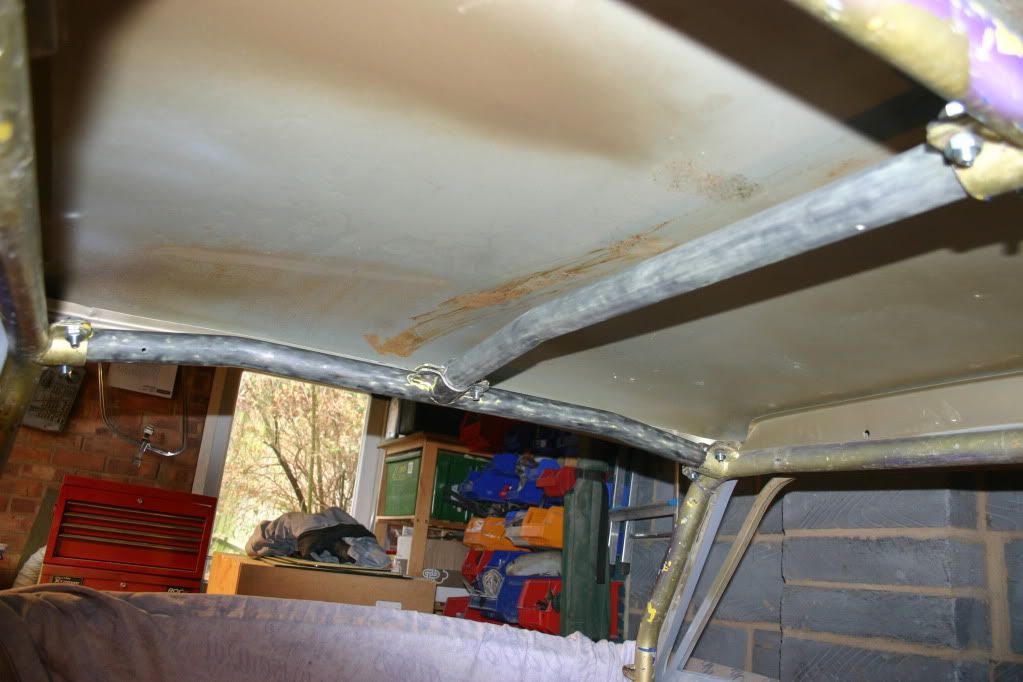
The roll cage mounts are all welded in, cleaned up and in primmer.
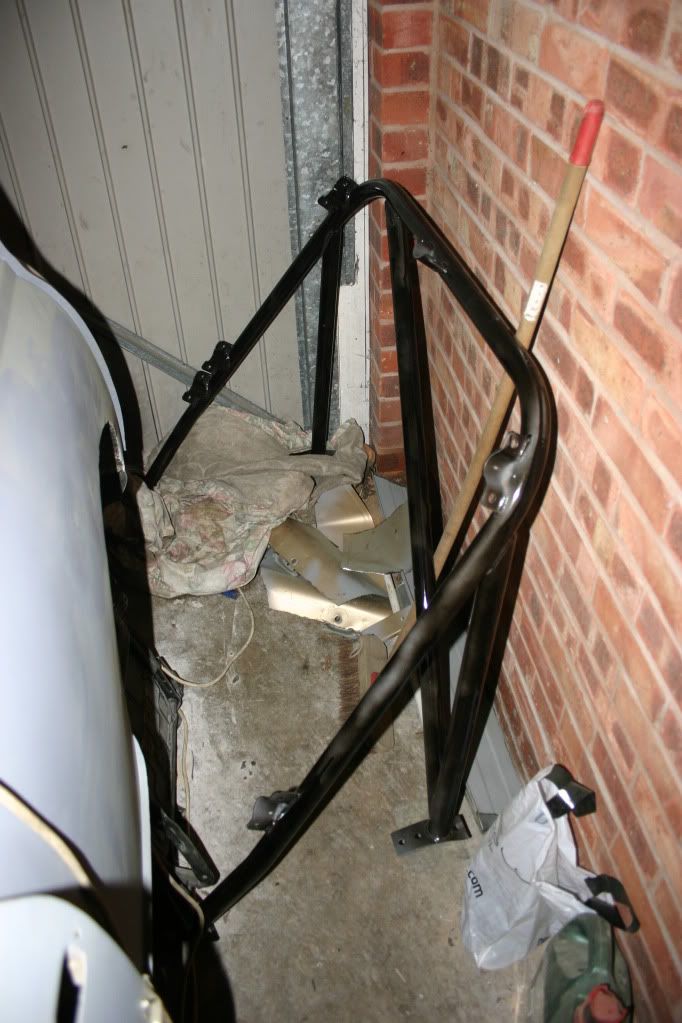
I finally have the roll cage all painted, it is now wrapped in about 100 foot of bubble wrap and in various storage places including under the our bed and suspended from the ceiling in the garage in a desperate attempt to stop it being chipped or scratched.

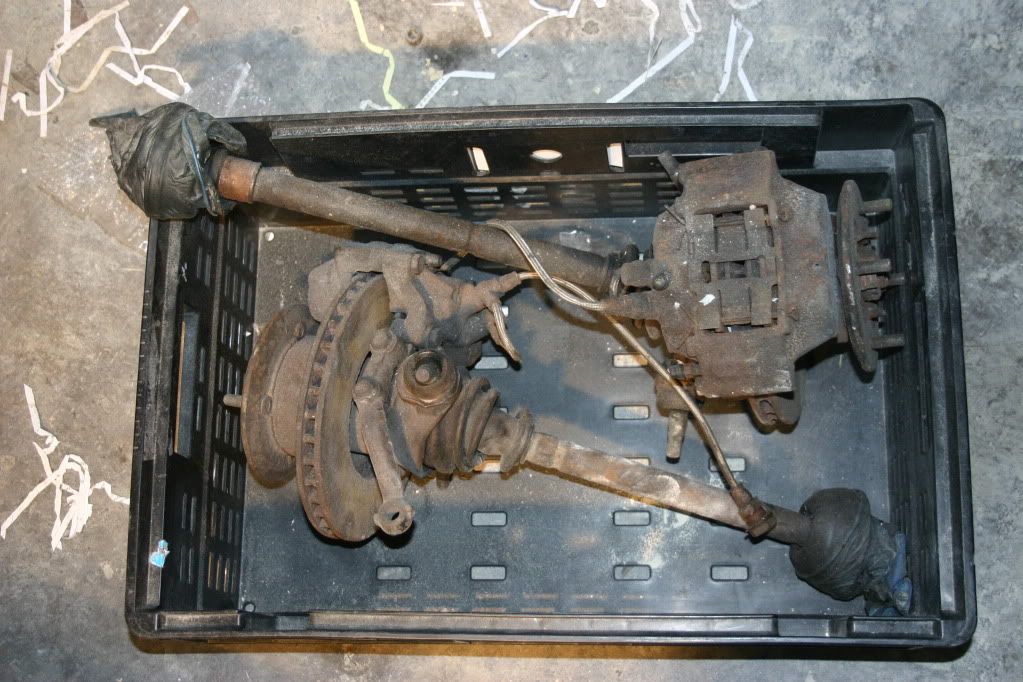
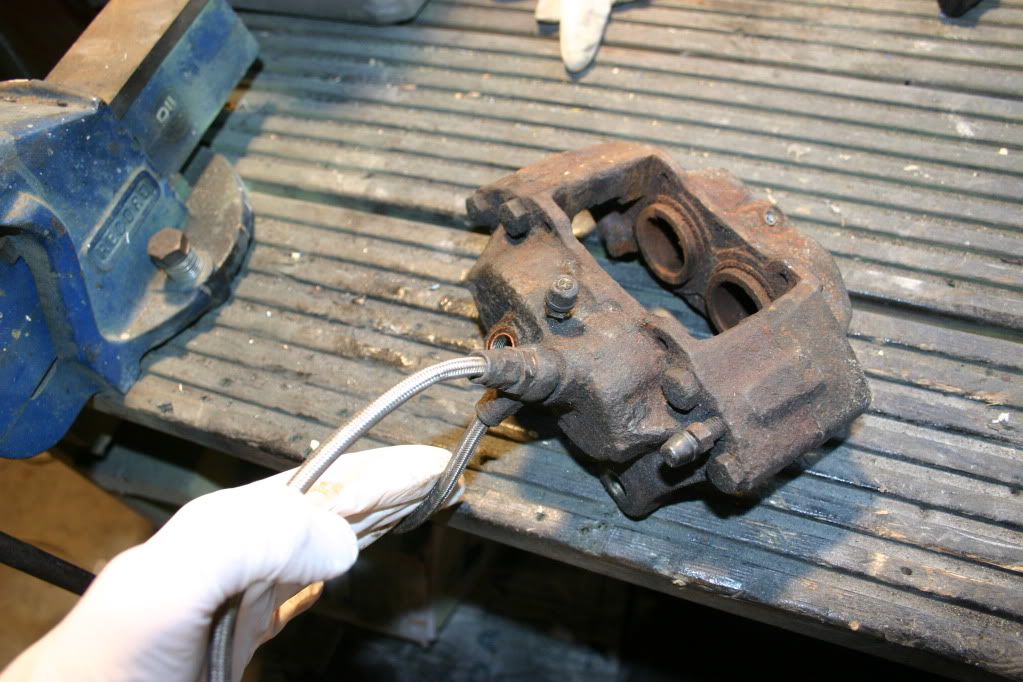
I decided I really did need to look at upgrading the brakes so brought myself a set of 4 pot callipers with all the metro drive shafts hubs etc as well. I have started to get these sorted but they will need quite a lot of work to get them ready to be fitted. The pistons are well and truly seized and one of the bleed nipples has sheered of.
|
dan_w
64 Posts
Member #: 4837
Advanced Member
Tonbridge Kent
|
|
The fuel tank I ordered was delivered on Tuesday so I have made some brackets to hold this in place. Nothing special but will do the job. It’s a snug fit and I will be fitting some foam tape between the corners and the tank. But I am not sure if there is a need for a strap over the top or not. Its tight enough that it will not jump out or anything under normal driving but I guess if the car rolled it would come out so best to get one made up.
My mate from the body shop came over the other weekend to give me a hand getting ready for paint. Still a good days worth of sanding to be done to get a nice finish on both the front and rear valances. But hopefully should be ready for paint by the end of the month. Funds allowing.
Talking of paint I have decided on another colour. I gave my mate the paint code for the Fiat burnt orange I had originally decided on but when he turned up he said ho could not find it in their charts so brought them round. Big mistake! A couple of hours later and I have decided on Lotus Scandal Green with a black roof and black arches. The picture below does not show it to well as it has a really nice metallic in it. I was a little bit unsure until last week I saw an Elise in it and that is it now.

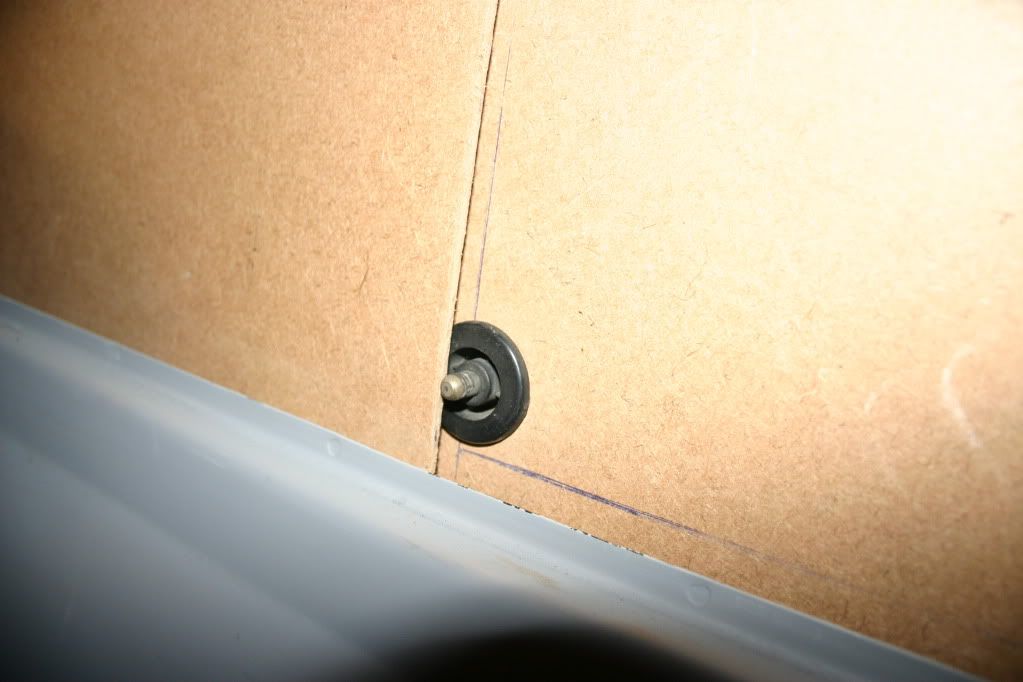
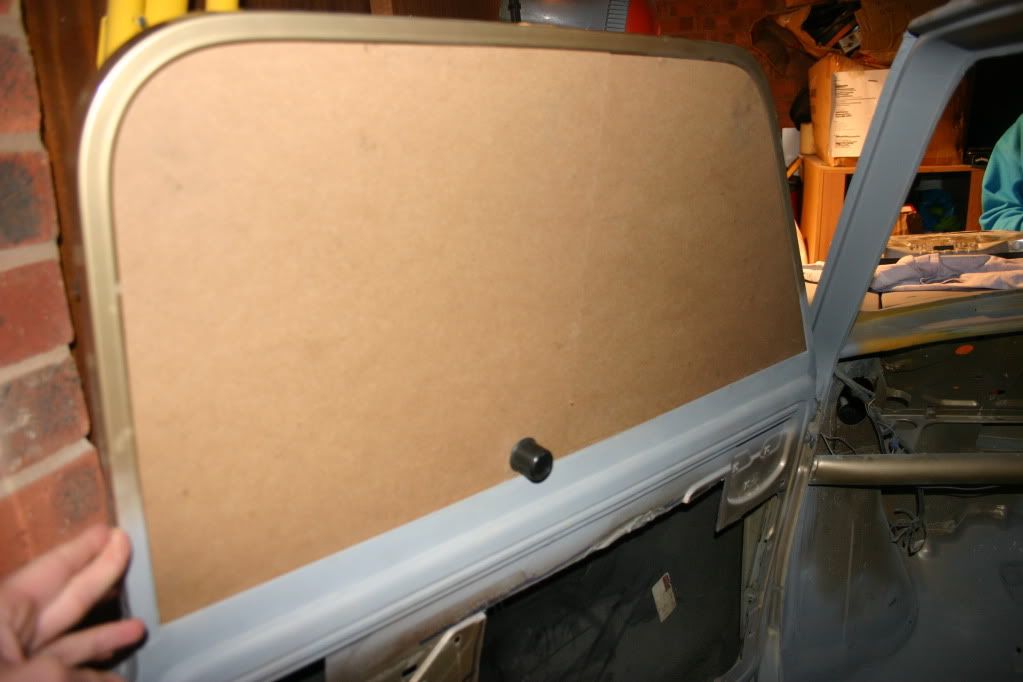
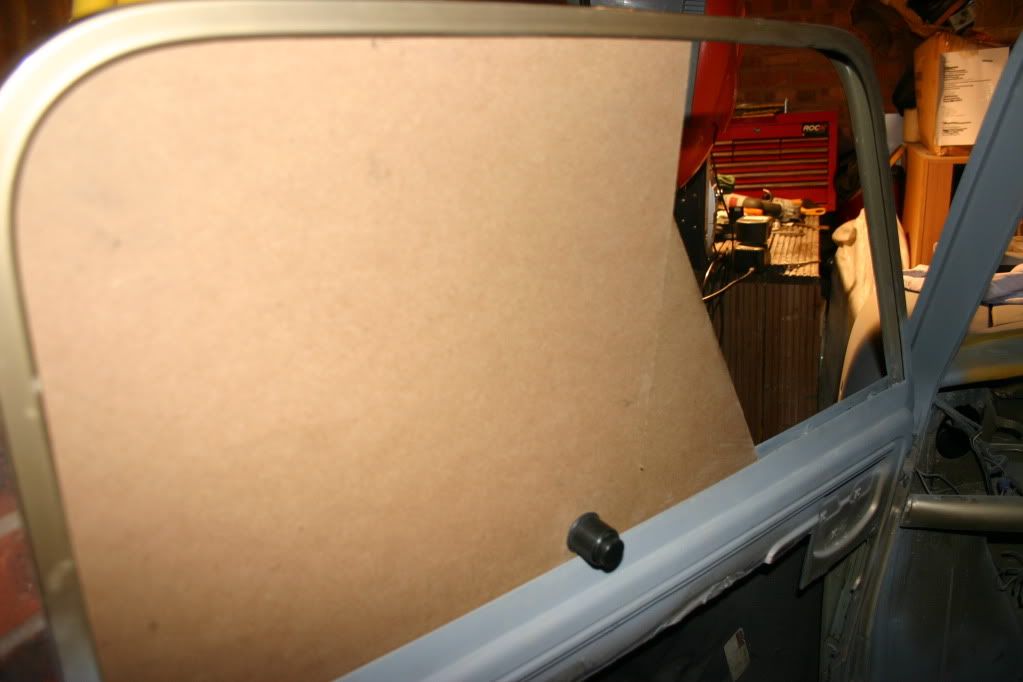
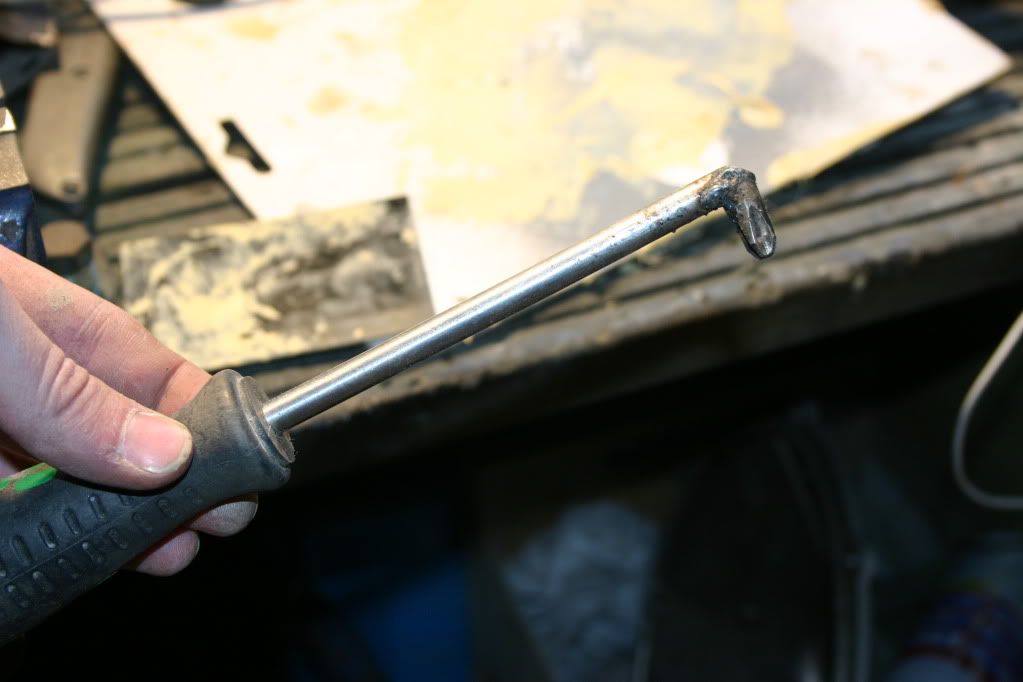
In preparation for painting I have finally removed the doors, this is something I should have done a long time ago but due to some numpty previously welding the bolts under the wing of one side on and rounding off 2 of the others I was a bit unsure of how to get them off and if I really needed to.
Due to the thickness of all ratchet screwdrivers I could find I decided to make a nifty screwdriver to remove the screws that hold the door to the hinge. I am a little worried about refitting once painted so may just remove the old hinges completely and get some new ones. Any suggestions or alternative ways to get the doors back on?
I could not decide what to do about the inside roof of the car, I originally wanted to paint it the same as the car but my mate advised the finish may not be great as the paint will be sagging down and spraying at this angle may not be that easy. I did not really want to go to 1 the expense of a head lining 2 the hassle of fitting one and 3 having a stripped out interior I did not think it would look right. I have therefore painted it with just plain old black Hammerite using a foam roller, I have only done the first coat at present but all looks ok. It will defiantly need at least another 1 or 2 coats but I am more than happy. No pics at present but will update when I have some.
|
Brett
9502 Posts
Member #: 1023
Post Whore
Doncaster, South Yorkshire
|
|
looking good :)
Yes i moved to the darkside
Instagram @jdm_brett
|
minimole23
4309 Posts
Member #: 1321
Post Whore
Wiltshire
|
|
I like the look of the loud paint scheme.
Regarding the underside of the roof I just used a rattle can. Got more then an acceptable standard of finish.
On 7th Oct, 2010 5haneJ said:
yeah I gave it all a good prodding
|
|
Home > Show Us Yours! > Dan's 998 build
|
|
Users viewing this thread:
none. (+ 1 Guests)
|
Next ->
|
|
