|
Home > Show Us Yours! > Mini Roadster - My build thread
|
Graham T

608 Posts
Member #: 1106
Post Whore
Hungerford, Berks
|
|
Being as I now have my engine started, I thought it was time I shared my Project with you all.
This is a bit of an abbreviated build thread of the last 2 ½ year’s work.
Originally the project was going to be a convertible with a mildly tuned 1275 turbo engine, but I ended up getting a bit carried away and getting involved in EFI. The result so far has taken a lot longer than I expected.
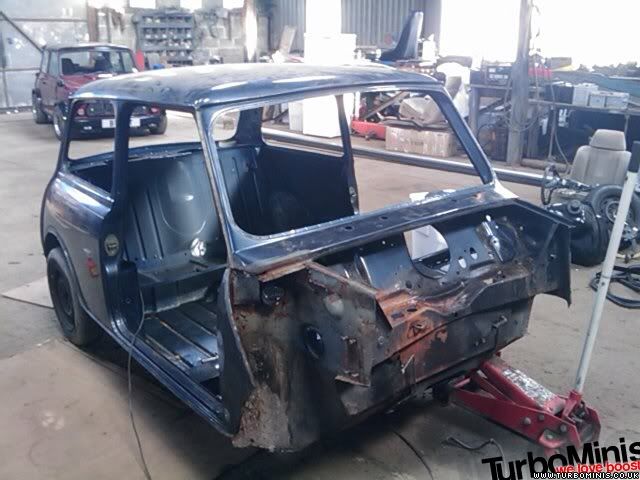
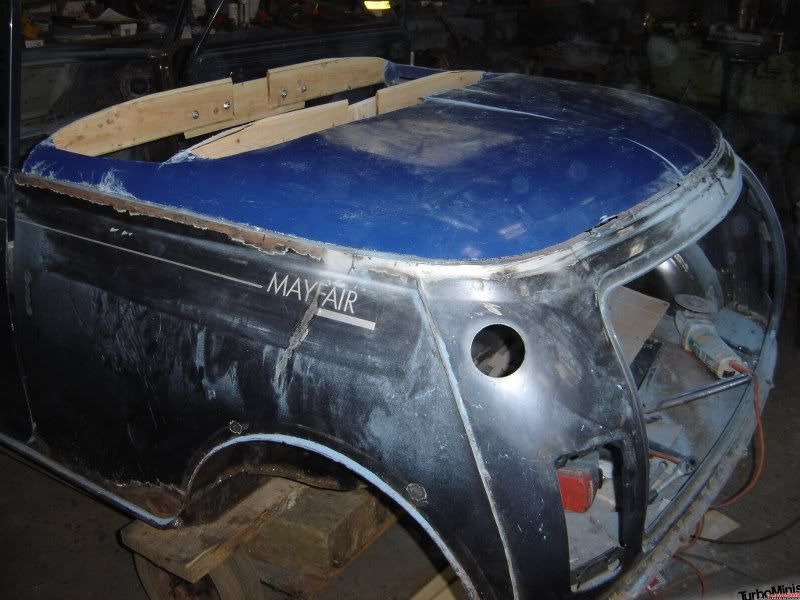
The project car is a 1989 Mayfair.

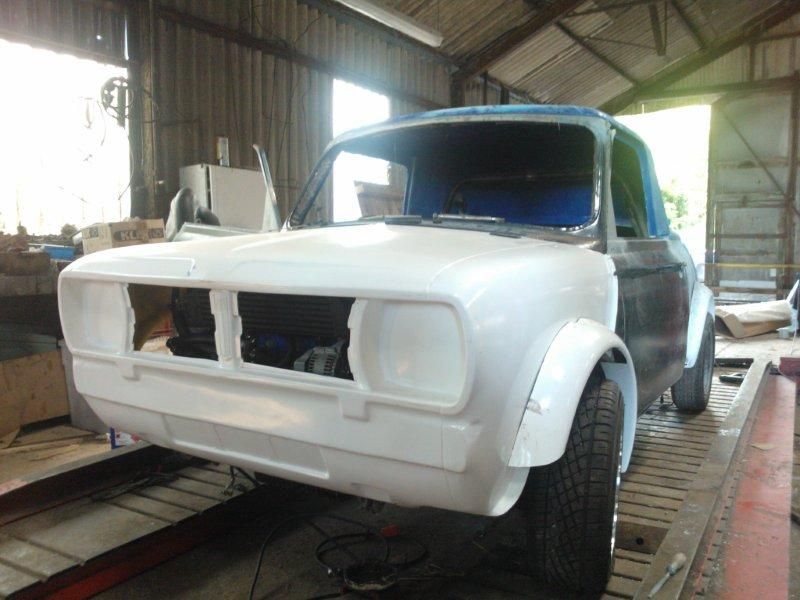
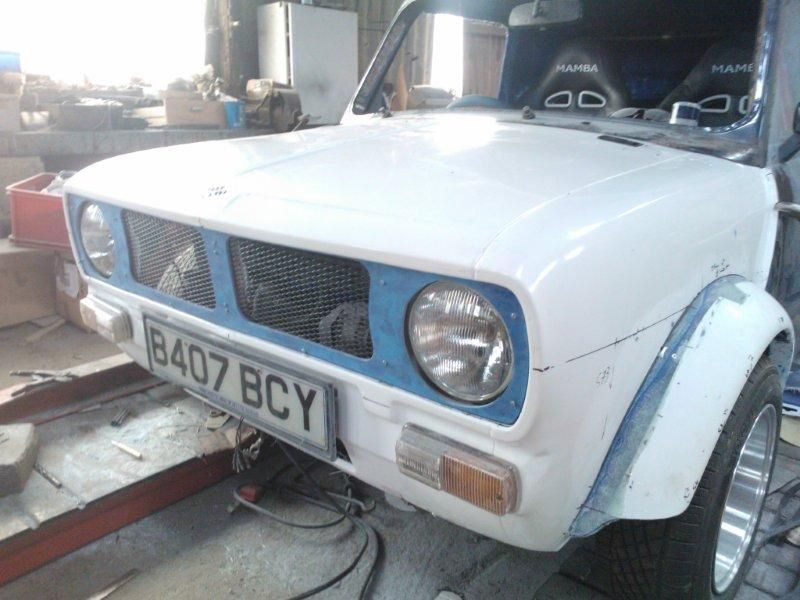
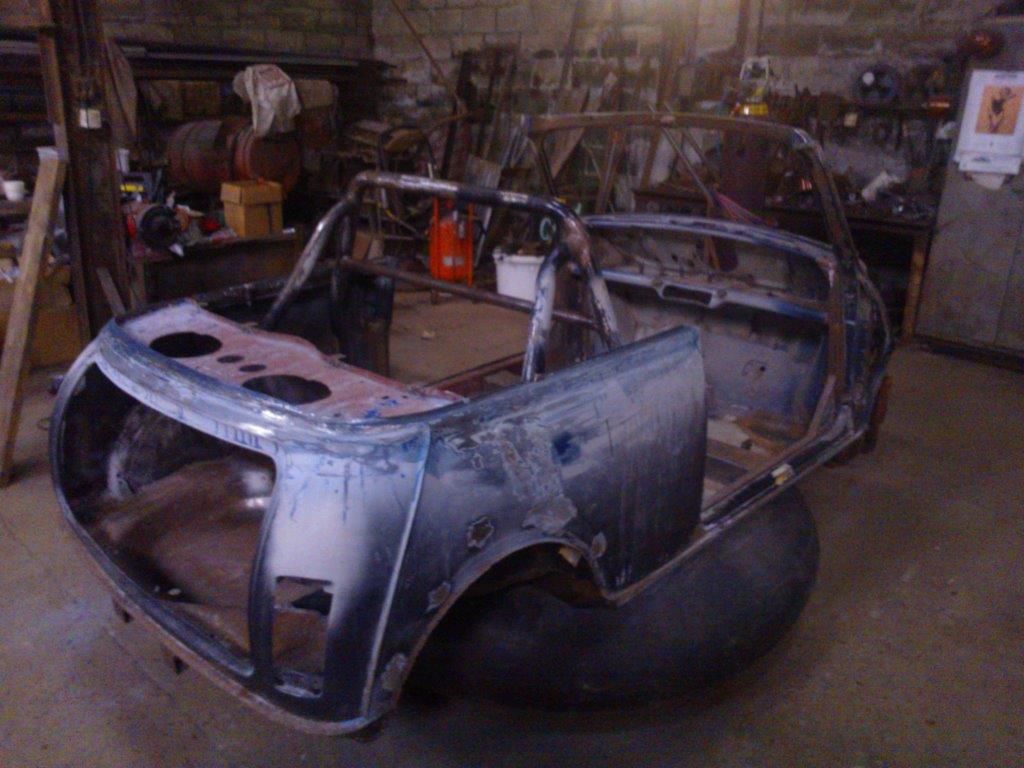
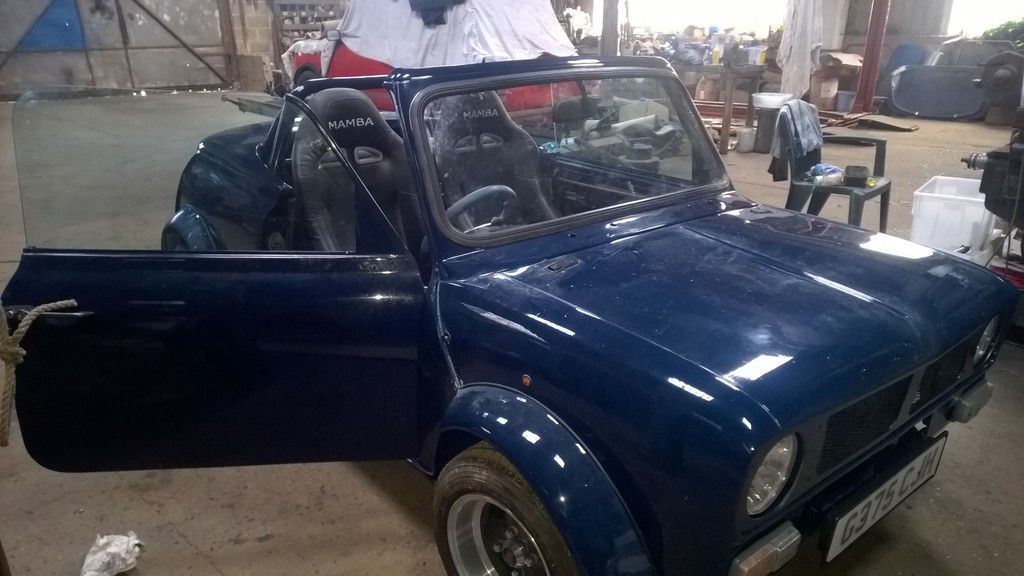
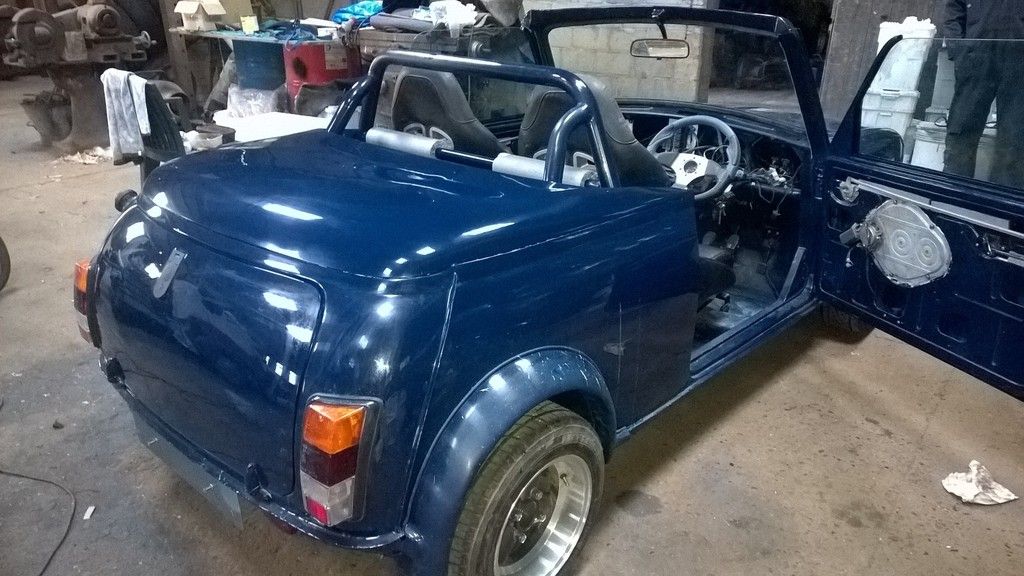
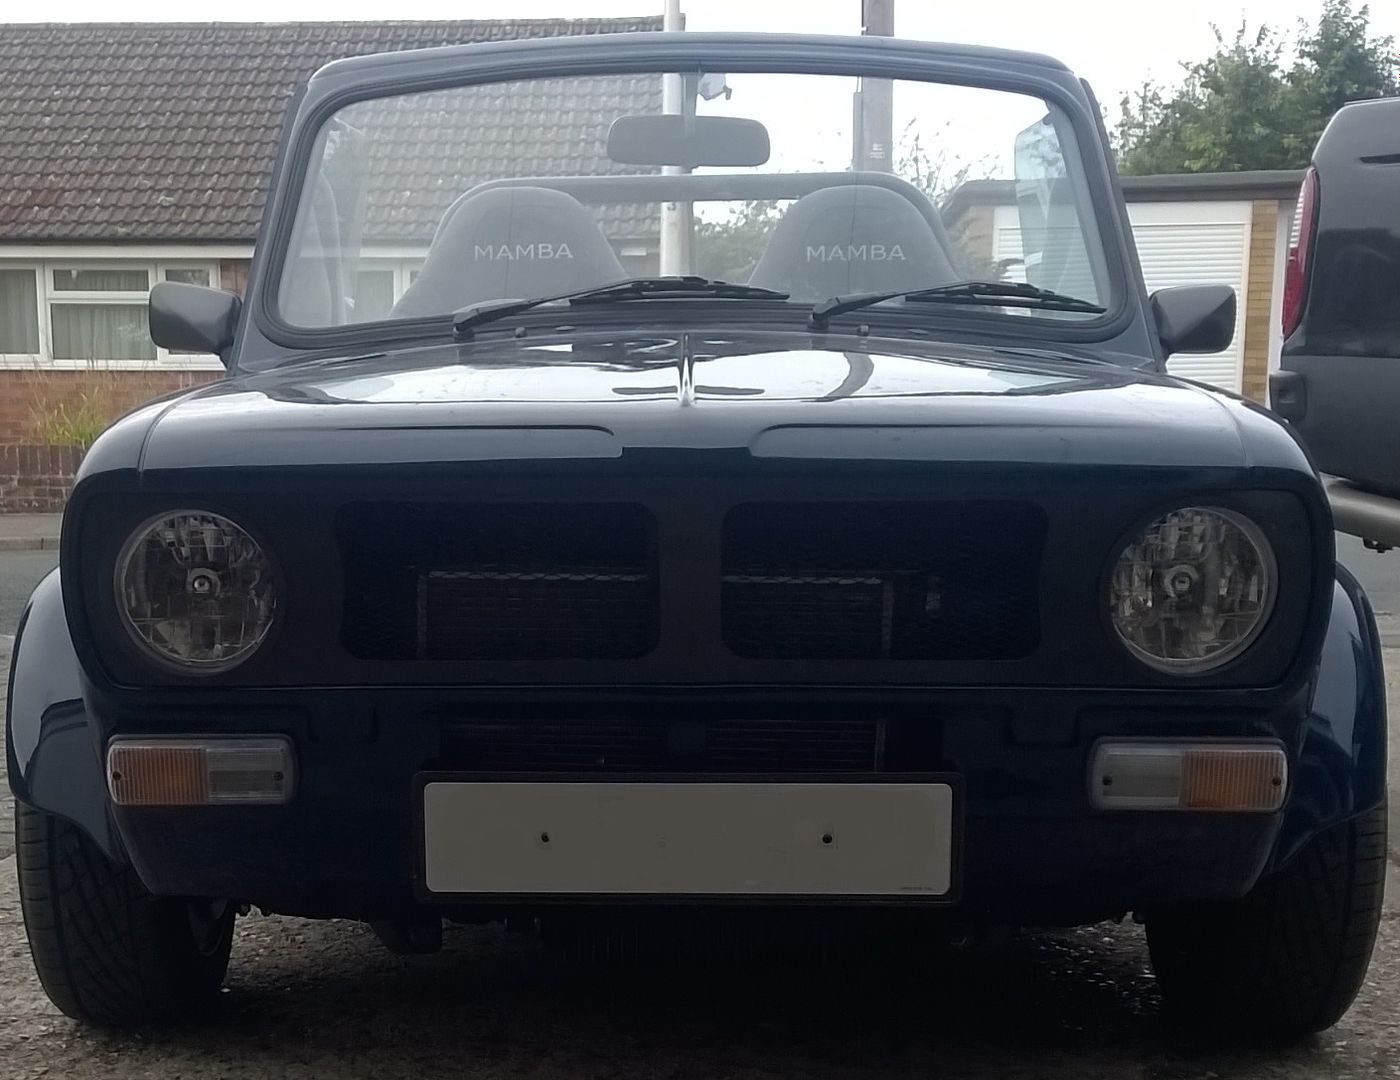
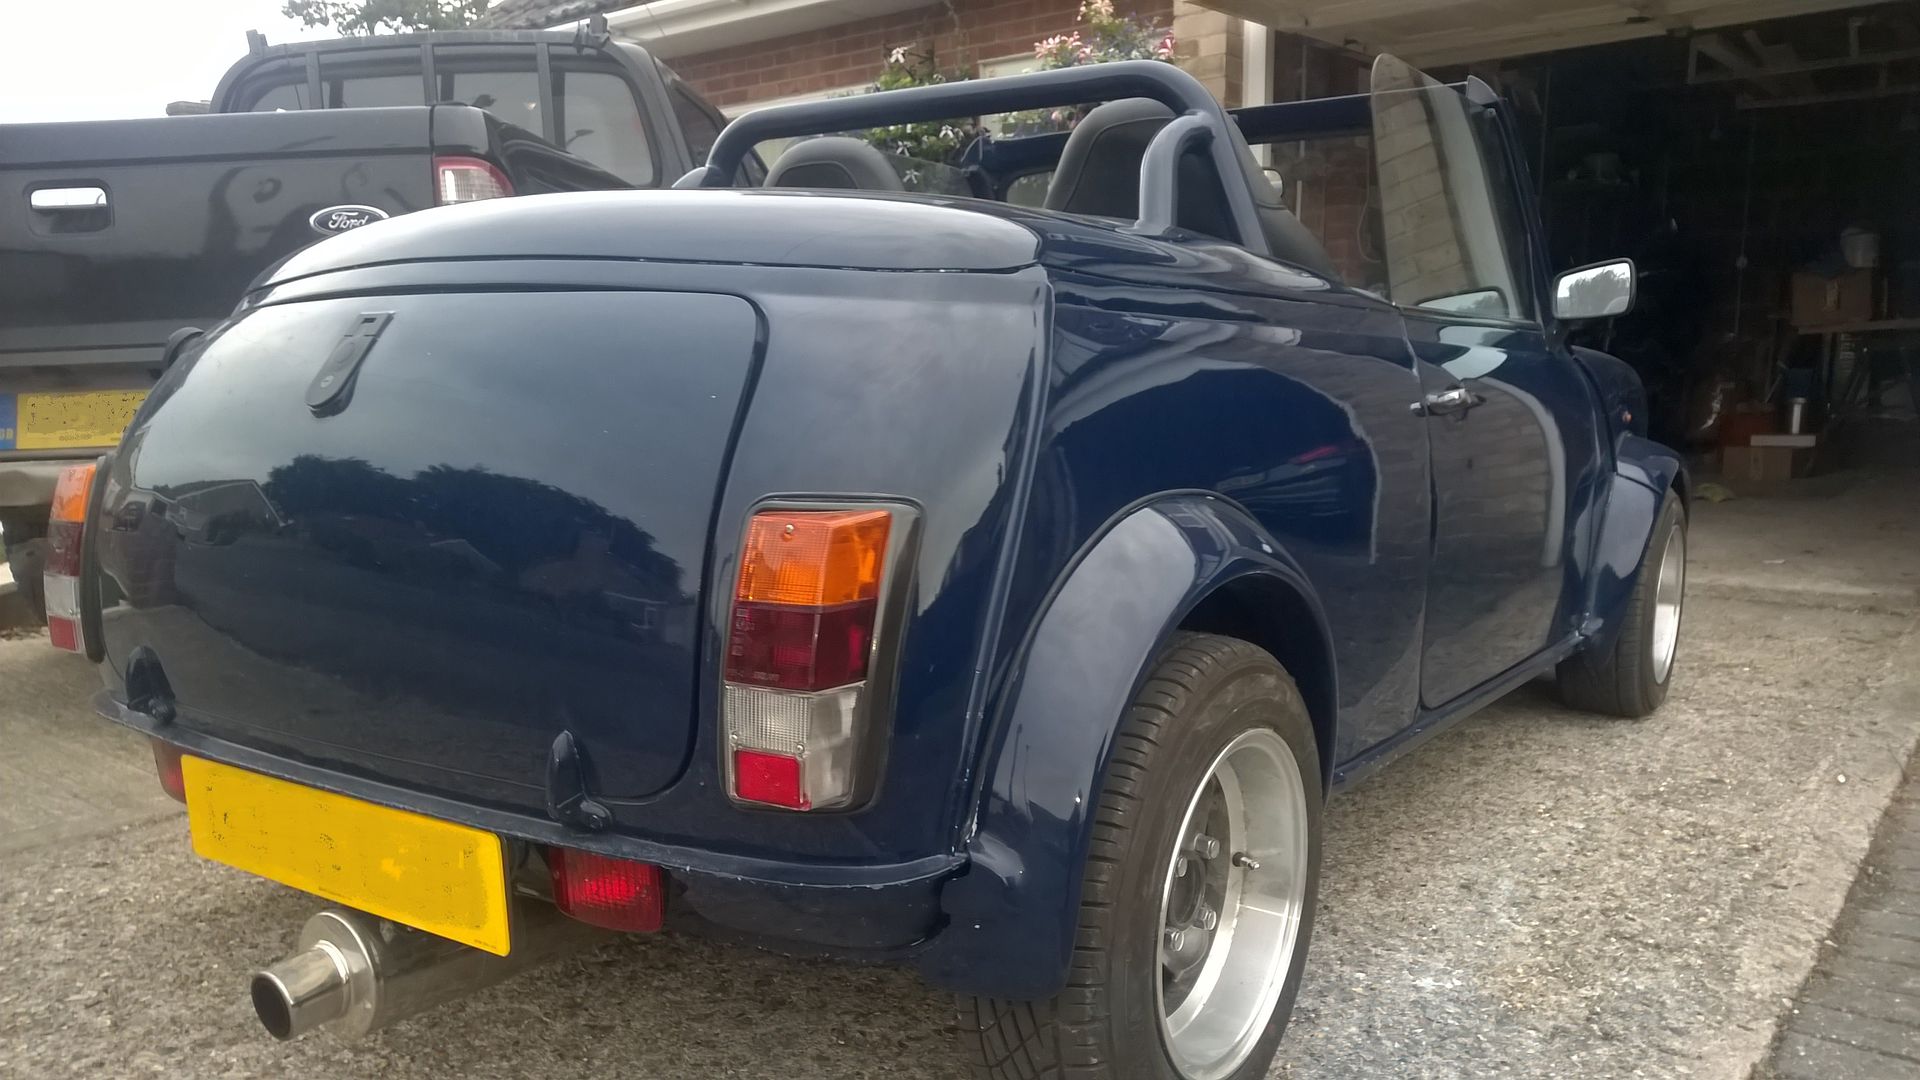
I’m sure the shell styling will not be everyone's cup of tea, but I always wanted a convertible for the summer. I did not want a tent stuck on the top, so opted to make a hard top. The result has ended up being a sort of roadster style. A bit more of a “bubble” than I had hoped, but I am changing the round nose front end for the clubman style: Firstly, to get a bit more definition in the shape and secondly, because the engine is very tight in the round nose front –The Intercooler does miss the bonnet, but only just.
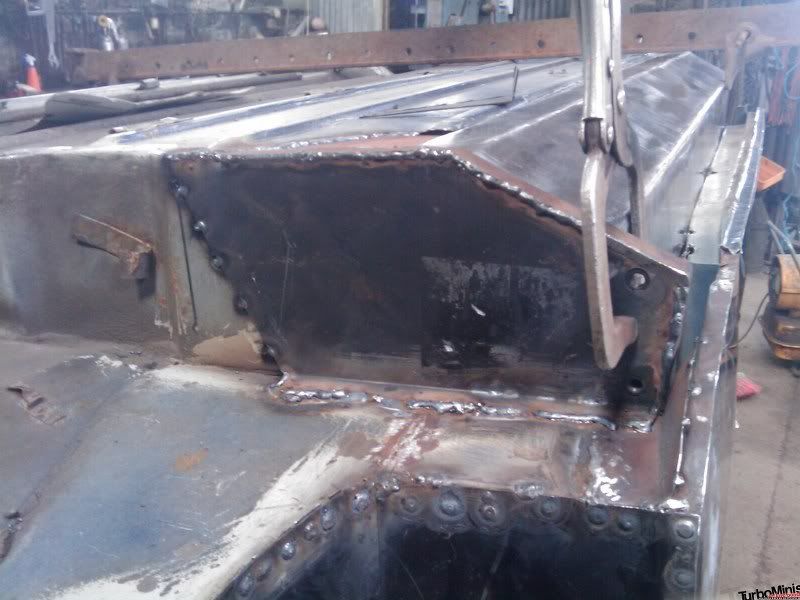
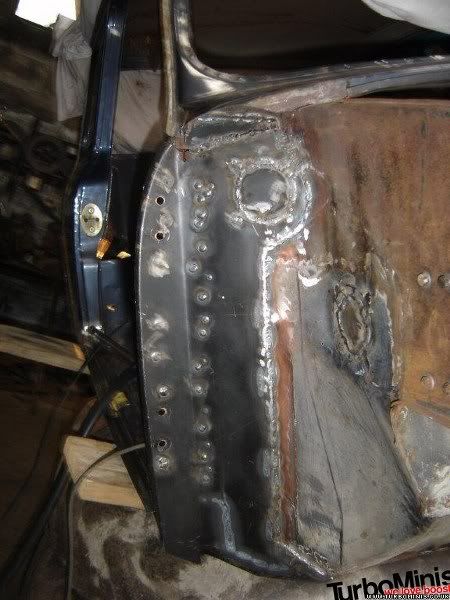
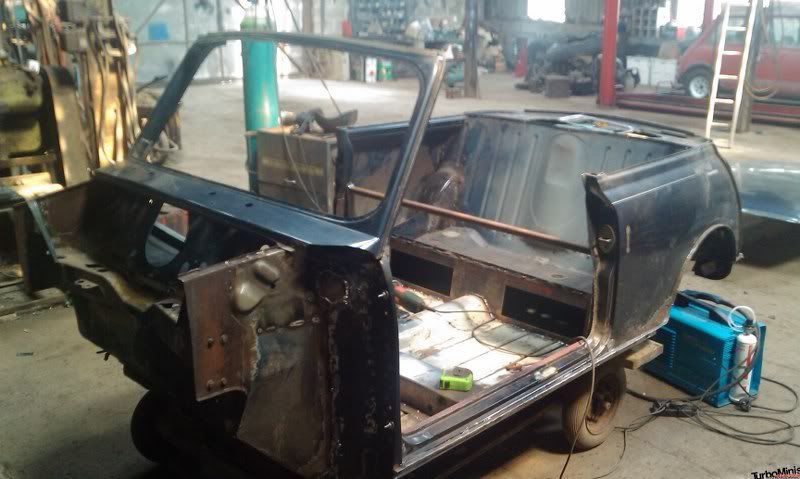
We started off by completely rebuilding the shell and replacing most of the rotten panels, some with bought and some with home made…
 ] ]
Edit – Spelling
Edit 2 – picture sizes reduced
Edited by Graham T on 21st Jan, 2013.
’77 Clubman build thread
http://www.turbominis.co.uk/forums/index.php?p=vt&tid=618189
Siamese 5 port EFI testing
http://www.turbominis.co.uk/forums/index.php?p=vt&tid=611675
|
Graham T
608 Posts
Member #: 1106
Post Whore
Hungerford, Berks
|
|
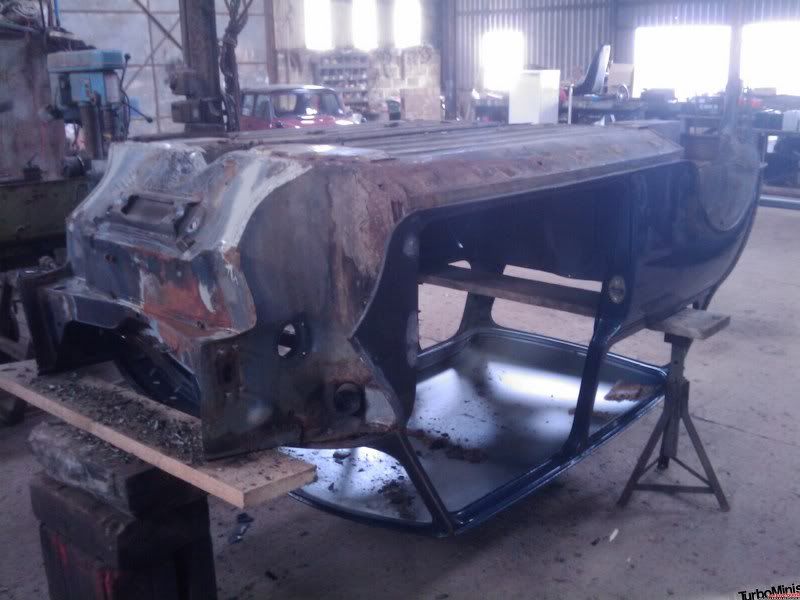
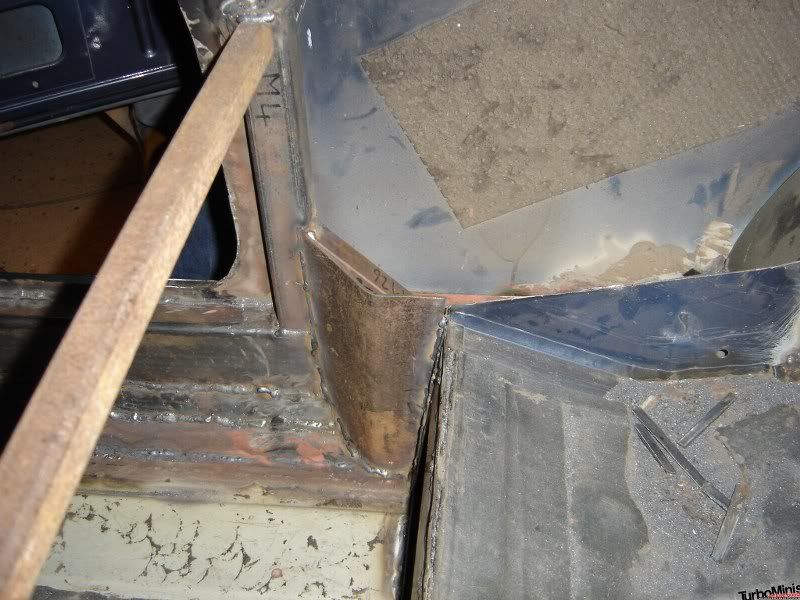
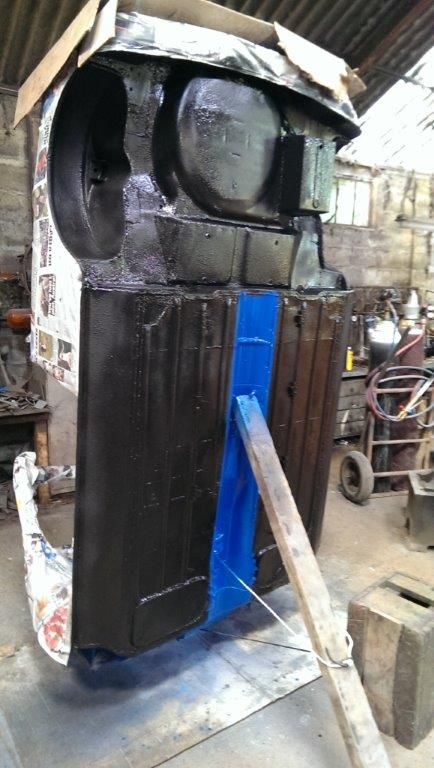
…before adding the convertible strengthening kit

…and then replacing the remaining panels that could not be done before the strengthening was added.
Edited by Graham T on 21st Jan, 2013.
’77 Clubman build thread
http://www.turbominis.co.uk/forums/index.php?p=vt&tid=618189
Siamese 5 port EFI testing
http://www.turbominis.co.uk/forums/index.php?p=vt&tid=611675
|
Graham T
608 Posts
Member #: 1106
Post Whore
Hungerford, Berks
|
|
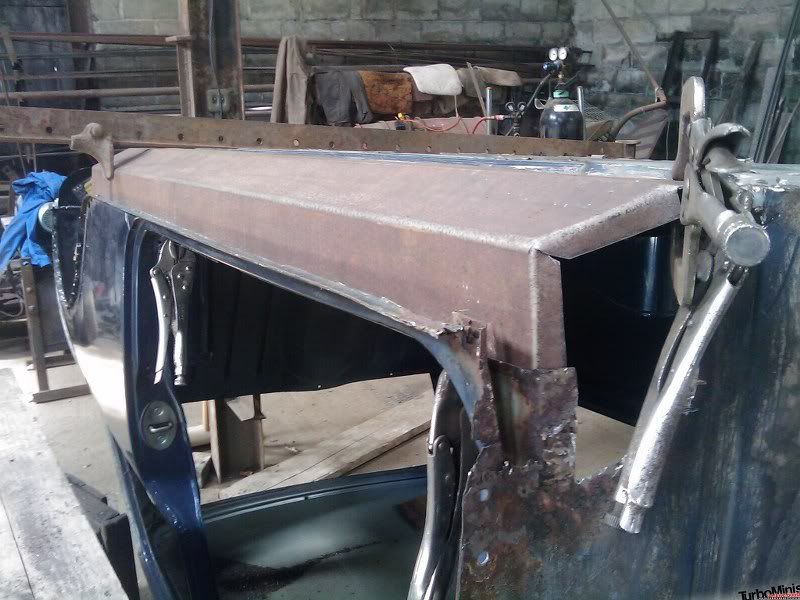
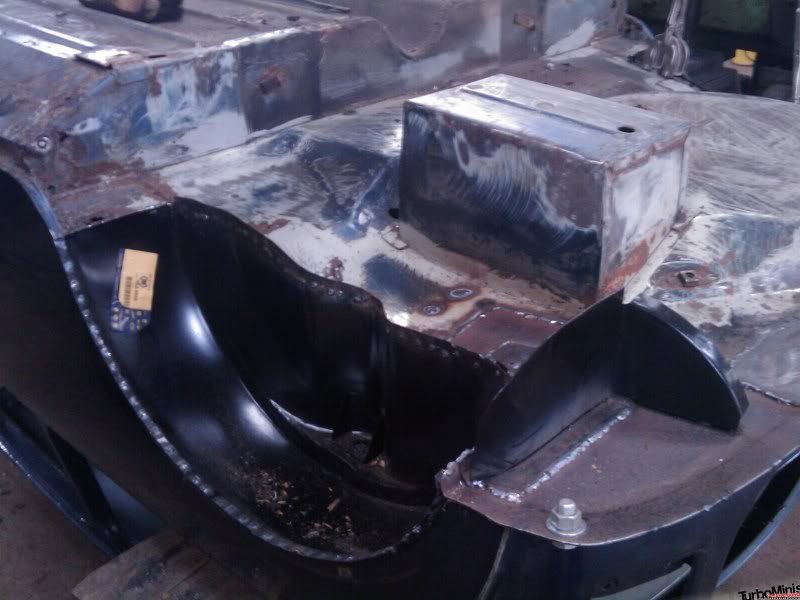
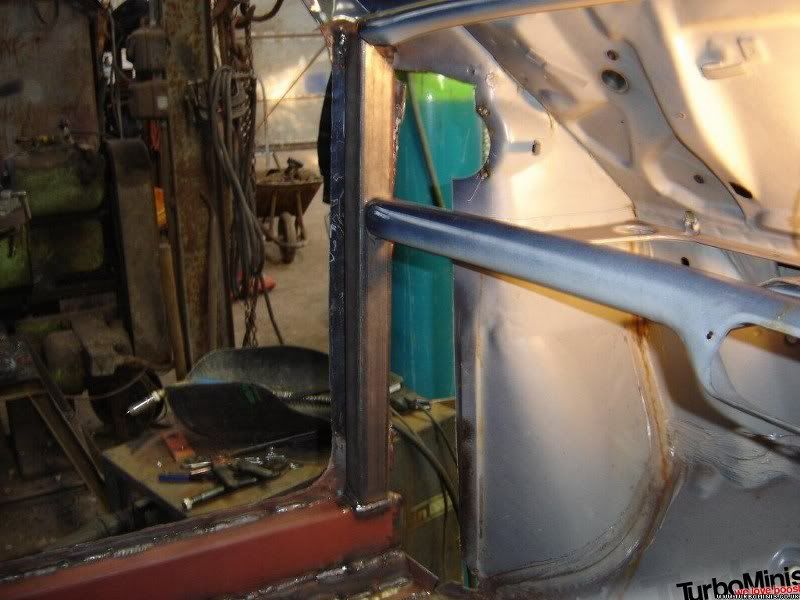
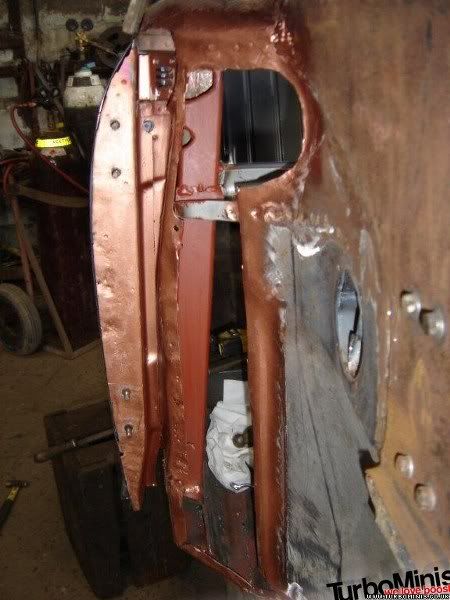
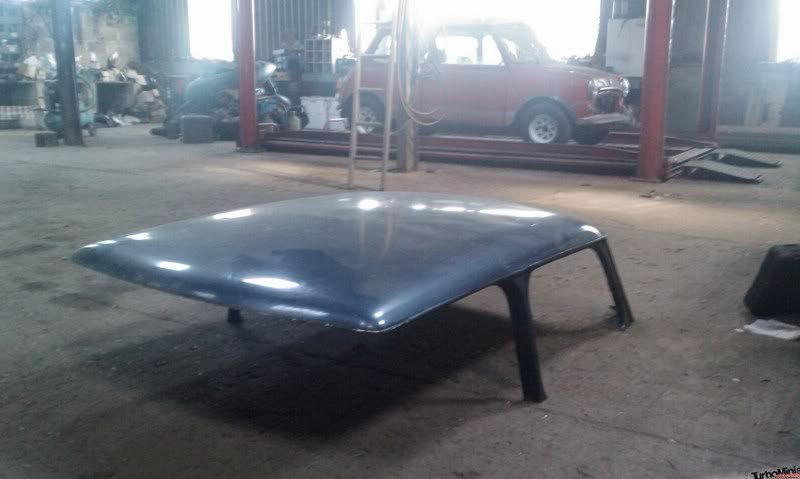
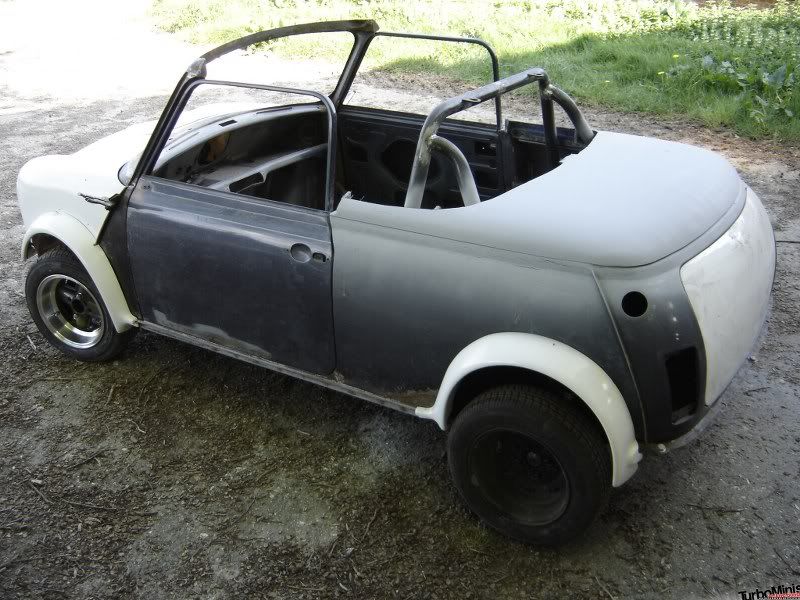
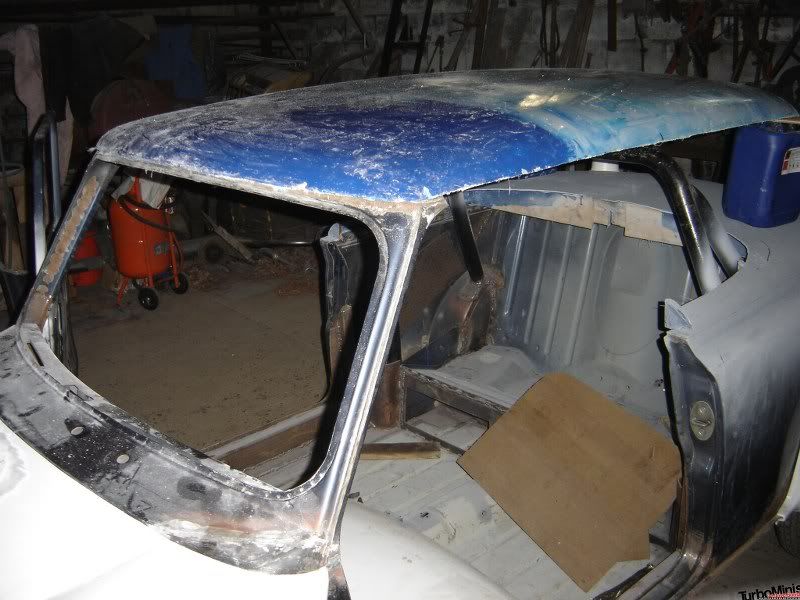
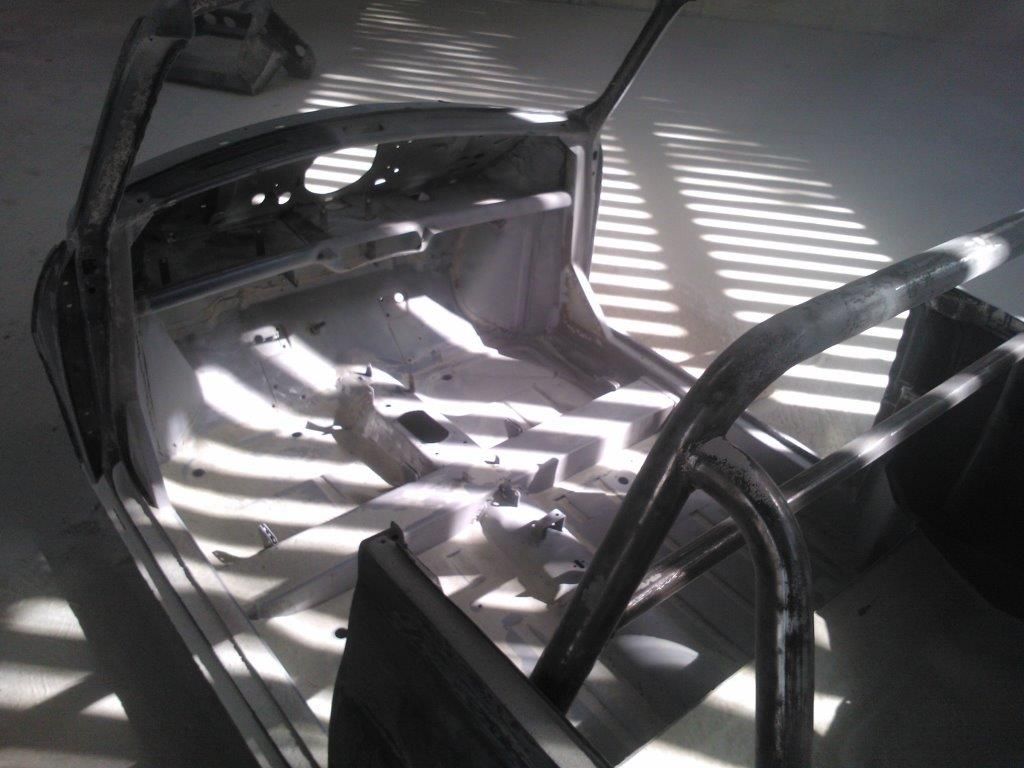
The next stage converting the shell was to be removal of the roof, but before doing that I need to take some fiberglass mouldings of the roof and ‘C’ pillars to be used to make the rear panel and roof section.
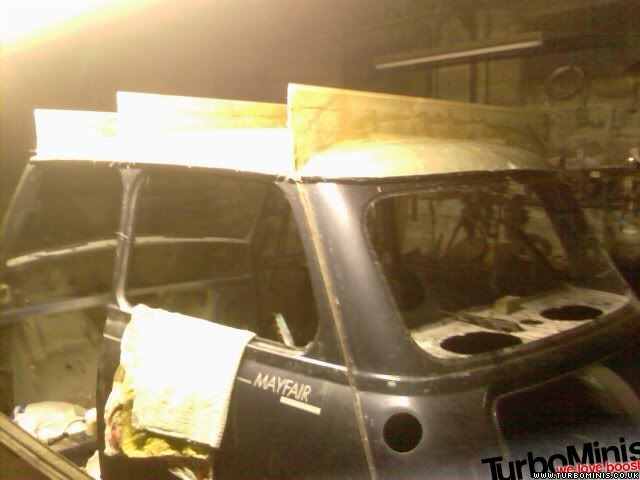
We decided to put in a brace between the ‘B’ Pillars because we were concerned about the modifications causing the pillars to spring.
Edit – reduced picture size
Edited by Graham T on 21st Jan, 2013.
’77 Clubman build thread
http://www.turbominis.co.uk/forums/index.php?p=vt&tid=618189
Siamese 5 port EFI testing
http://www.turbominis.co.uk/forums/index.php?p=vt&tid=611675
|
Graham T
608 Posts
Member #: 1106
Post Whore
Hungerford, Berks
|
|
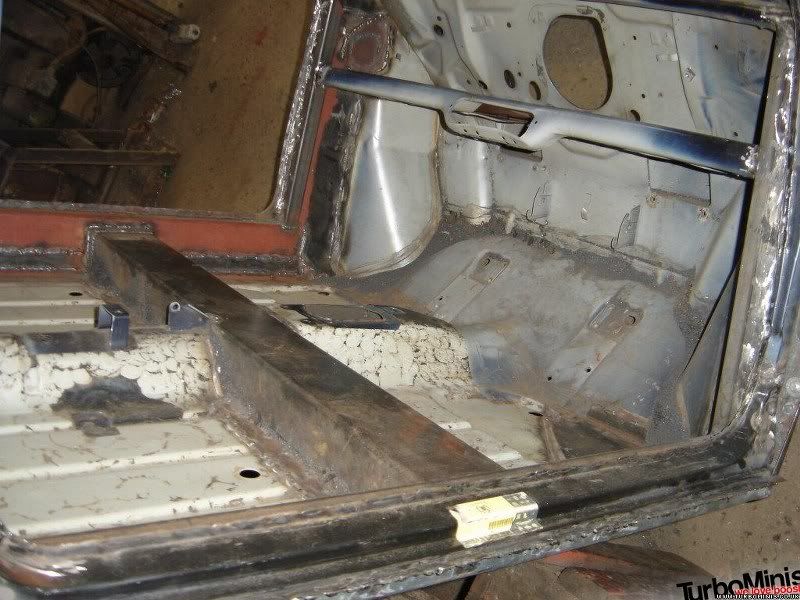
Then off came the roof…
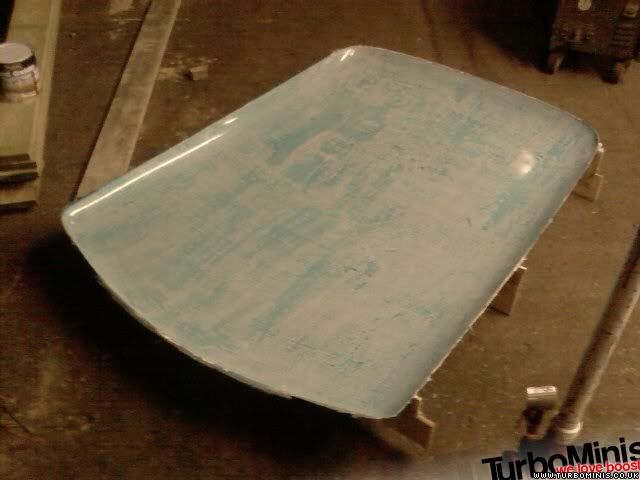
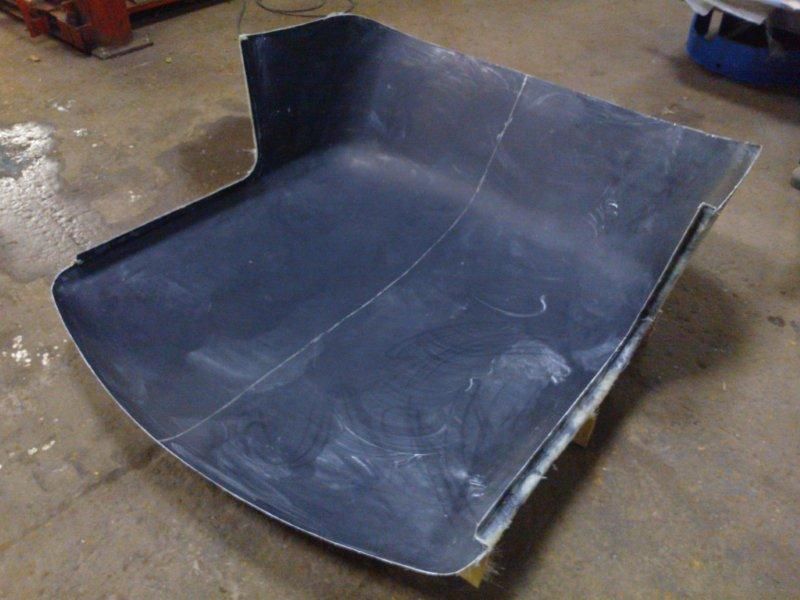
The next phase was making the fiberglass top sections from the moulds previously taken
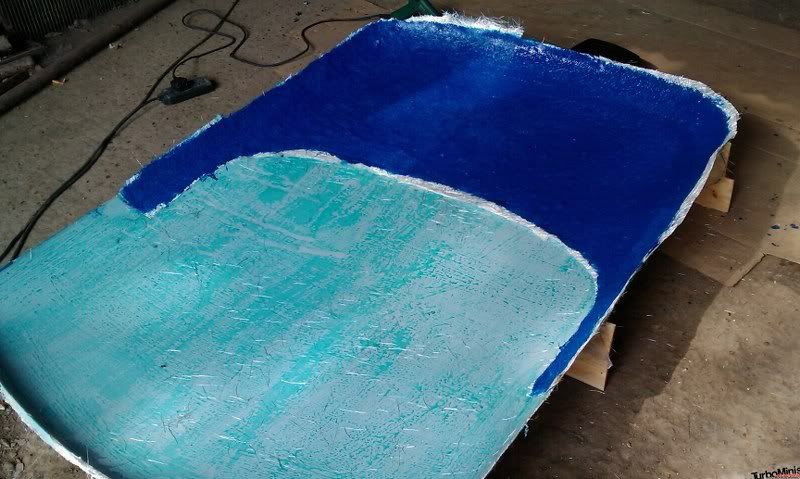
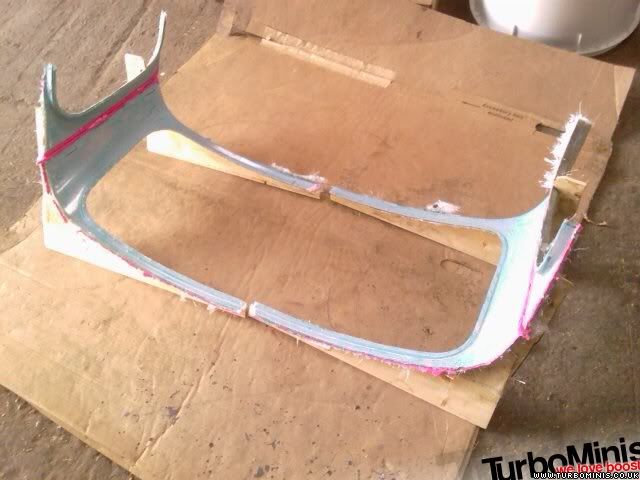
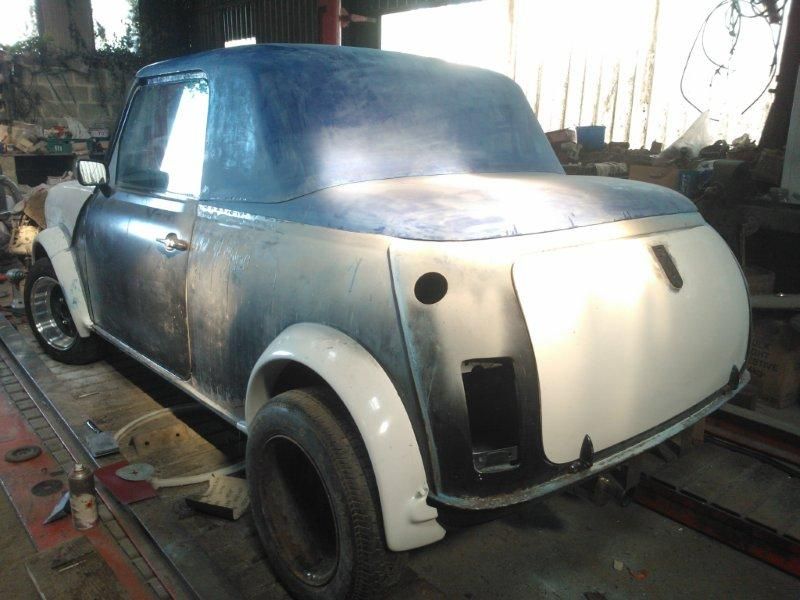
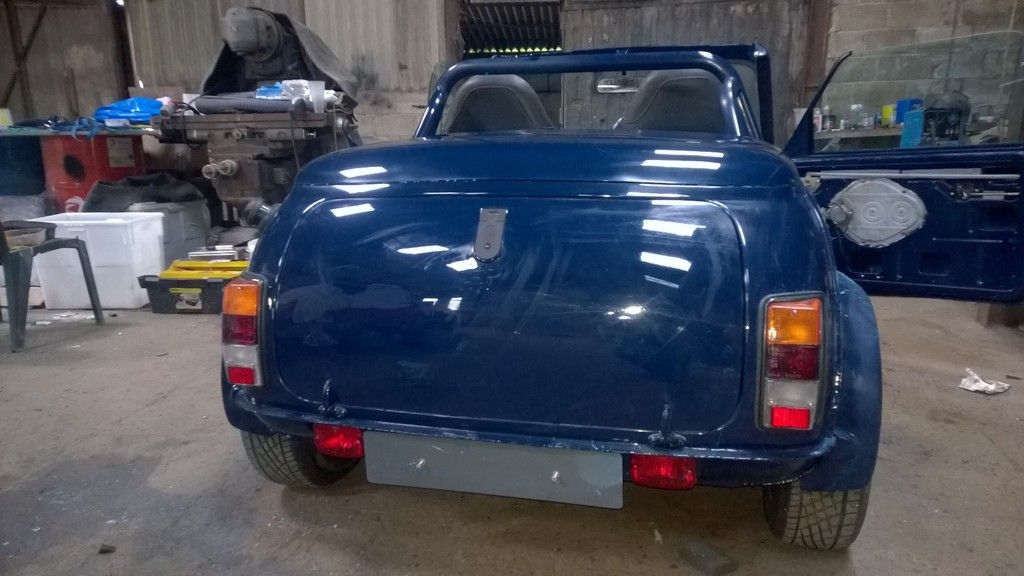
After a lot of trimming filling and flatting, the result for the rear panel:
This is only the bung to make a new mould, so that the finished panel is one section, not pieces.
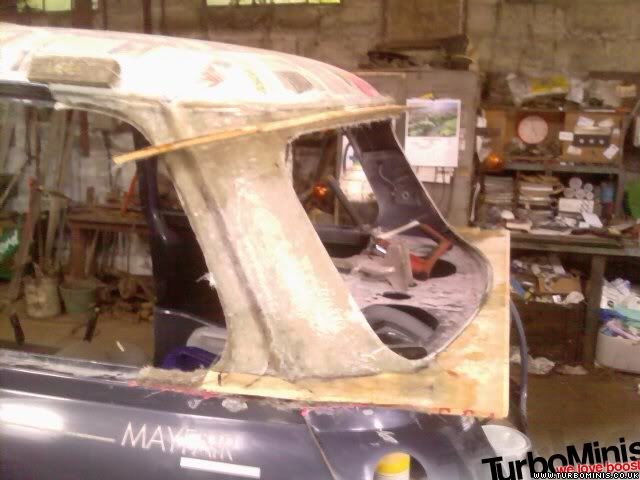
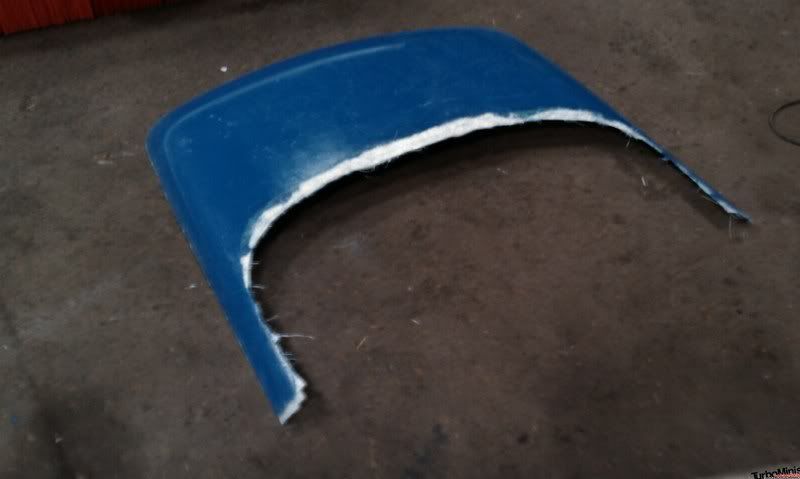
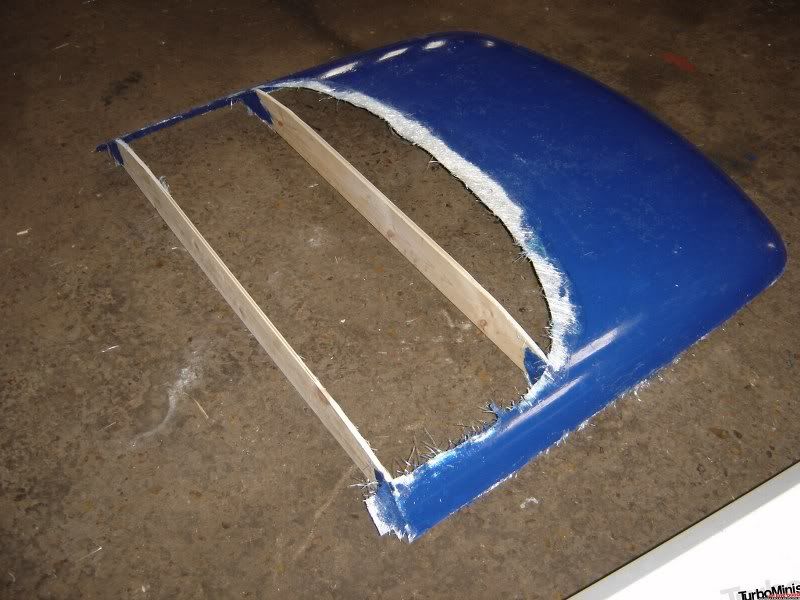
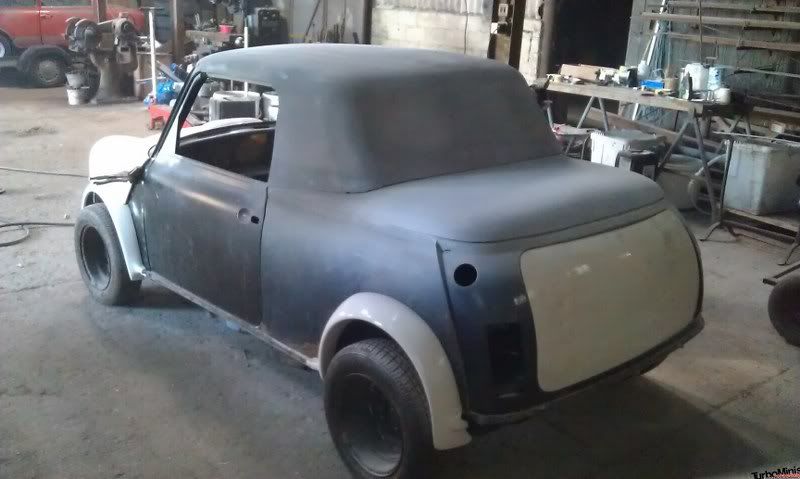
Again with the hard top, cutting and shutting to create the basic shape.
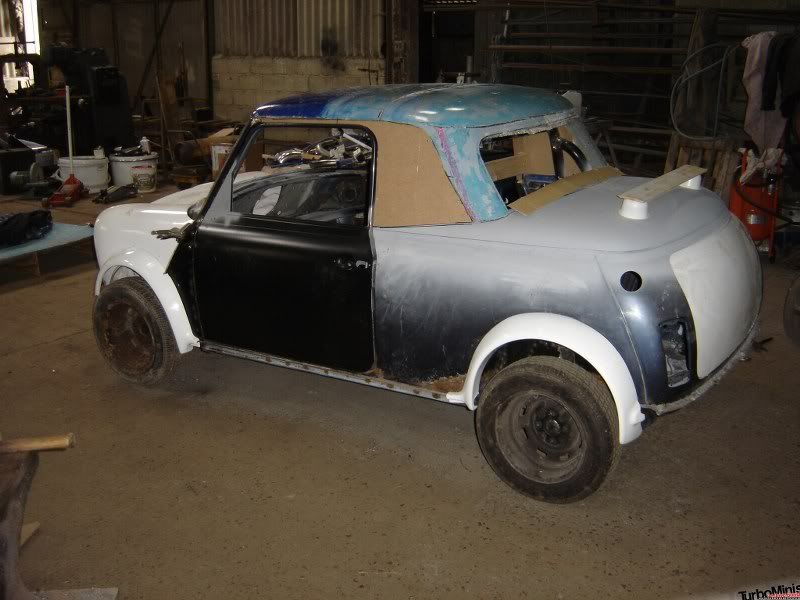
Excuse the mock up “spoiler”. We were experimenting with breaking up the lines because I was getting concerned about the shape and the fact it was starting to look a bit, well, round…
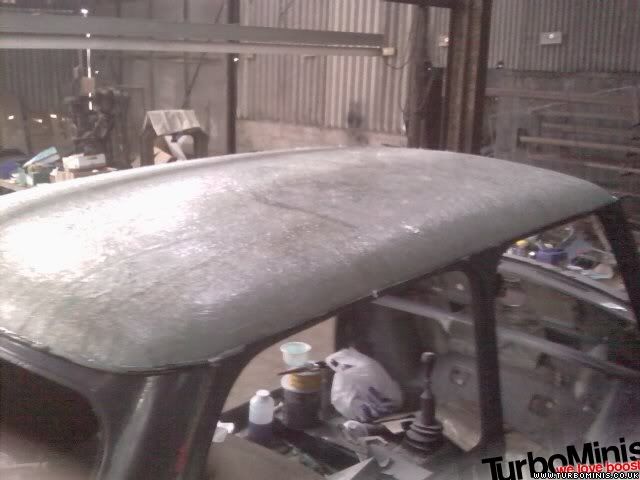
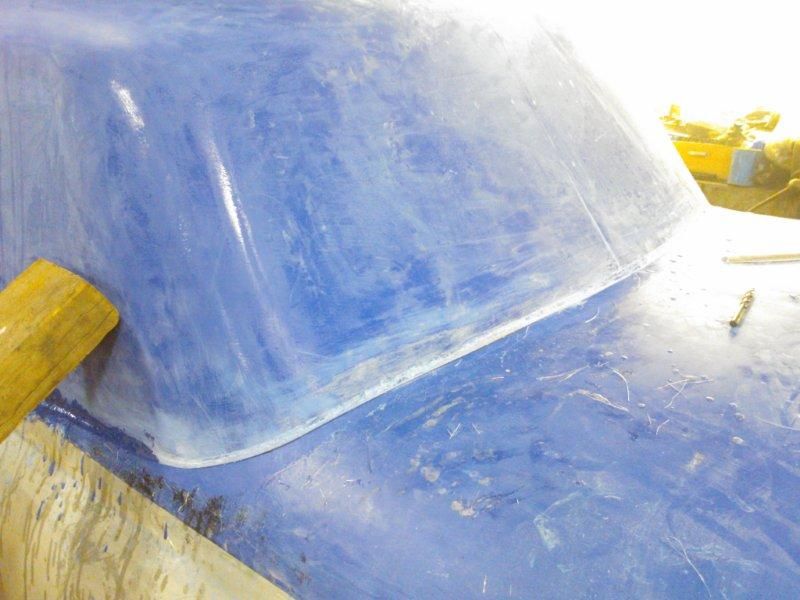
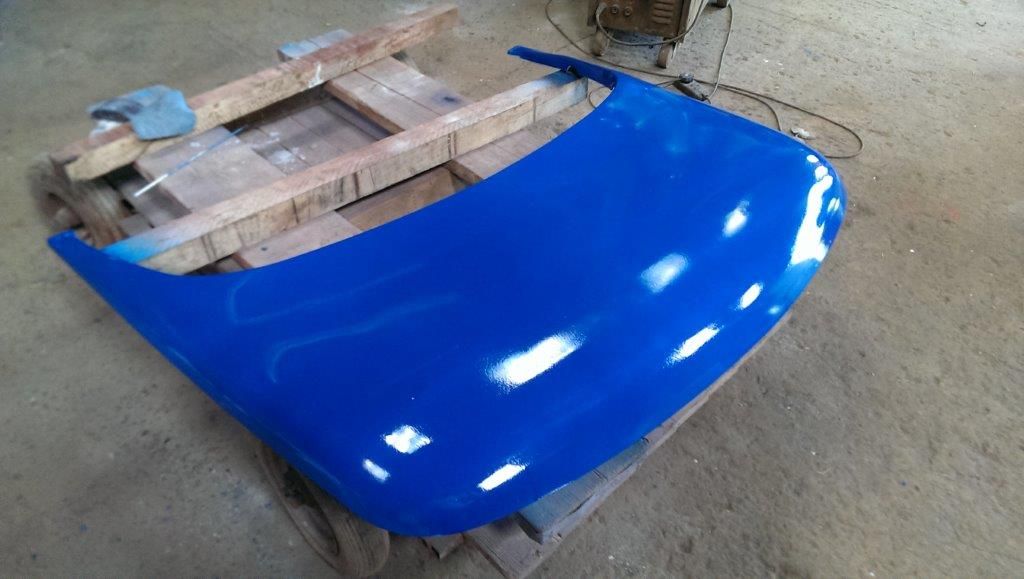
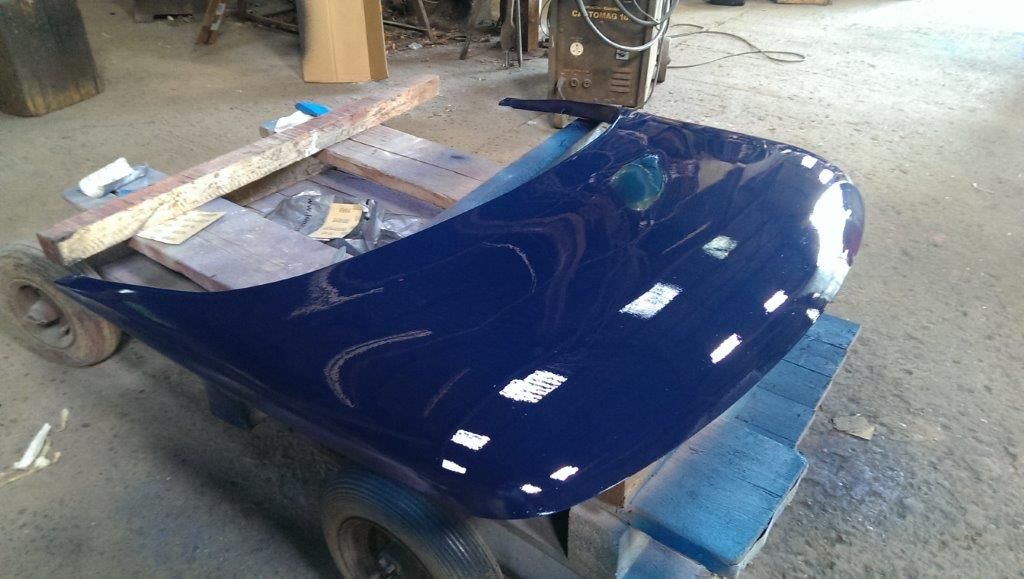
Anyhow, after a lot more filling and profiling, the finished hardtop bung.
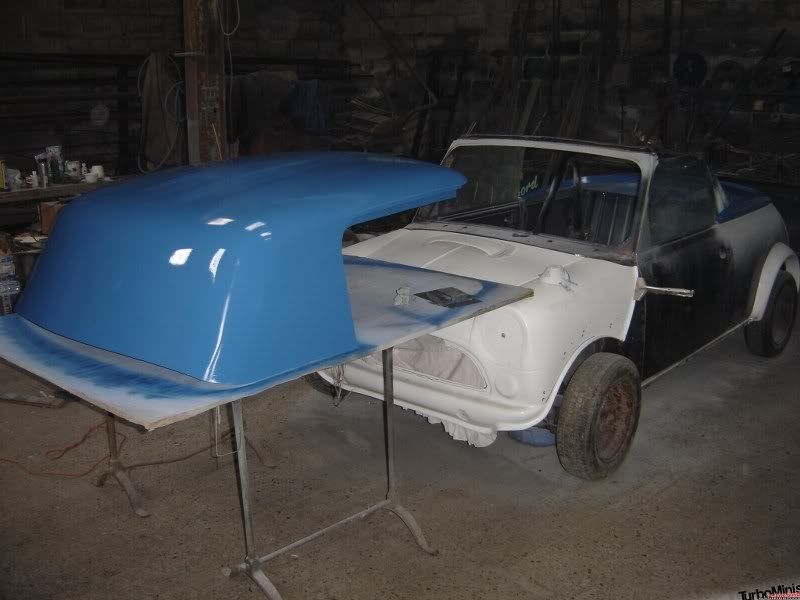
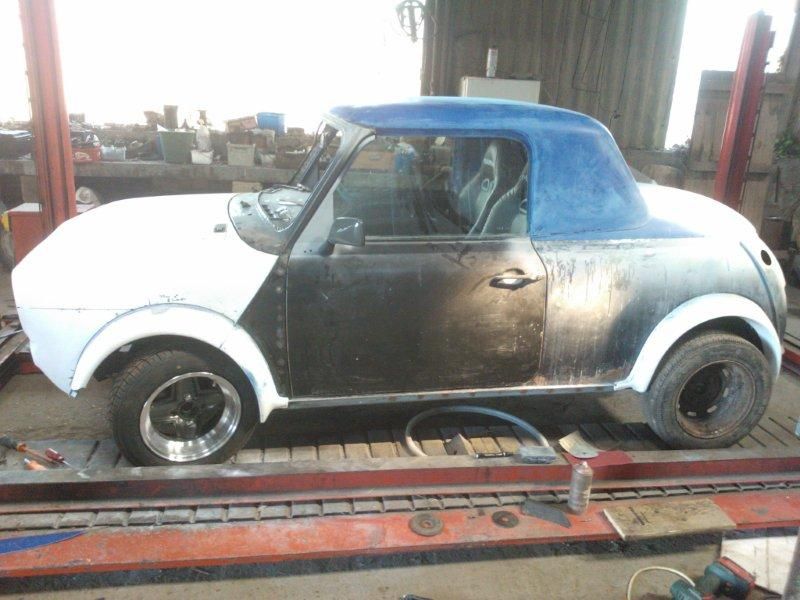
And this is what it looks like put all together, prior to the final coat of paint:
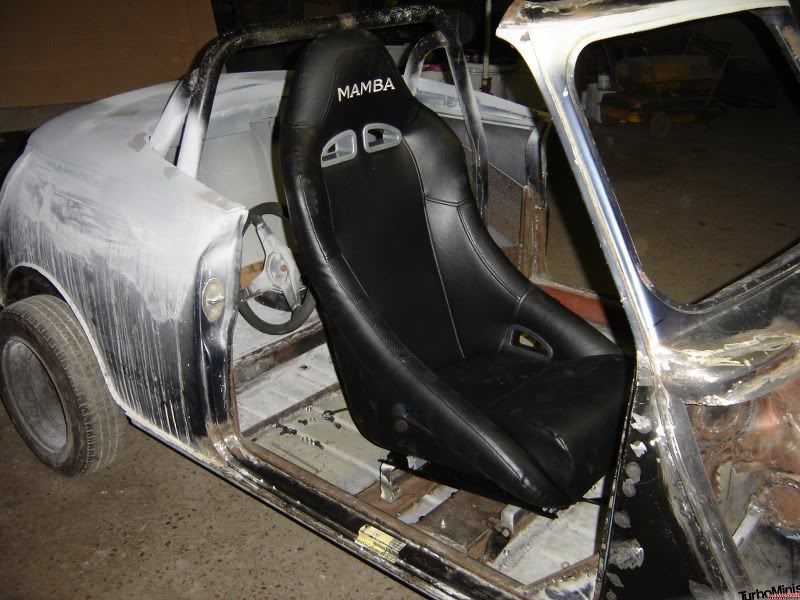
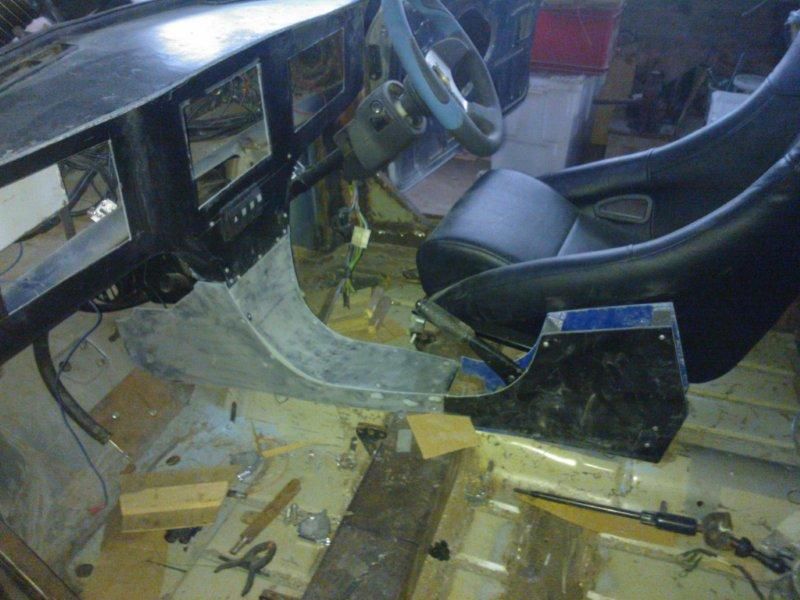
Seat mounting:
Edited by Graham T on 21st Jan, 2013.
’77 Clubman build thread
http://www.turbominis.co.uk/forums/index.php?p=vt&tid=618189
Siamese 5 port EFI testing
http://www.turbominis.co.uk/forums/index.php?p=vt&tid=611675
|
Graham T
608 Posts
Member #: 1106
Post Whore
Hungerford, Berks
|
|
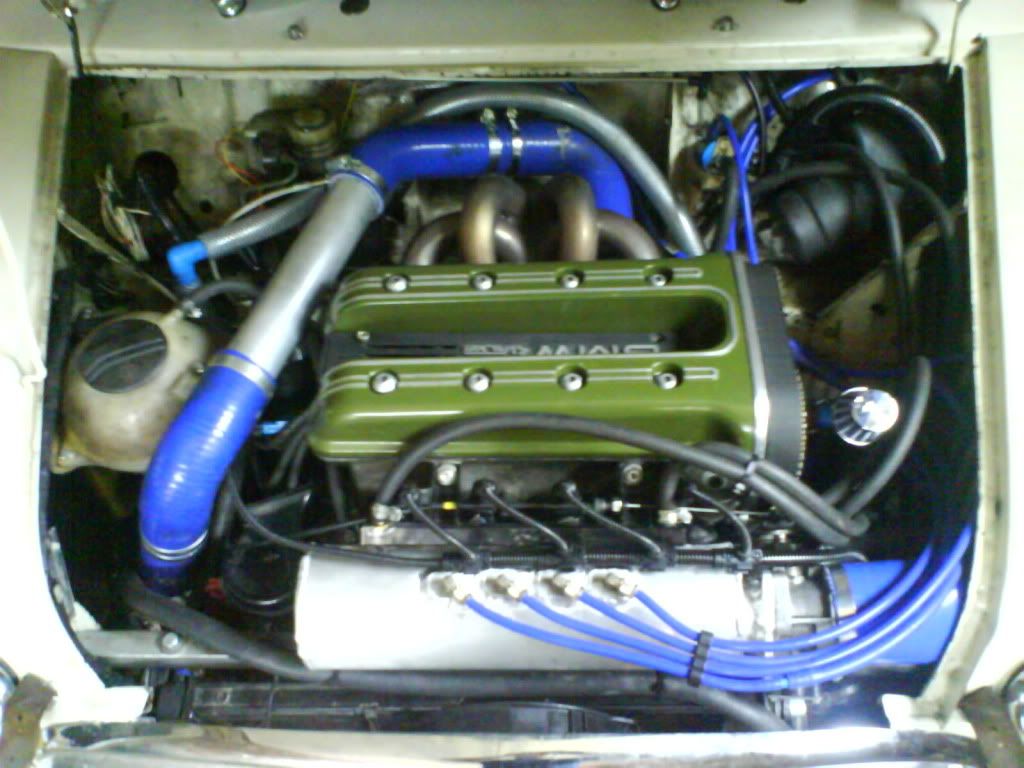
With 90% of the welding on the shell completed and the bungs made for the rear panel and the hardtop, work again started on the engine.
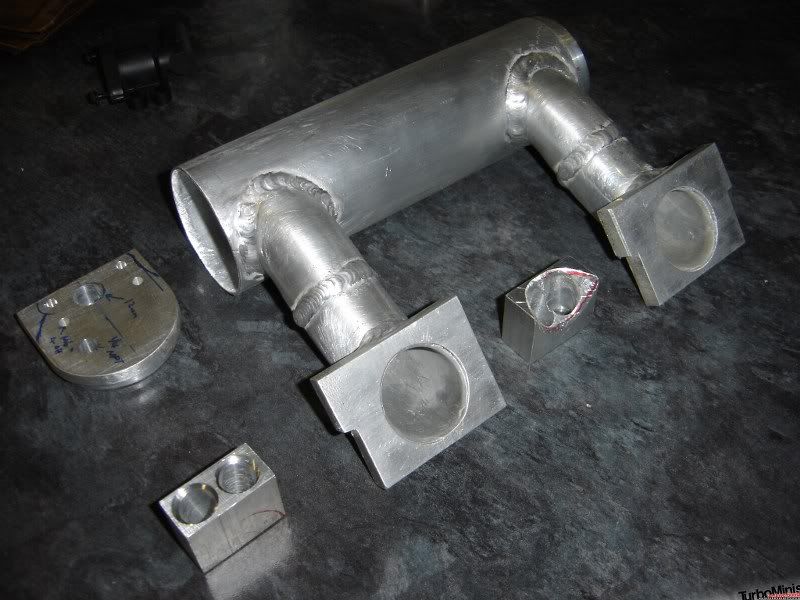
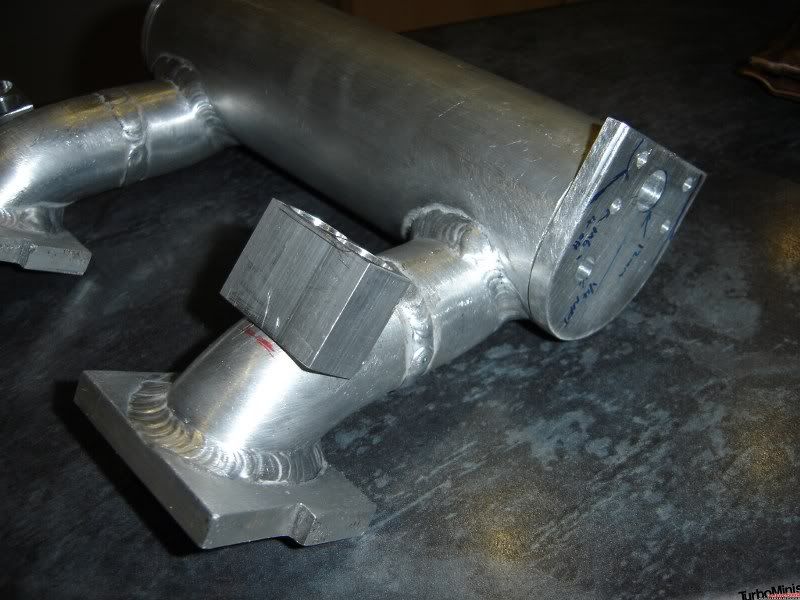
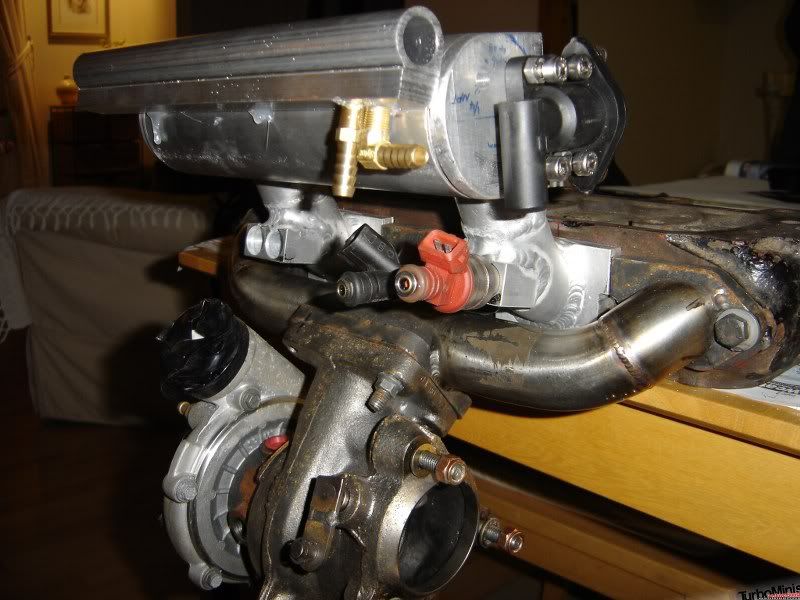
Work on the engine has been on and off during the last year, predominantly centred around the inlet manifold for the injection.
More in depth details about the inlet manifold can be found on this thread:
http://www.turbominis.co.uk/forums/index.php?p=vt&tid=415626
but here are a few pictures of the components making up the manifold:

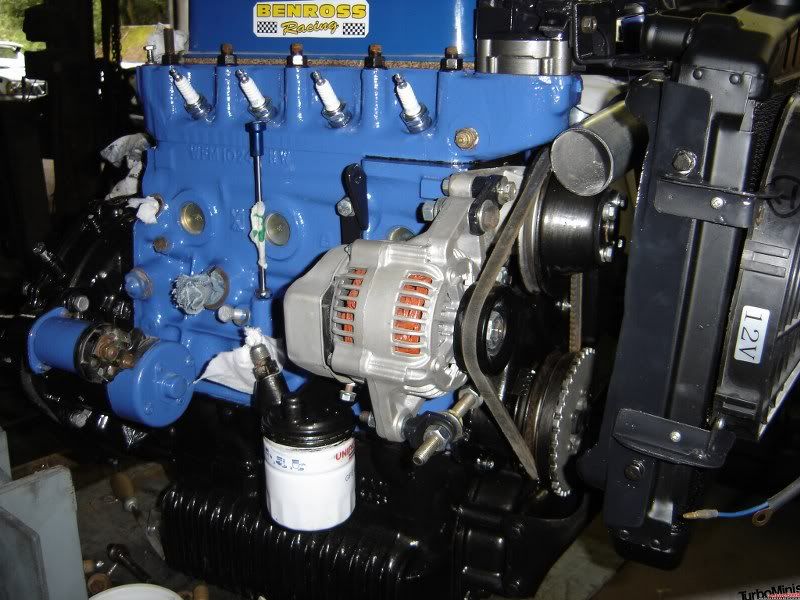
With the engine in the car, all the engine components and brackets and mountings were made.
The front subframe removed, and the downpipe test fitted.
Once I was happy with the basic fitting the Engine was removed from the subframe ready for final build.
Nippon denso alternator and VR sensor mounting:
Lambda sensor sample chambers and pipe work
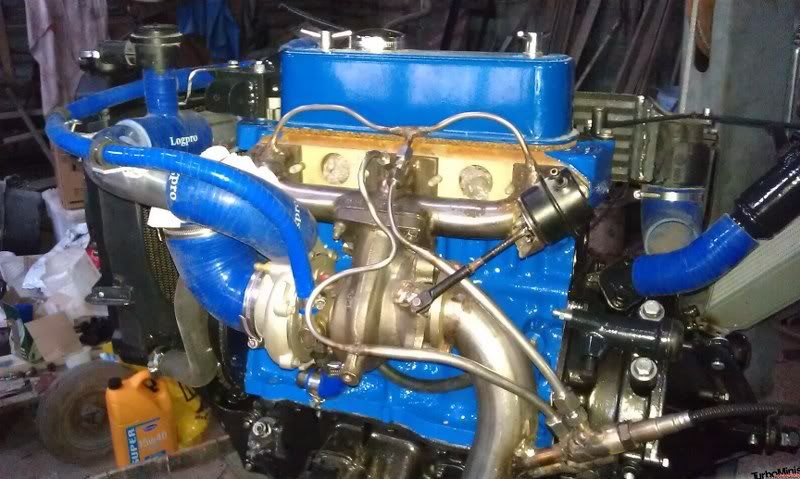
Final fitment of manifolds
Secondary trigger housing:
ECU wiring loom and fuse/ relay board

ECU wiring loom engine bay connectors
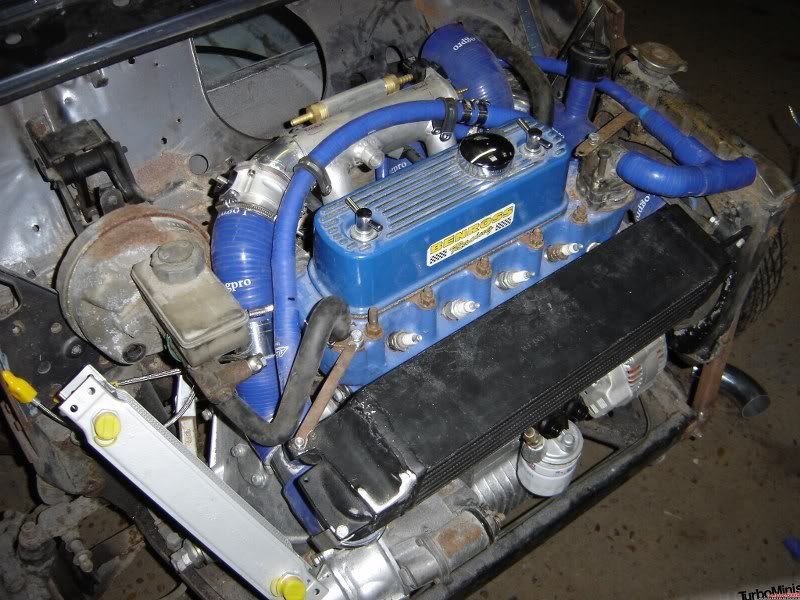
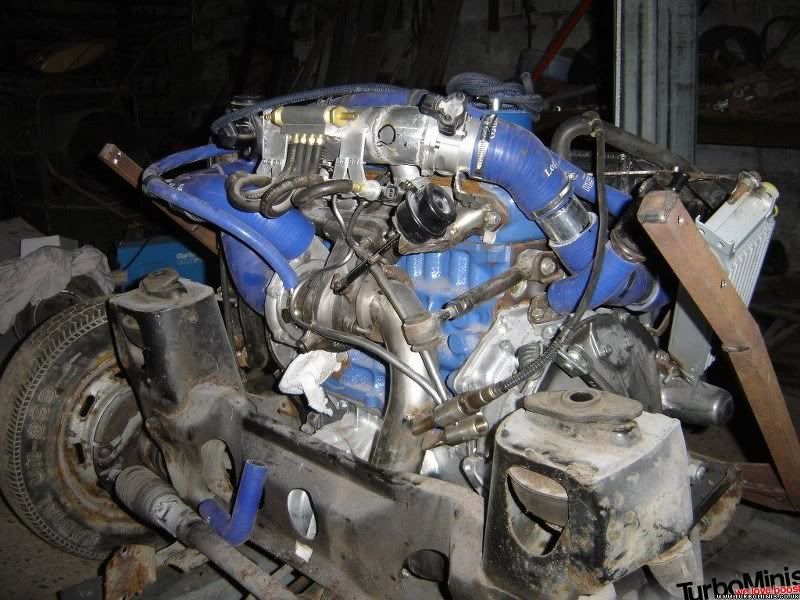
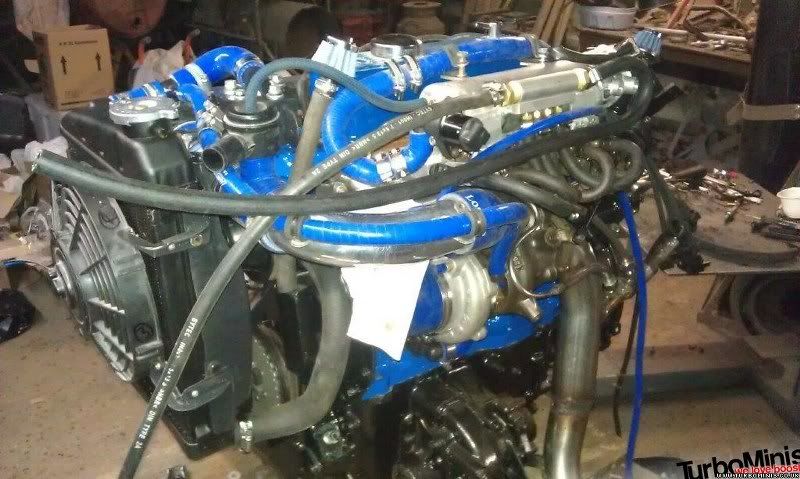
Completed engine build, less wiring
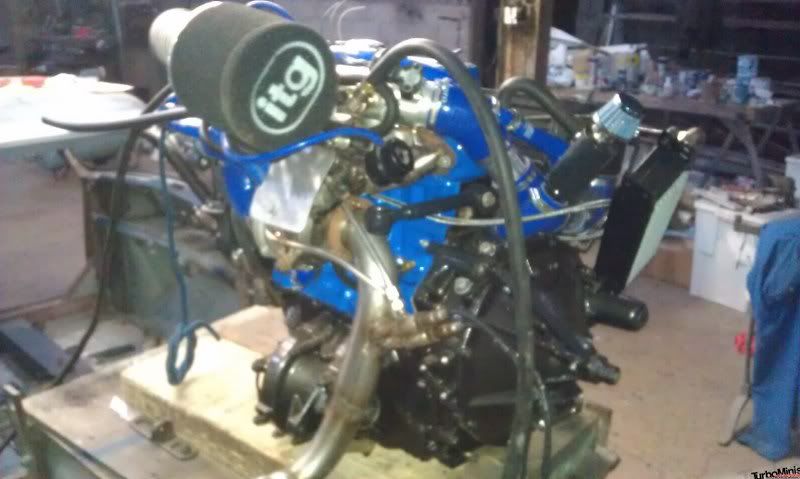
Fitment in the subframe for startup and testing.
And that brings me up to date with the build so far.
There is still a long way to go, but with the engine fitted and started up I can final get on with the rest of the build.
Edited by Graham T on 21st Jan, 2013.
’77 Clubman build thread
http://www.turbominis.co.uk/forums/index.php?p=vt&tid=618189
Siamese 5 port EFI testing
http://www.turbominis.co.uk/forums/index.php?p=vt&tid=611675
|
matty
8297 Posts
Member #: 408
Turbo Love Palace Fool
Aylesbury
|
|
Nice work!
Just out of interest, what did you use as a releasing agent?
https://www.facebook.com/pages/Fusion-Fabri..._homepage_panel
www.fusionfabs.co.uk

1/4mile in 13.2sec @ 111 terminal on 15psi
|
Graham T
608 Posts
Member #: 1106
Post Whore
Hungerford, Berks
|
|
Thanks matty, just loads of bee's wax to polish then a PVC release agent.
’77 Clubman build thread
http://www.turbominis.co.uk/forums/index.php?p=vt&tid=618189
Siamese 5 port EFI testing
http://www.turbominis.co.uk/forums/index.php?p=vt&tid=611675
|
apbellamy

16540 Posts
Member #: 4241
King Gaycharger, butt plug dealer, Sheldon Cooper and a BAC but generally a niceish fella if you dont mind a northerner
Rotherham, South Yorkshire
|
|
good skills
On 11th Feb, 2015 robert said:
i tried putting soap on it , and heating it to brown , then slathered my new lube on it

|
kcchan
264 Posts
Member #: 8853
Senior Member
Bristol
|
|
Nice to see something different.
Good work on the efi too!
|
mw3
684 Posts
Member #: 9590
Post Whore
Derby
|
|
I dont usually like stuff like this but it looks wicked! Great job, i love the roll bar at the back of the seats
Matt W
On 14th Mar, 2012 mw3 said:
Got a nice big delivery from Carl at Force Racing today.
|
Wile E. Coyote

481 Posts
Member #: 7893
Senior Member
Portsmouth
|
|
Some Great fabrication work there ! great stuff !
My 79 Clubman Build Thread - http://www.turbominis.co.uk/forums/index.php?p=vt&tid=451008
Jamie.
|
wolfie

8215 Posts
Member #: 90
Post Whore
Somewhere around Swindon
|
|
Good skills!
Looks like Tony Pikies old car
Crystal Sound Audio said:
Why wolfie...you should have your name as Fuckfaceshithead !
"A common mistake that people make when trying to design something completely
foolproof is to underestimate the ingenuity of complete fools."-Douglas Adams
|
dig-mini
478 Posts
Member #: 9269
Senior Member
Rotherham
|
|
SHOULD LOOK THE BIZZ WHEN YOU'VE DONE
Craig
my mini van http://www.turbominis.co.uk/forums/index.php?p=vt&tid=448248
|
Advantage

1137 Posts
Member #: 1450
Post Whore
Near Paris - France
|
|
That's nice (and makes me want a convertible / roadster)
Rusty by nature
On 23rd Jun, 2008 paul wiginton said:
They said "That sounds rough mate." I said "Cheers it cost me a fortune to make it sound like that!"
|
Graham T
608 Posts
Member #: 1106
Post Whore
Hungerford, Berks
|
|
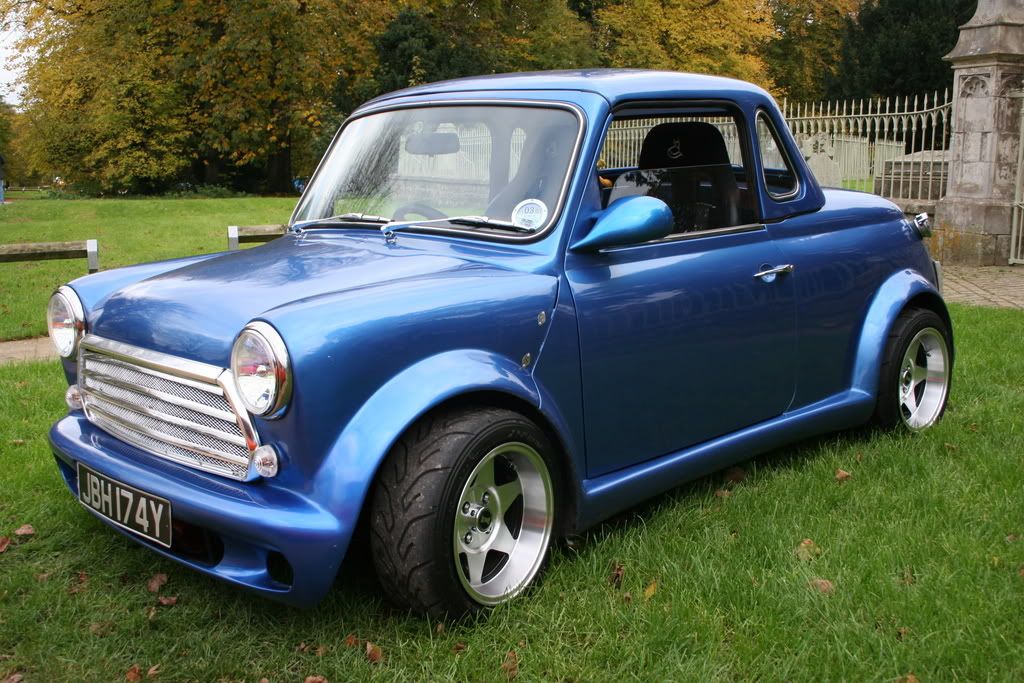
On 4th Dec, 2011 wolfie said:
Good skills!
Looks like Tony Pikies old car
I'm not sure, but I think this is the car I took a good look around 3 - 4 years ago when I was deciding what to do. The top was off when I saw it, so I could not visualize it completely.
The one major difference will be that I will have no chrome on show - Mine will be solid Tahiti blue with anthracite trims.
I remember the guy saying he was an apprentice coach builder when he built this. May not be the same guy/ car though...
’77 Clubman build thread
http://www.turbominis.co.uk/forums/index.php?p=vt&tid=618189
Siamese 5 port EFI testing
http://www.turbominis.co.uk/forums/index.php?p=vt&tid=611675
|
wolfie
8215 Posts
Member #: 90
Post Whore
Somewhere around Swindon
|
|
yep same car
Tony and his ex Emma bought it from a guy who build it as part of his university degree they would have had it 3-4 years ago
Crystal Sound Audio said:
Why wolfie...you should have your name as Fuckfaceshithead !
"A common mistake that people make when trying to design something completely
foolproof is to underestimate the ingenuity of complete fools."-Douglas Adams
|
Graham T
608 Posts
Member #: 1106
Post Whore
Hungerford, Berks
|
|
well, I just hope I can get the build quality of mine somewhere near as good as I remember that being.
’77 Clubman build thread
http://www.turbominis.co.uk/forums/index.php?p=vt&tid=618189
Siamese 5 port EFI testing
http://www.turbominis.co.uk/forums/index.php?p=vt&tid=611675
|
Graham T
608 Posts
Member #: 1106
Post Whore
Hungerford, Berks
|
|
It’s been well over a year since I updated this build thread and it sometimes feels like I have not actually made any progress in the build.
To be fair I’m nowhere near as far on in the build as I had hoped. But looking back through, I’m actually surprised at how far on I actually am.
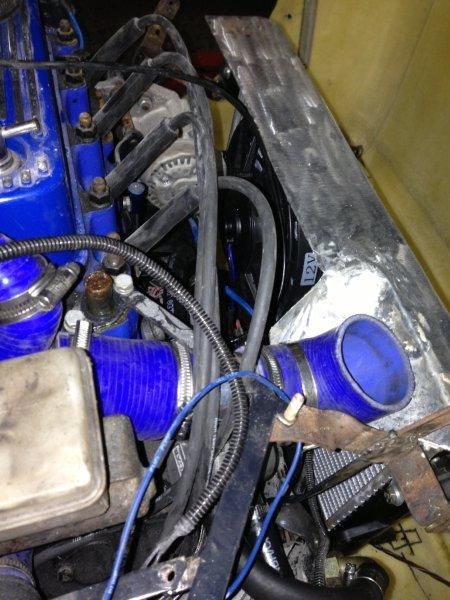
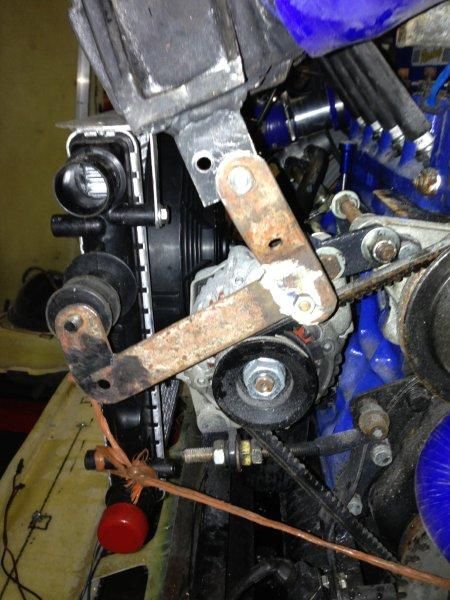
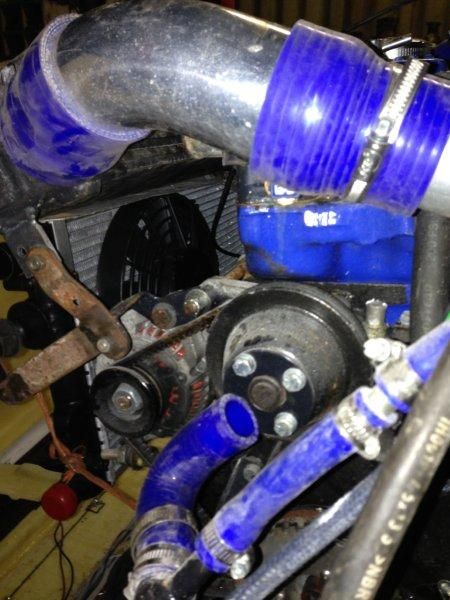
There have been a couple of significant changes in the project over the last year – mainly the change from a round nose front to a Clubman front and also I have changed the engine bay around somewhat to remove the side mount Radiator and install a front mounted radiator.
So just a small selection of pictures from the last year’s efforts:
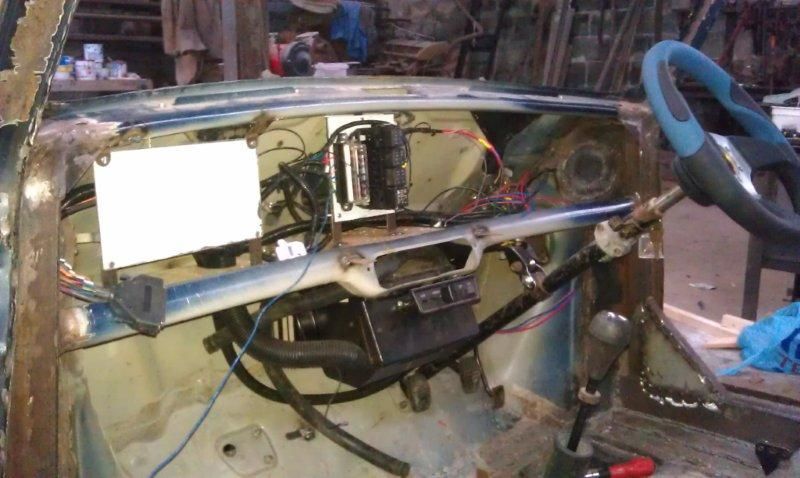
Fuse/ relay board, MS2 and IOx, plus Alarm mountings fixed int eh front pacel shelf.
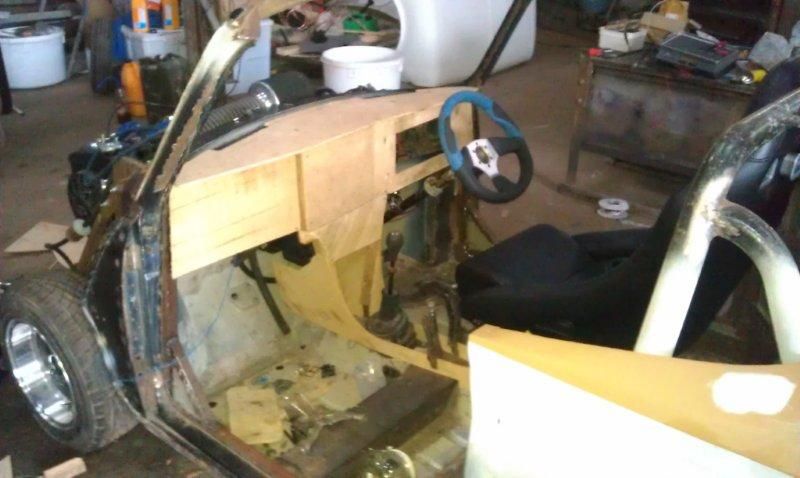
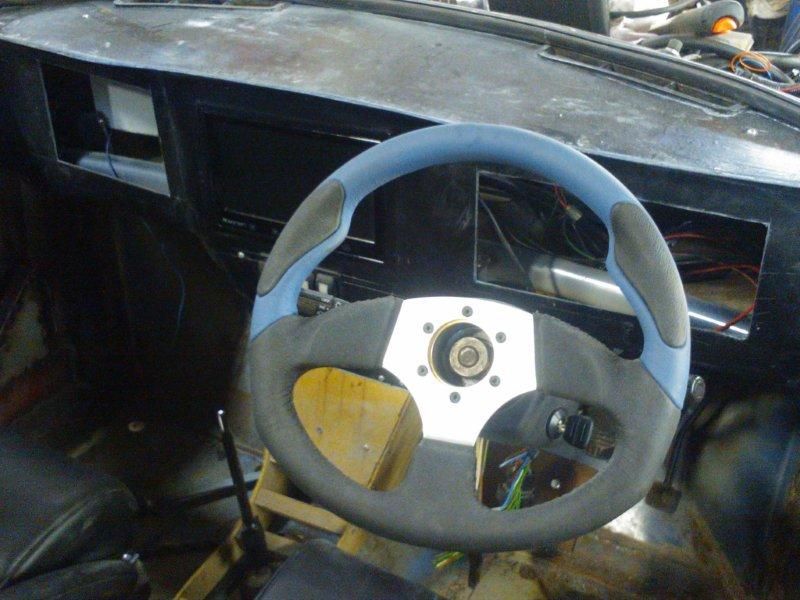
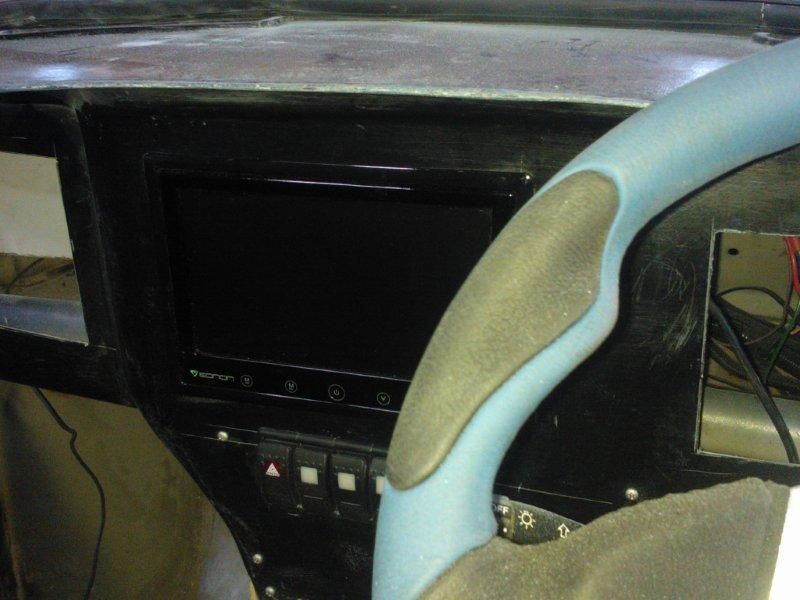
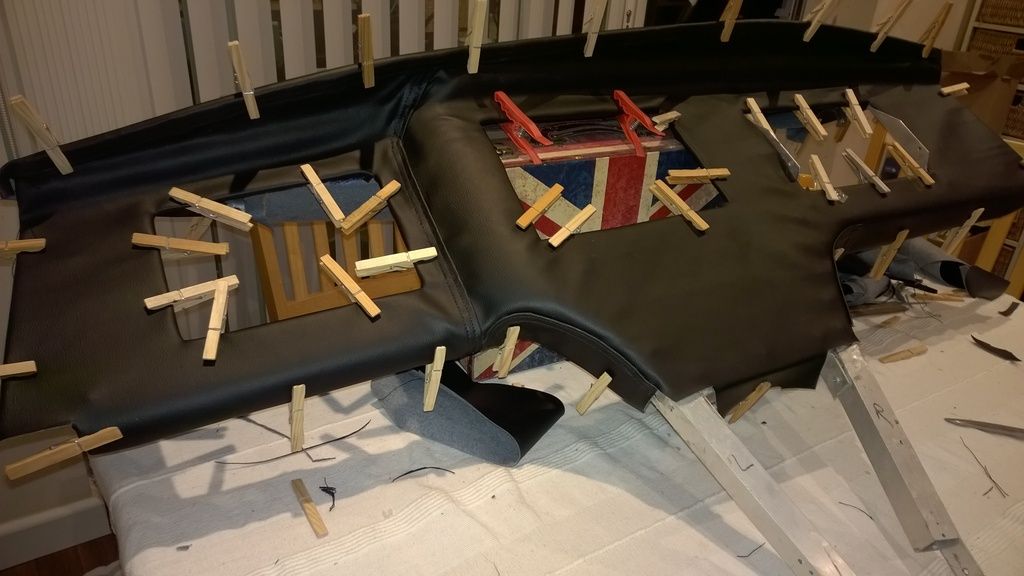
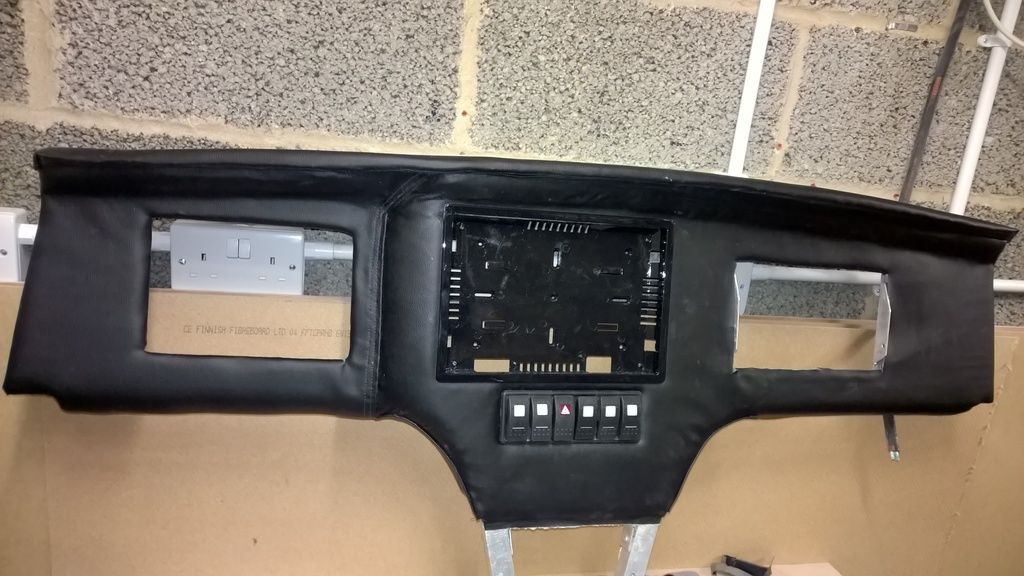
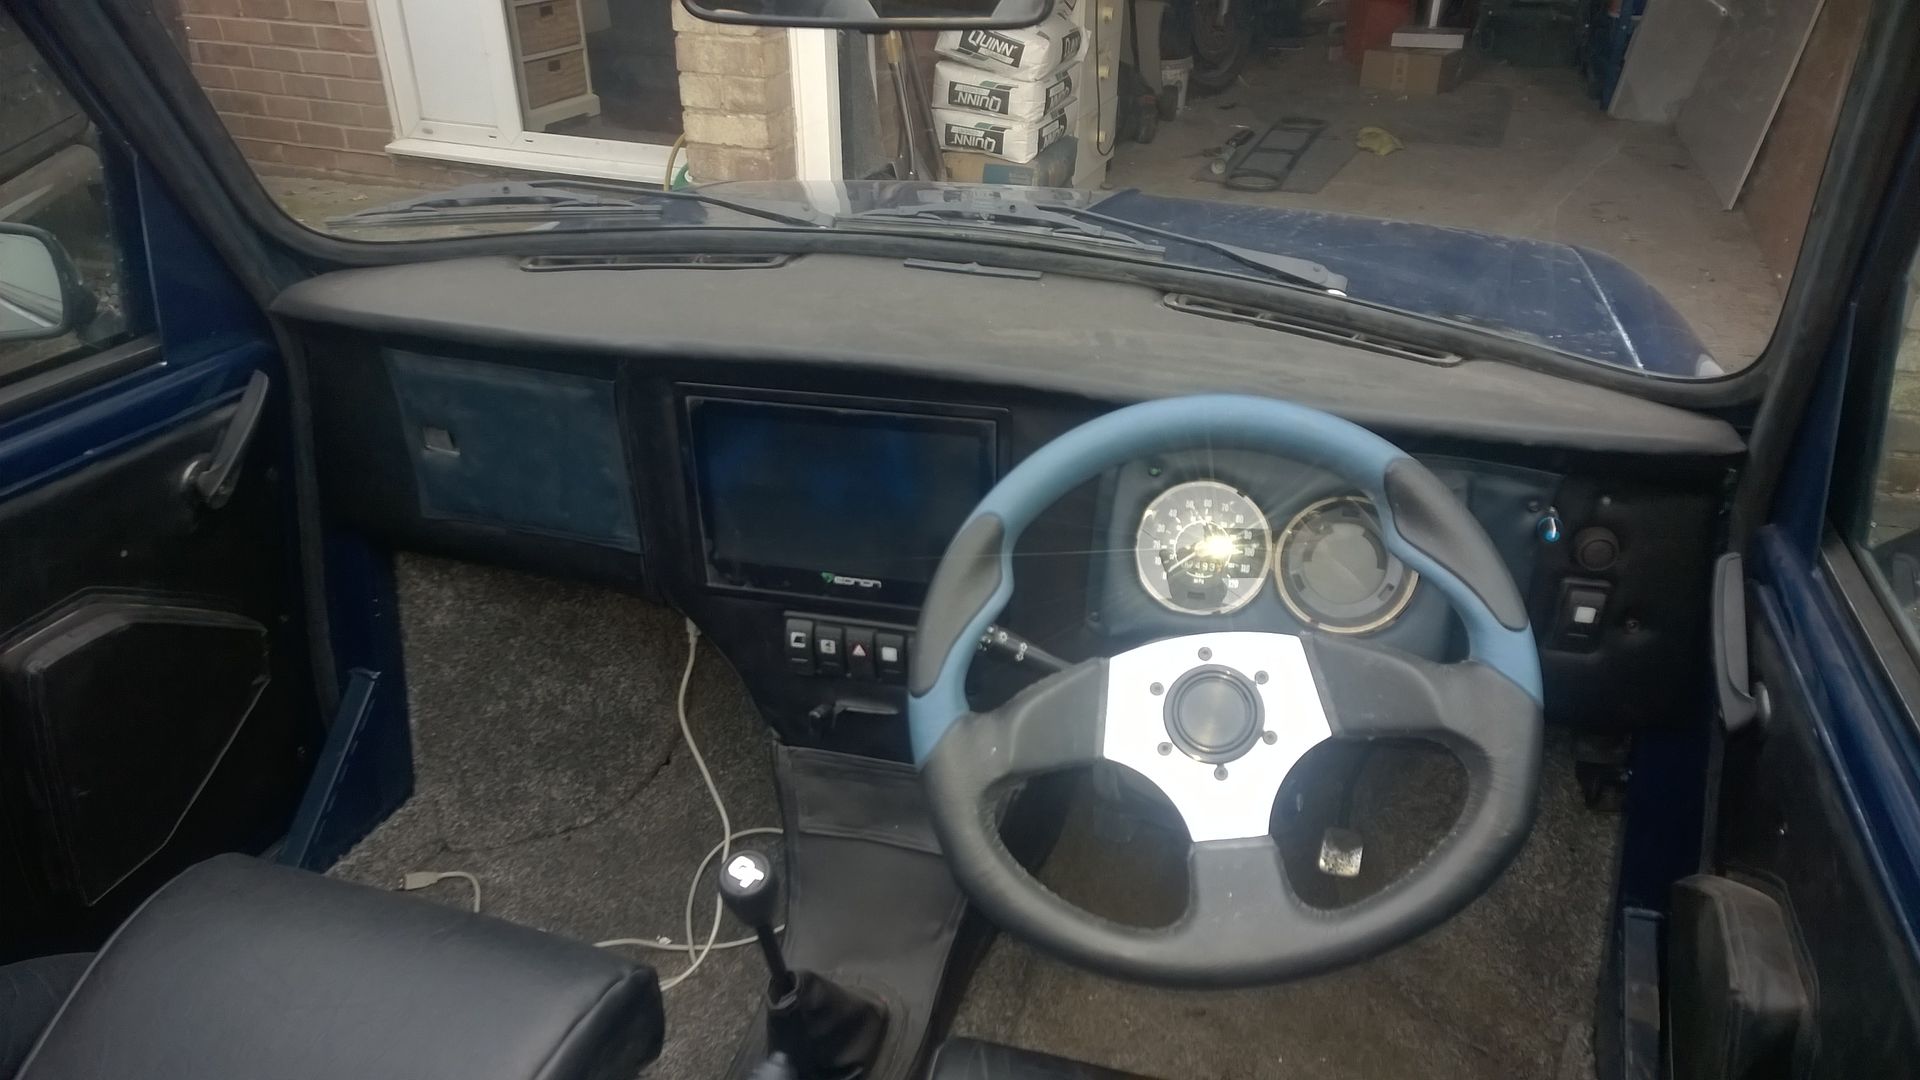
The wooden mock up for the dashboard and centre console:
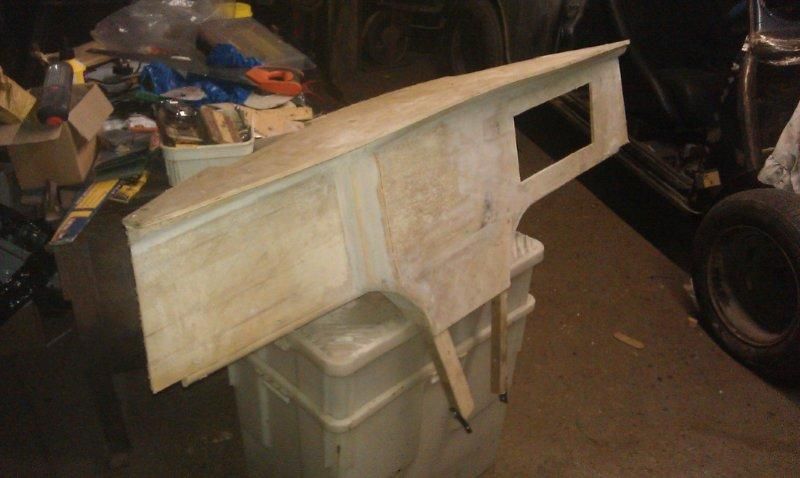
Which was later used to make the moulds
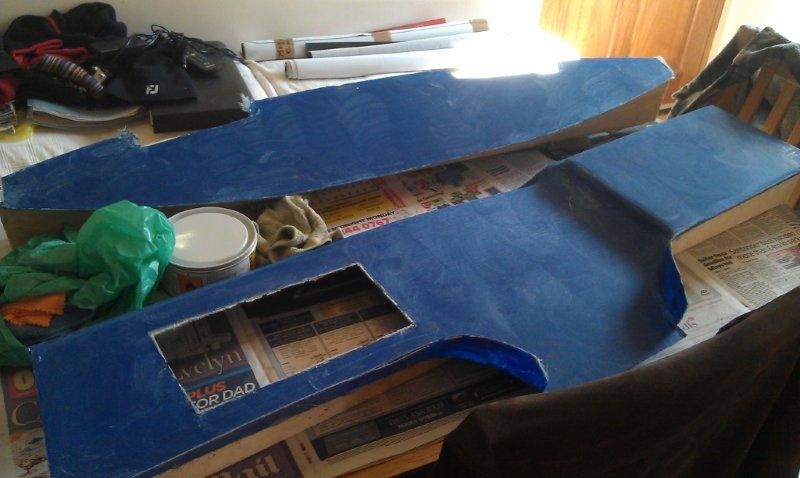
For the finished dashboard and centre console assemblies

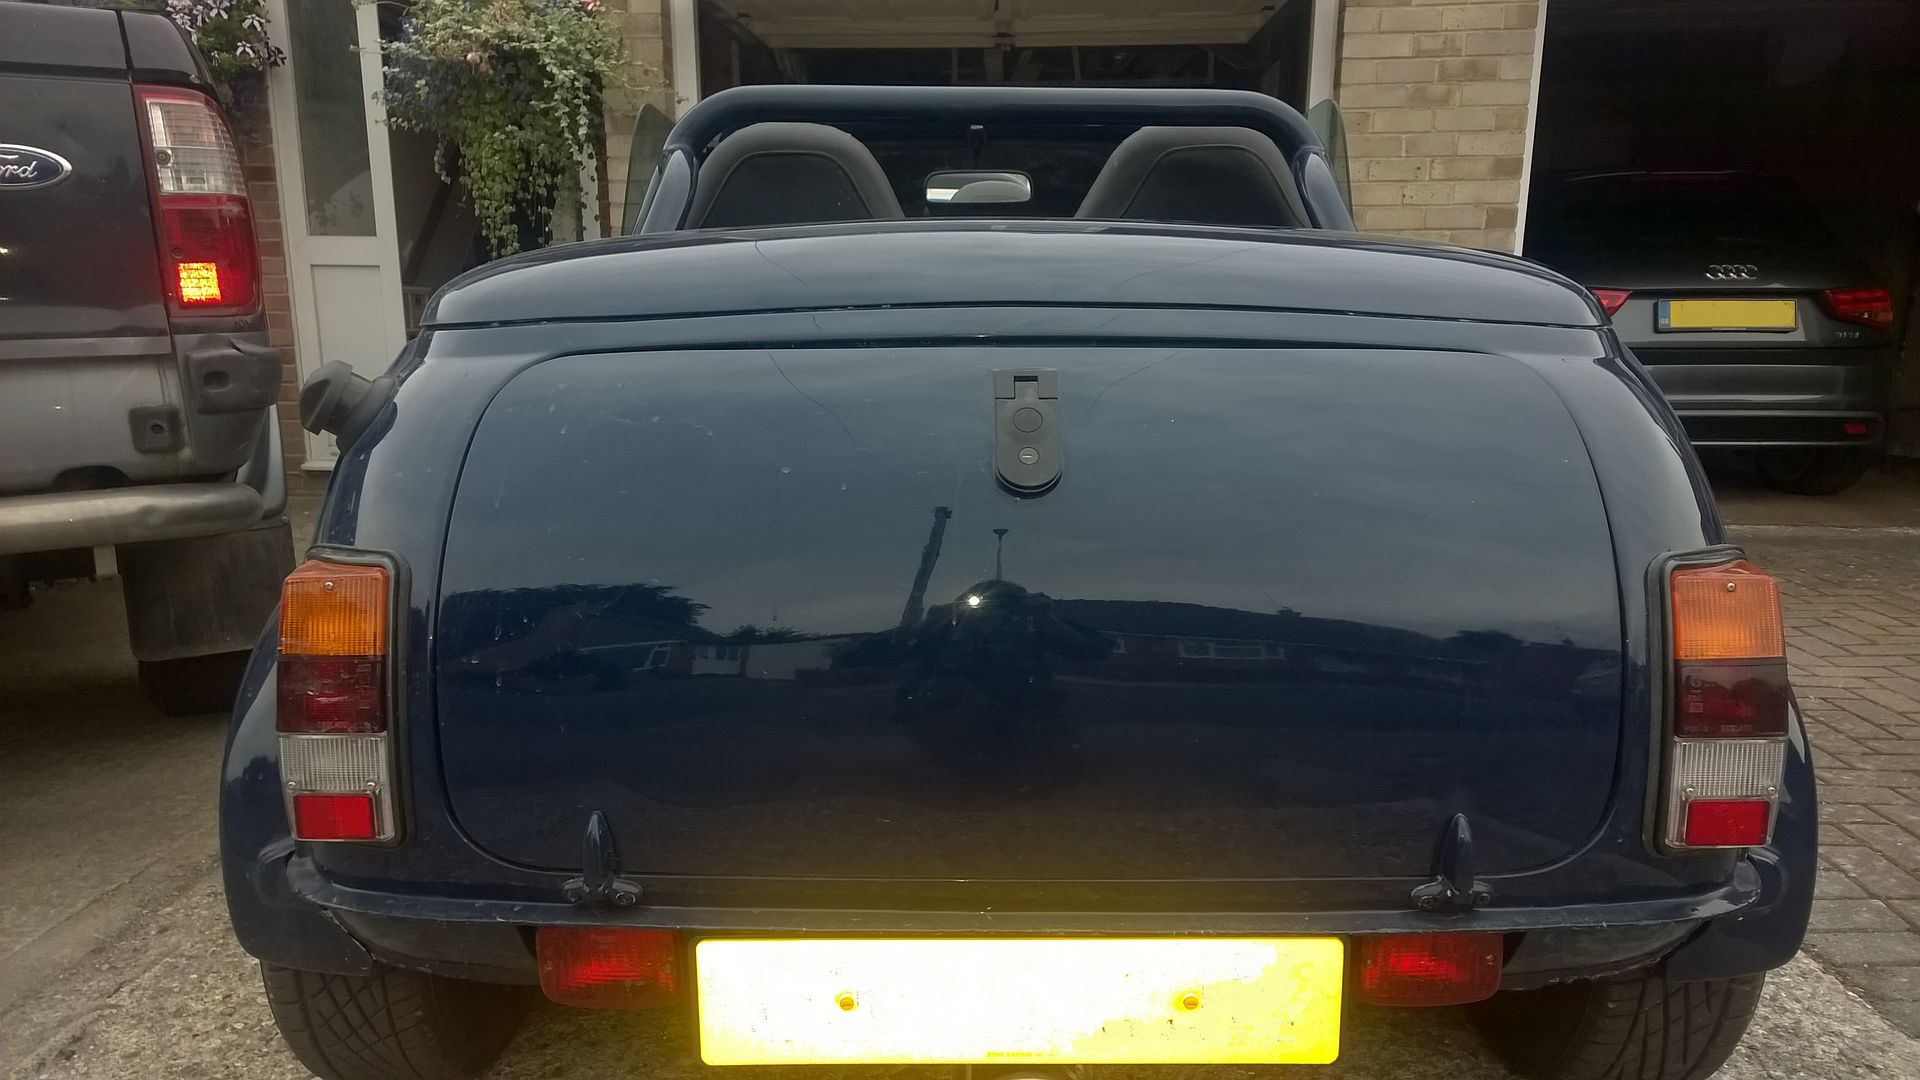
The final mould and finished piece for the new back section
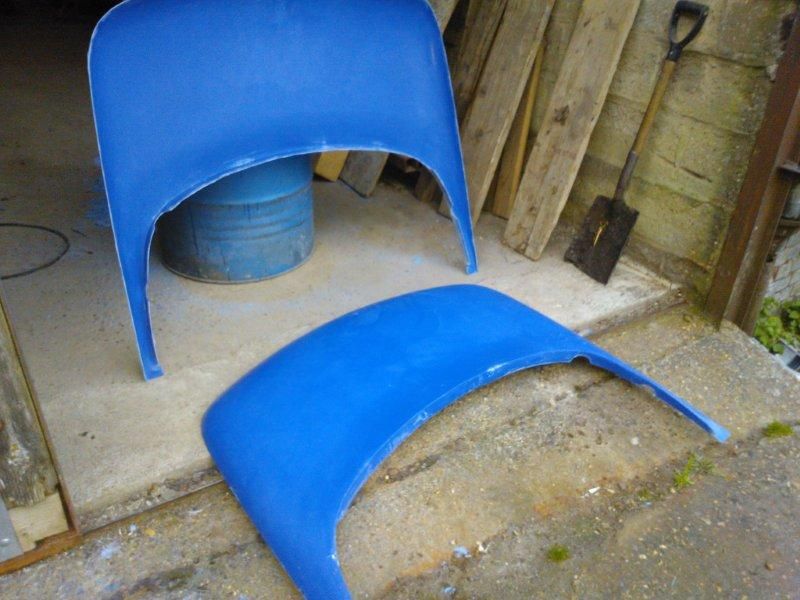
Hard top final Mould
And final hardtop shell

After I had the hardtop and rear section moulded in an place finishing the hardtop and fitting to the rear section was a complete nightmare, but the finished fit is good.
There is a rubber seal fitted to the underside of the hardtop “return” which seals against the rear section, and in turn the rear section is sealed against the body with another rubber seal – hopefully no leaks…
There are 4 over centre catches securing the hardtop to the rear section and a further 2 at the front of the hardtop securing it to the headrail.
The hardtop shell has also been reinforced with U section aluminium and fibreglass across its width, with steel reinforcement around the door rubber lip..
There is still a fair amount of “finishing” work left to do on the mouldings ready for painting, but the overall fitment and securing is completed.
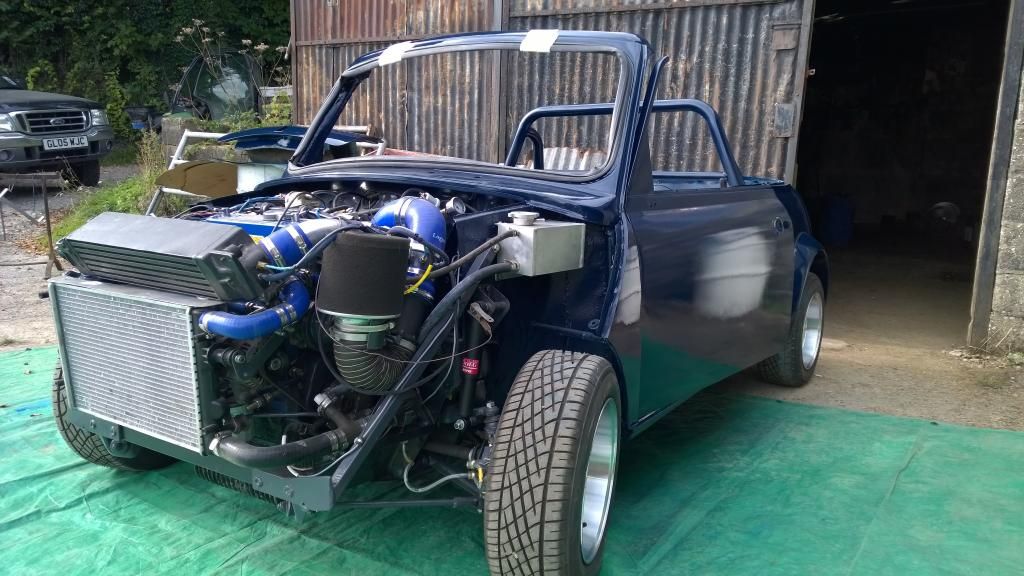
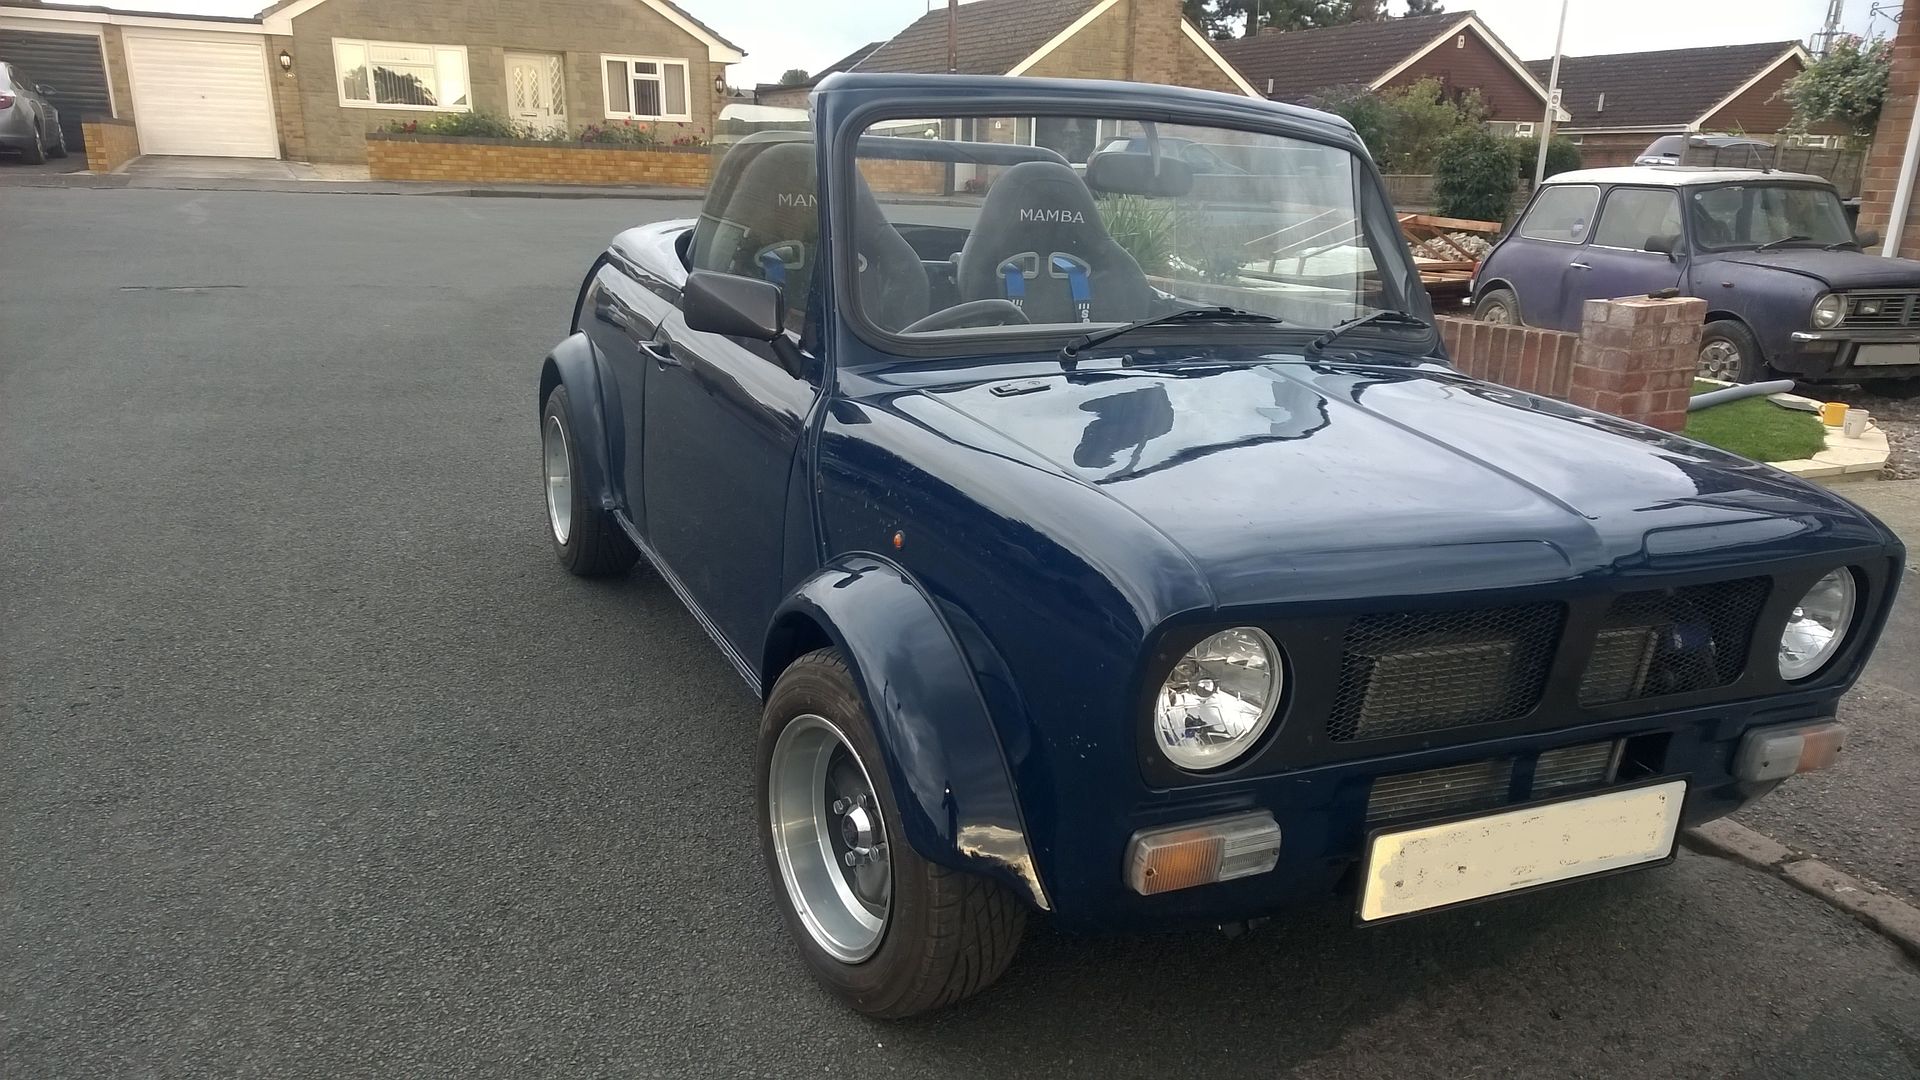
Fitting the fibreglass front end was as much of a pain as I thought it would be. I’m still not 100% happy with it at this point.
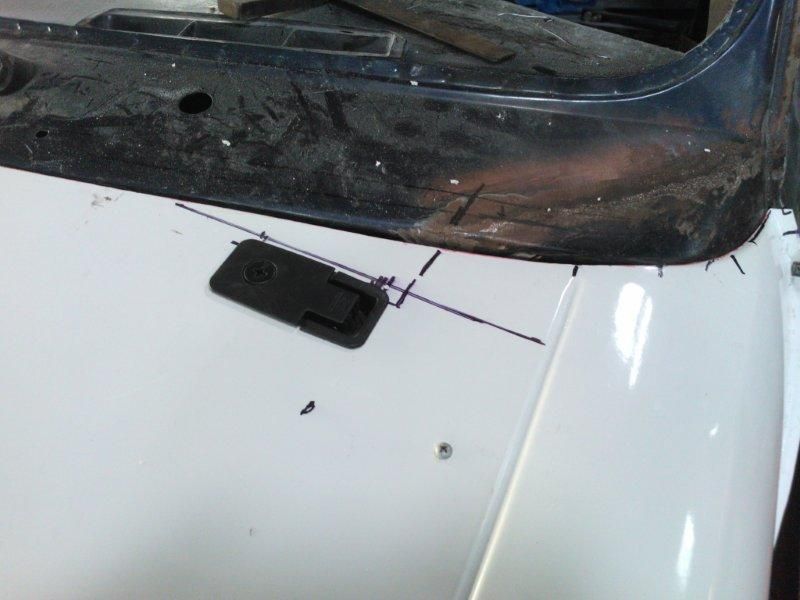
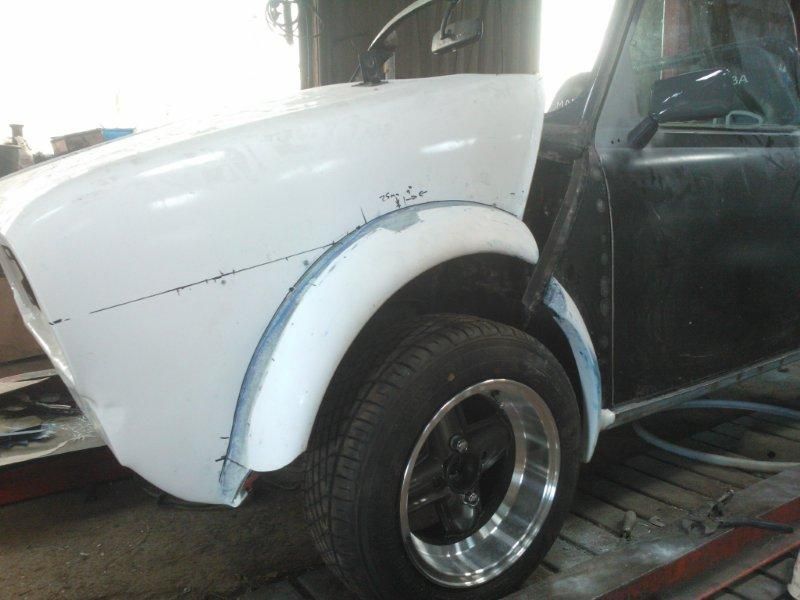
Another big problem I encountered was getting the arches to fit the wheels. Apart from the fact that they are a pretty bad fit in the first place, the fibreglass front curved inward on the wings, so that had to be strengthen to bring the wings back out to somewhere near where they should be.
Additionally the wheels I have seem to have an odd offset – Overall I had to build the arches out by a fair mount to adequately cover the tyre tread.
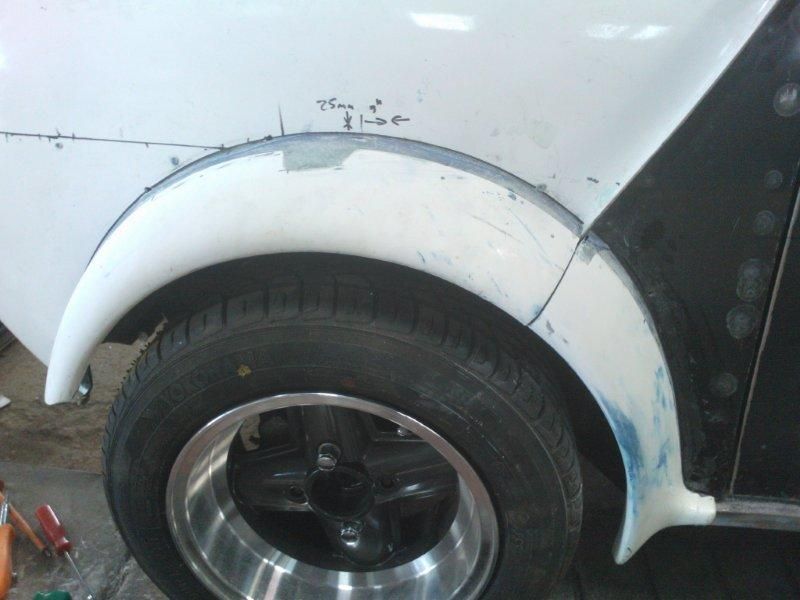
However, even with these problems, I’m, happy with the end result
Even with the fibreglass boot lid, fitting was not an easy job. The boot lid was actually warp and so took a lot of “gentle” persuasion to fit flush.
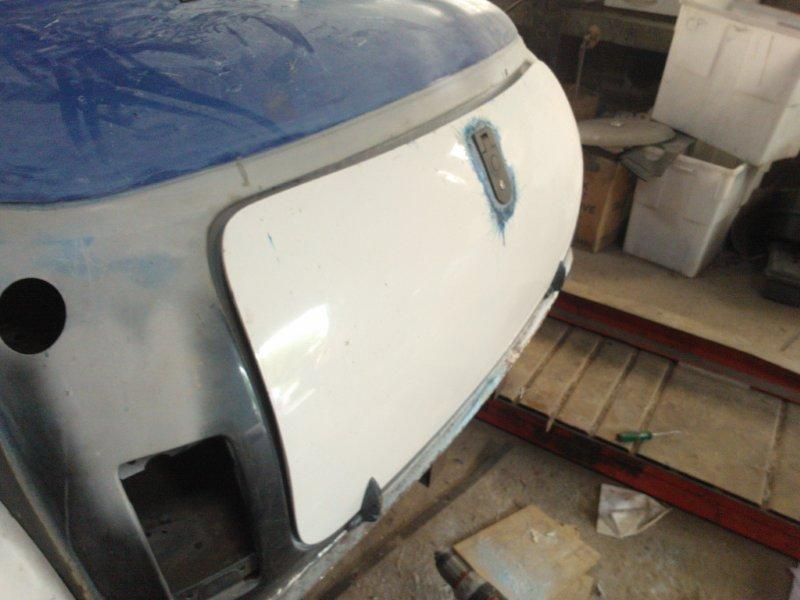
It’s still not ideal, so will need a bit more work to fit.
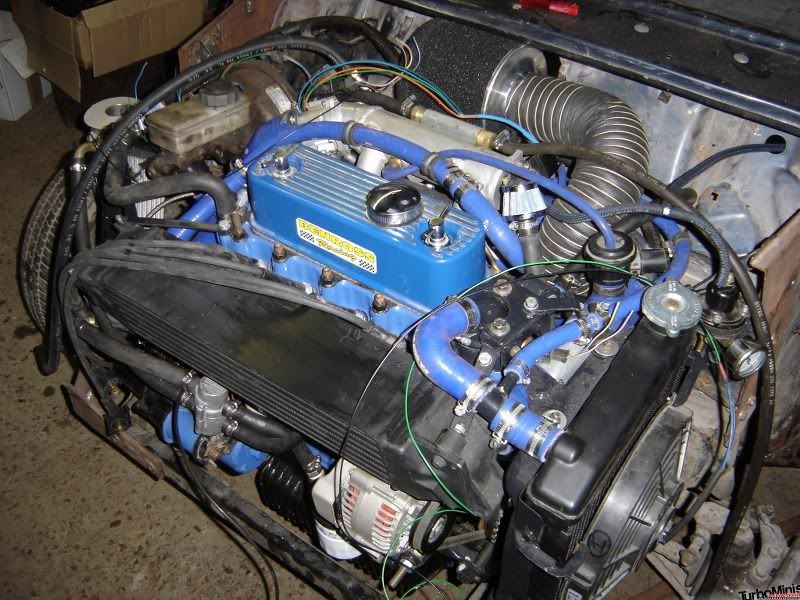
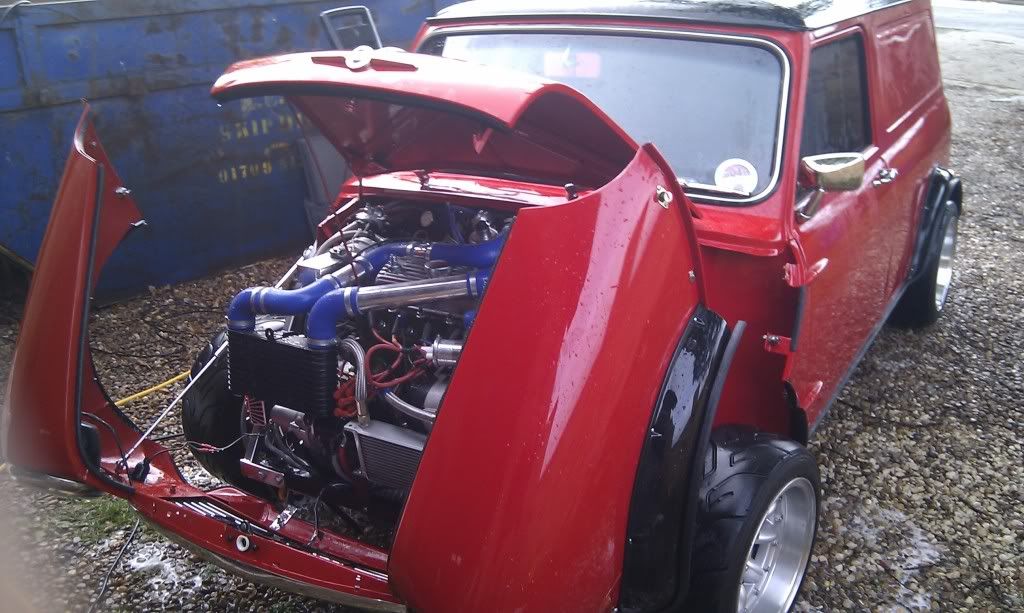
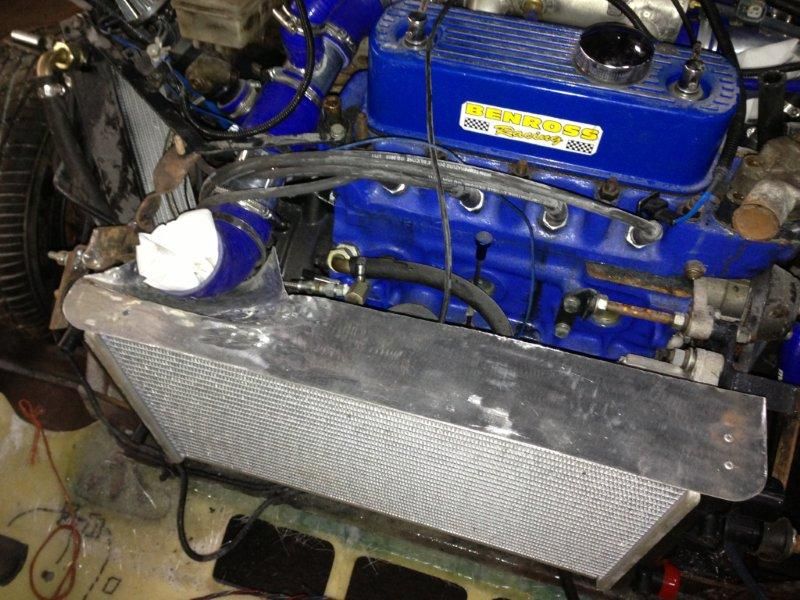
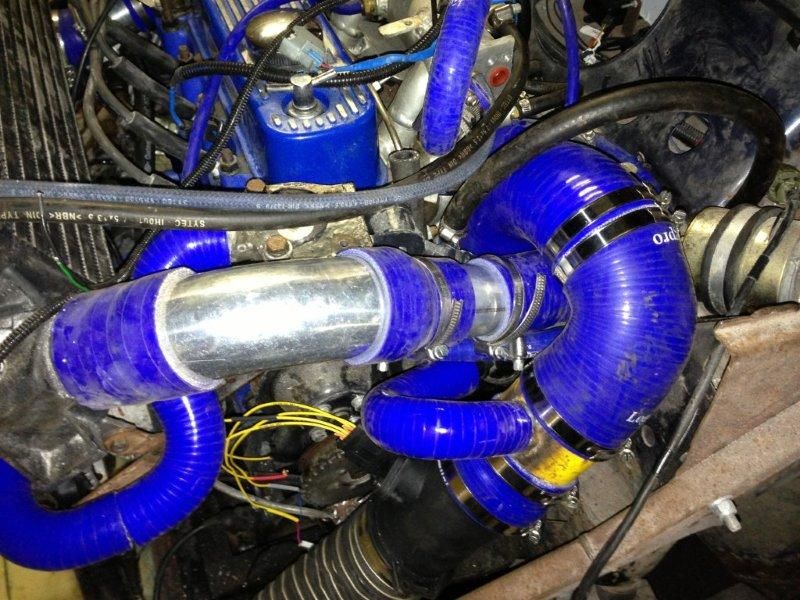
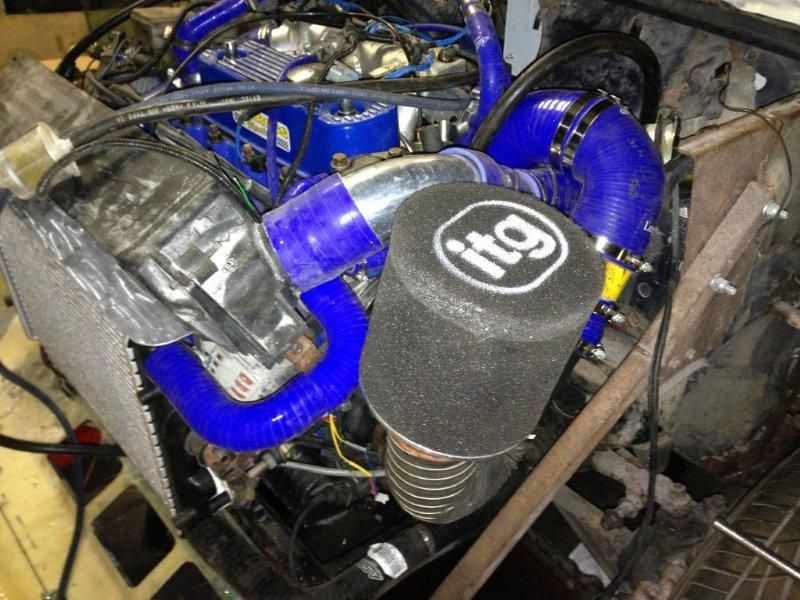
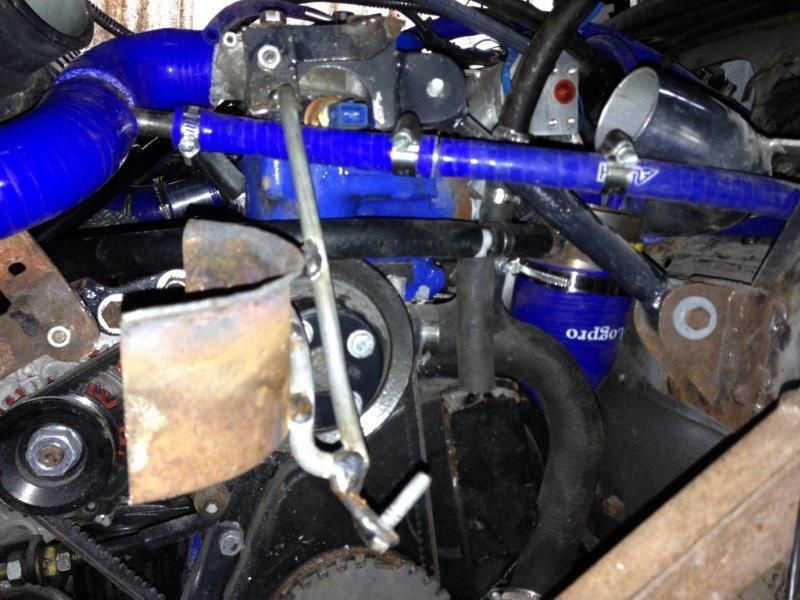
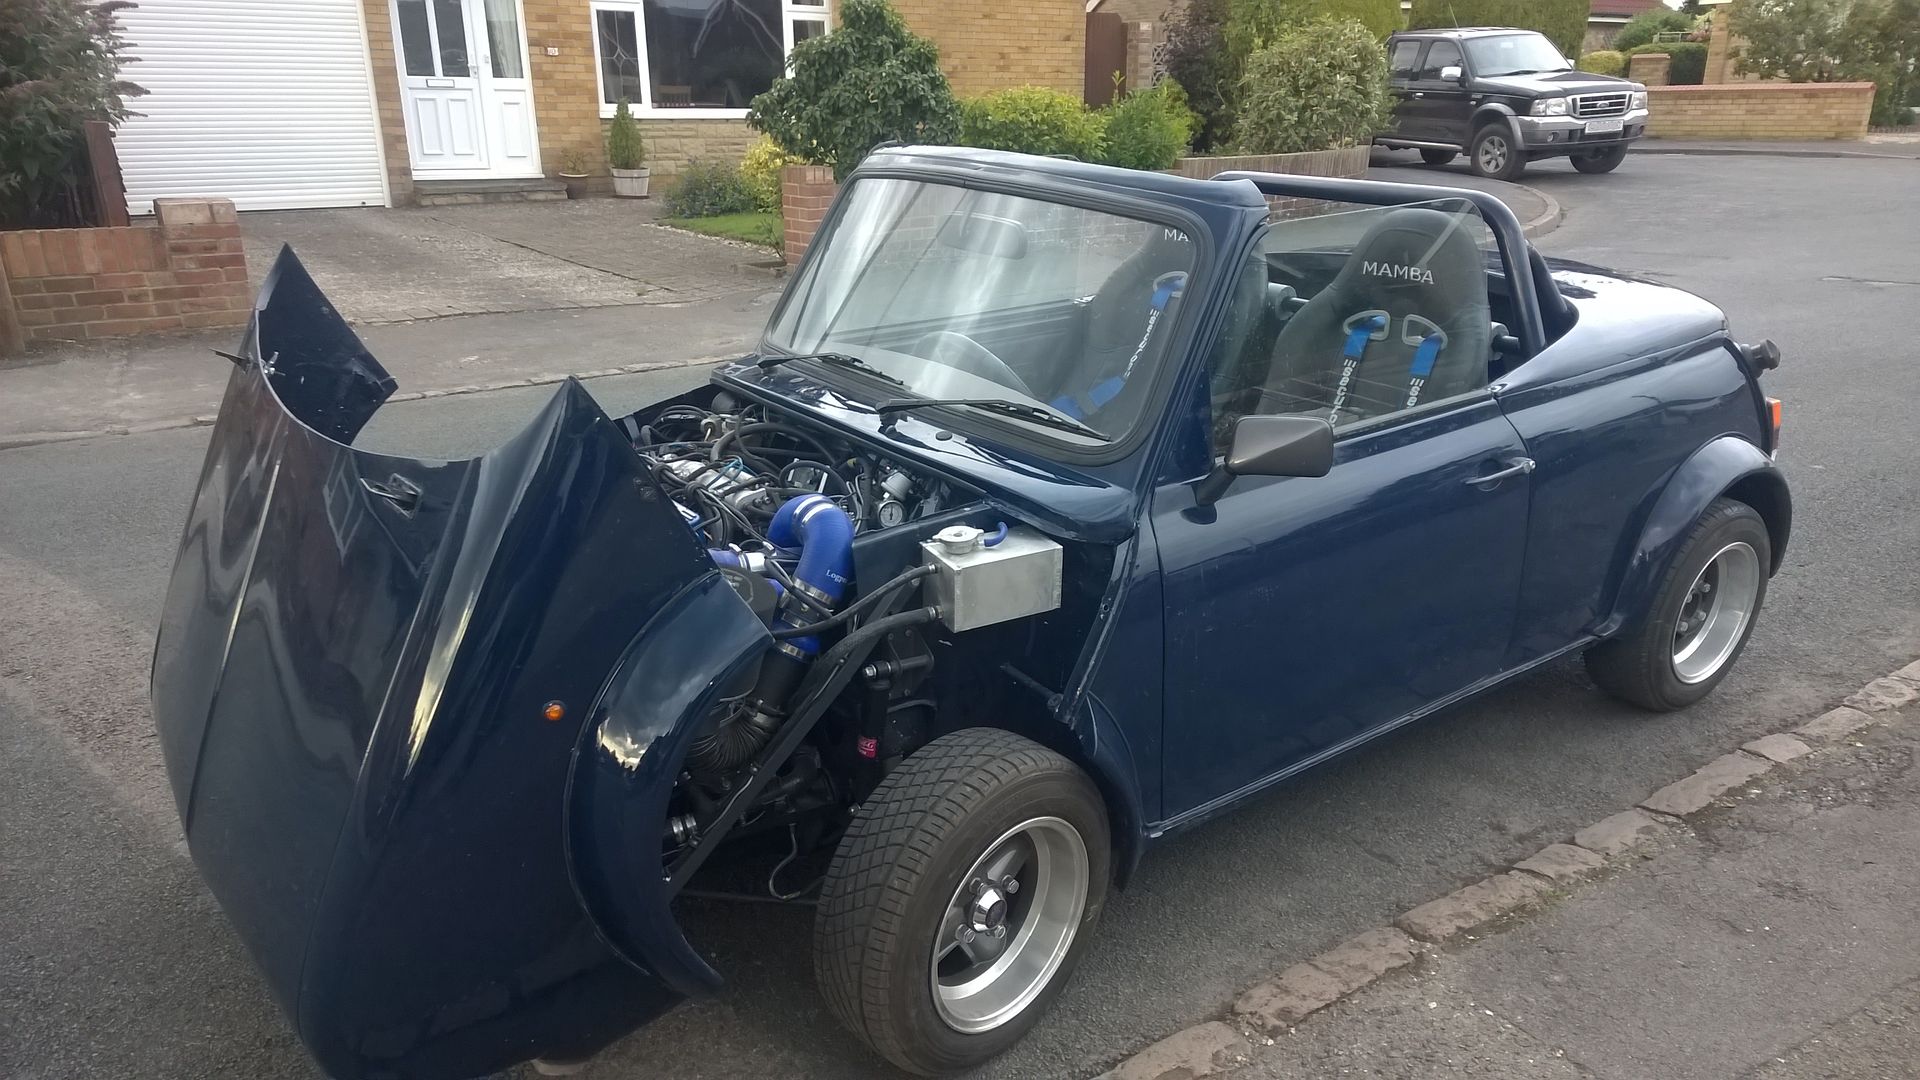
After a 4 month break from building the car, I got back into just before Christmas and decided a front mount rad was the way to go.
As I had not really thought about where the air filter would fit and with the addition of the MAF sensor, I thought this would help to make some space.


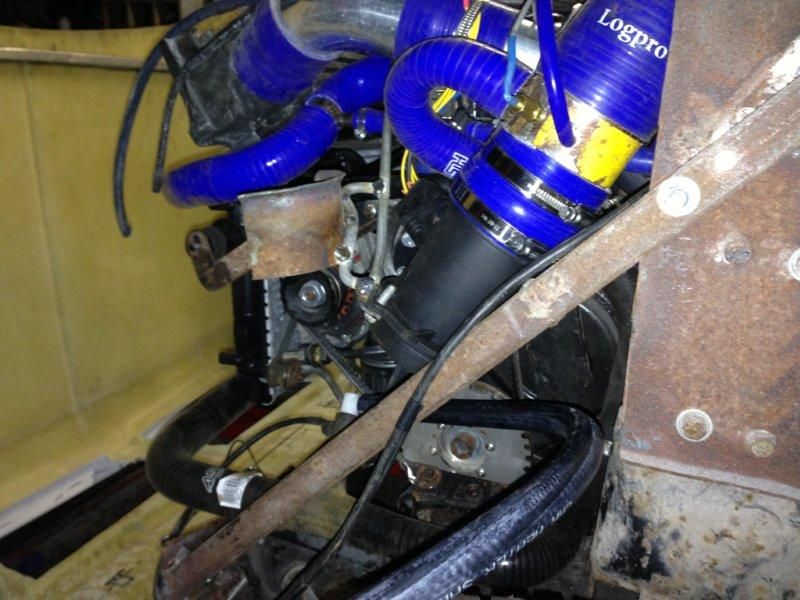
I think that the engine is ready to come back out of the car again now, so that we can get back to finishing the body work.
Hopefully, once it gets a bit warmer outside I can crack on a get it finished…
’77 Clubman build thread
http://www.turbominis.co.uk/forums/index.php?p=vt&tid=618189
Siamese 5 port EFI testing
http://www.turbominis.co.uk/forums/index.php?p=vt&tid=611675
|
kappa
882 Posts
Member #: 9854
Post Whore
Hounslow, Middlesex
|
|
Looks like a really good build mate
|
pinkyandnobrain
720 Posts
Member #: 2588
Post Whore
Pretoria South Africa
|
|
Reminds me alot of a '32 Ford Roadster Hotrod. The round arse and bubbly roof. Wonder what it would look like with the roof chopped ?
Stacks of work has gone it to this and it looks cool, weldone
"So wat we gonna do tonight Brain?"
"Same thing we do evernight Pinky!"
"Try to take over the world!"
|
Graham T
608 Posts
Member #: 1106
Post Whore
Hungerford, Berks
|
|
And so, another 6 months goes by depressingly quickly…
I had hoped to have the Roadster built on the road and ready for MITP, however, that’s an impossibility at this point – still there’s always MITP 2014, or maybe Castle combe this year.
Anyhow, a few pictures of the last 6 months work, starting with a complete strip down and shot blasting.
Before:
During:
After:
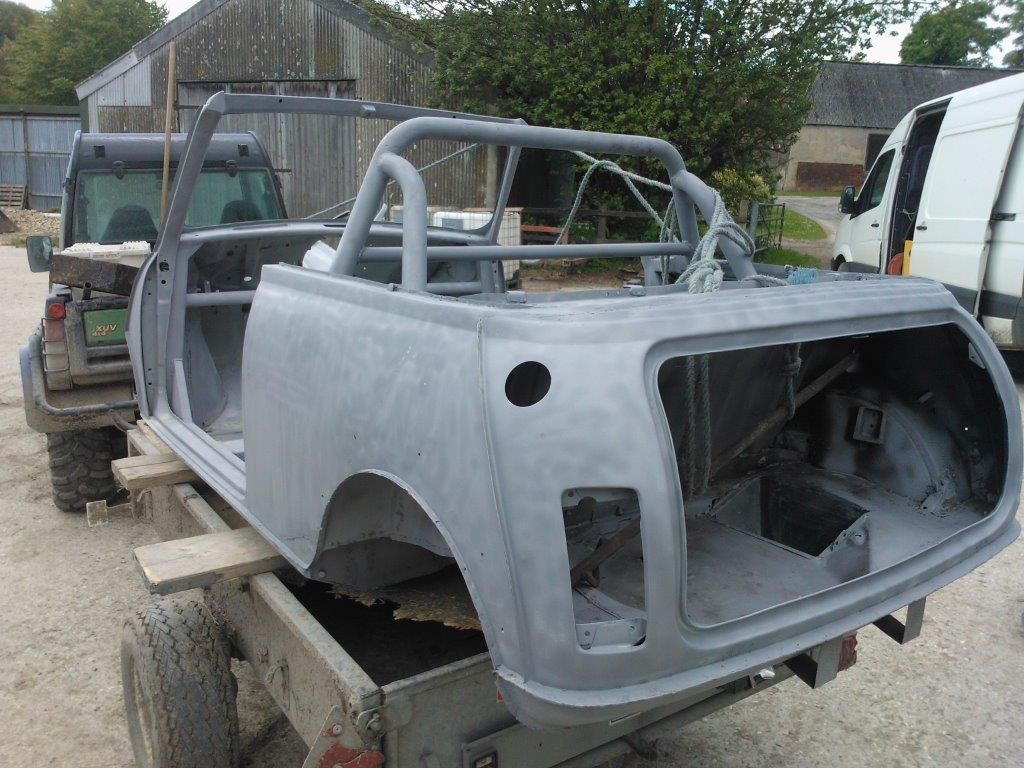

Then, once the weather picked up, on to filling, priming and colour coat:
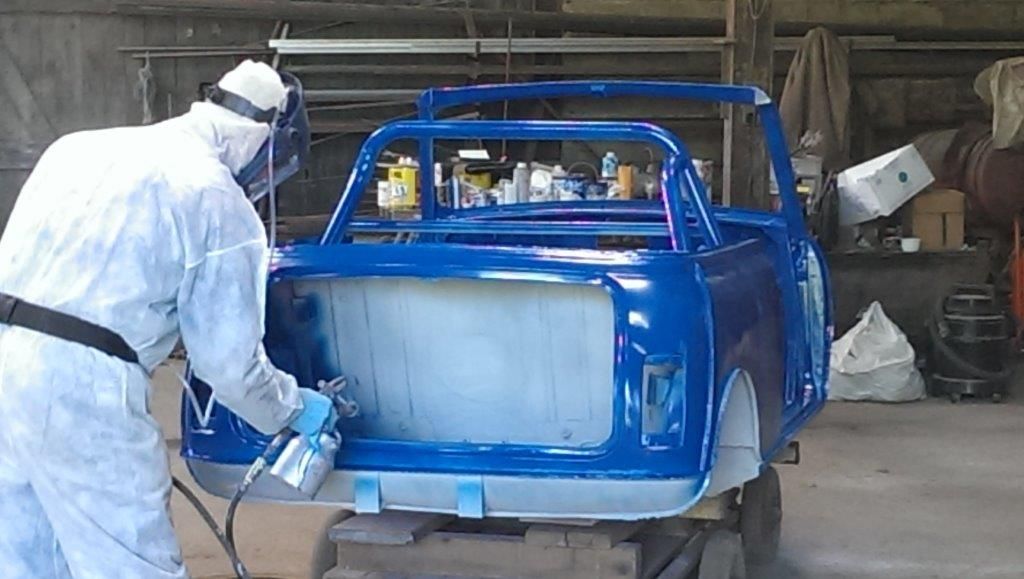
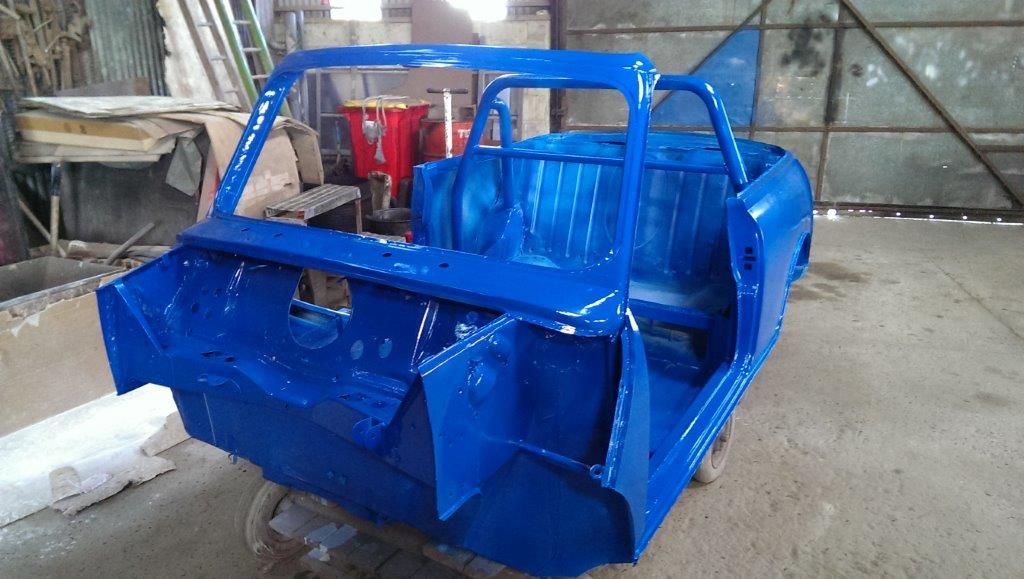
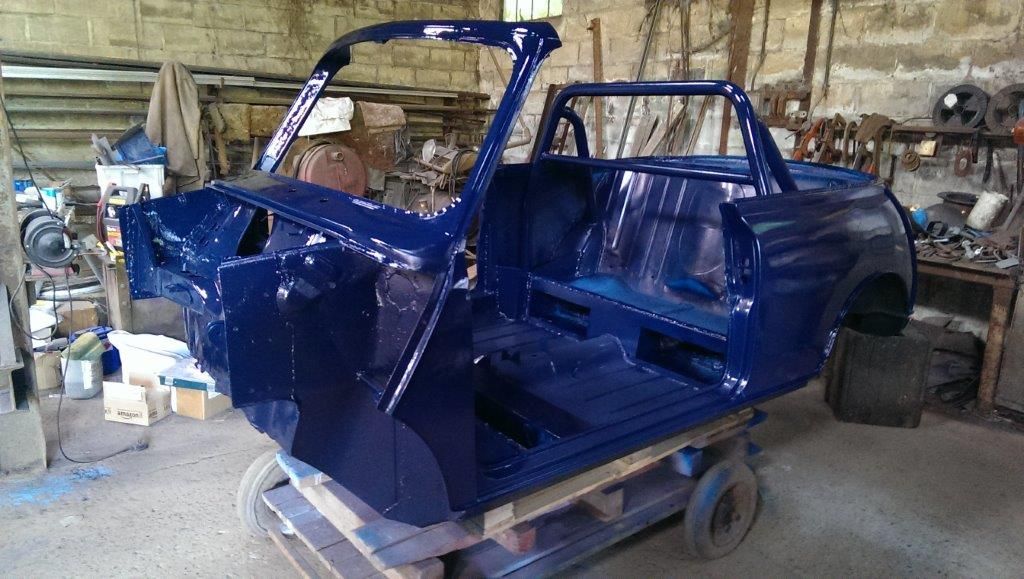
At this point I decided I hated the colour. It was much lighter than I had anticipated, so a quick bit of searching about and I settled on a ford colour.
A much deeper blue and more in keeping with my vision of the finished car.
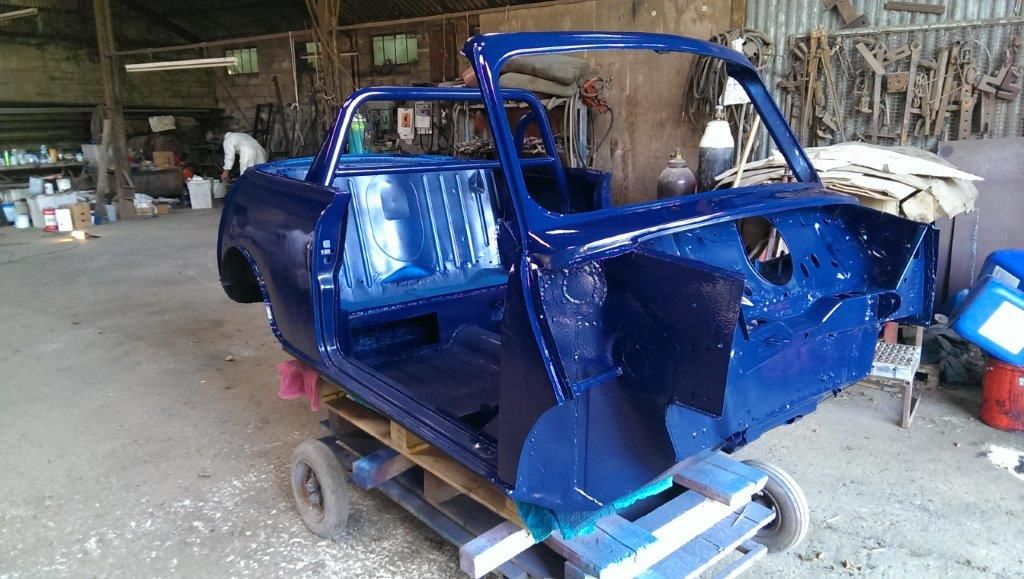
The exterior still needs a final light rub down and finishing coat, but that we will do once the doors, boot lid and bonnet are on the car.
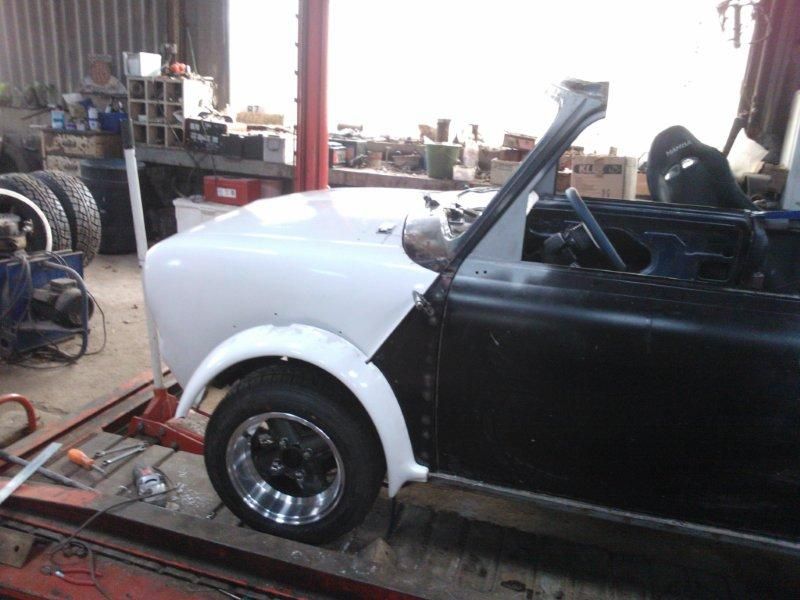
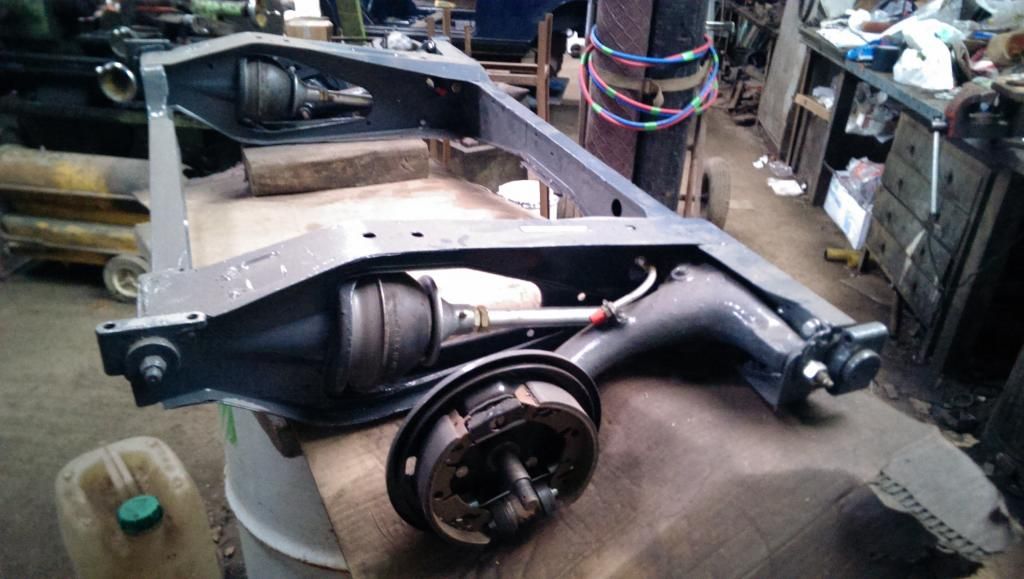
The next stage was to fit up the subframe and finish the flip front and arches ready for spraying.
Thankfully the bonnet went back on as it came off and the arches actually lined up as hoped.

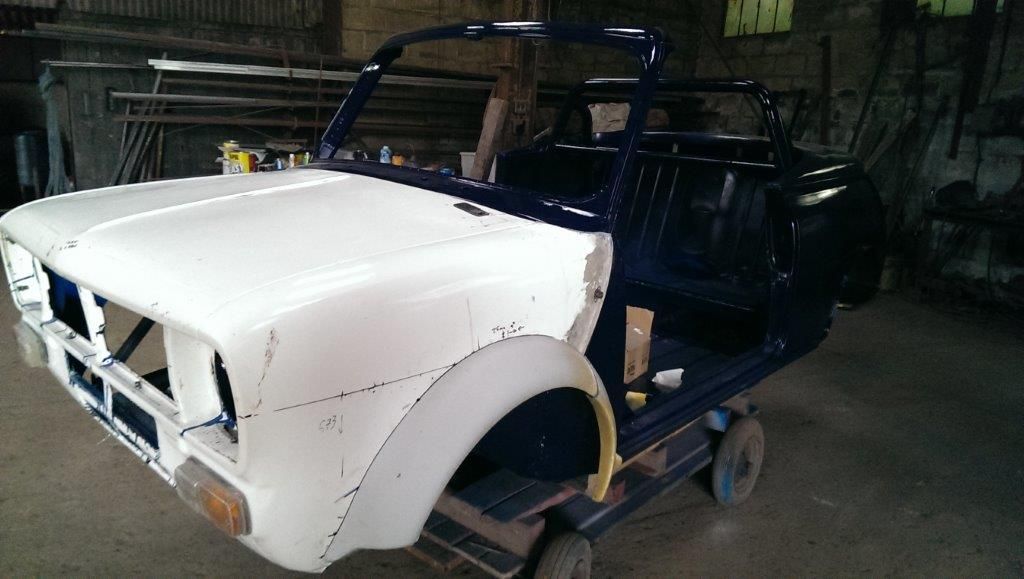
We are currently in the process of prepping the front end for paint, so with any luck, this weekend the whole car will be the same colour blue, then we can take the subframe out, lay the fuel and brake pipes and the battery lead and begin the rebuild.
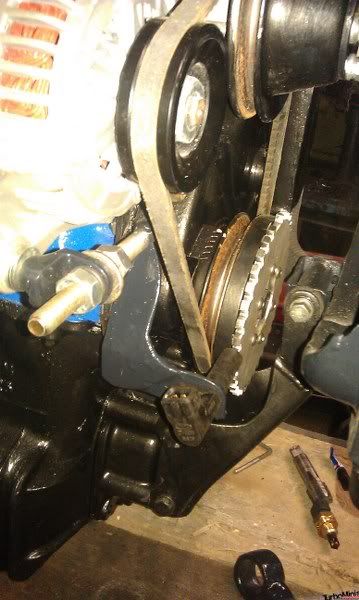
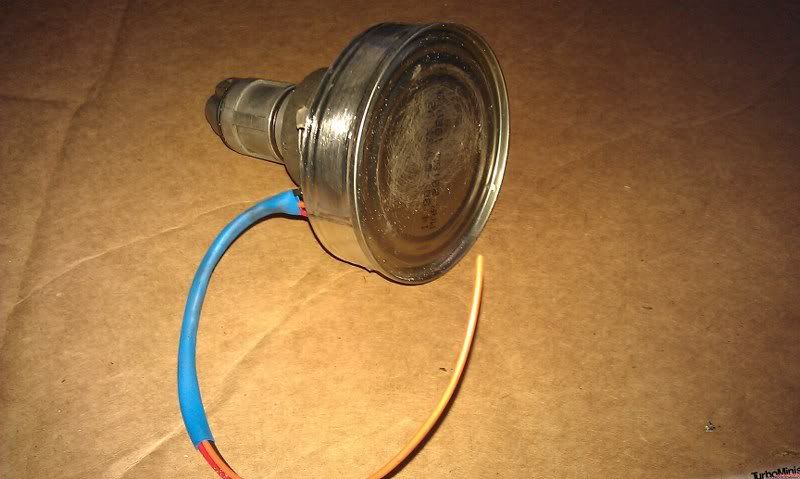
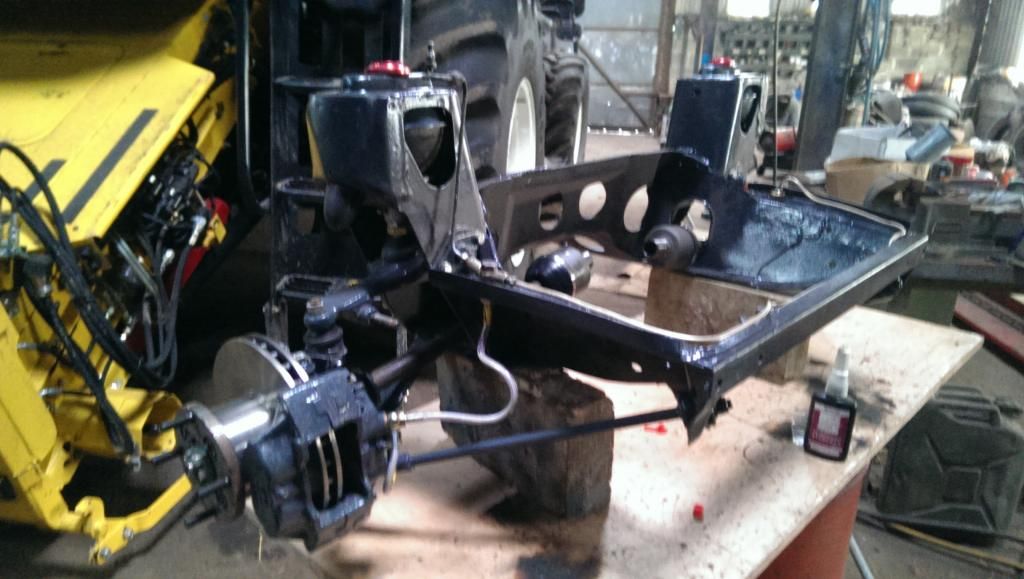
Between waiting for the weather to break so that we could begin spraying and getting the suspension and subframe components ready, I also had a bit of time to work on the traction control.
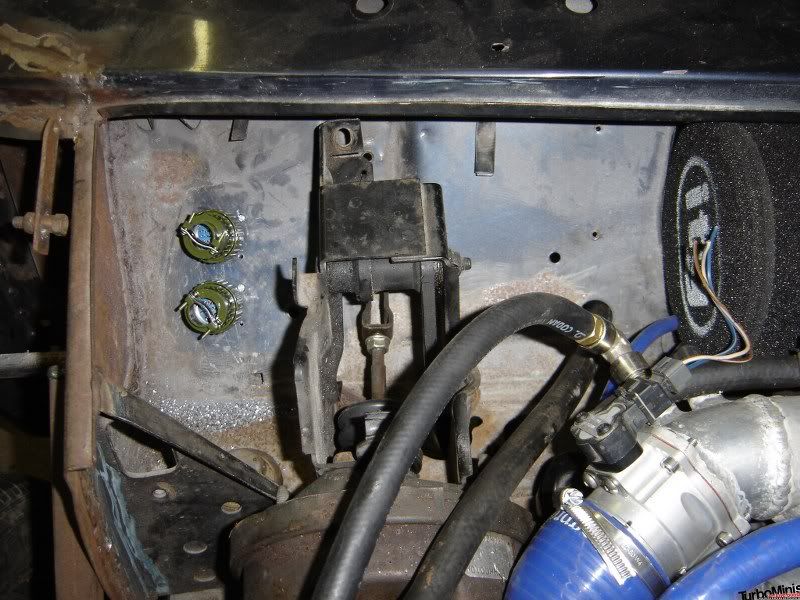
This is the front wheel pickup:


And In position:


I tested the unit on a simple test rig, powered by a battery drill and geared up to spin at around 5000 rpm, much faster than I would ever expect to go, but I get a nice clean signal which the MS2 interprets fine and the TC code is doing as expect. Now I have just to make up the rear wheel sensors to go with it.
’77 Clubman build thread
http://www.turbominis.co.uk/forums/index.php?p=vt&tid=618189
Siamese 5 port EFI testing
http://www.turbominis.co.uk/forums/index.php?p=vt&tid=611675
|
Graham T
608 Posts
Member #: 1106
Post Whore
Hungerford, Berks
|
|
Blimey – 2 years since I last did an update on my build thread, and to be honest that’s 1 year and 6 months longer than I had really anticipated this build taking.
However, I now THINK I’m on the home straight…
So a very brief outline of what I’ve been doing and I’ll let the pictures tell the story, rather than rambling on:
Traction control rear wheel sensors


Subframes
Squeezing the engine in


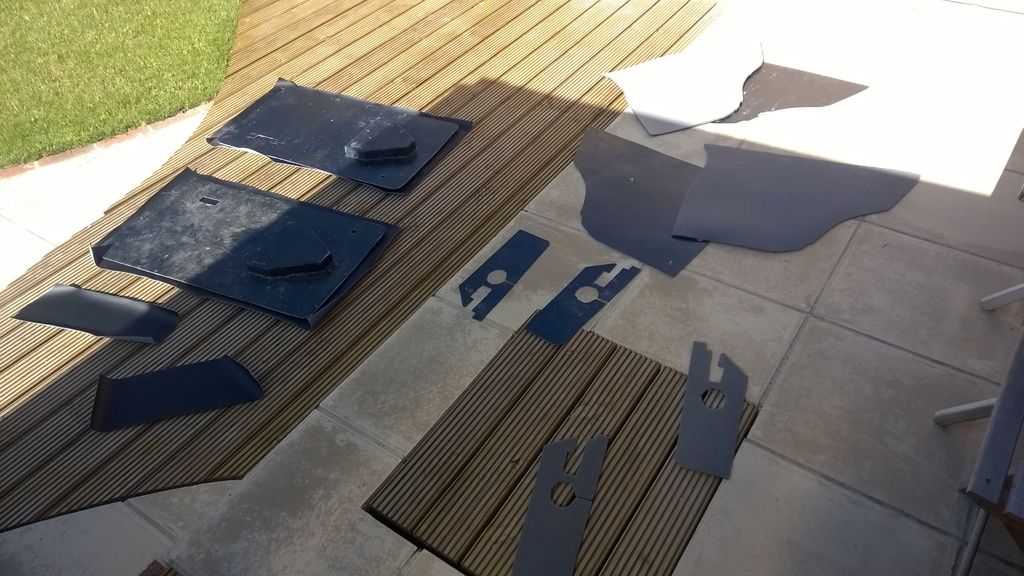
Making the dash and all the interior trims
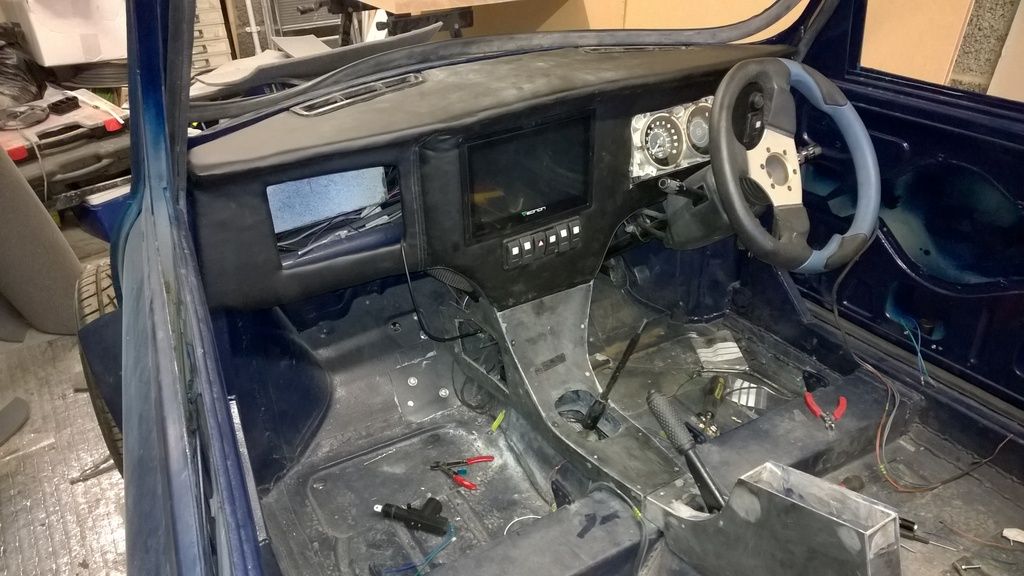
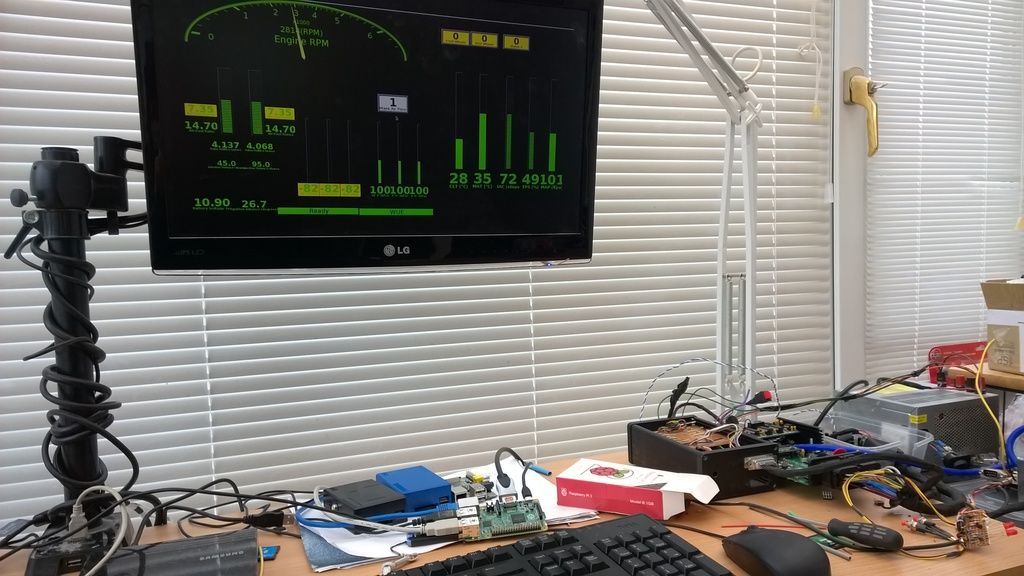
Tweeking the Megasquirt 2 dash
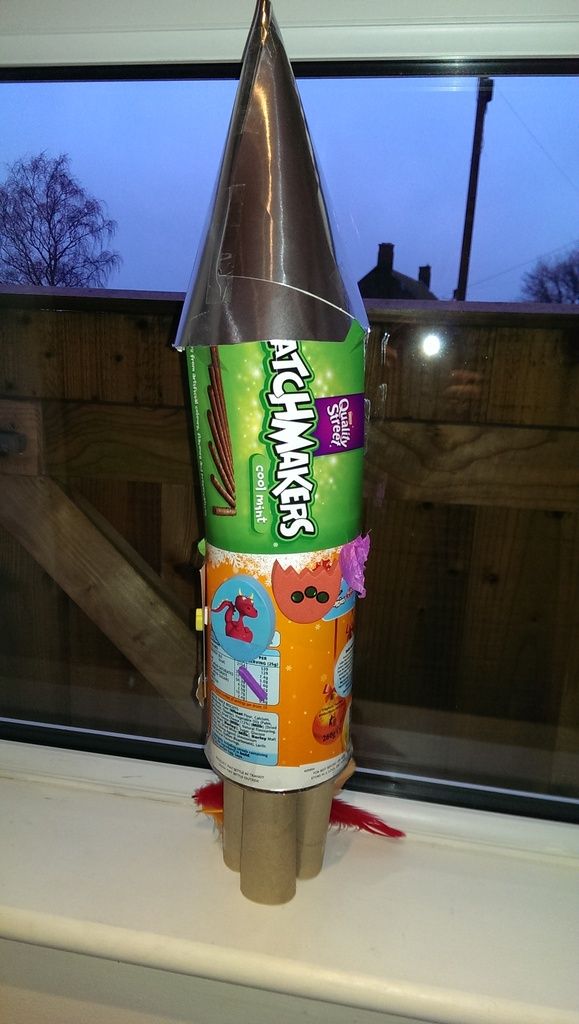
Helping my 5 year old Niece build a rocket
Then painting, rubbing down, painting again, rubbing down and more painting.
We just could not get the 2k paint to flow and ended up with some serious orange peel.
Eventually though, 7 years and 4 months later I think we are getting there.
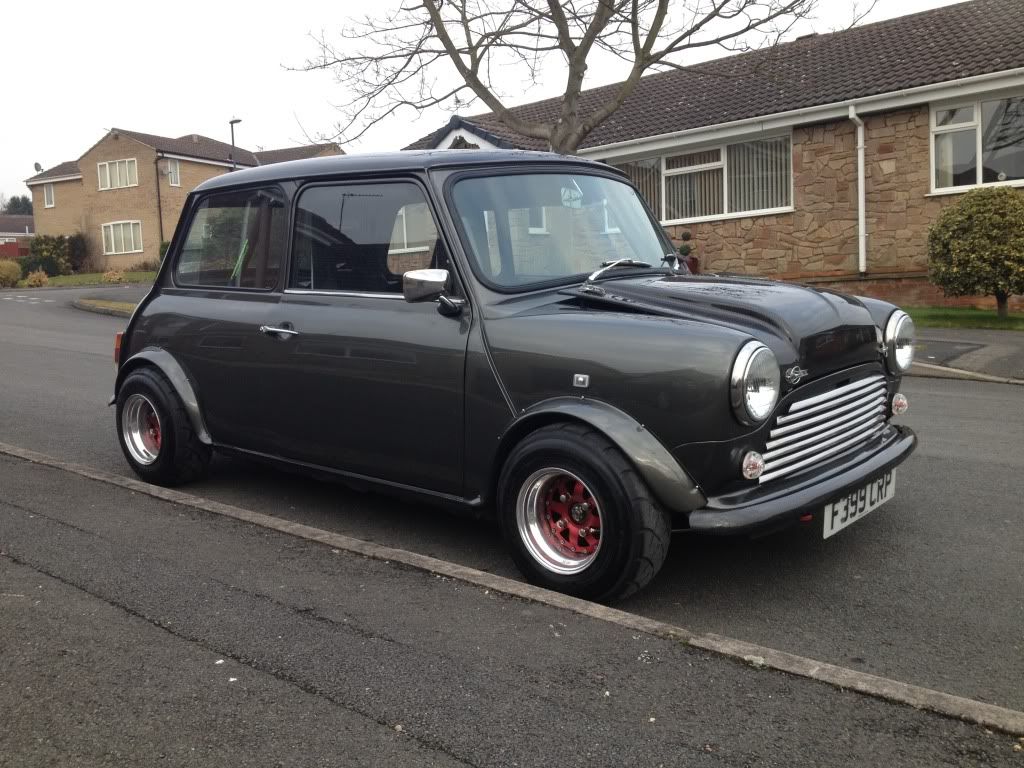
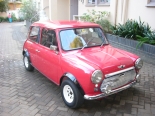
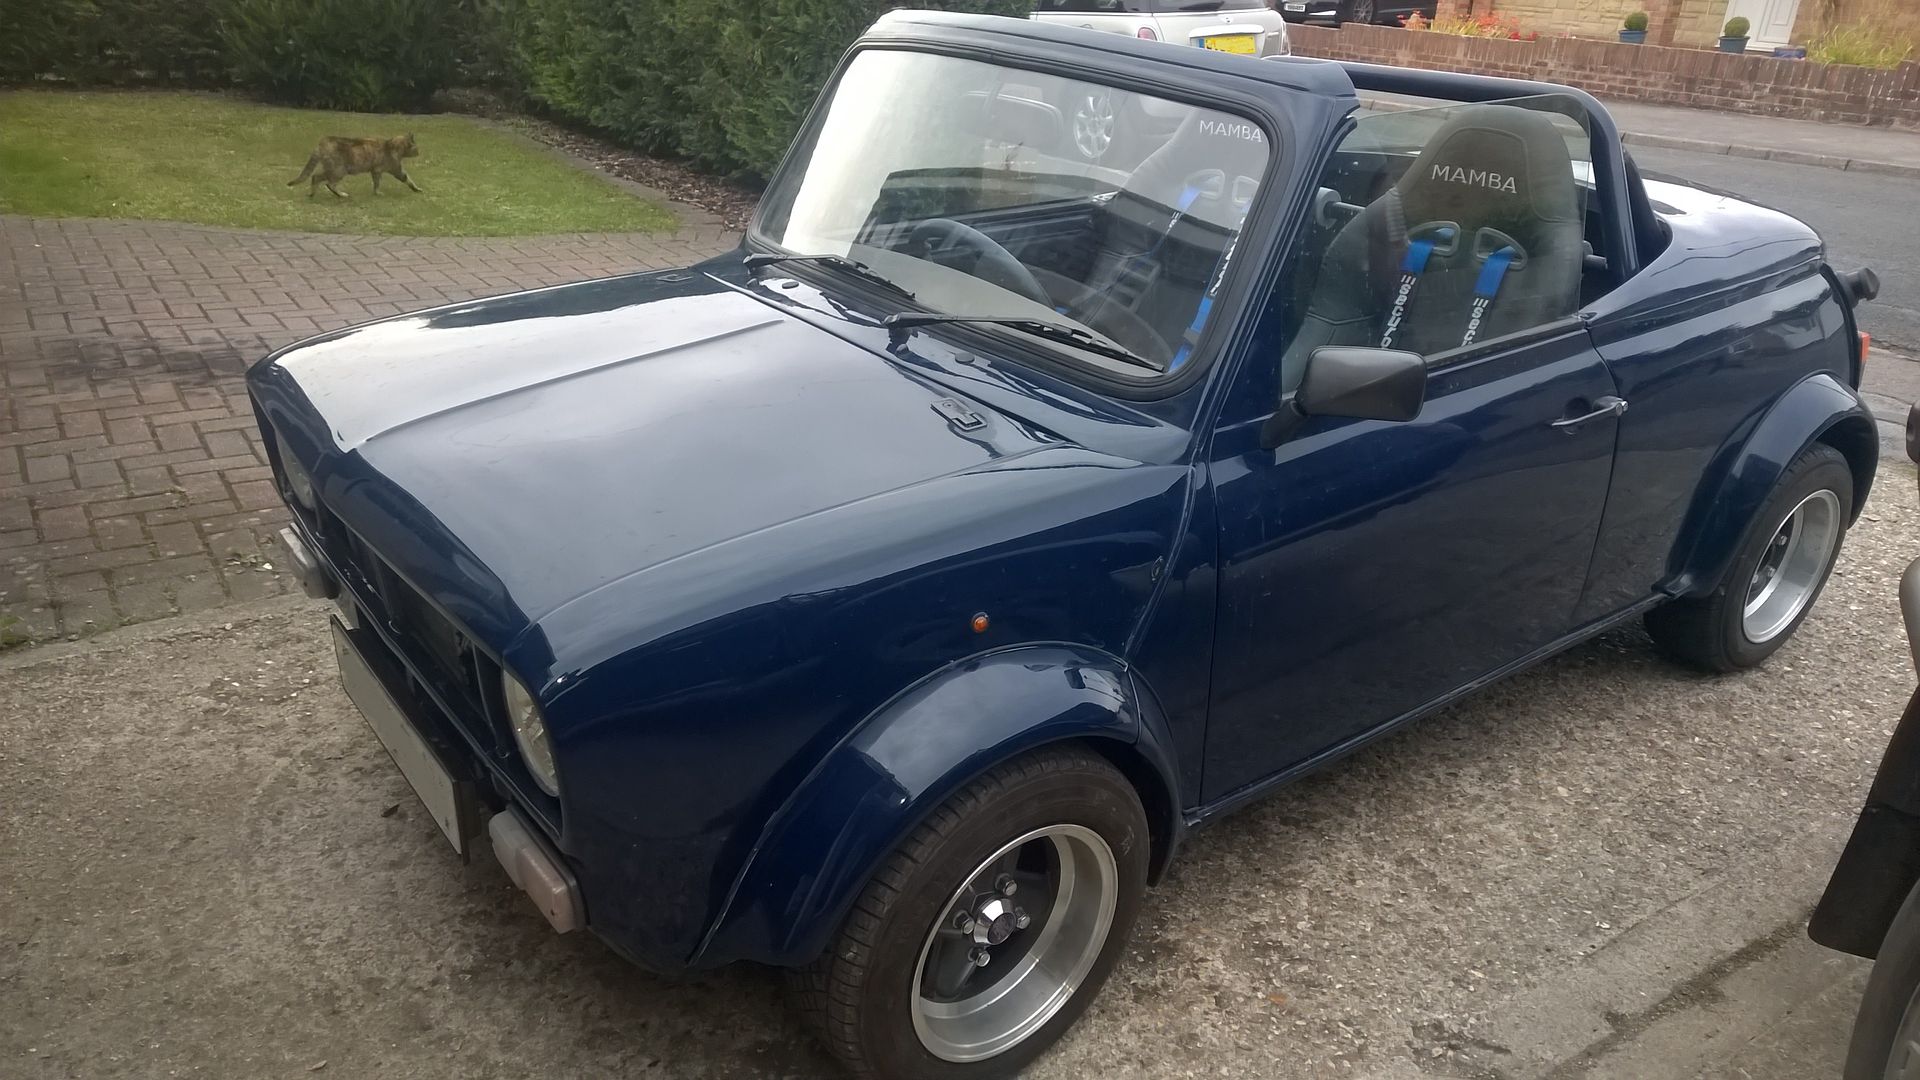
From this
To this
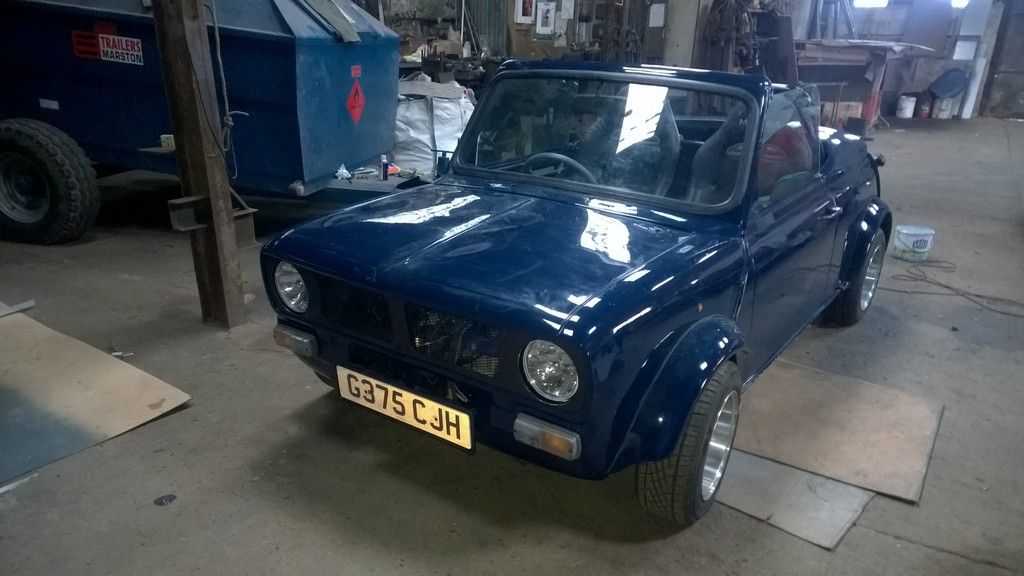
I know it’s not everyone’s cup of tea, but I have to admit being chuffed as nuts with it.
There is still a fair amount to do, but today I think we turned a massive corner.
I’m hoping that within the next 3 or 4 weeks I can report back that I have an MOT and then I can start working on tuning…
’77 Clubman build thread
http://www.turbominis.co.uk/forums/index.php?p=vt&tid=618189
Siamese 5 port EFI testing
http://www.turbominis.co.uk/forums/index.php?p=vt&tid=611675
|
Yo-Han
976 Posts
Member #: 3228
Post Whore
North of the Netherlands
|
|
I think it looks great, in my mind personal touches make it your own..
Nicely done!
Dazed and Confused....
|
theoneeyedlizard
7265 Posts
Member #: 1268
The Boom Boom speaker Police!
Essex
|
|
Very well done.
In the 13's at last!.. Just
|
Graham T
608 Posts
Member #: 1106
Post Whore
Hungerford, Berks
|
|
So, as normal 3 or 4 weeks turns into 2 1/2 + months.
but, after all the oil pressure issues and then some serious leaks in my downpipe/ AFR sample tubes, its ready for the road.
It went through the MOT today with no issues, so apart from the DVLA MOT website being down for most of the last few days and the tester not being able to submit the MOT, just the Tax to get (once the MOT is registered on the DVLA database) and I can officially drive it on the road.
Just a few cosmetic bits left to do, and a serious amount of polishing and clean.
Then there are a few electronics bits left for Traction control boost control and pressure/ temp sampling.
In the mean time I have one more fairly serious issue to resolve: The waste gate is stuck open.
On my first real test run I was getting 2PSi of boost at just over 1800RPM, rising to 5.5 at 3100RPM. Then we check the car over, rechecked tracking, etc and I drove it home, ready for MOT.
A nice gentle drive home, no hard accelerating or the such like, but it was having issues below 2900RPM. I though it was just the fact I've not done much with the injection timing or fuel VE tables, but when I parked up the tick over was all over the place.
After checking the datalogs, I could see it had made no boost over the 8 mile drive.
Looking under the bonnet I noticed the actuator rod had decided to part company with the waste gate arm on the turbo and the C clip has done a disappearing act.
The problem is, and I have had this before with this turbo, the waste gate goes down past the casting of the exhaust exit and then will not return back past it again...
I assume that the play on the waste gate disc and pin is enough to let the disc go down round, then the disc drops on the pin enough not to allow it back up.
Ultimately it means I have to take the downpipe off again and get my fingers in the turbo housing to push the waste gate up past the casting.
No amount of wiggling of the waste gate arm will get it up past.
Has anyone else experienced this on a GT1752???
Anyhow, a balls ache, but not the end of the world. It still put a grin on my face driving for the first time, even without any boost.
’77 Clubman build thread
http://www.turbominis.co.uk/forums/index.php?p=vt&tid=618189
Siamese 5 port EFI testing
http://www.turbominis.co.uk/forums/index.php?p=vt&tid=611675
|
|
Home > Show Us Yours! > Mini Roadster - My build thread
|
|
Users viewing this thread:
none. (+ 1 Guests)
|
|
|

