|
Home > A-Series EFI / Injection > EFI Testing - Dyno Day 6: 1.5:1 Ratio rockers
|
Graham T

604 Posts
Member #: 1106
Post Whore
Hungerford, Berks
|
|
On 28th Feb, 2019 Joe C said:
on the ARP kits I have used yep they are all the same diameter, (5/16?)
5/16"?? not 3/8"
?
77 Clubman build thread
http://www.turbominis.co.uk/forums/index.php?p=vt&tid=618189
Siamese 5 port EFI testing
http://www.turbominis.co.uk/forums/index.php?p=vt&tid=611675
|
Graham T
604 Posts
Member #: 1106
Post Whore
Hungerford, Berks
|
|
double post
Edited by Graham T on 28th Feb, 2019.
77 Clubman build thread
http://www.turbominis.co.uk/forums/index.php?p=vt&tid=618189
Siamese 5 port EFI testing
http://www.turbominis.co.uk/forums/index.php?p=vt&tid=611675
|
Graham T
604 Posts
Member #: 1106
Post Whore
Hungerford, Berks
|
|
On 28th Feb, 2019 Paul S said:
Some excellent results. Thanks for sharing.
Great to see the long intake runners and LCB style turbo manifold doing a great job in improving VE.

Your runner length of about 450mm is giving you peak torque/SOT at around 4500rpm as I would expect.
If you wanted to flatten and increase your torque/SOT at higher revs, then a slightly shorter runner length would do that.
Starting to feel inclined to do some work on mine now :)
Thanks Paul, yes, results are looking good.
Runner length is a bit under 450mm.
My plan to flatten out the torque curve is:
to slightly retard the cam timing, which is currently at 106Deg and give me a bit more power slightly up the rev range I want to see peak power at around 5800 6000 RPM, rather than the current at around 5300RPM.
Also, I have been working on a new Plenum piece for a fair while now, which has just gone on hold while I get the engine back together.
But obviously thats also priority now with the old one splitting - there is only so long duct tape will hold out
The new plenum should allow me to change runner lengths a whole lot easier.
Im actually going for slightly longer runners, but in the name of experimentation, they will be a little different and should be a whole lot easier to change the length of.
77 Clubman build thread
http://www.turbominis.co.uk/forums/index.php?p=vt&tid=618189
Siamese 5 port EFI testing
http://www.turbominis.co.uk/forums/index.php?p=vt&tid=611675
|
Joe C

12307 Posts
Member #: 565
Carlos Fandango
Burnham-on-Crouch, Essex
|
|
SOT is looking impressive!
Yeah 3/8" doh, ben a while since i looked at a mini engine....
On 28th Aug, 2011 Kean said:
At the risk of being sigged...
Joe, do you have a photo of your tool?
http://www.turbominis.co.uk/forums/index.p...9064&lastpost=1
https://joe1977.imgbb.com/
|
Rod S
 (2)[/url] by [url=https://www.flickr.com/photos/150672766@N03/]Rod Sugden[/url], on Fli)
5988 Posts
Member #: 2024
Formally Retired
Rural Suffolk
|
|
My decades old memory was slightly out.
It was a lower torque rather than a smaller diameter.
EDIT - no, both, the original was only 5/16", not 3/8" - END edit
See this article, it was because Leyland drilled that one hole shallower so didn't use full torque at the risk of damaging the block.
http://www.spriteparts.com.au/tech/stud.html
And it was a bolt rather than a stud/nut on the actual "S" and there is a replica.
https://www.minispares.com/product/classic/C-AHT281.aspx
Presumably that replica bolt is shorter than the stud.
I'm pretty certain all those years ago when we did it, we drilled full depth and used a normal stud and normal torque and got lucky with not breaking through (but the workshop we were using had plenty of "free" loctite in case....)
Edited by Rod S on 28th Feb, 2019.
Schrödinger's cat - so which one am I ???
|
Graham T
604 Posts
Member #: 1106
Post Whore
Hungerford, Berks
|
|
Finally
Its back on the road. First drive in the mini yesterday since I limped home from Roberts back In February.
As normal, because I never seem to find time to write this stuff up while I am doing it, Epic post to follow
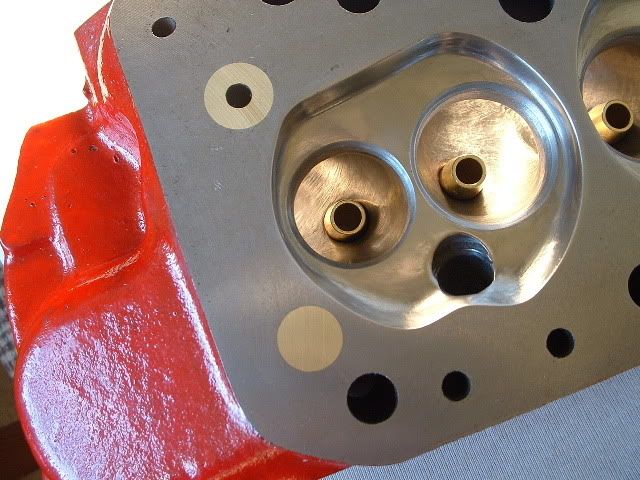
Drilling out the 2 extra stud holes in the head and block was nowhere near as difficult as I thought it would be.
Head cleaned up and rebuilt.

Pistons de-coked

No damage as far as I can see. In fact, I was impressed/ surprised with how clean the pistons came up.
I had a slight delay in rebuilding as I wanted to get the head flow tested while it was off.
So another trip up to see Robert, this time with little danger of me getting carried away and damaging anything!
Flow test results:
Inlet and Exhaust

Inlet versus stock 1275
(purple trace with no markers indicates % difference)

Exhaust versus stock 1275
(purple trace with no markers indicates % difference)

Interesting to see the results versus a standard 1275 head, but I've really no idea if this head is good or average??
I did have a small moment were I thought No 4 exhaust valve was bent, it would only seat fully in a limited rotation in the guide.


But, it turned out to be excessive carbon on the lower part of the valve stem, only on one side.

After that small panic I cleaned the stems, got the head built up and mounted on the block (after using the DTI on the piston to double check the TDC marker on the timing chain cover Which is 4 degs out and matched what I had previously measured)

Grrrrr!

I never thought about the rocker cover fitting.
I little bit of work with the file and all was good.
Next I changed the cam timing after speaking with Swift tune, from 106 Deg to 110 Deg.
That might be a little OTT, but I can always change it back a little if necessary.
77 Clubman build thread
http://www.turbominis.co.uk/forums/index.php?p=vt&tid=618189
Siamese 5 port EFI testing
http://www.turbominis.co.uk/forums/index.php?p=vt&tid=611675
|
Graham T
604 Posts
Member #: 1106
Post Whore
Hungerford, Berks
|
|
At this point I decided to take a little departure from just getting the engine running.
Ive changed so many things, had an oil cooler pipe blow off and a temporary oil pipe burst when testing the oil pump, then the head gasket go and spray coolant everywhere.
The engine bay was a bit of a mess


so operation clean up commenced:
Everything in the engine bay washed down, de-oiled, and re-painted.
New brackets and steadies made.
Re-piped the pressure signal tapings and added more fuel filters for signal damping
revised the turbo and heater pipe routing.
Replaced all the engine steady rubbers.
Made a new alternator bracket and adjuster the old bracket was twisting and the alternator pulley was out of square and not even in-line with the water pump/ crank pulley.
I also replaced the starter motor, because when I stripped it down to clean and paint it, it looked fairly worn and its a pain to get at without stripping out the MAF and air filter so do it now.
Re-piped the MAF sensor and repositioned the air filter (Mainly due to the fact the solenoid on the new starter is 10mm big Diameter than the old one, so the MAF and air filter were fouling on it.)
I also decided to prepare for the new inlet manifold and runners by moving some of the electrical kit that would be in the way. This then lead to a whole lot of wiring being modified and re-routed.
Worn starter

New Alternator bracket

Next step was the inlet manifold.
Once I had removed the carbon fibre bandage and the filler I used to shape it for the fiberglass mould that I took of it, I found the fracture.

That is about 70mm long and under boost, because the whole plenum balloons, it would make a pretty large hole for air to escape.
Now, I must admit to taking a shortcut at this point.
The new plenum went on hold in order to sort out the head gasket, so I still have a few months (at my pace) of work to do on it and I do not want to miss most of the summer, so I decided on a patch up the old plenum and hope it holds.
A bit of epoxy glue and another carbon fibre bandage just for now and boost turned down to a reasonable level.
I will have to take the plenum off in a few weeks anyway to adjust the valve clearances and check the head stud torque, so hopefully I will have the new plenum completed by then.
77 Clubman build thread
http://www.turbominis.co.uk/forums/index.php?p=vt&tid=618189
Siamese 5 port EFI testing
http://www.turbominis.co.uk/forums/index.php?p=vt&tid=611675
|
Graham T
604 Posts
Member #: 1106
Post Whore
Hungerford, Berks
|
|
With all that done, spot the difference:
Before the strip down:

After:

Yesterdays drive was very short, just a quick 2 miles around the outskirts of town, just to make sure there were no major issues.
Before I left my drive I had a water leak. Turn out I had not tightened one of the jubilee clips on the heater pipes, so easily remedied.
Second issue I had was a leaking injector oring. Once on boost I could smell petrol, so I stopped and opened the bonnet, armed with a fire extinguisher.
No fire, but one of the secondary injectors had been dripping fuel out from the fuel rail end. I Moved the injector around to re-seat it and all was good.
I did reduce the pre-load on the Waste gate actuator just a fraction too much. Just 6.4PSI 
That now it has an extra half a turn ( 0.5mm) of pre load, which should net me around 8PSI. Hopefully not too much for the patched Plenum to cope with.
Compression test results:
1 = ~155PSI
2 = ~145PSI
3 = ~145PSI
4 = ~150PSI
That is around the same as all previous tests, though the inner cylinders seem a little low.
Next steps drive!!! 
And of course get the new plenum built.
Also, I still need to complete the new air filter housing and pipe work.
77 Clubman build thread
http://www.turbominis.co.uk/forums/index.php?p=vt&tid=618189
Siamese 5 port EFI testing
http://www.turbominis.co.uk/forums/index.php?p=vt&tid=611675
|
Steve220
242 Posts
Member #: 11017
Senior Member
Shropshire
|
|
Gta, I see you've got a few filters on your pressure pipework, is that recommended? I fried a maf sensor that turned out to have fuel in it and wondered if there maybe a solution!
|
Graham T
604 Posts
Member #: 1106
Post Whore
Hungerford, Berks
|
|
On 29th Apr, 2019 Steve220 said:
Gta, I see you've got a few filters on your pressure pipework, is that recommended?
I would not say it is recommended, but it was suggested by Joe C back on page 2 of this thread, as a means to damping the fluctuation in Pressure signal.
It seems to work very well, hence adding fuel filters to all the high pressure signals.
This has reminded me that I forgot to replace the MIG tips when I swapped out the silicon pipe.
77 Clubman build thread
http://www.turbominis.co.uk/forums/index.php?p=vt&tid=618189
Siamese 5 port EFI testing
http://www.turbominis.co.uk/forums/index.php?p=vt&tid=611675
|
Turbo Phil
4619 Posts
Member #: 20
My sister is so fit I won't show anyone her picture
Lake District
|
|
Nice work and its nice to see someone sharing such information.
Im assuming thats a 36mm inlet valve ? What depression where the airflow tests run at ? Im guessing 28 ?
Phil.
WWW.TURBO-MINI.COM
|
Graham T
604 Posts
Member #: 1106
Post Whore
Hungerford, Berks
|
|
On 30th Apr, 2019 Turbo Phil said:
Nice work and its nice to see someone sharing such information.
Im assuming thats a 36mm inlet valve ? What depression where the airflow tests run at ? Im guessing 28 ?
Phil.
Phil, I measured valve sizes at 35.77mm inlet and 29.77mm Exhaust.
I am honestly not sure for the depression on the airflow tests.
Hopefully Robert will see this and be able to give some feedback.
Edited by Graham T on 30th Apr, 2019.
77 Clubman build thread
http://www.turbominis.co.uk/forums/index.php?p=vt&tid=618189
Siamese 5 port EFI testing
http://www.turbominis.co.uk/forums/index.php?p=vt&tid=611675
|
robert

6743 Posts
Member #: 828
Post Whore
uranus
|
|
yup 28 phil.
Medusa + injection = too much torque for the dyno ..https://youtu.be/qg5o0_tJxYM
|
dan187
774 Posts
Member #: 6724
Post Whore
Wootton Bassett
|
|
Graham, Im interested in what cam and compression ratio youre running. Is it in a build thread somewhere?
1275 N/A Sprite, 998 T2 Turbo Mayfair
1275 EFi Turbo
|
Graham T
604 Posts
Member #: 1106
Post Whore
Hungerford, Berks
|
|
Dan,
It's a SW5-07 cam.
Compression ratio IIRC is 8.3:1 - I can't find the document with it written in at the moment.
Build thread http://www.turbominis.co.uk/forums/index.php?p=vt&tid=452880
77 Clubman build thread
http://www.turbominis.co.uk/forums/index.php?p=vt&tid=618189
Siamese 5 port EFI testing
http://www.turbominis.co.uk/forums/index.php?p=vt&tid=611675
|
Graham T
604 Posts
Member #: 1106
Post Whore
Hungerford, Berks
|
|
New Air Filter housing finally completed.

This is how the previous air filter was installed:

There were a couple of reasons I decide to re-do the air filter:
1) To try to clean up the MAF trace. A thought was that with the cylindrical air filter directly mounted onto the flange of the MAF housing, I might be inducing an amount of turbulent air into the MAF housing, messing up the readings.
2) The Cylindrical air filter was open all around, which means that it was ingesting air from inside the confines of the engine bay.
The Thermistor in the inlet piping suggested that although this was OK when moving at speed out of town, ie it was getting nice cool air pushing through the engine bay, when in town or parked ticking over, it was getting a lot of hot air, which obviously was not getting any charge cooling and as a result this was affecting fuelling and AFR balance.
Now, its all pretty close inside the flip front, which means that its all still a bit of a compromise

Hopefully though, getting rid of the cylindrical Filter will help make the flow into the MAF more Laminar, along with getting the filter slightly further way from the MAF.
There is also the option of putting some flow straighteners inside the outlet throat of the air filter housing if need be.
I have not done this yet as I would prefer not to add any restrictions to air flow, regardless of how small those restrictions might be, unless it is absolutely essential.
With regard to the inlet temperature, there will still be an amount of heat soak into the air filter housing, but hopefully the carbon fibre will help reduce this, but there is still sure to be a lot of hot engine bay air ingested when slow moving or at a stop. Hopefully though, I will see at least some difference.
Last night I finally got out for a gentle 16 mile drive.
As yet I have not had time to look through the logs, but in all fairness it really was a gentle drive, so theres not really much to look at in the log files.
I did have one little blip of the throttle to check boost levels:
The extra half a turn (0.5mm) of pre load on the waste gate actuator brought the boost level back up slightly, now just over my expected 8PSI, to 8.4PSI.
77 Clubman build thread
http://www.turbominis.co.uk/forums/index.php?p=vt&tid=618189
Siamese 5 port EFI testing
http://www.turbominis.co.uk/forums/index.php?p=vt&tid=611675
|
Jay#2

2500 Posts
Member #: 648
Post Whore
Northern Ireland (ex AUS)
|
|
The filter housing is really neat.
On 7th Nov, 2008 Nic said:
naeJ
m
!!!!!!sdrawkcab si gnihtyreve ?droabyekym ot deneppah sah tahw ayhwdd
|
Jimster
Site Admin

9401 Posts
Member #: 58
455bhp per ton
12 sec 1/4 mile road legal mini
Sunny Bridgend, South Wales
|
|
Amazing results here, well done
Team www.sheepspeed.com Racing
On 15th May, 2009 TurboDave said:
I think the welsh one has it right!
1st to provide running proof
of turbo twinkie in a car and first to
run a 1/4 in one!!
Is your data backed up?? directbackup.net one extra month free for all Turbo minis members, PM me for detials
|
Graham T
604 Posts
Member #: 1106
Post Whore
Hungerford, Berks
|
|
Thanks Chaps.
On to todays ramblings
As said before, the last drive out I had was a very gentle 16 mile cruise just to make sure everything was ok in the engine bay, but I did have one very small blip of boost, just to check I had not over done the waste gate preload.

You are looking at the yellow trace here.
So cruising at around 62MPH, 3200RPM, ~74 Kpa and 34% TP
Hit the throttle up to 75% at which point the Corrective Realignment Automation Processor took over control of the car, calculated I was too close to the nearside bank and did its normal overcorrection to the offside.
Being brave (ish) I held my ground until peak boost A whole 4MPH faster

Anyway, looking at the logs to work out why boost rose quite as quickly as it did, I notice that during cruise before the blip, it was actually reading ~116Kpa pre intercooler.
Not only that, but on cruise I had 112Kpa of pre turbine back pressure.
So, my theory:
I have a cheap Chinese recirculating dump valve installed, which is currently plumbed in so that post compressor pressure cannot push it open, so it relies solely on Plenum signal pressure to suck it open.
I have been out to the garage and tested the DV with a syringe.
The valve opens under vacuum at 50Kpa, so anything above 50Kpa MAP and the valve is tight shut.
Coming back and looking at various other parts of the log, this does seem to compute 50Kpa and below Pre intercooler pressure reads at atmosphere

55 - 60Kpa I start to see slight Boost at both pre and post intercooler and slight exhaust pre turbine back pressure.

So on the one hand, I have boost being produced even when cruising, which seems to help with boost build when needed, but on the other hand, it means I have pre turbine back pressure which I assume will hurt both full economy and power.
So if I adjust the dump valve to a very weak setting, say opening at 95 Kpa, will this have the effect of:
a) Reducing pre turbine back pressure and giving better economy and more power off boost?
b) Allowing the turbo to be more free running and assisting with spool up?
c) Partially bypass the compressor housing when off boost and reduce flow restriction in the inlet tract.?
This will be the next thing to play with once the sun comes back out to play.
Edited by Graham T on 18th May, 2019.
77 Clubman build thread
http://www.turbominis.co.uk/forums/index.php?p=vt&tid=618189
Siamese 5 port EFI testing
http://www.turbominis.co.uk/forums/index.php?p=vt&tid=611675
|
Graham T
604 Posts
Member #: 1106
Post Whore
Hungerford, Berks
|
|
Just a small update
One of the things I forgot to put back after the recent rebuild was thermocouples.
Originally they were in the LSU sample chambers, but I decided I would move them into the Exhaust runners while sorting out the mess under the bonnet.
Somehow though, they got forgotten. That is until I was looking for some other parts a few days back and found them.
So they are now installed.

Yellow arrow indicates where they were installed, red arrows, where they are now installed, about 200mm or so before the Turbo flange.
The maximum temperature I ever saw in the LSU sample chambers was ~310 Deg C.
Now maximum I have seen so far in the exhaust runners in 805 Deg C.

The interesting thing though is how the temperature difference changes.
In the above, the maximum difference you can see is ~20 Deg C.
There are other parts of the log though where the differences are up to 30 Deg C.
But as boost and rev's rise, the exhaust runner temperature difference seems to reduce.
Another point if interest is the MAF trace.
In the above it is by no means perfect, but in comparison to this:

(white trace in bottom graph)
..its good.
I will try a flow straightener next, but I think the turbulence might be down to the pipe reducing by around 12 mm about 40mm after the MAF housing.
The final, hopefully positive, so far is change in cam timing.
From one of the 8PSI (ish) runs in last Augusts Dyno day, you can see an average AFR of 11.7 after it goes richer at around 5250 RPM

In the below logging, its averaging 12.85 AFR, and going leaner, which means I can pour a bit more fuel in top end and hopefully get a slightly bigger bang.

So all told, I think, maybe moving forward.
Edited by Graham T on 2nd Jun, 2019.
77 Clubman build thread
http://www.turbominis.co.uk/forums/index.php?p=vt&tid=618189
Siamese 5 port EFI testing
http://www.turbominis.co.uk/forums/index.php?p=vt&tid=611675
|
robert
6743 Posts
Member #: 828
Post Whore
uranus
|
|
just ridiculously good , well done Graham .
Medusa + injection = too much torque for the dyno ..https://youtu.be/qg5o0_tJxYM
|
evolotion

2909 Posts
Member #: 83
Post Whore
Glasgow, Scotland
|
|
geeking out to this, loving all the data.
turbo 16v k-series 11.9@118.9 :)
Denis O'Brien.
|
robert
6743 Posts
Member #: 828
Post Whore
uranus
|
|
maf overlay on a single graph should be good graham
Medusa + injection = too much torque for the dyno ..https://youtu.be/qg5o0_tJxYM
|
Graham T
604 Posts
Member #: 1106
Post Whore
Hungerford, Berks
|
|
Here you go.
first Graph is an updated version of road only data which was on the previous page.

Second graph compares with Dyno Runs.

Looking at those, I have a couple of things to think about...
One of which would be:
Is the air filter getting hit directly by air causing some of the spikey trace?
The 2nd Gear Pull - 6000RPM trace, has less, but larger spikes than the 4th Gear pull.
2nd Gear trace looks alot more like the Dyno traces.
Second thing, and I need to do a comparision with MAP, is that MAF keeps rising up and over
6000RPM, where as with the Carb Dyno trace and the Sept 2018 - 34 trace it just flattened out.
I will add one of the Feb Dyno runs later ( other than the fatal 23PSI run), just to compare higher revs.
77 Clubman build thread
http://www.turbominis.co.uk/forums/index.php?p=vt&tid=618189
Siamese 5 port EFI testing
http://www.turbominis.co.uk/forums/index.php?p=vt&tid=611675
|
robert
6743 Posts
Member #: 828
Post Whore
uranus
|
|
on the first graph graham why is the orange line so much lower ?
Medusa + injection = too much torque for the dyno ..https://youtu.be/qg5o0_tJxYM
|
|
Home > A-Series EFI / Injection > EFI Testing - Dyno Day 6: 1.5:1 Ratio rockers
|
|
|
